TOP

AT&T Fleet Complete

Learn how to set up AT&T Fleet Complete, your solution for a more efficient and responsive fleet. Find tips on how to use available dispatching, routing, tracking, and reporting features while engaging in two-way communications between your operations staff and couriers.

Back to Product Page
Use the dropdown to get support, or purchase this product

Related Content

No related content found

Work Schedules in AT&T Fleet Complete

Add a work schedule

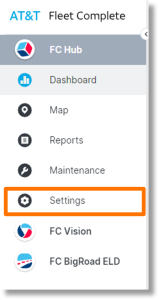
  1. Click Settings on the left side bar.

    Click Settings on the left side bar.

  2. Click Work schedules.

    Click Work schedules.

  3. Click the plus sign to add a new work schedule.

    Click the plus sign to add a new work schedule.

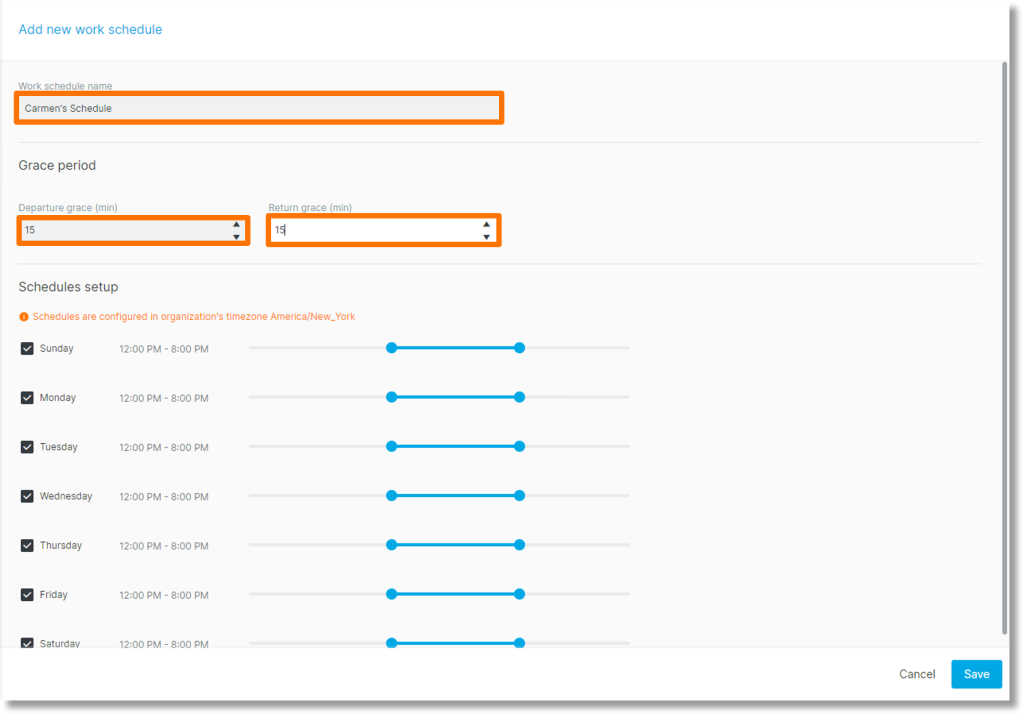
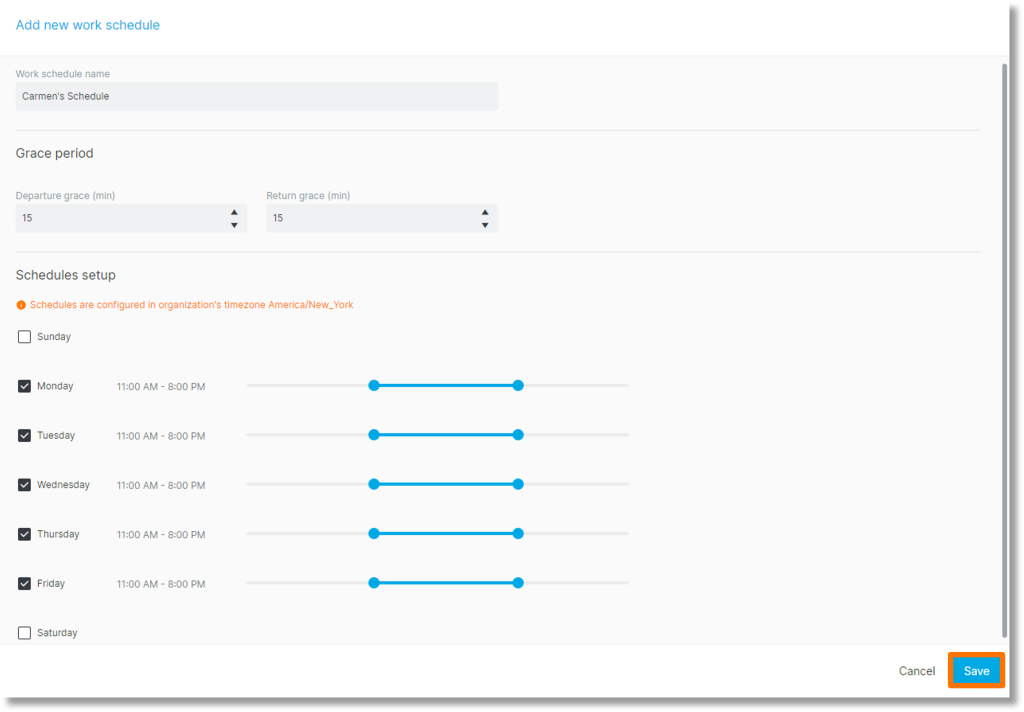
  4. Click inside the field labeled “Work schedule name” and enter the name for the new work schedule.
  5. In the “Grace period” section, click inside the field below “Departure grace (min)”. Click the up and down arrows to select the number in minutes.
  6. Click inside the field below “Return grace (min)”. Click the up and down arrows to select the number in minutes of the return grace period.

    Complete the fields.

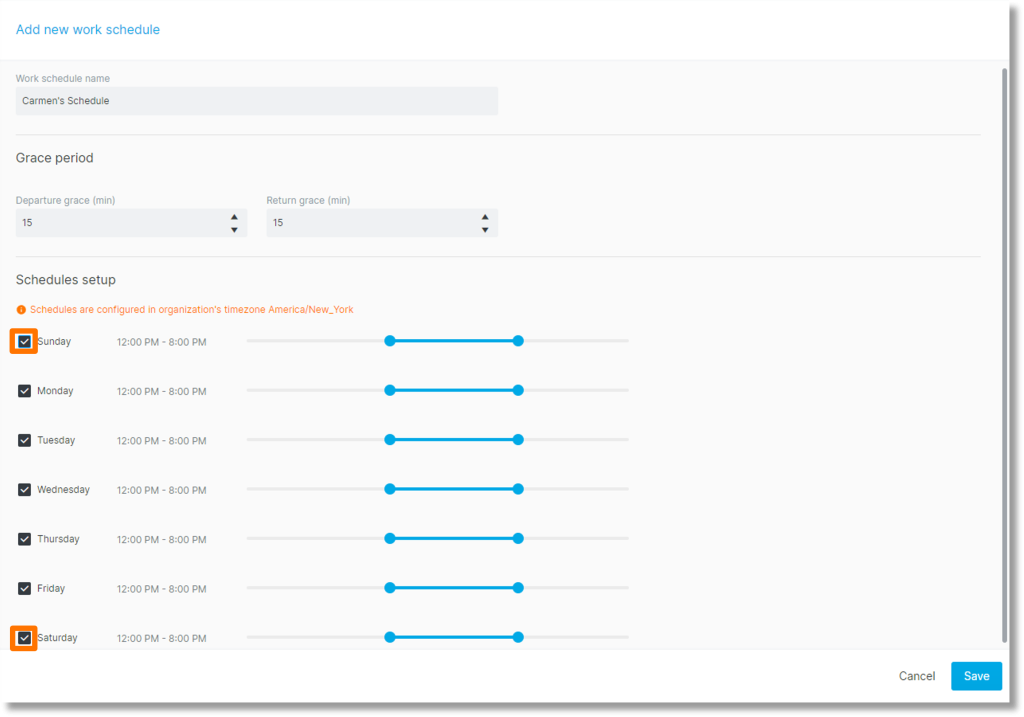
  7. Under “Schedules setup”, click the checkboxes to the left of the days of the week to select/deselect the scheduled days for the work schedule.

    Under “Schedules setup”, click the checkboxes to the left of the days of the week to select/deselect the scheduled days for the work schedule.

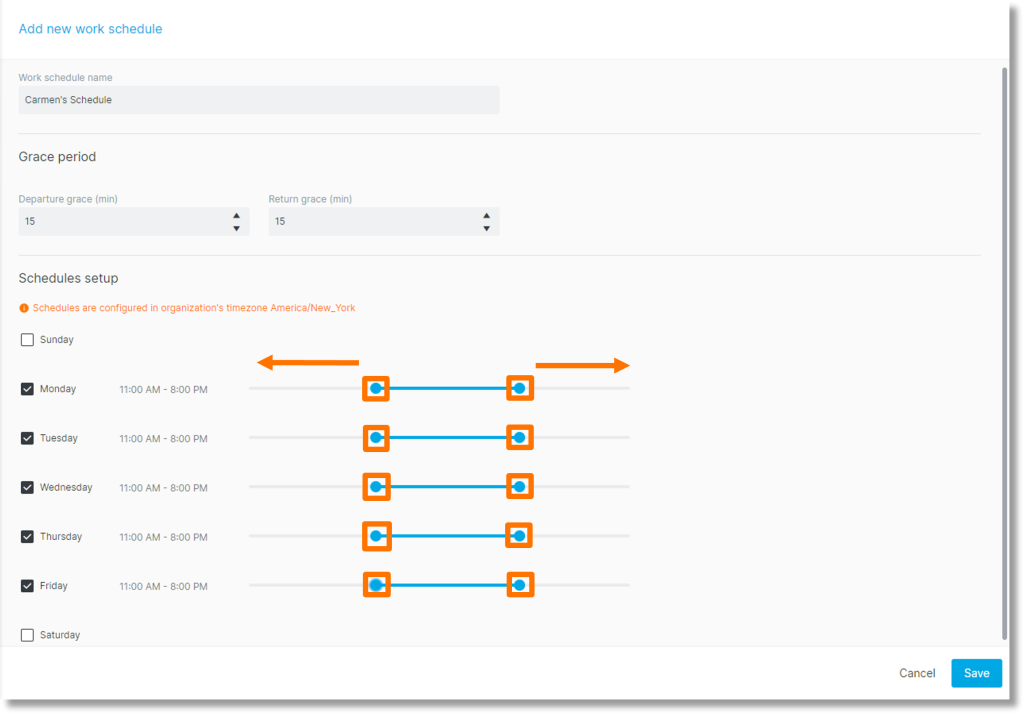
  8. To the far right of the days listed, slide the two circular dials to the right or left to set the work hours.

    To the far right of the days listed, slide the two circular dials to the right or left to set the work hours.

  9. Click Save.

    Click Save.

  10. Notifications appear that the new work schedule is successfully created.
    Note: Once the work schedule is created, it can be edited at any time.

    Notifications appear that the new work schedule is successfully created.

Delete a work schedule

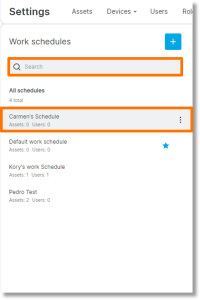
  1. After navigating to the “Work schedules” tab, click inside the “Search” field to type the work schedule name or locate the work schedule in the list you wish to delete.

    After navigating to the “Work schedules” tab, click inside the “Search” field to type the work schedule name or locate the work schedule

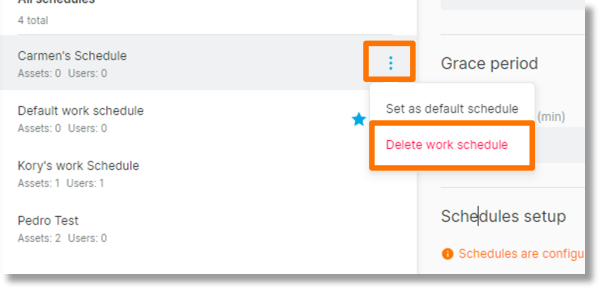
  2. To the right of the work schedule name, click the ellipses icon and select Delete work schedule.

    To the right of the work schedule name, click the ellipses icon and select Delete work schedule.

  3. Alternatively, you can select the work schedule.
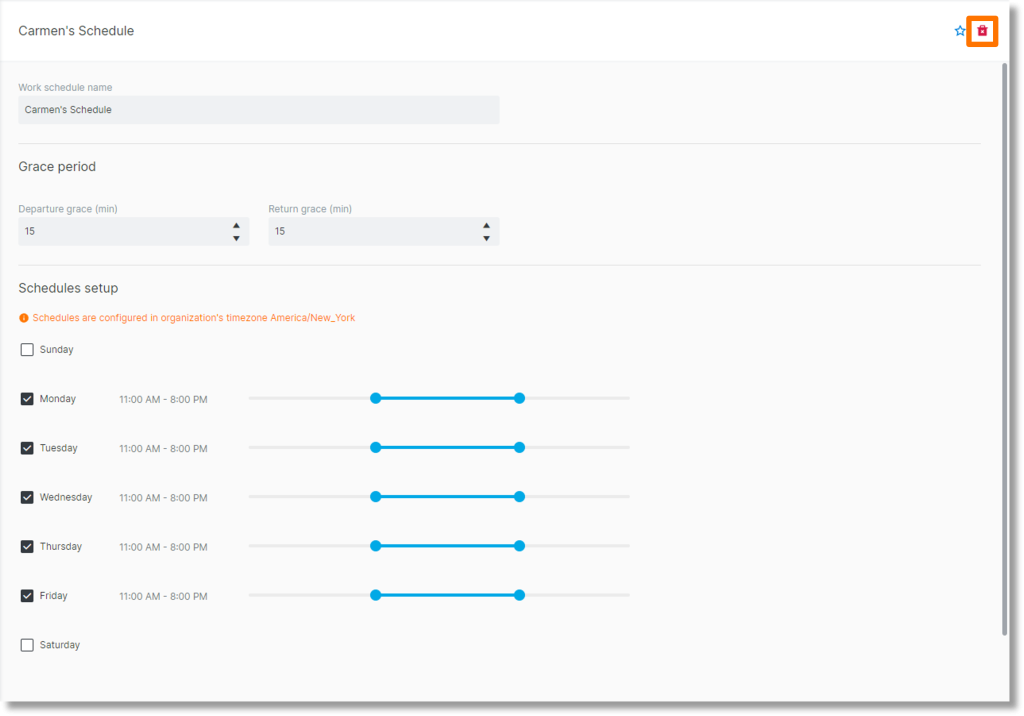
  4. At the top right of the work schedule, click the trashcan icon to select the option to delete the work schedule.

    At the top right of the work schedule, click the trashcan icon to select the option to delete the work schedule.

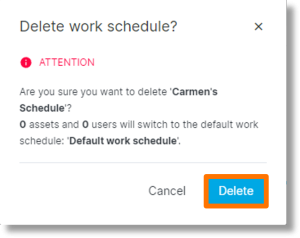
  5. A box populates to confirm the option to “Delete work schedule”. Click Delete.

    A box populates to confirm the option to “Delete work schedule”. Click Delete.

  6. A message populates at the top right to confirm the work schedule is deleted.

    A message populates at the top right to confirm the work schedule is deleted.