Add or delete users to your account | AT&T Office@Hand
Article #10857
- Log in to your Office@Hand online account as an administrator.
- Go to Users > User list > Users with Extensions.
- Click the Add User button.
- The “Add User” window will guide you with the process. Follow the steps below to add users with or without phones.
Add Users with Phones
- Select Domestic, then click Next.
- Enter the number of users under Qty.
- Select the State, Area Code, and Site.
- Click Select a Device. Click the picture of the device that will be added to the user, and then click Select.
- Click Add. You can also click Delete under Operation.
- Review the Order Summary, then click Next.
- Use an existing address under Select Shipping Address. You can also click Edit or New to add an address.
- Select the items by clicking the check box and click Assign to Selected.
- Click Next.
- Click the checkbox to confirm that you have read and understood the charges, and authorize the monthly recurring charges, and then click Next.
- Click Print to print a copy of the order or click Done. An order confirmation will be sent to the Super Admin email address.
Add Users without Phones
- Select Domestic, then click Next.
- Click Add Users without Devices.
- Enter the number of users under Qty.
- Select No under With Numbers.
- Select the Site.
- Click Add.
- Review the Order Summary, then click Next. An order confirmation will be sent to the Super Admin email address.
Note: Check your email for the Order Confirmation to complete the order process. This will be added to the Unassigned Extensions list. To assign the extension to a User, the Administrator must go to the unassigned extensions list and manually fill out the User’s details.
Activate User
Follow the steps below to activate an unassigned extension. For bulk user activation, see How to Activate Bulk Users.
Setup by the user
- In the Admin Portal, click Users > User List.
- Click Unassigned Extensions.
- Click the extension to be activated.
- Click Set up by the user.
- Fill up the extension details. You can click Edit Role to change the default Assigned Role.
- Click Save & Enable.
Setup by the Admin on behalf of the user
- In the Admin Portal, click Users > User List.
- Click Unassigned Extensions.
- Click the extension to be activated.
- Select Set up by the admin on behalf of the user.
- Disable Send a welcome email to the user to enable login.
- Enter the temporary credentials of the users. Follow the Password and PIN criteria as you type.
- Select a Security Question and enter the Answer. The answer should be at least 5 letters.
- Fill up the extension details. You can click Edit Role to change the default Assigned Role.
- Click Set Up User.
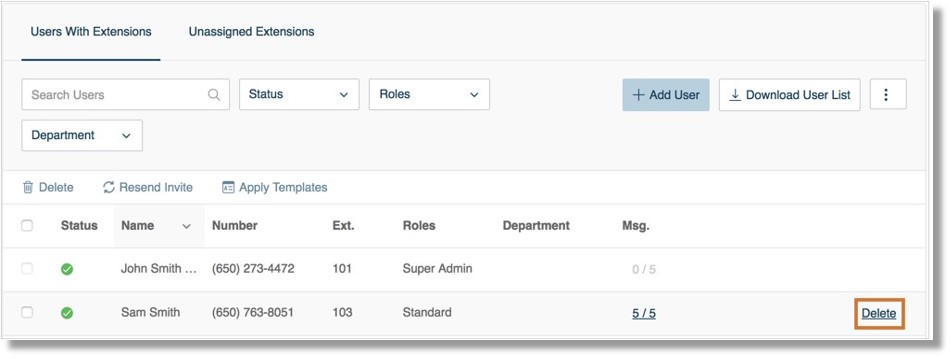
- Log in to your Office@Hand online account.
- Go to Users > User list.
- Click Delete on the right to delete the highlighted user. To delete multiple users, click the box on the right, then click the Delete button .
- The Delete User warning will appear all messages, greetings, rules, and recorded calls for the user will be lost and cannot be recovered. Click Yes to confirm deletion.

- A notification window will appear to confirm that the user has been deleted.
Key Words: 10857, deleting, user, extension, how to delete user, delete, add user, add extension, how to add without phones, add with phones, 2570, adding, deleting, user, extension
Was this page helpful? Yes No