TOP

AT&T Business Messaging

Learn how to use your AT&T Business Messaging service. Receive tips on how to log in to the AT&T Business Notification Center website to build lists and send messages, or integrate with notification applications. Use our step by step walk-throughs to learn how to create, edit, import, and export both contacts and groups.

Back to Product Page
Use the dropdown to get support, or purchase this product

Share a location in AT&T Business Notification Center

  1. Access the AT&T Business Notification Center.
    Note: The web portal defaults to the “Conversations” screen.
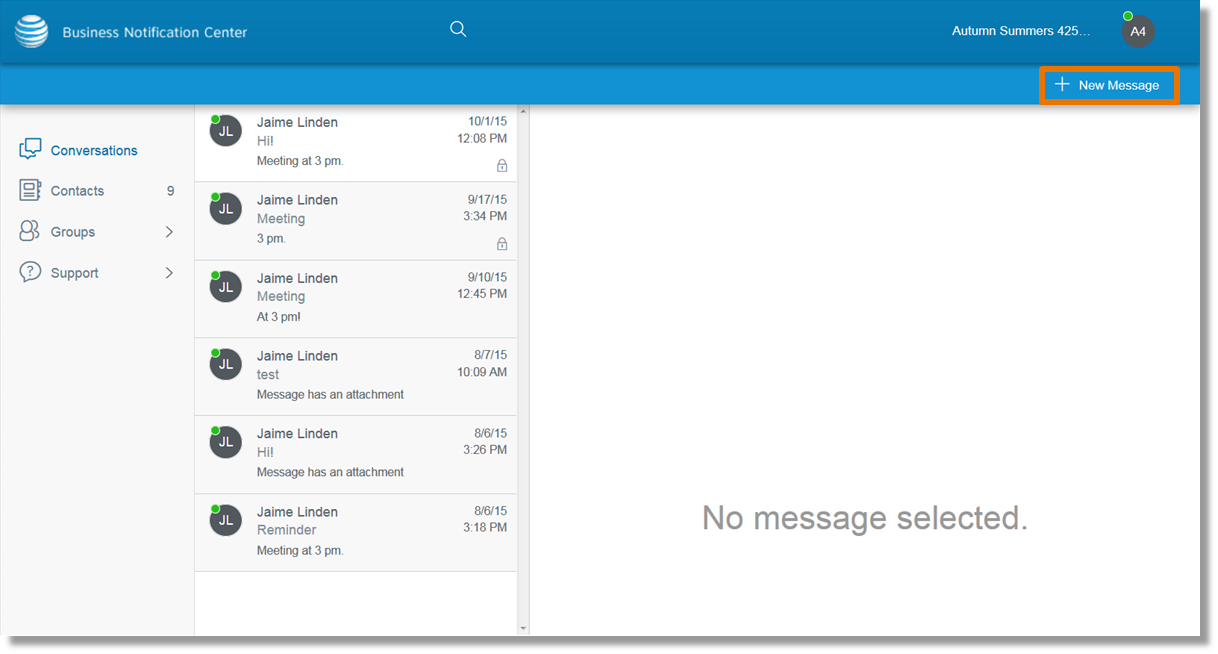
  2. At the top right of the page, click New Message.

    Step 2 image to click new message at the top right

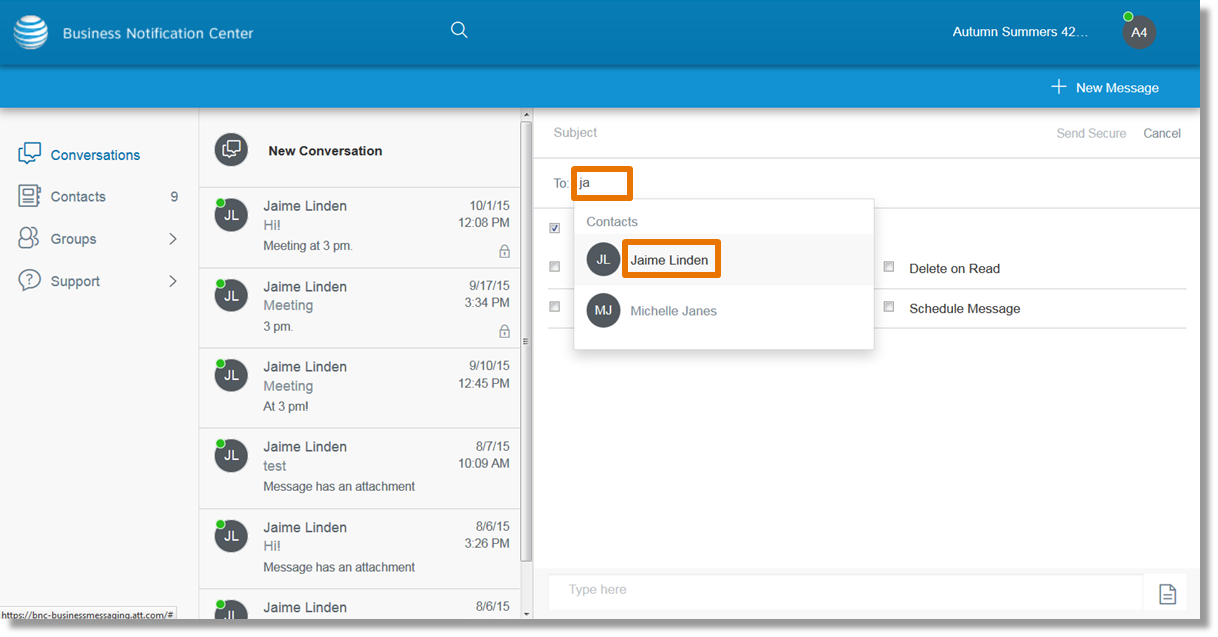
  3. Begin entering the name of the group or contact to which you would like to send the message.
  4. Click the contact or group name when it appears.

    Steps 3 and 4 image, to enter and select the contact or group name

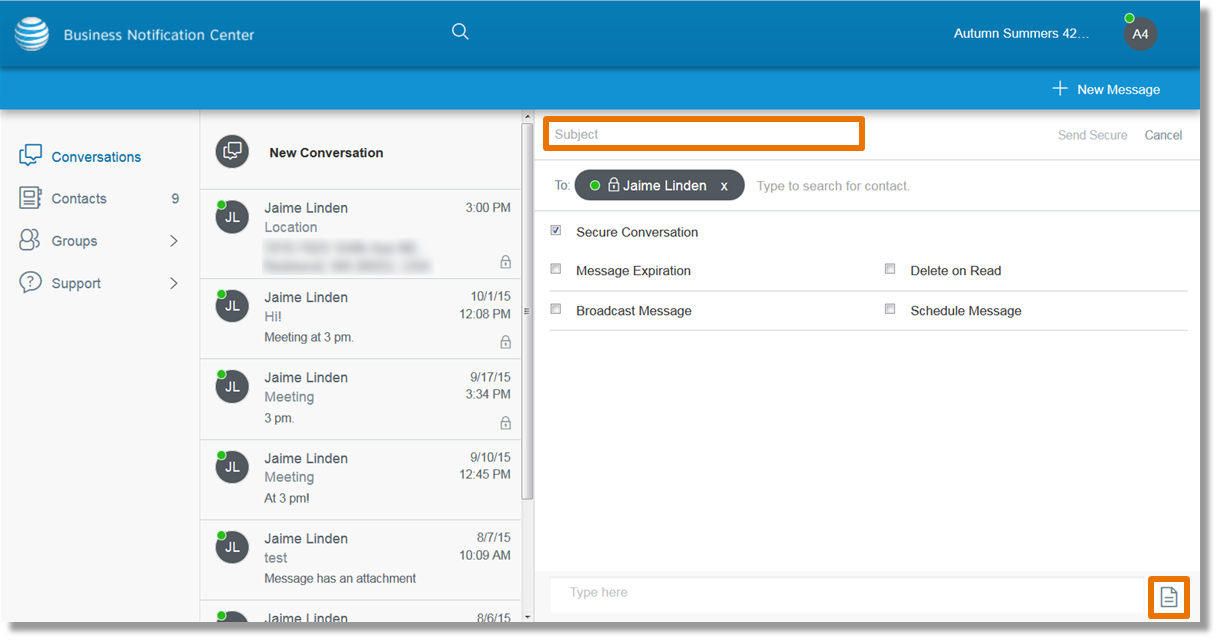
  5. Click inside the “Subject” field and complete the subject line.
  6. Click the attachment icon attachment icon at the bottom right of the page.

    Steps 5 and 6 enter subject line, click attachment icon at the bottom right of the page.

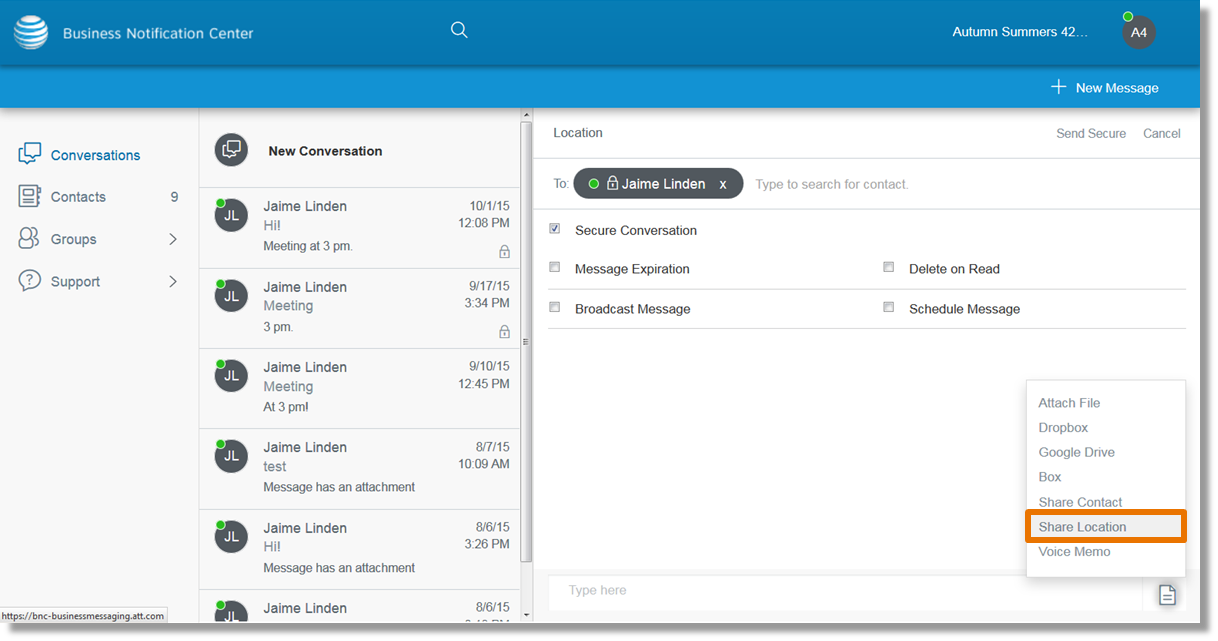
  7. Click Share Location.

    Step 7 image to click share location

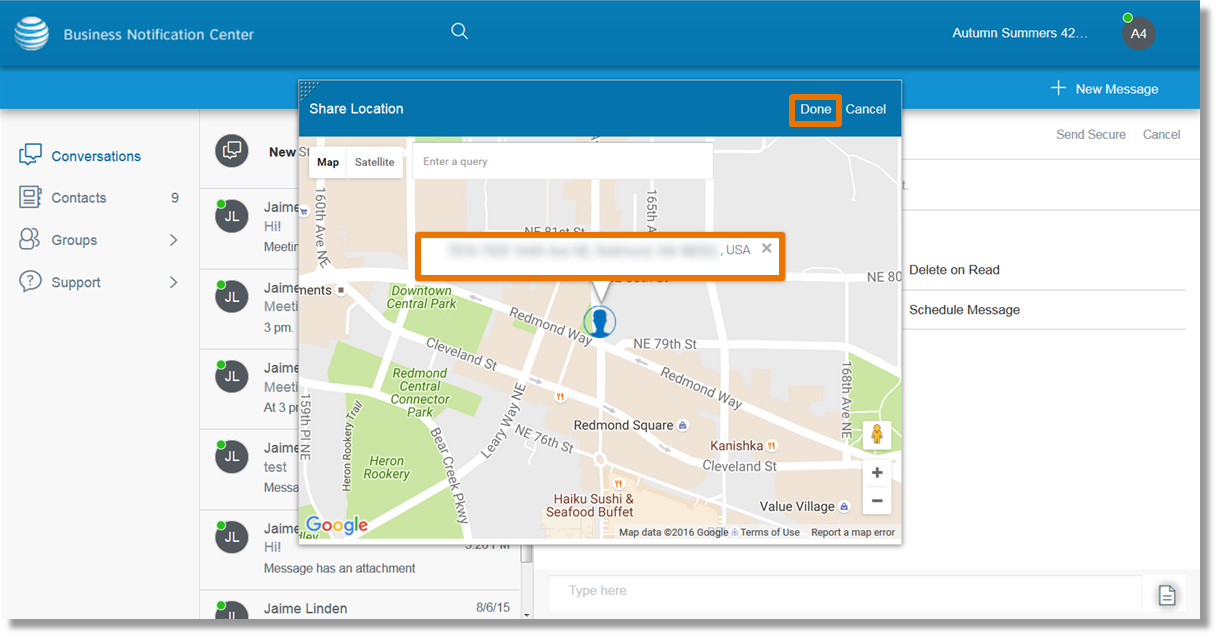
  8. Your location populates.
  9. Click Done.

    Steps 8 and 9 show that the location populates and click done.

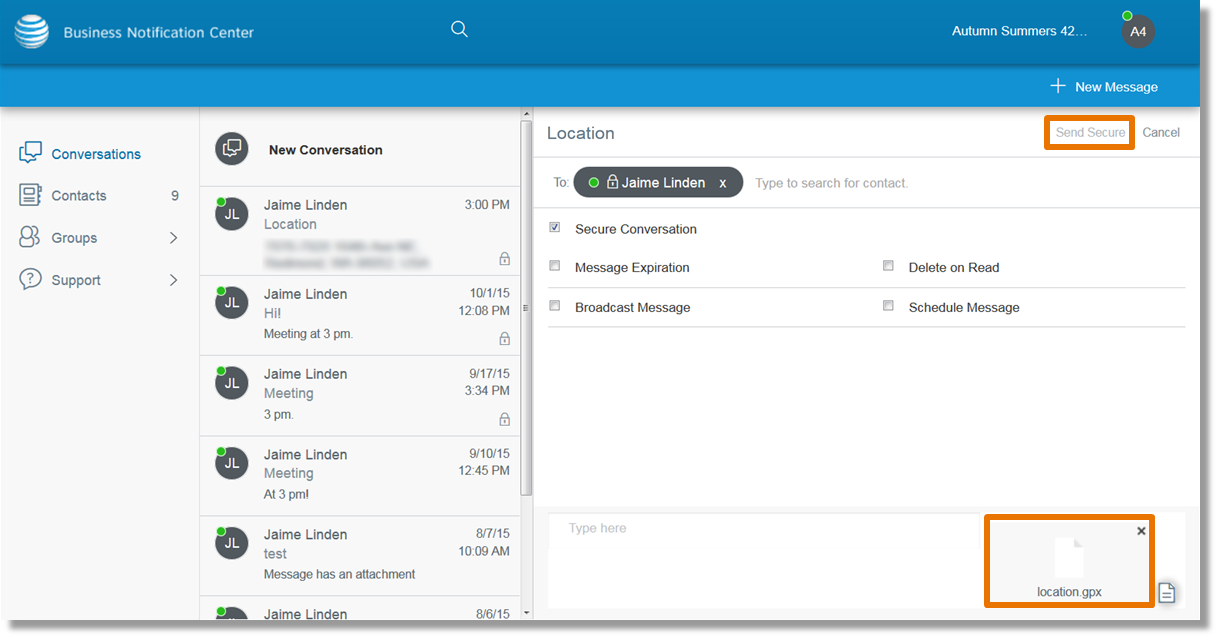
  10. The location attachment appears at the bottom right side of the email.
  11. Click Send Secure.
    Note: If the “Secure Conversation” box is not checked, click Send.

    Steps 10 and 11 location attachment appears at bottom right of email, click send to send the email

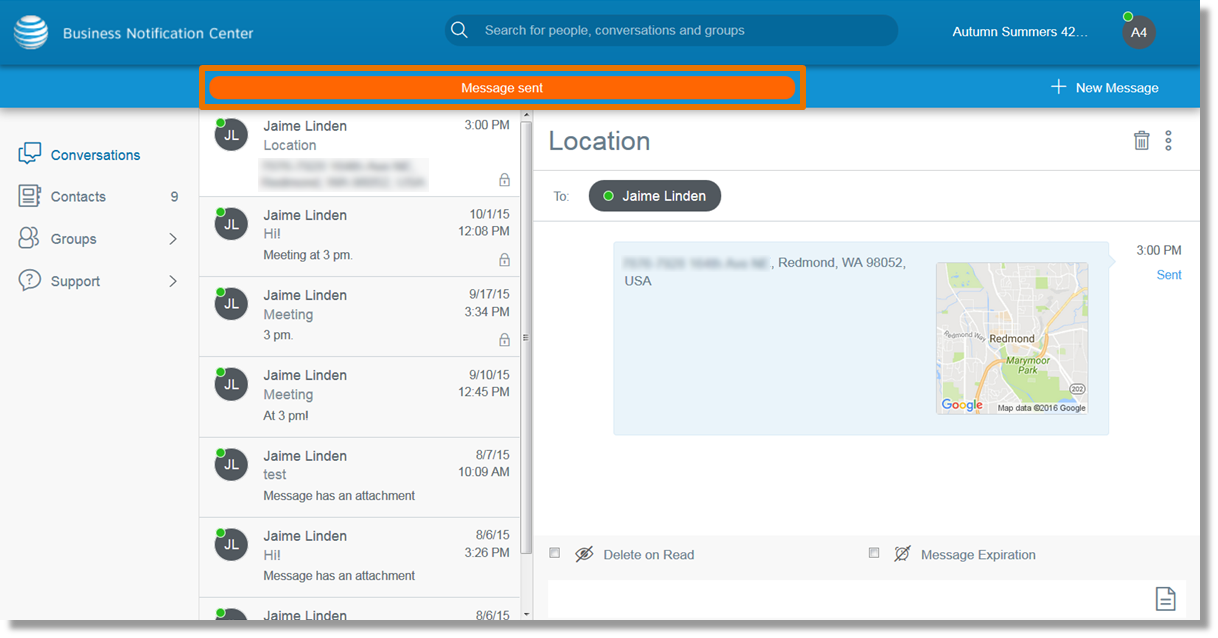
  12. The “Message sent” notification appears to confirm the message is sent.

    Step 12 image, message sent notification appears at top of screen