TOP

AT&T Fleet Management for Enterprise/Government

AT&T Fleet Management for Enterprise (AFMFE) delivers real results with GPS tracking information to enable fleets to be more efficient, profitable and customer focused. Vehicle tracking, optional vehicle engine and performance data, and extensive reporting assist in optimizing business operations.

Back to Product Page
Use the dropdown to get support, or purchase this product

Create a Dashboard Report

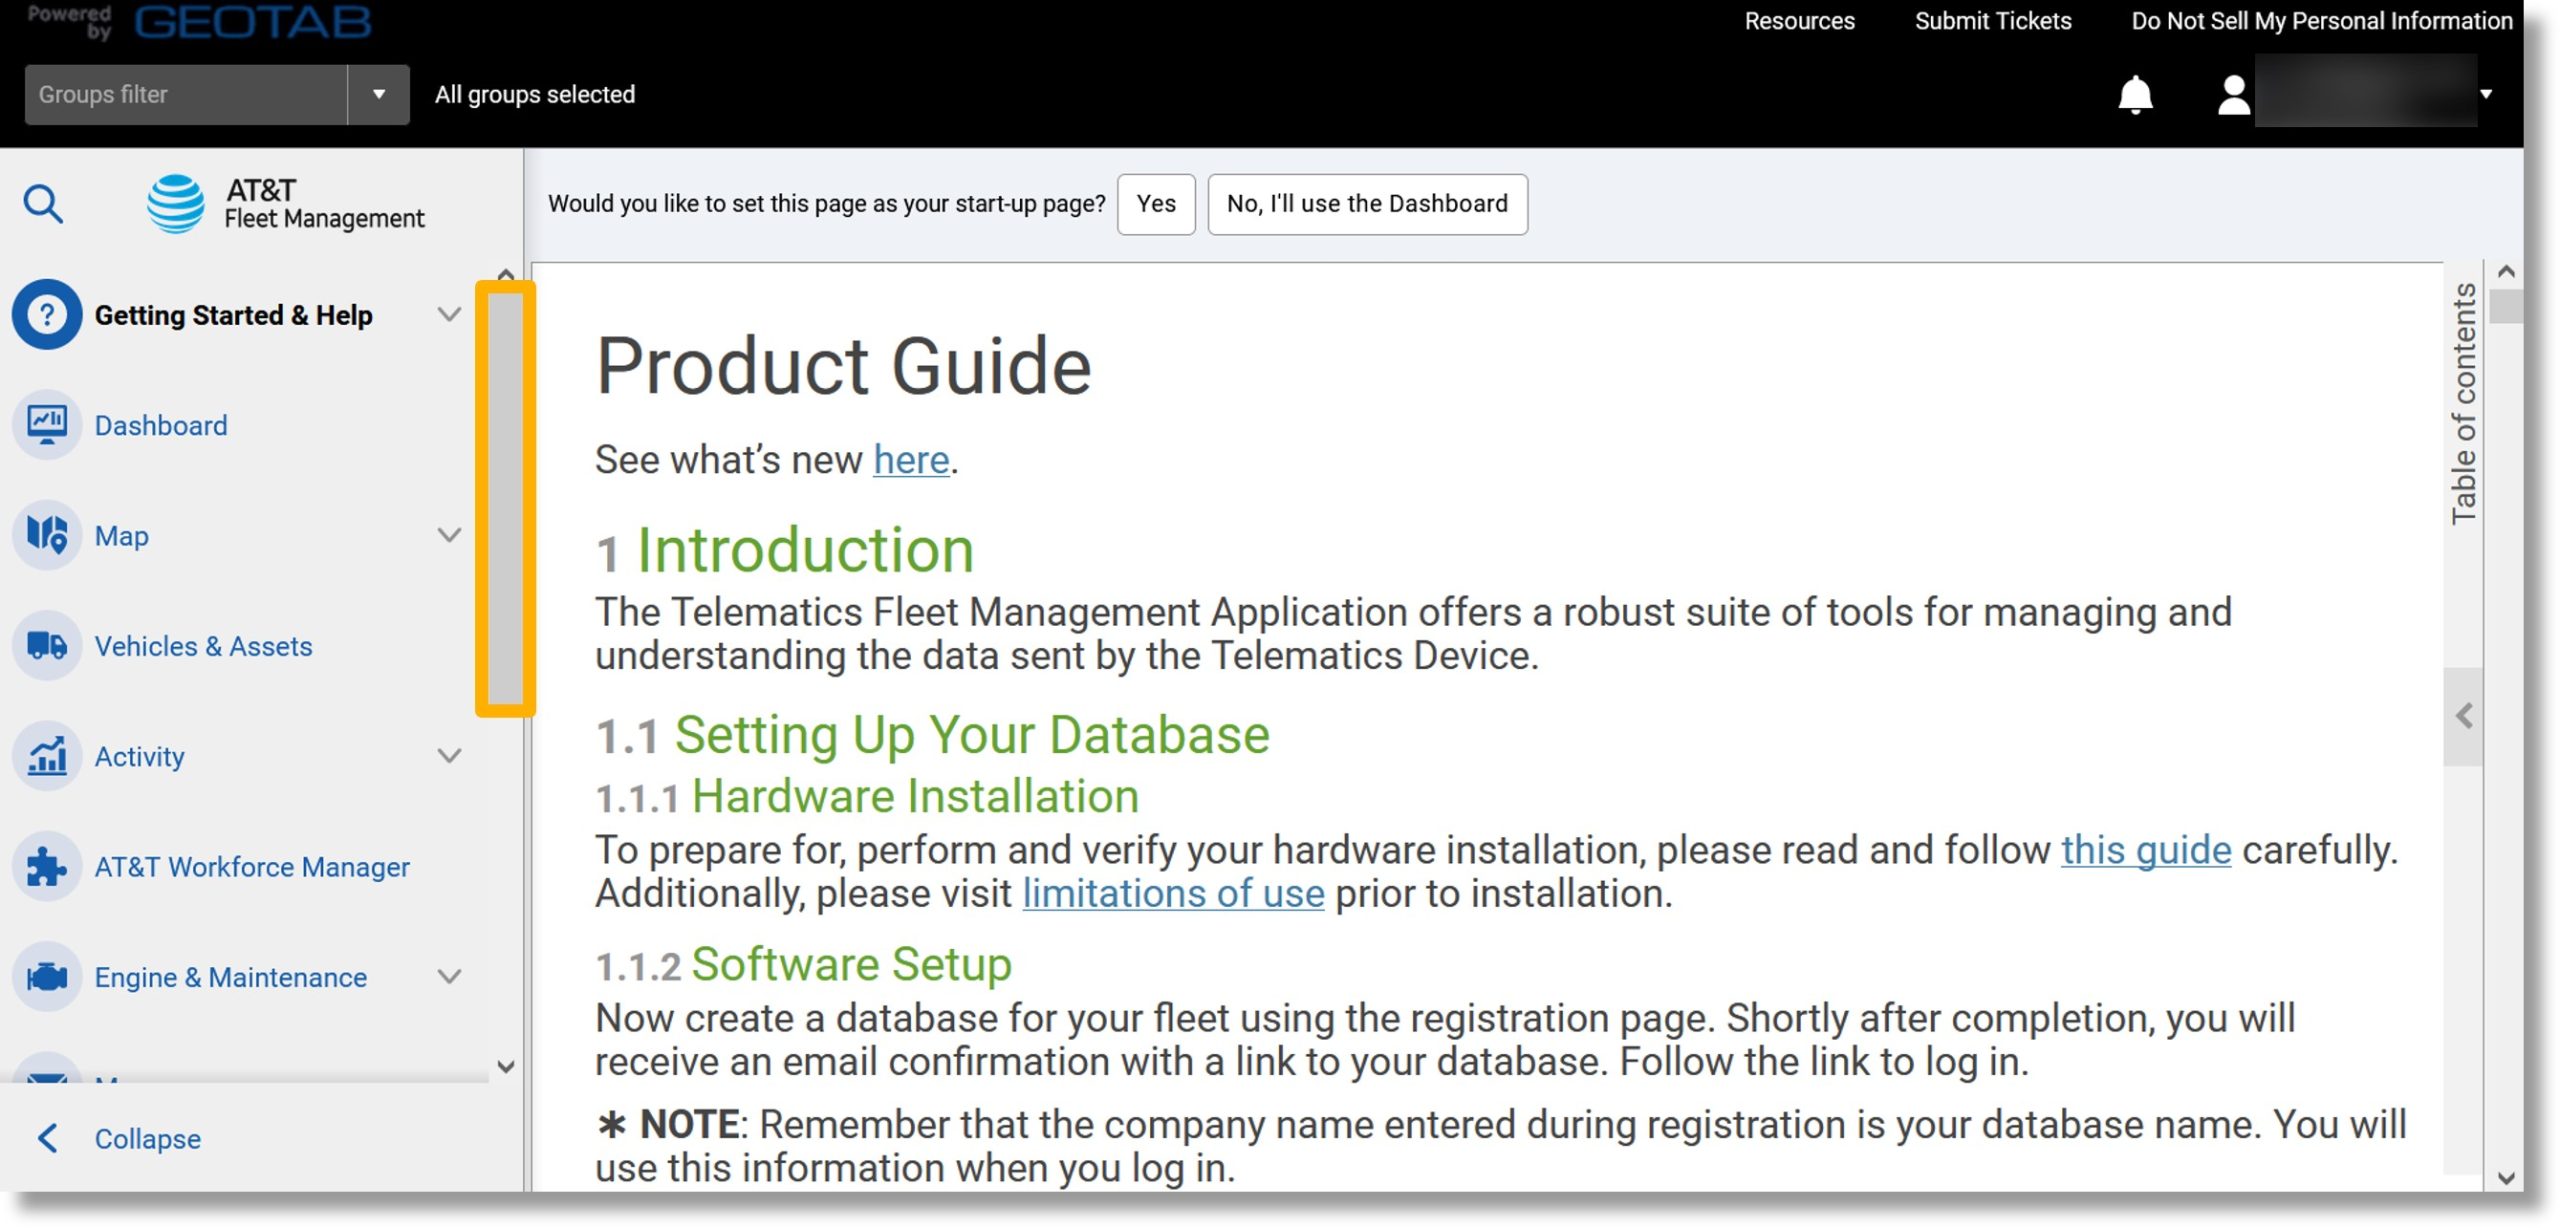
  1. Scroll down to Administration in the menu to the left.

    Image of step 1.

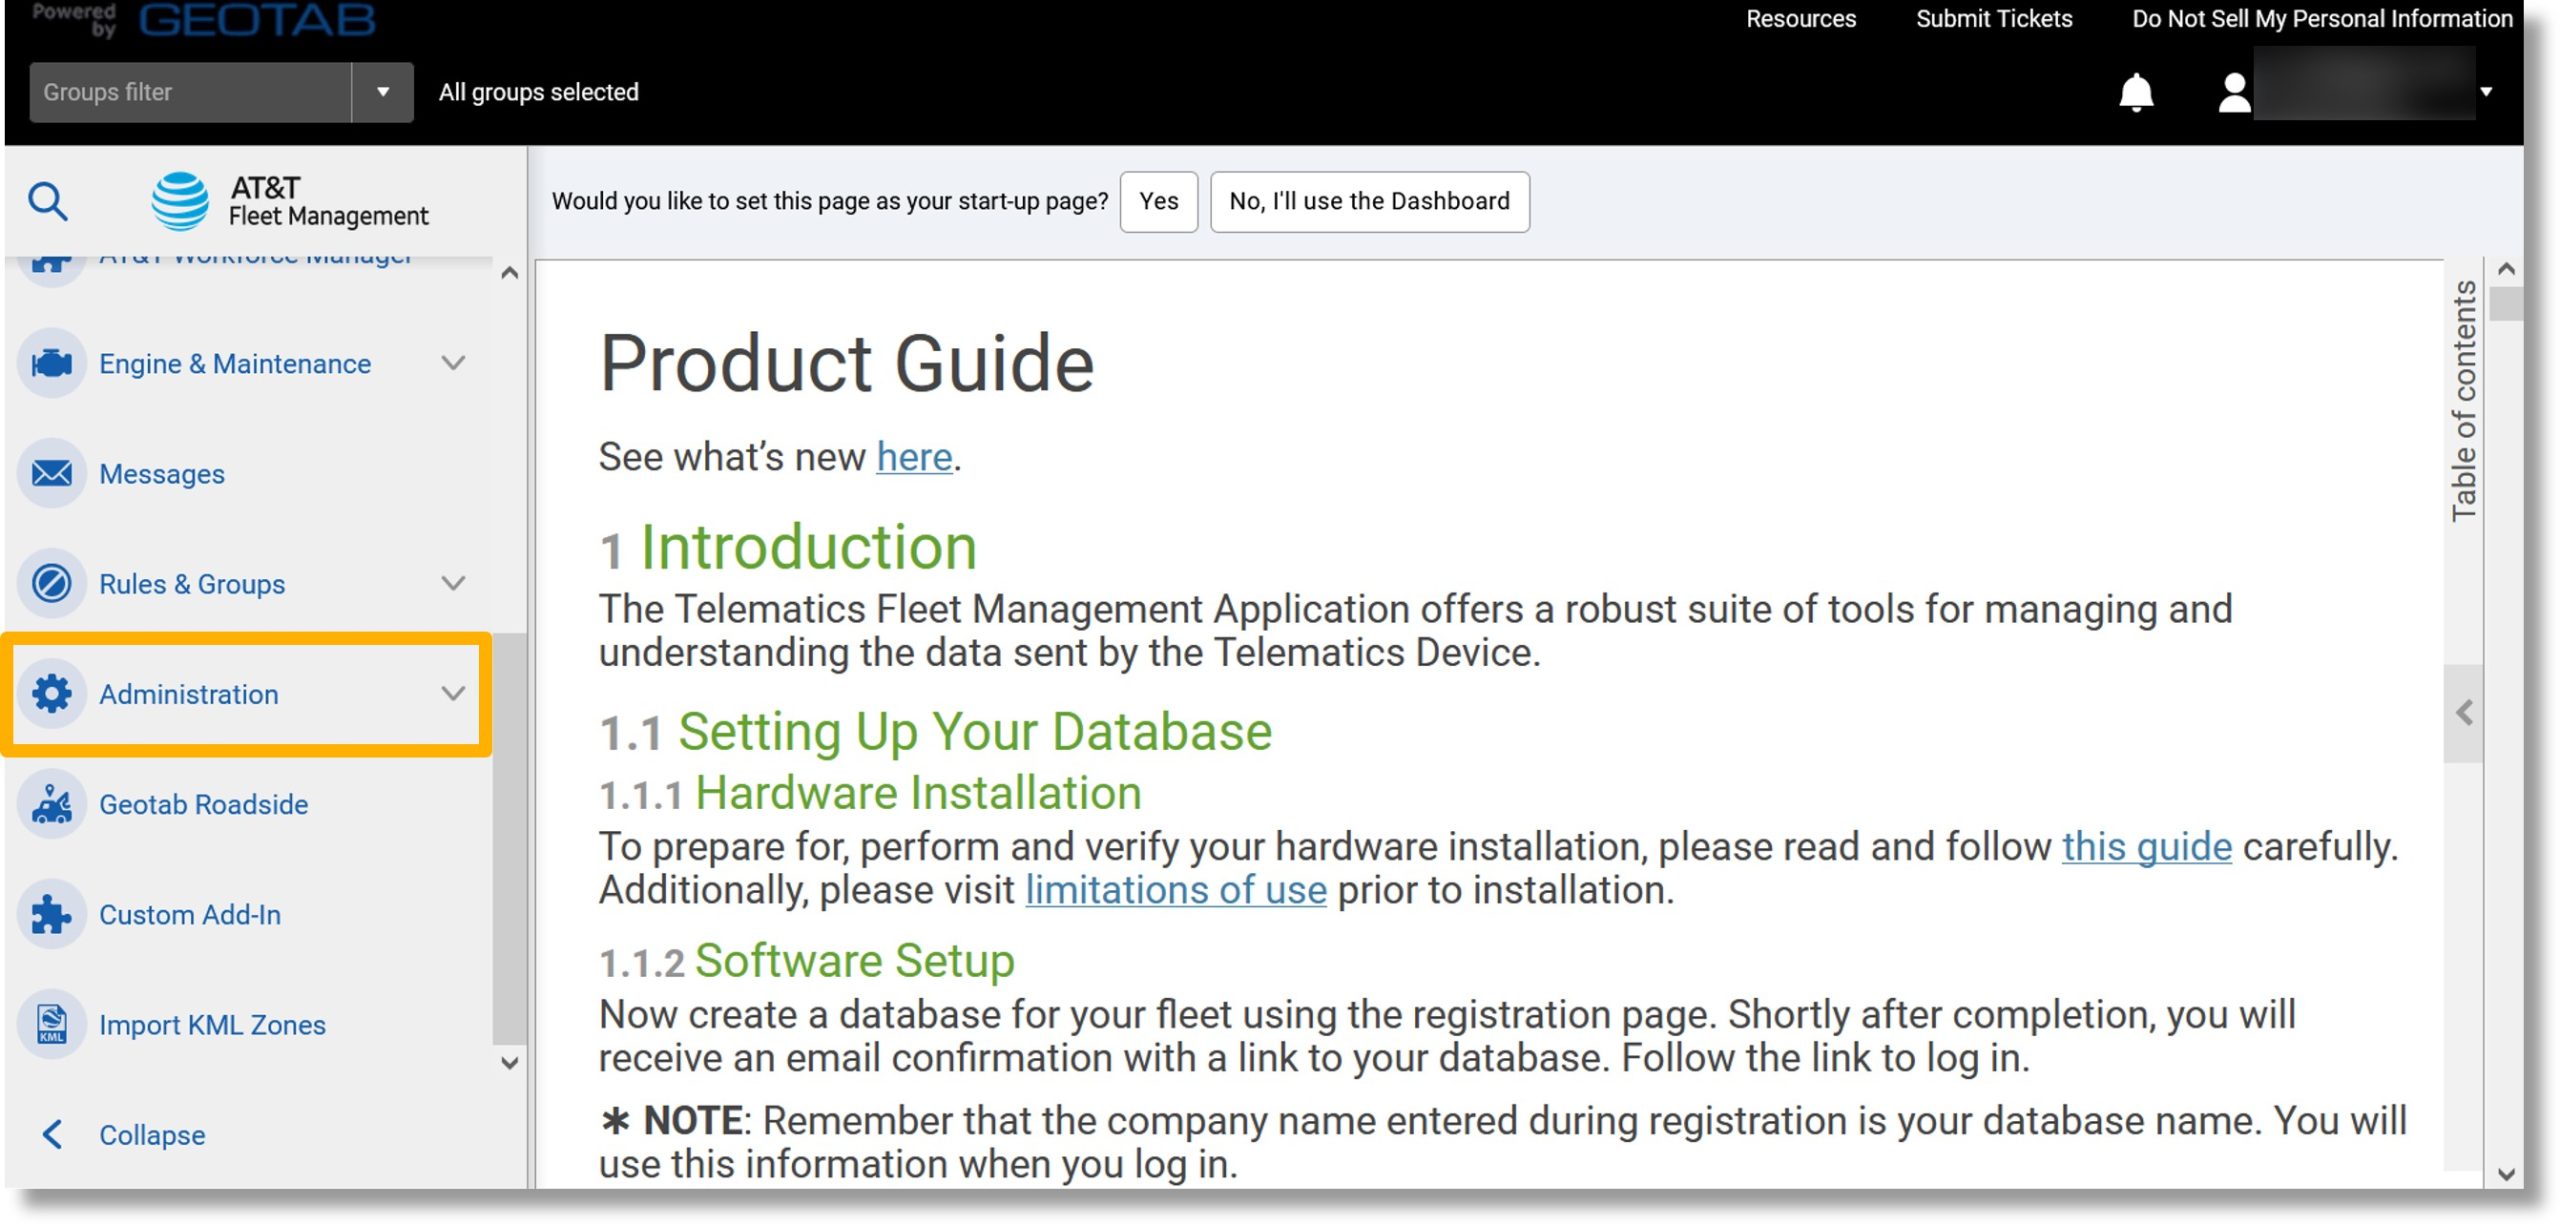
  2. Click on Administration.

    Image of step 2.

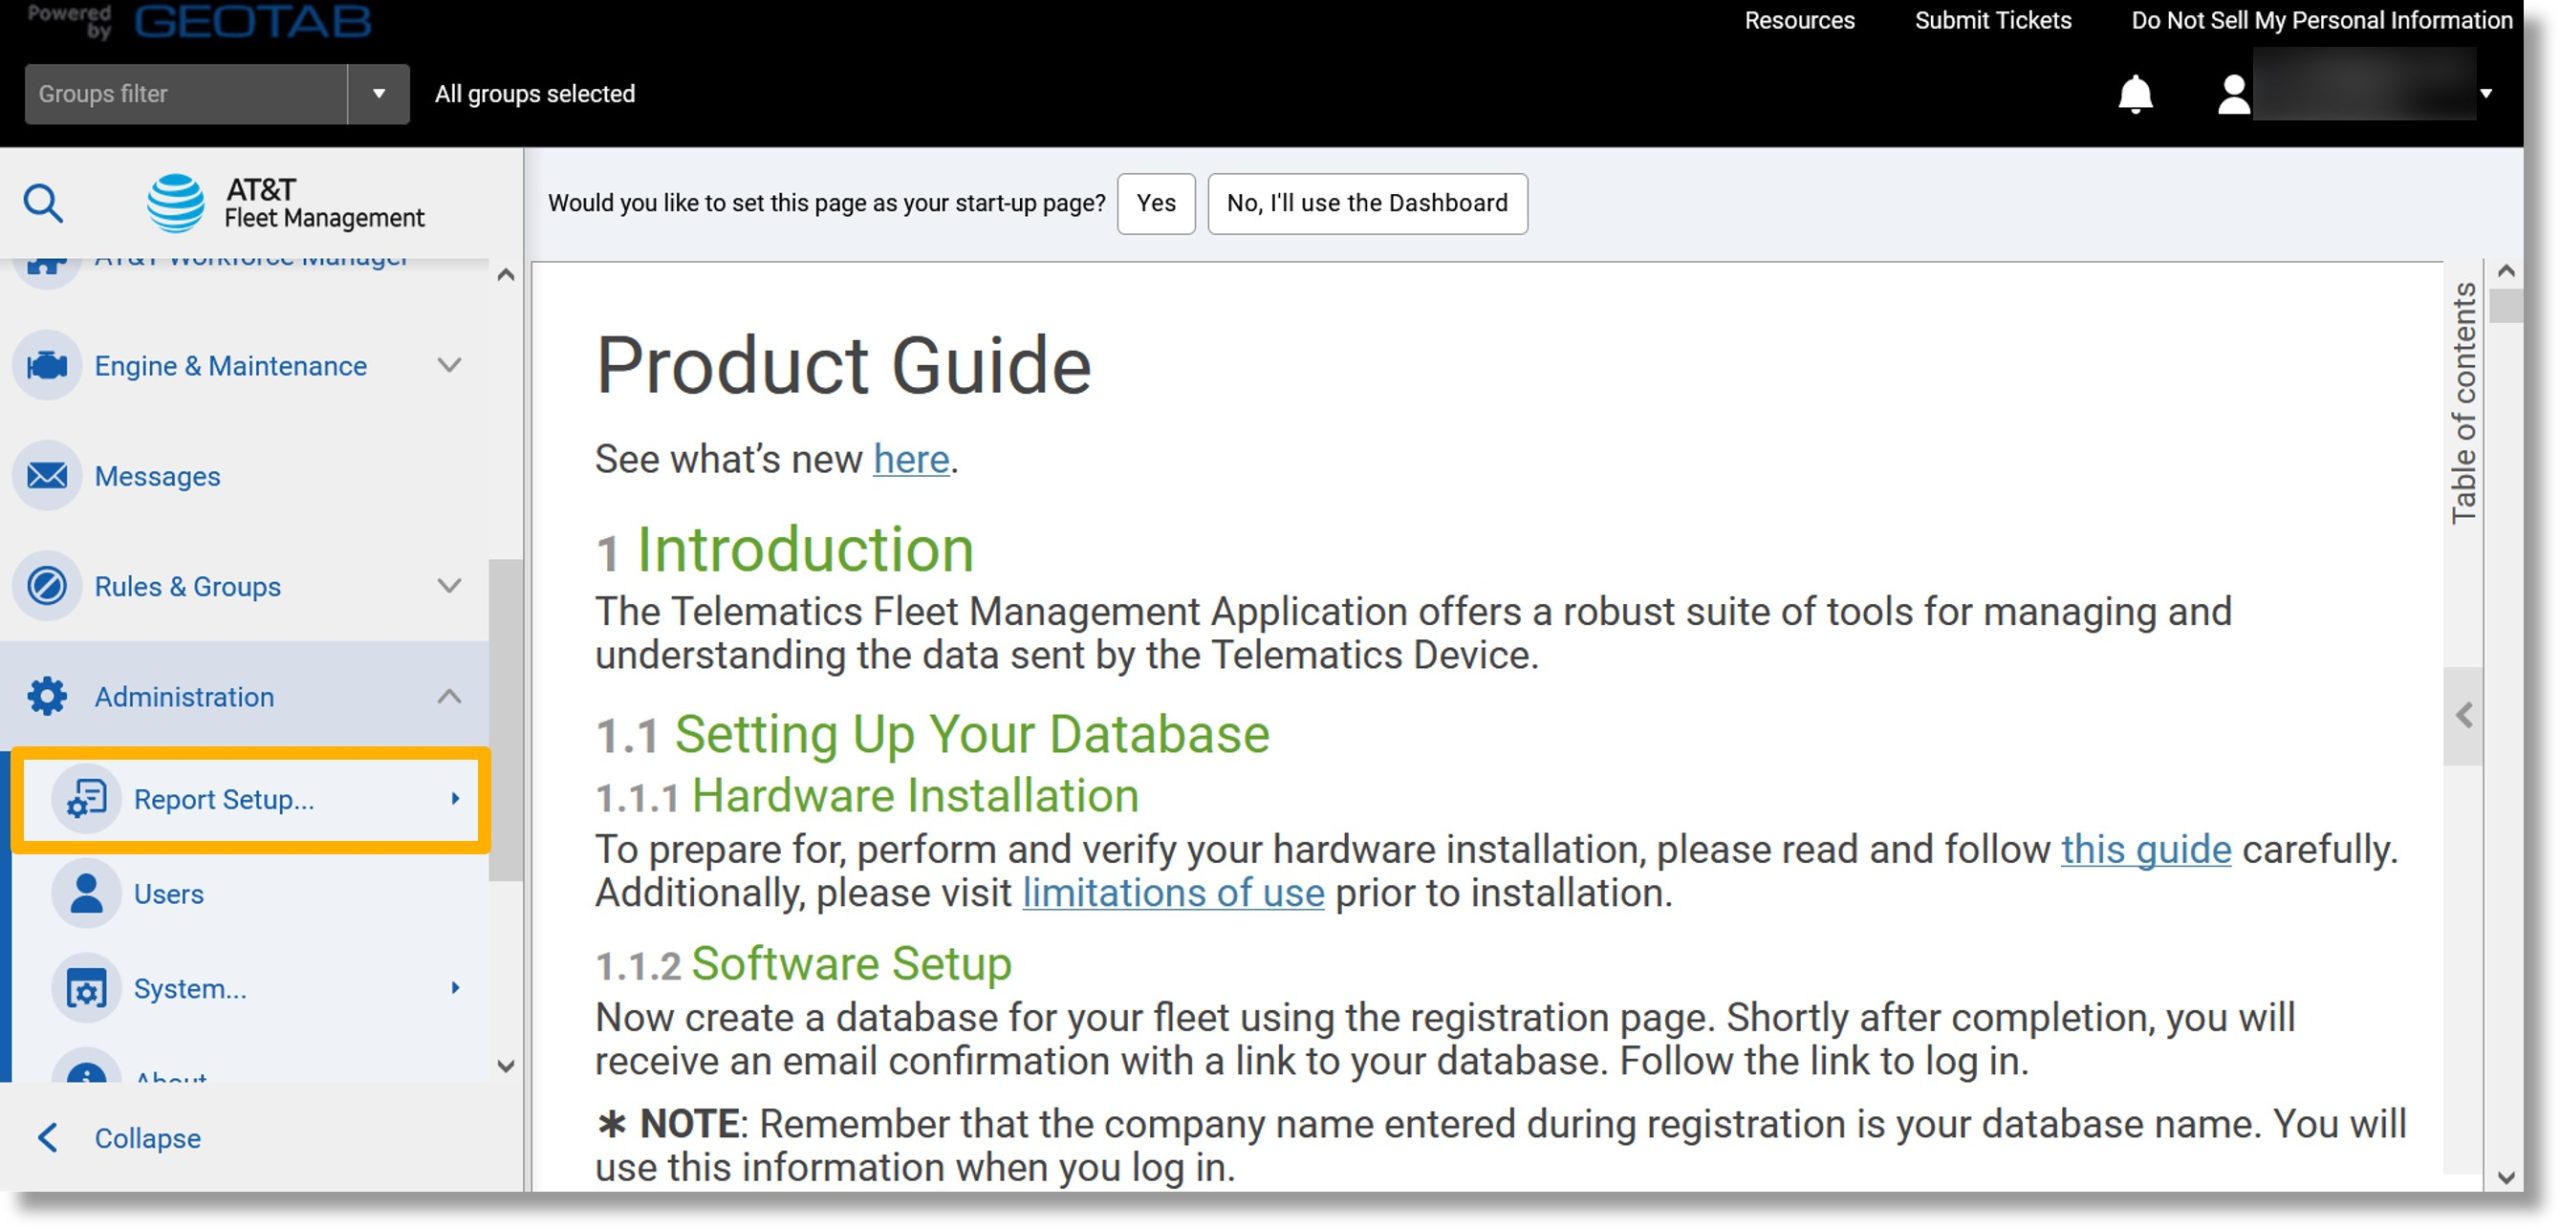
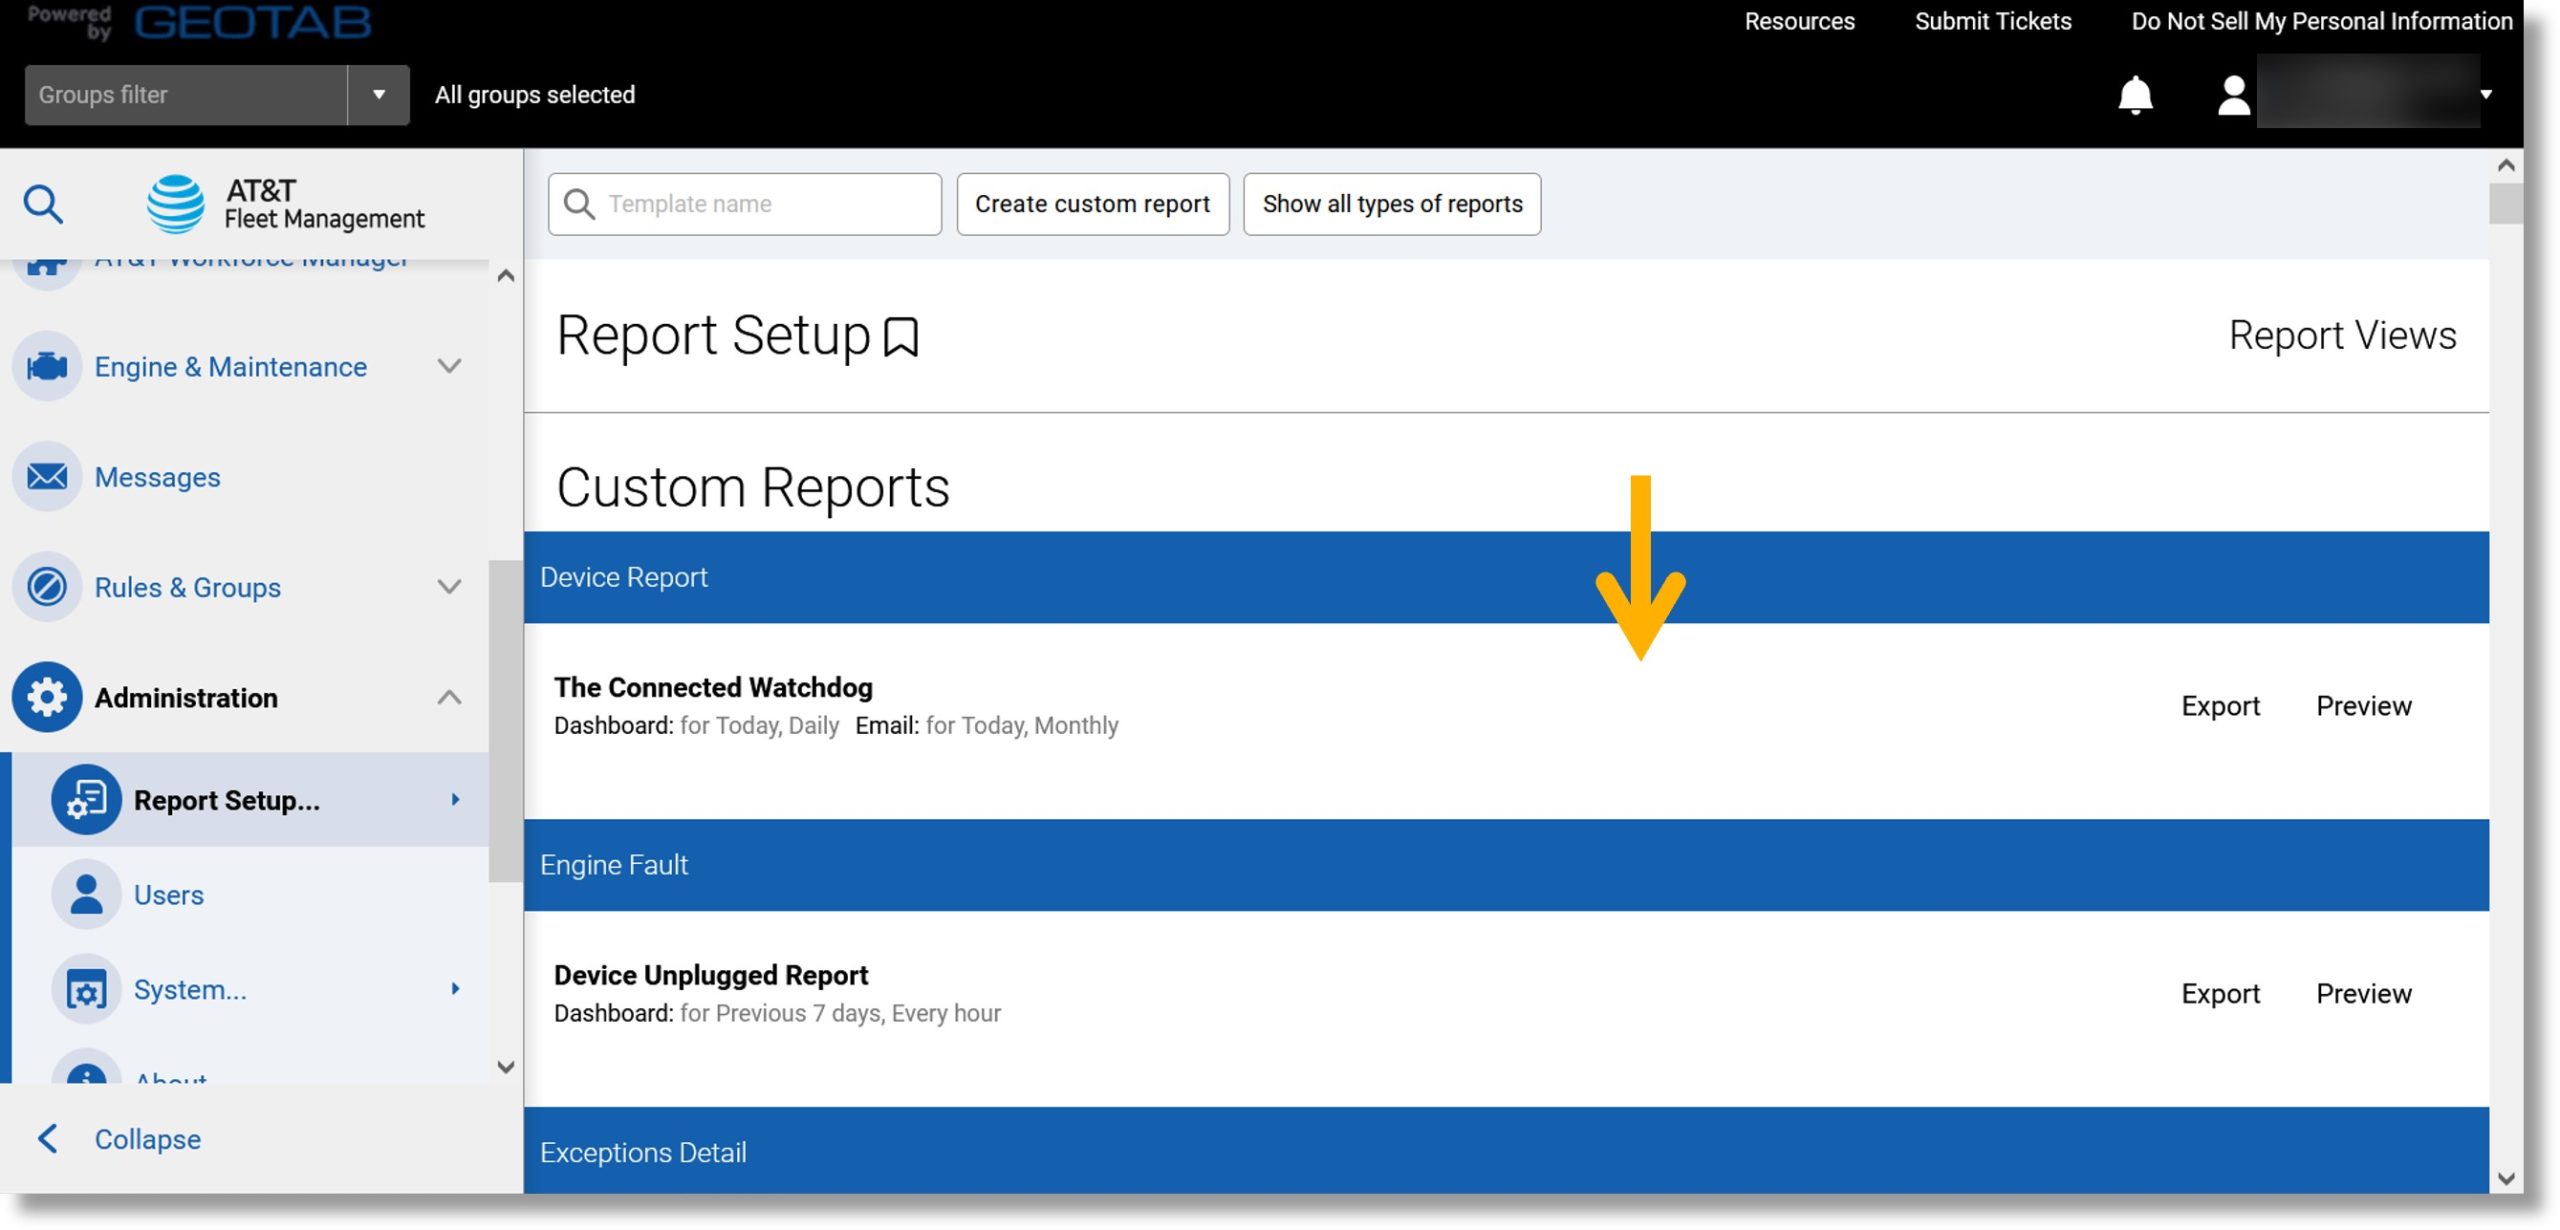
  3. Scroll down to Report Setup….

    Image of step 3.

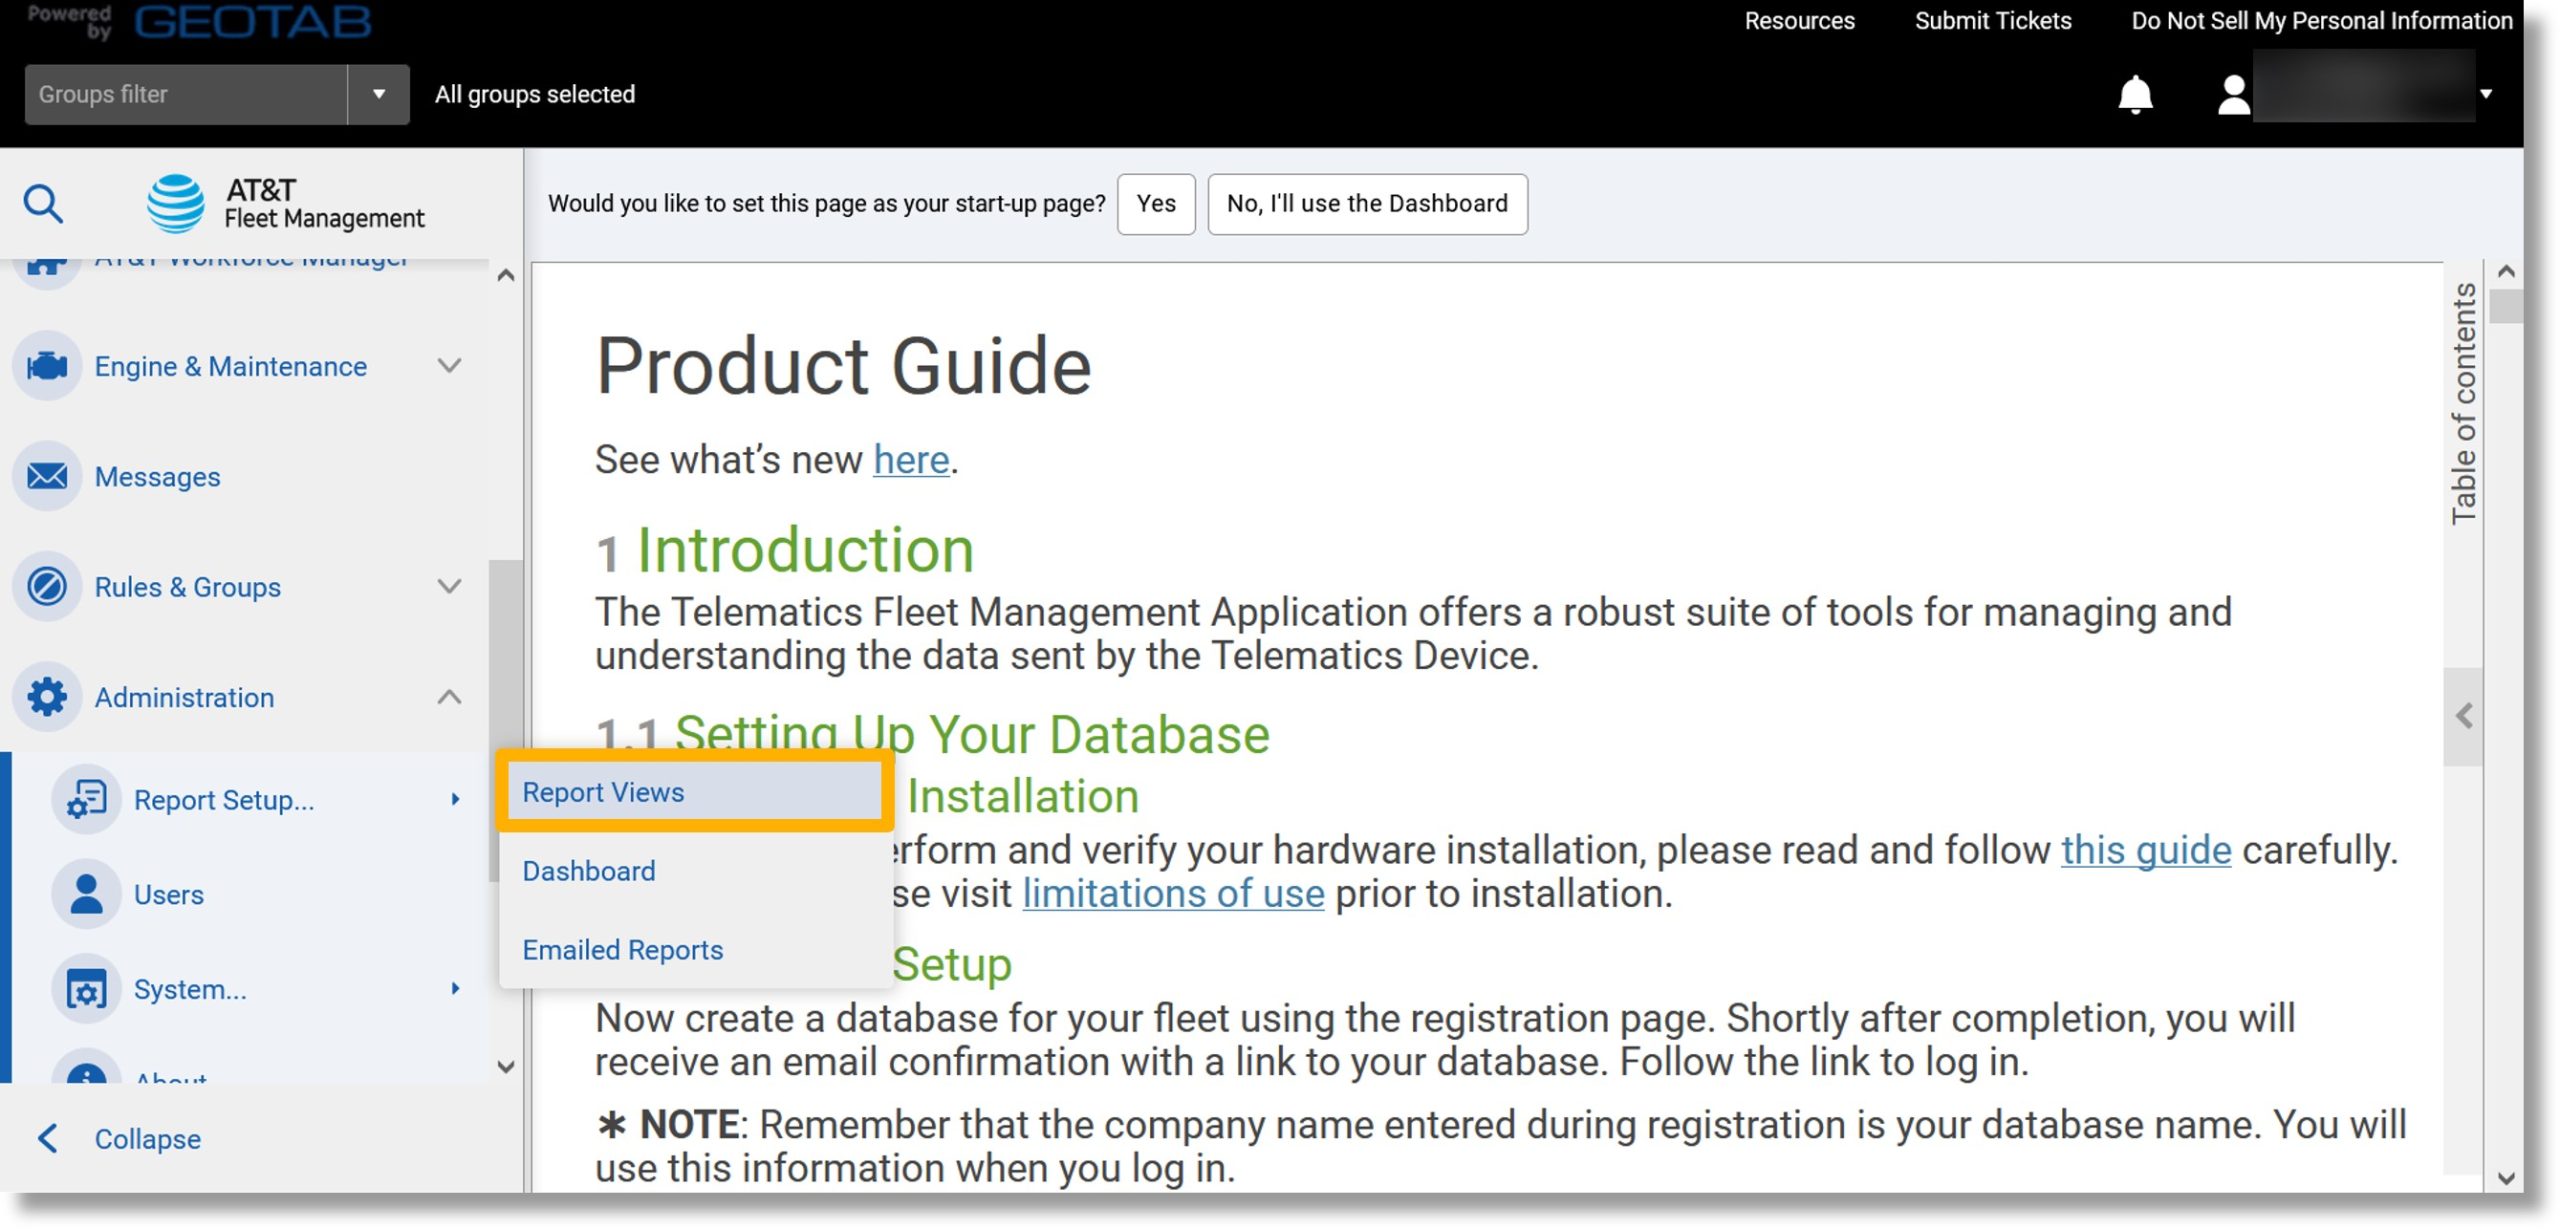
  4. Click on Reports Views.

    Image of step 4.

  5. Scroll down to the desired report.
    Note: You can also click in the “Template name” field to search for one.

    Image of step 5.

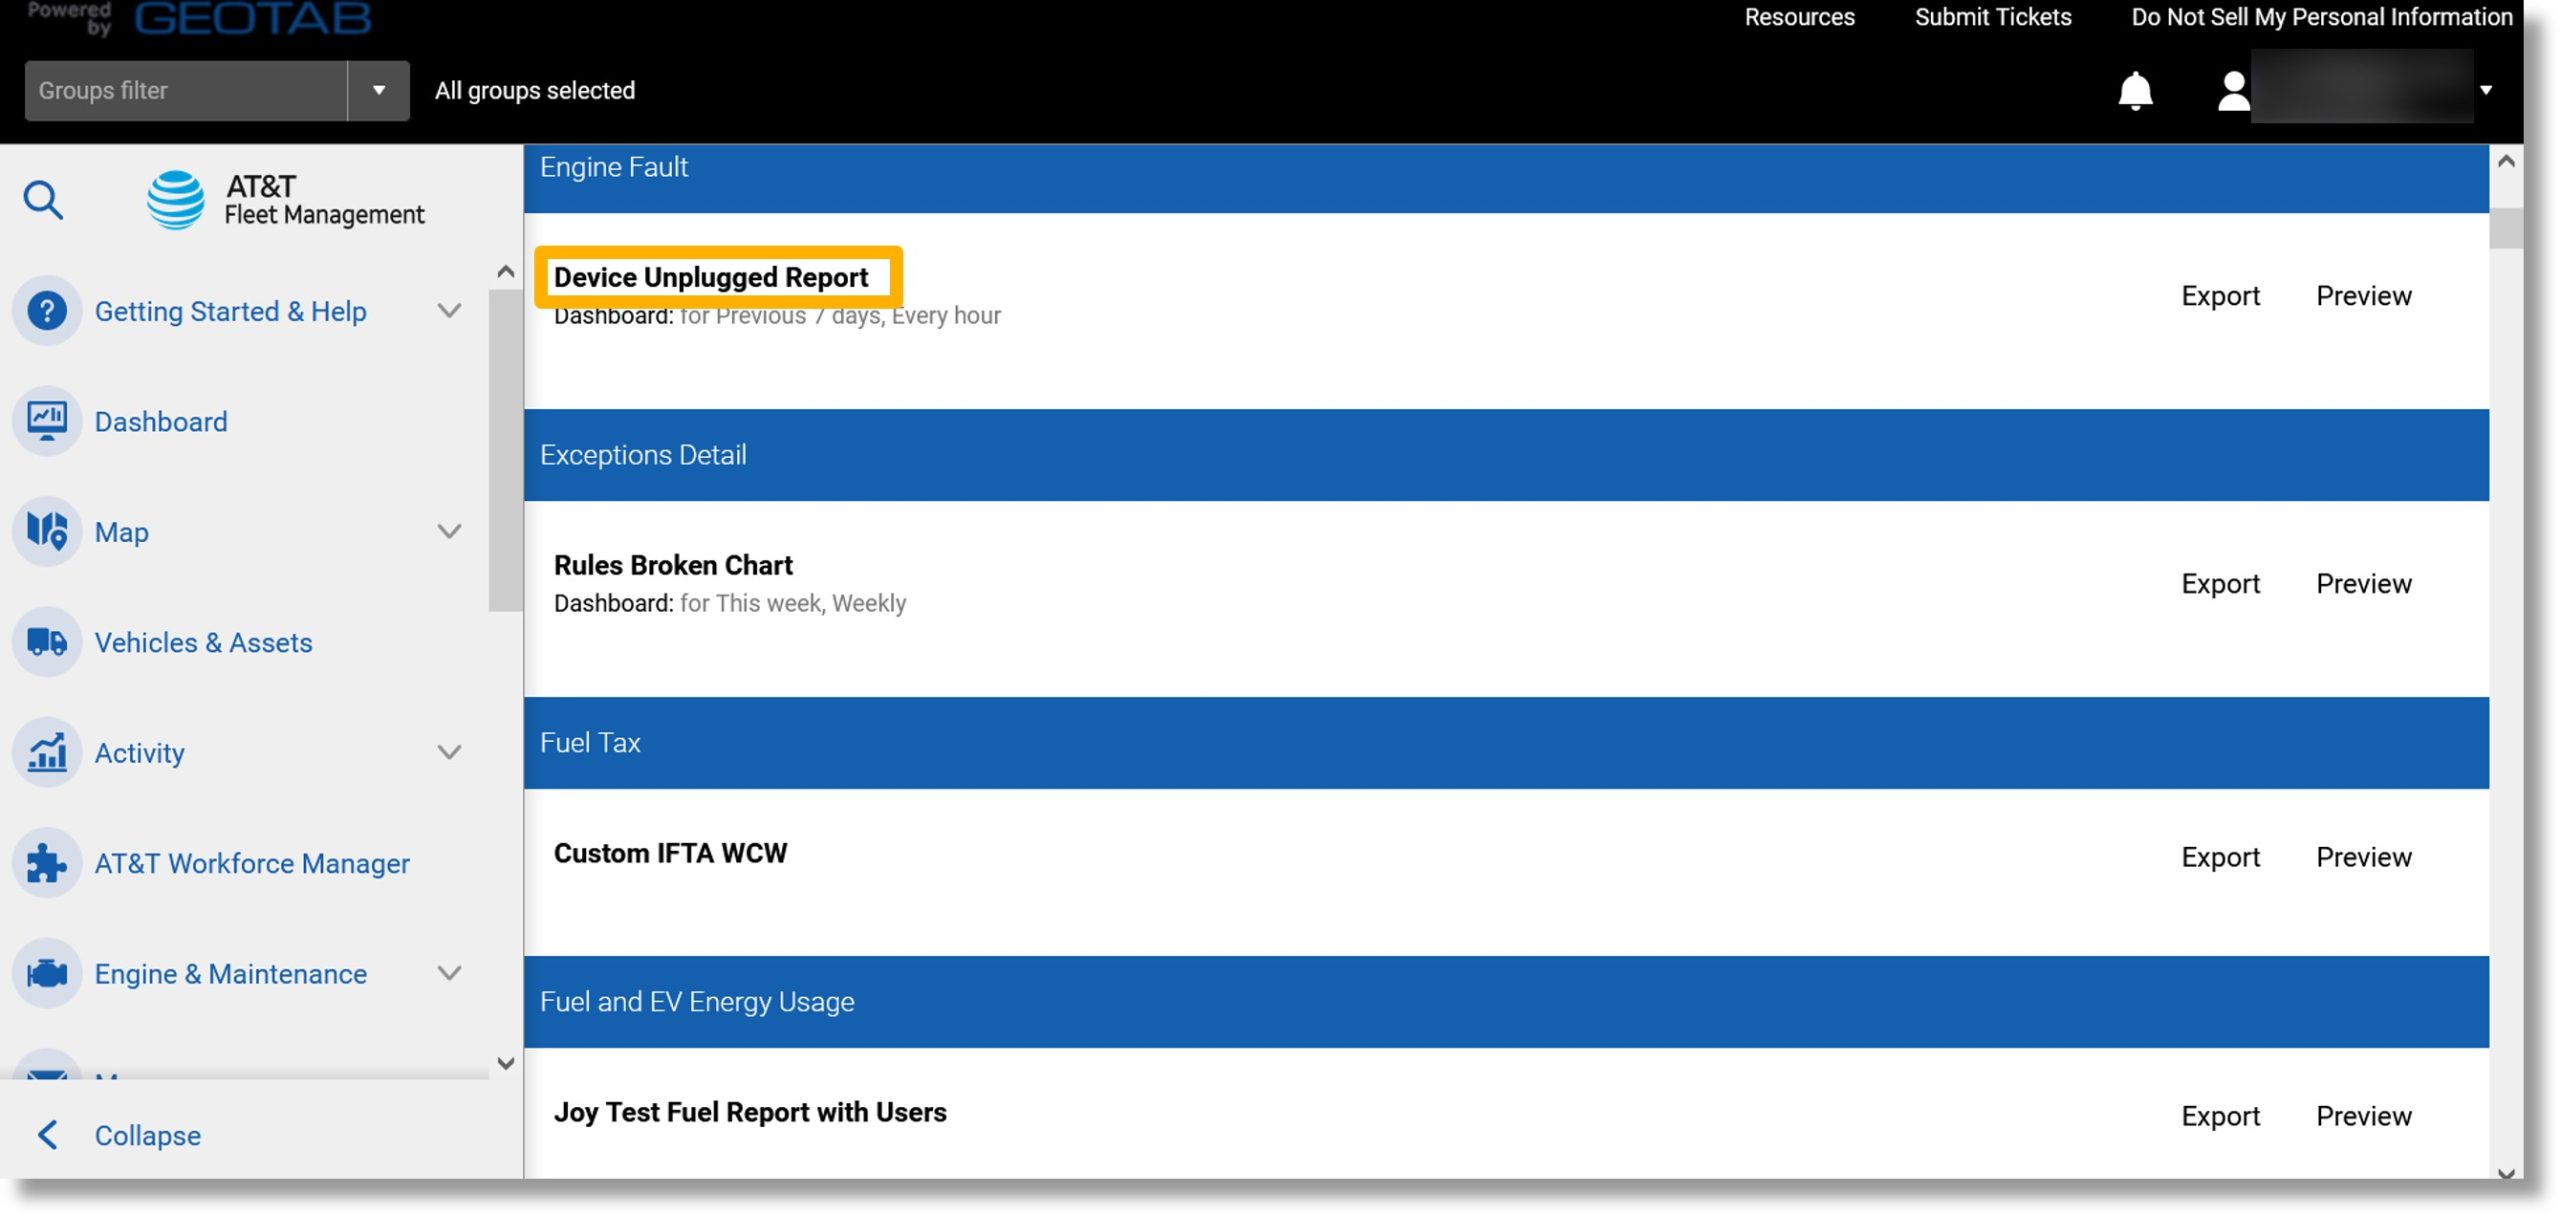
  6. Click on the name of the desired report.

    Image of step 6.

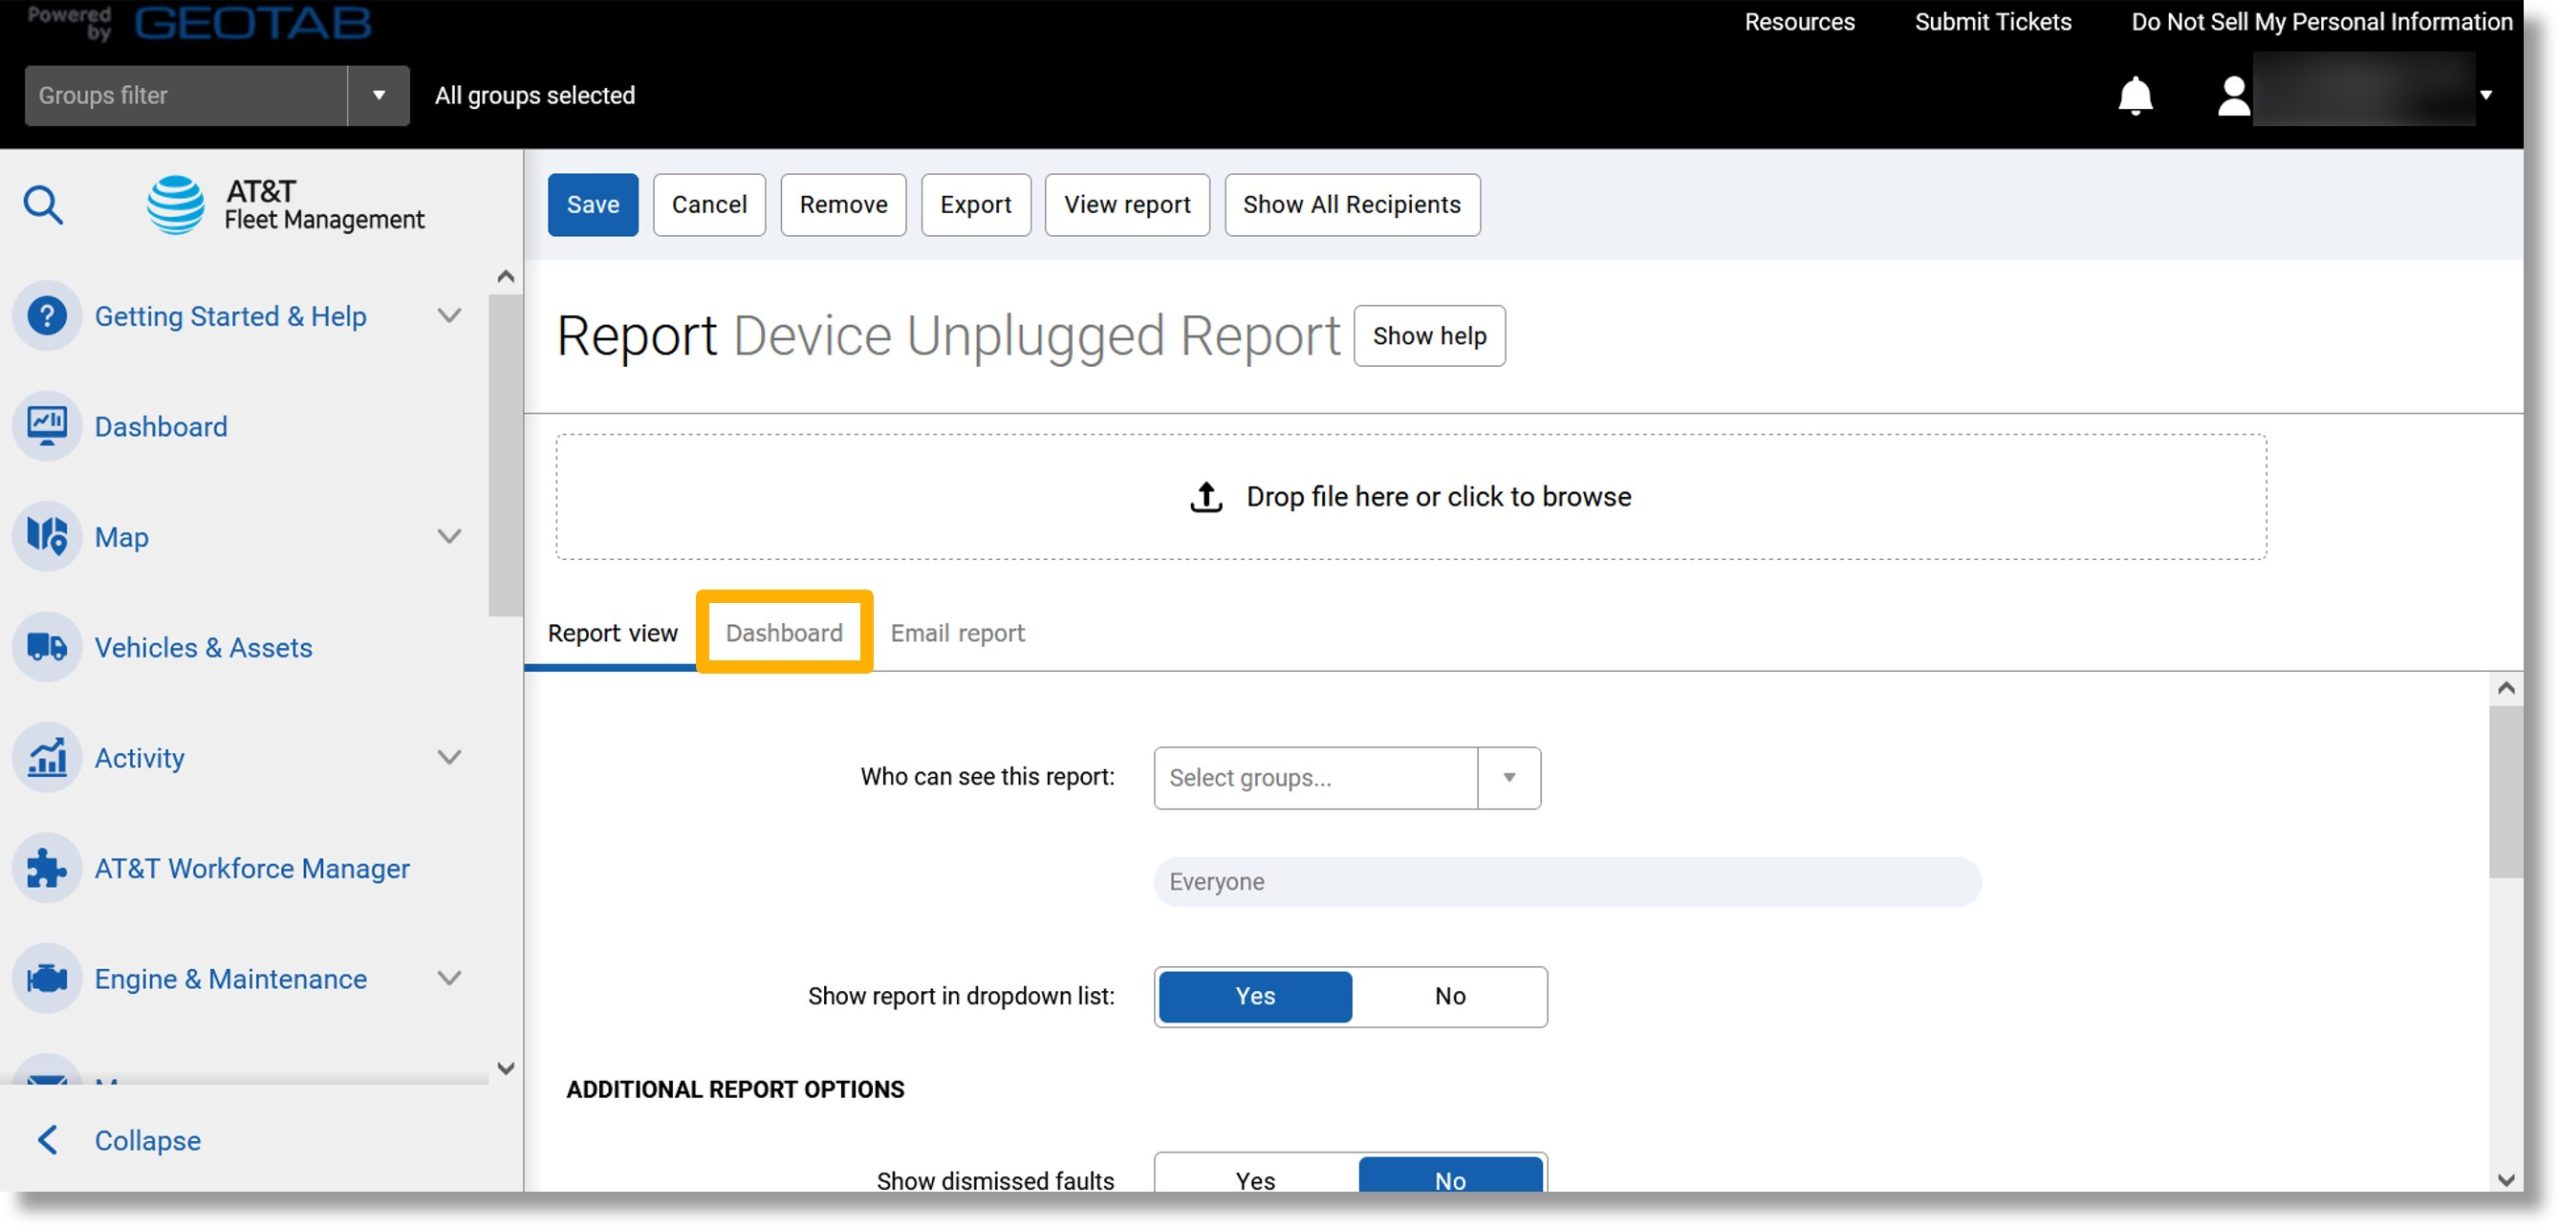
  7. The report’s settings display.
  8. Click on the Dashboard tab.

    Image of steps 7 and 8.

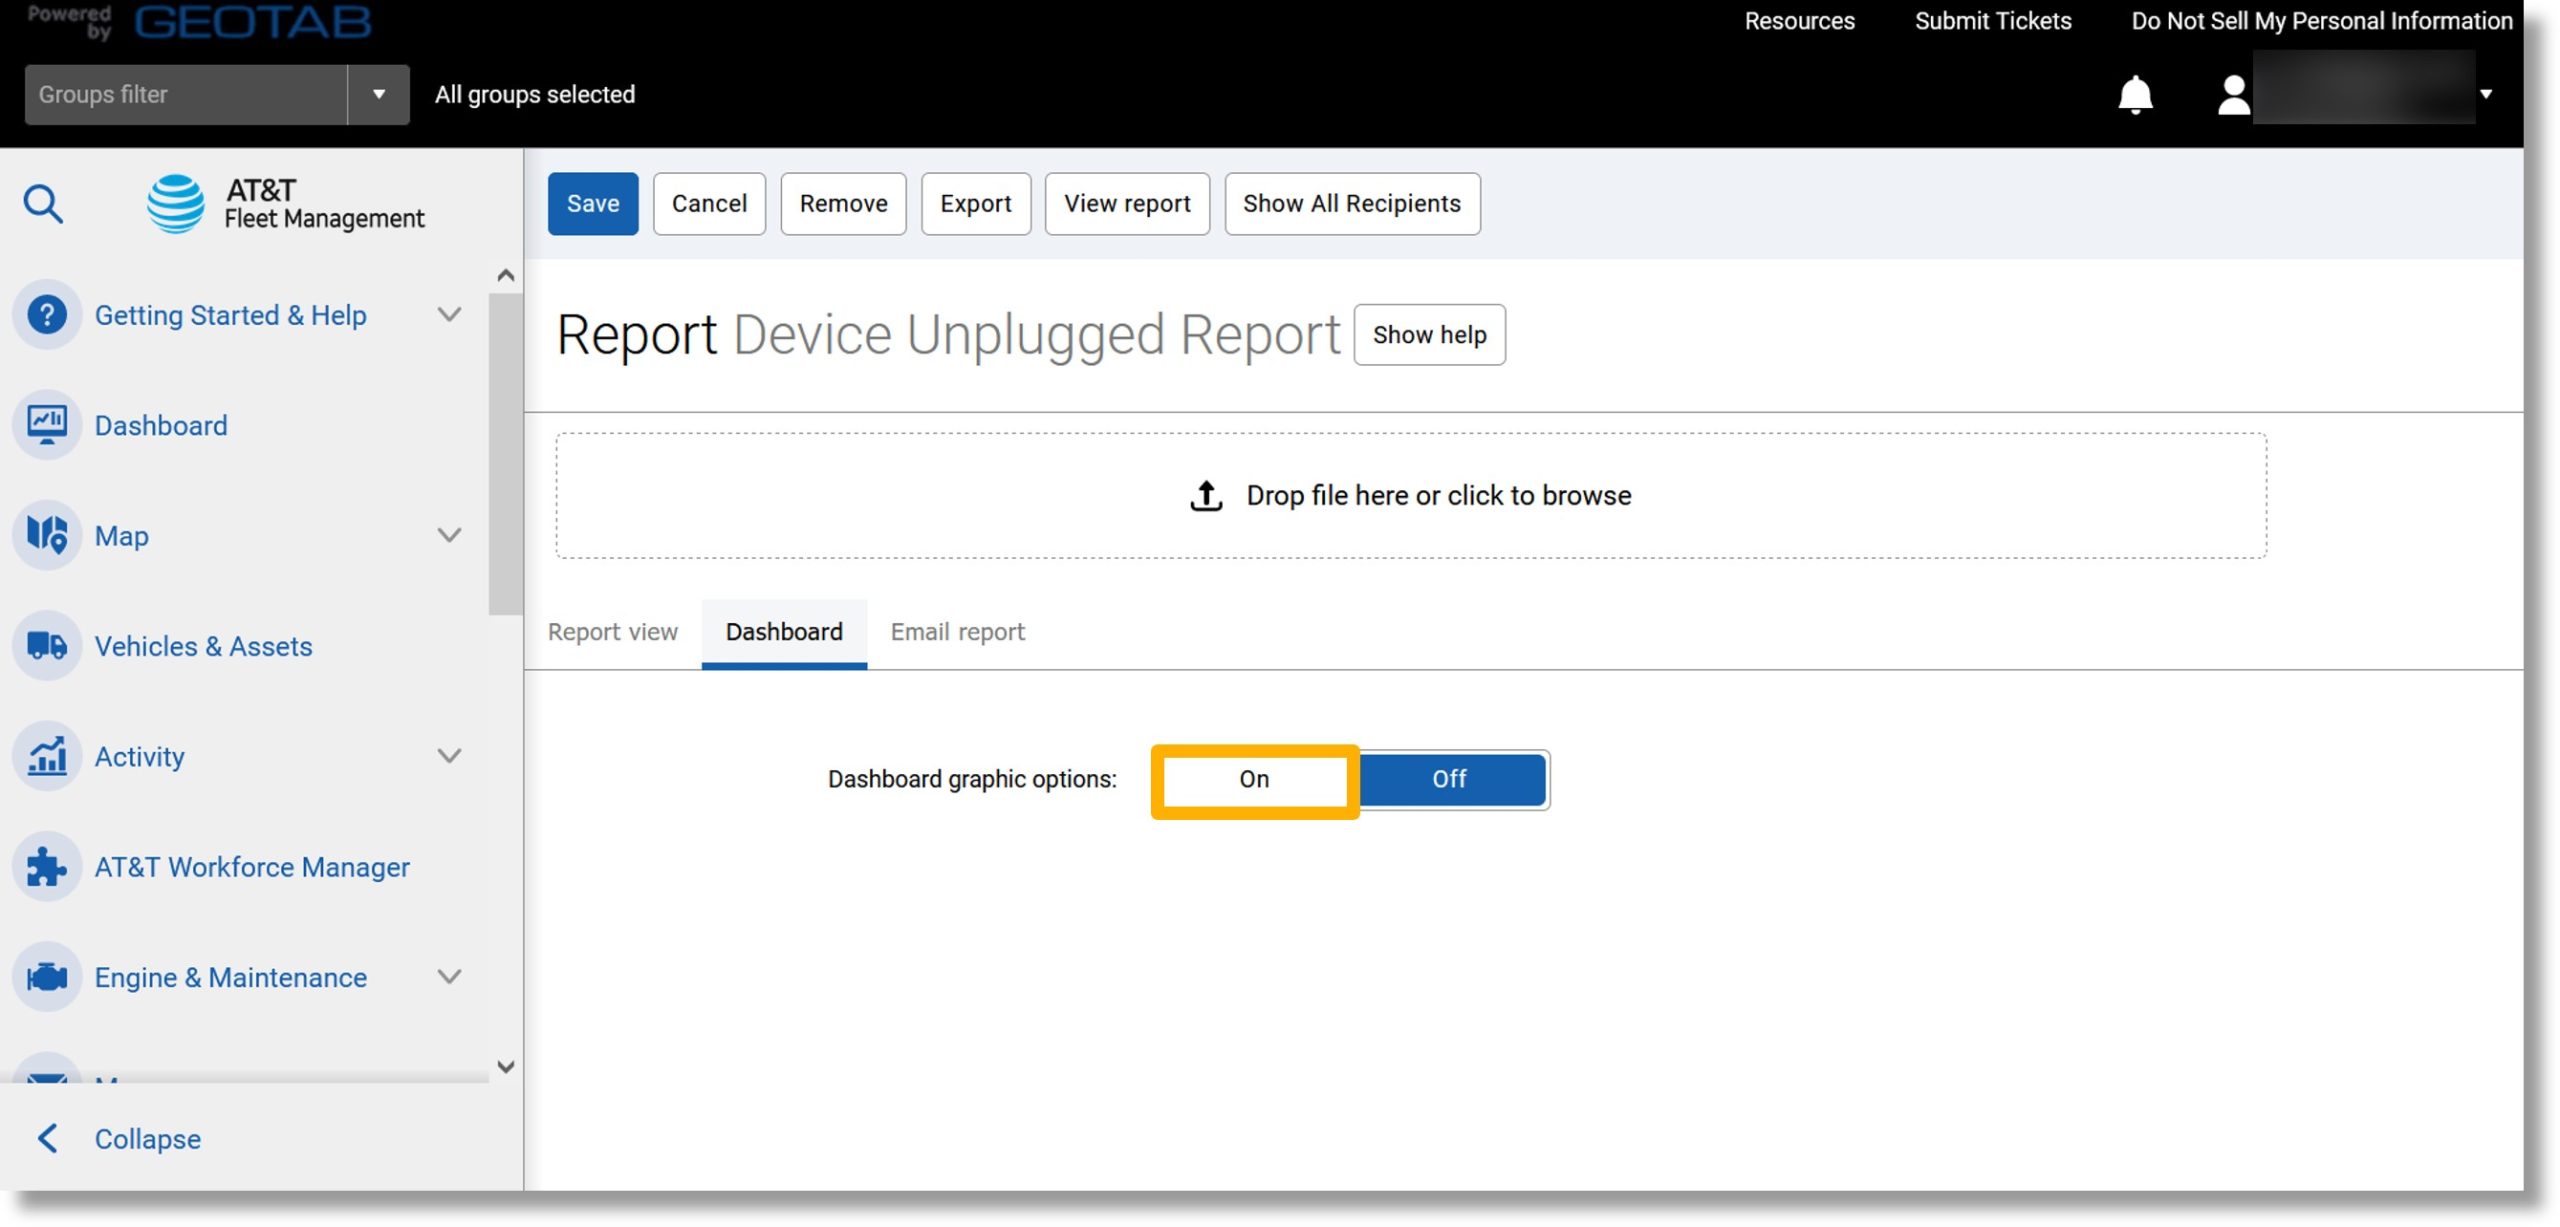
  9. Click on Yes to the right of “Dashboard graphic options”.

    Image of step 9.

  10. Click on the drop down to the right of “Group dashboard viewers:”.

    Image of step 10.

  11. Select the desired group from the list.
  12. Scroll down.

    Image of steps 11 and 12.

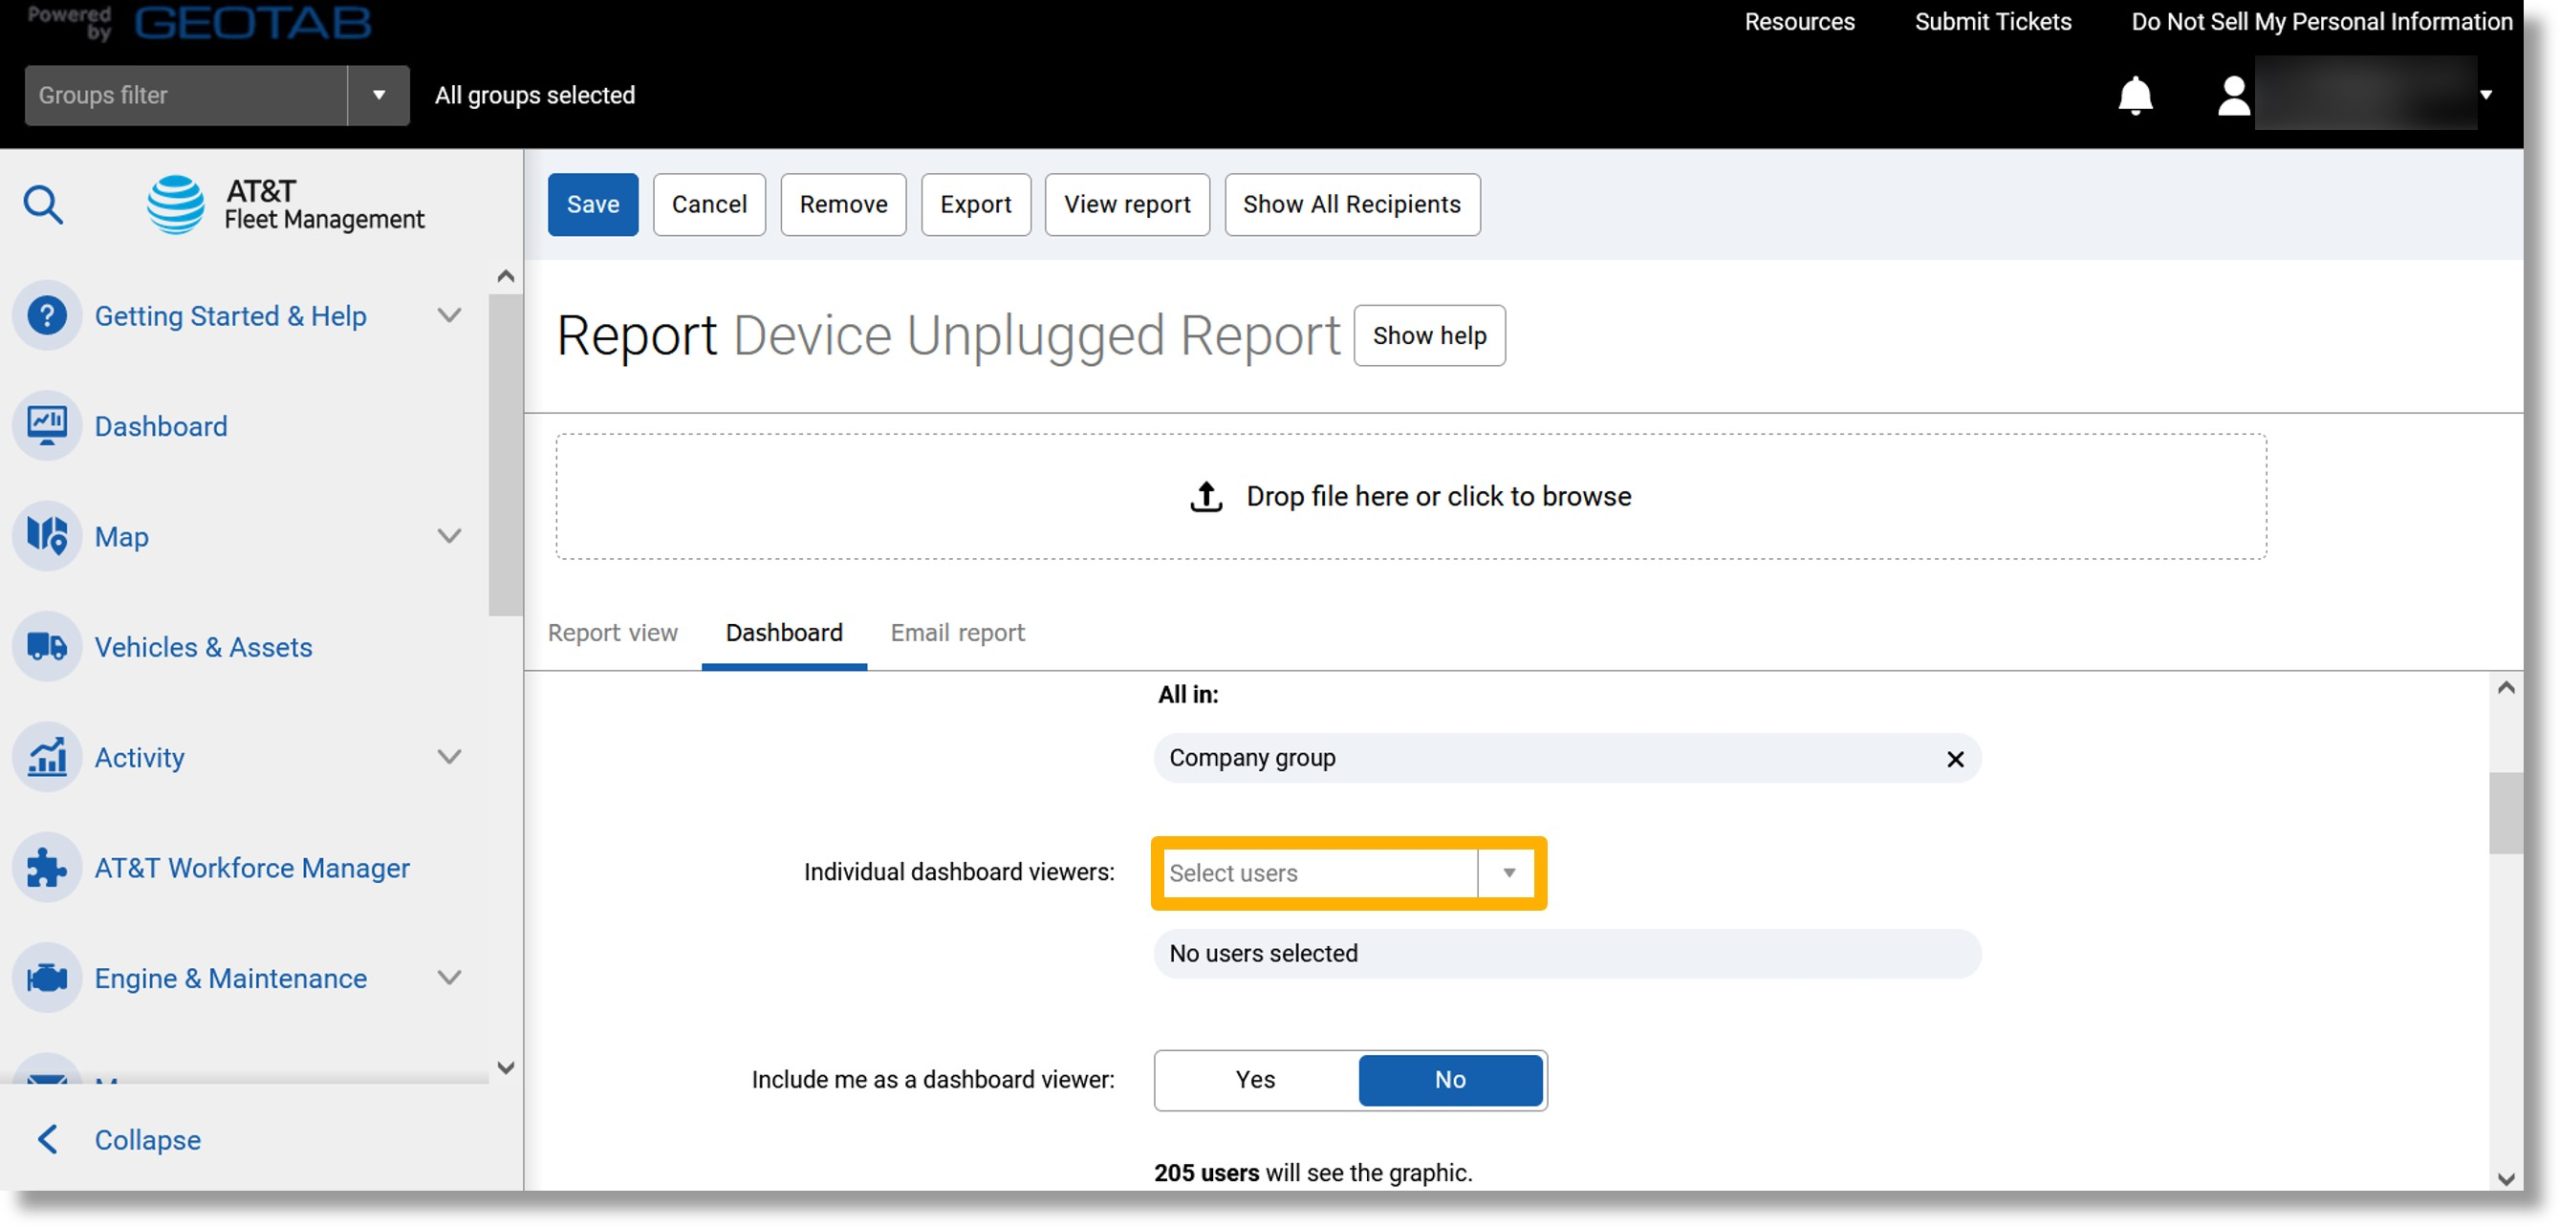
  13. Click on the drop down to the right of “Individual dashboard viewers”.

    Image of step 13.

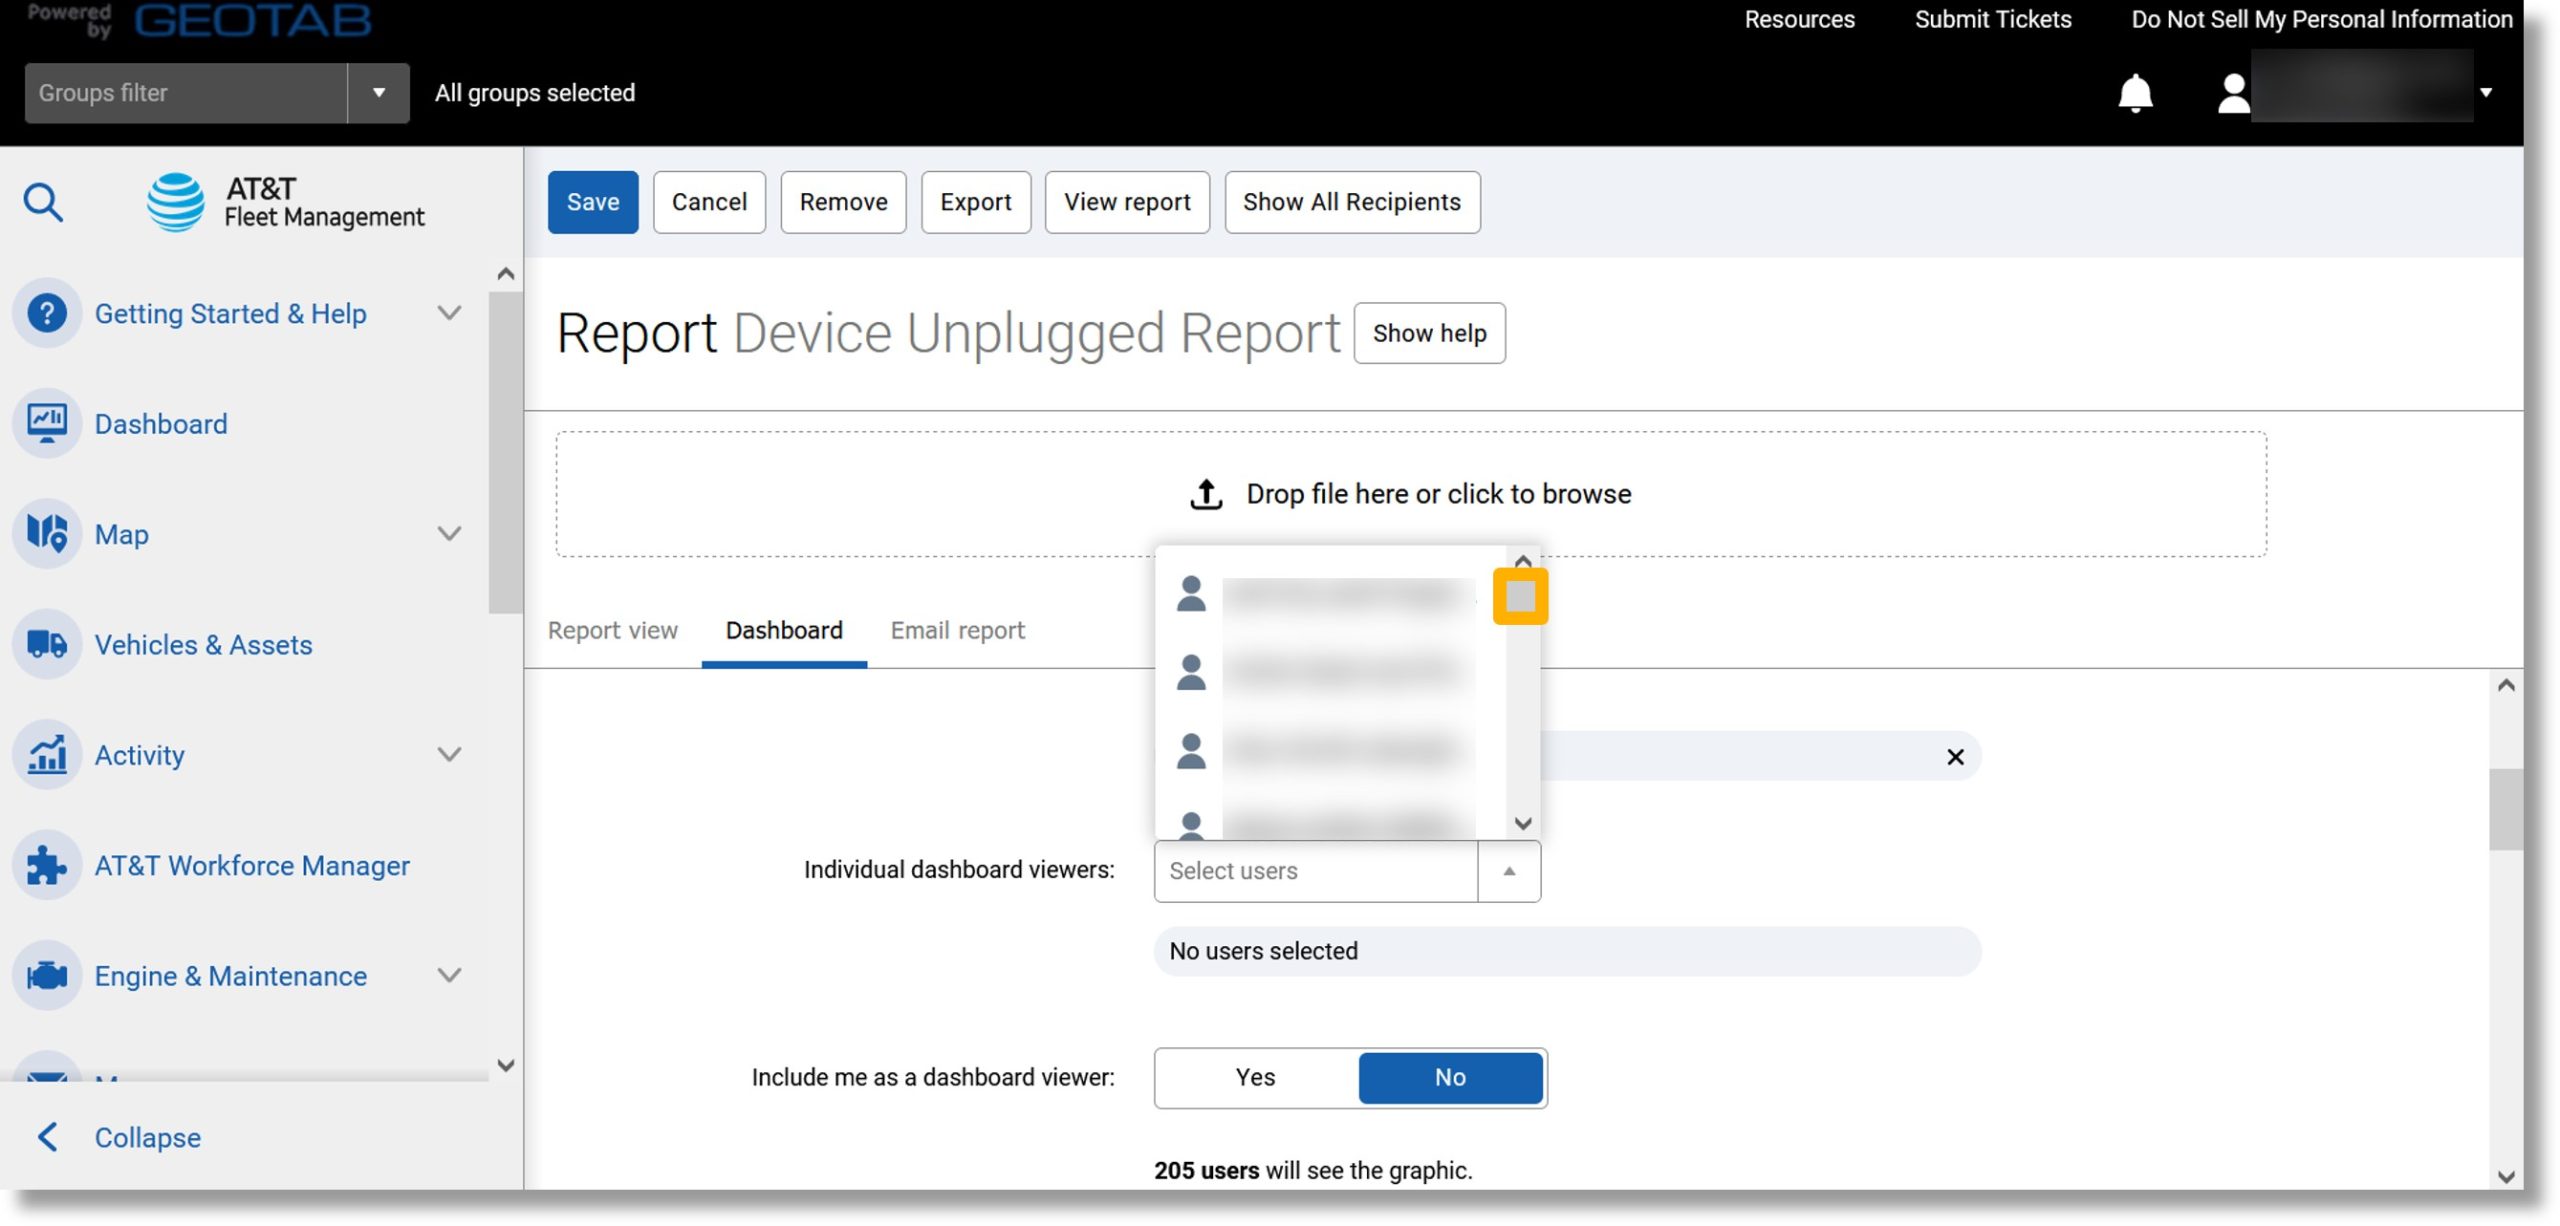
  14. Scroll to and click on the desired viewers.

    Image of step 14.

  15. Scroll down.

    Image of step 15.

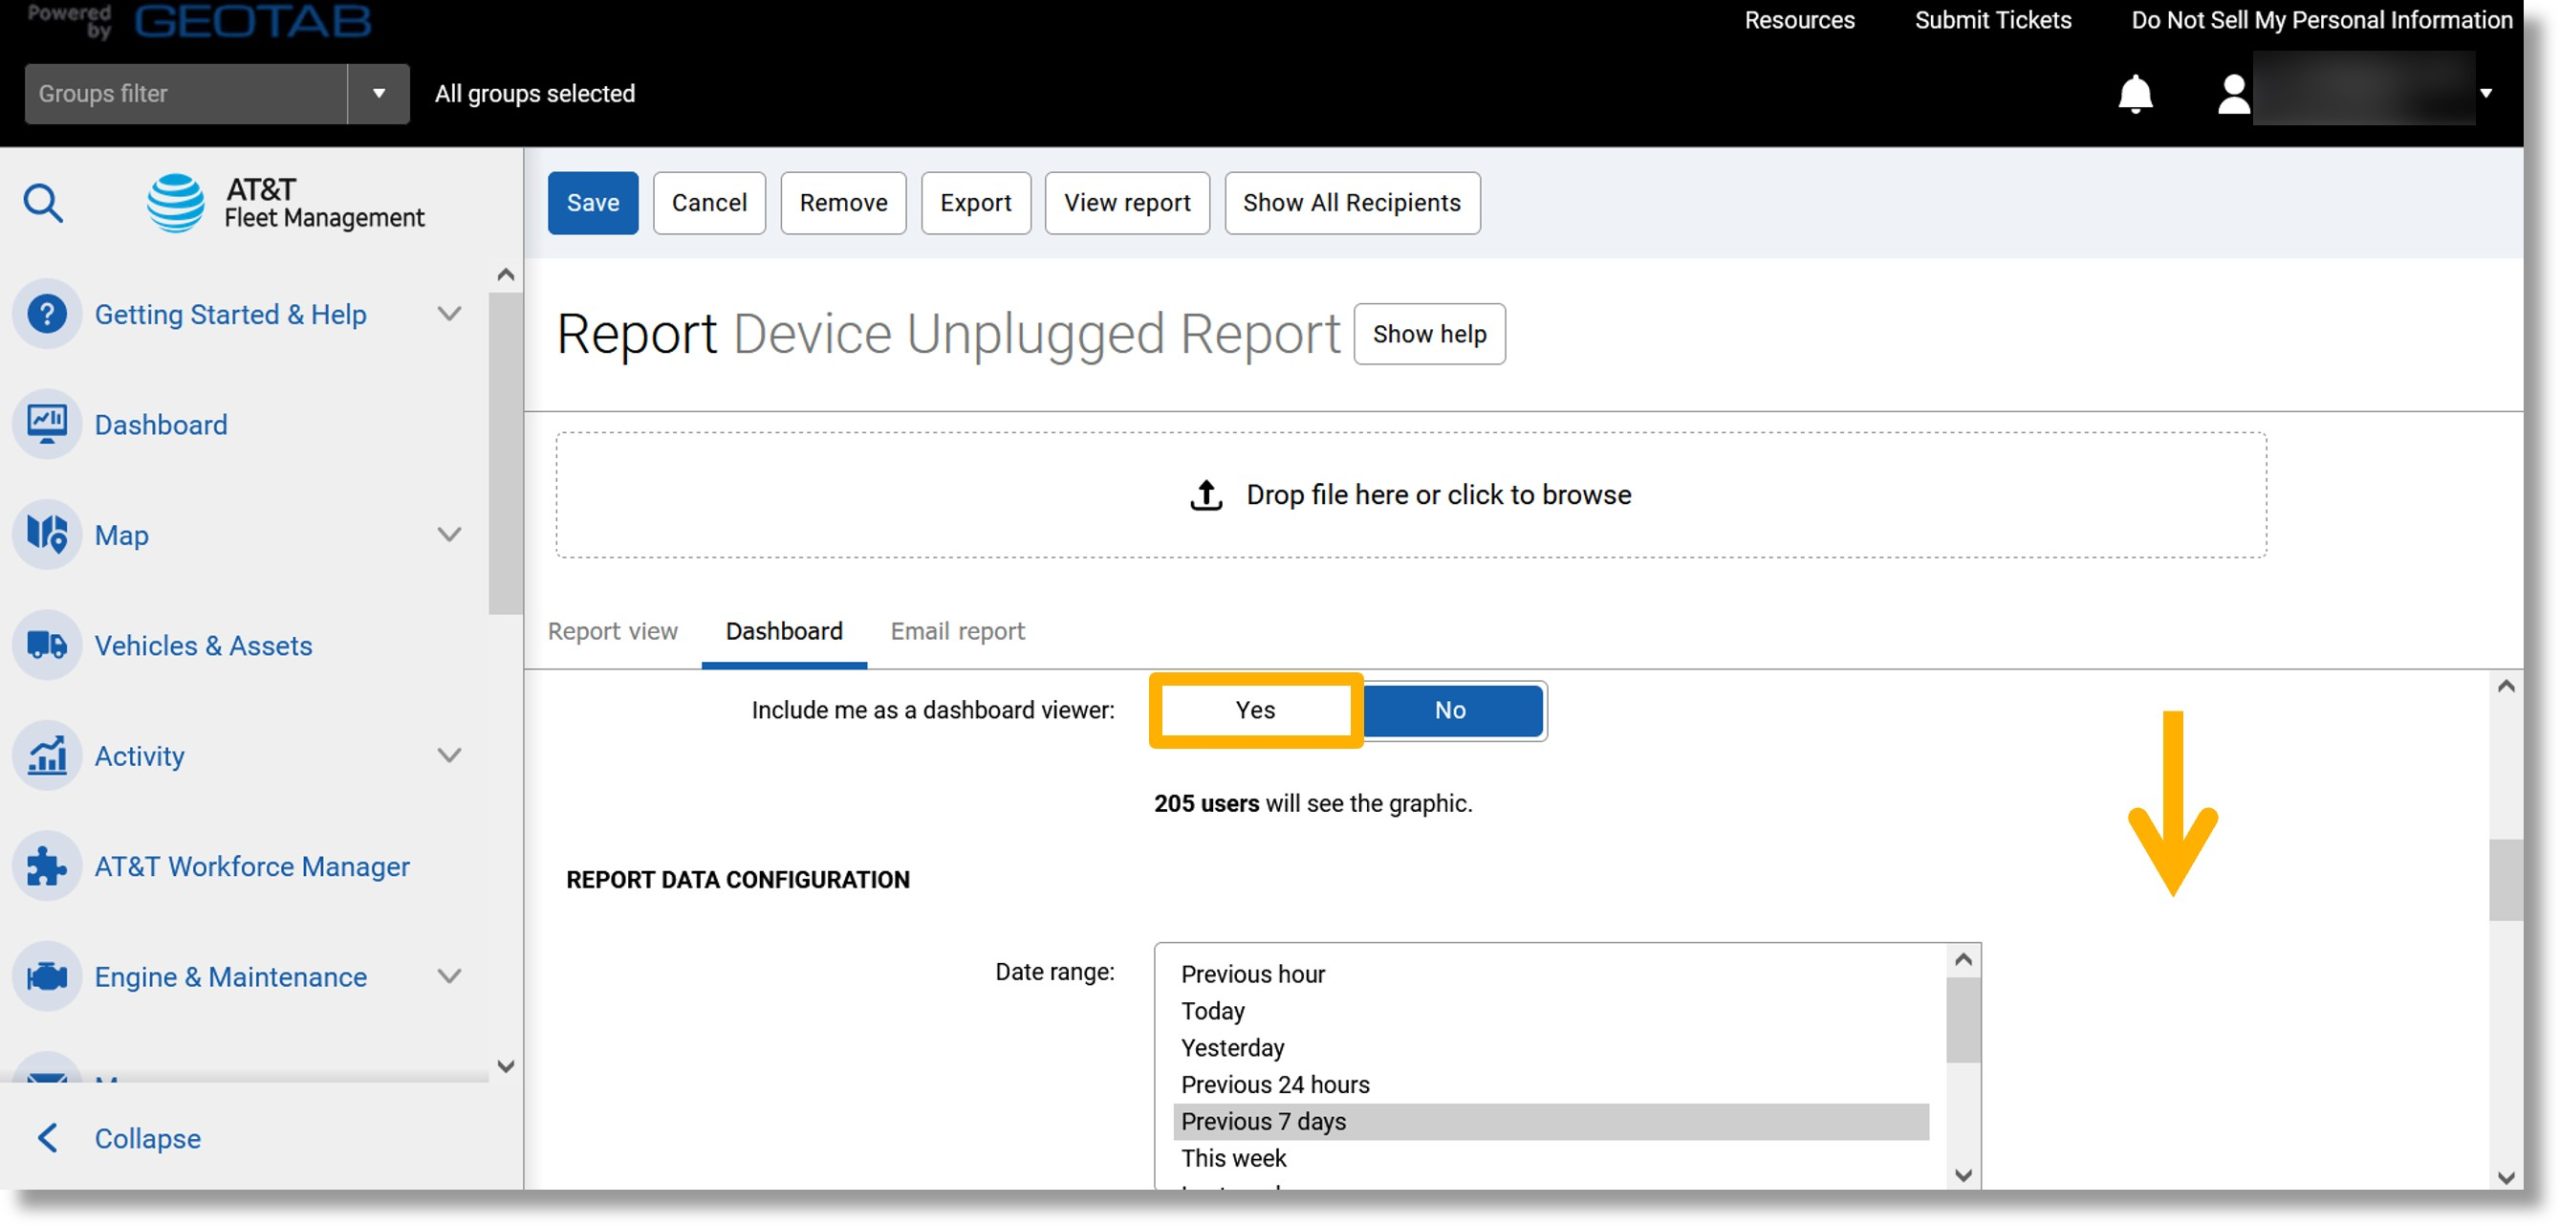
  16. Click Yes to the right of “Include me as a dashboard viewer” to view the report on your dashboard.
  17. Scroll down.

    Image of steps 16 and 17.

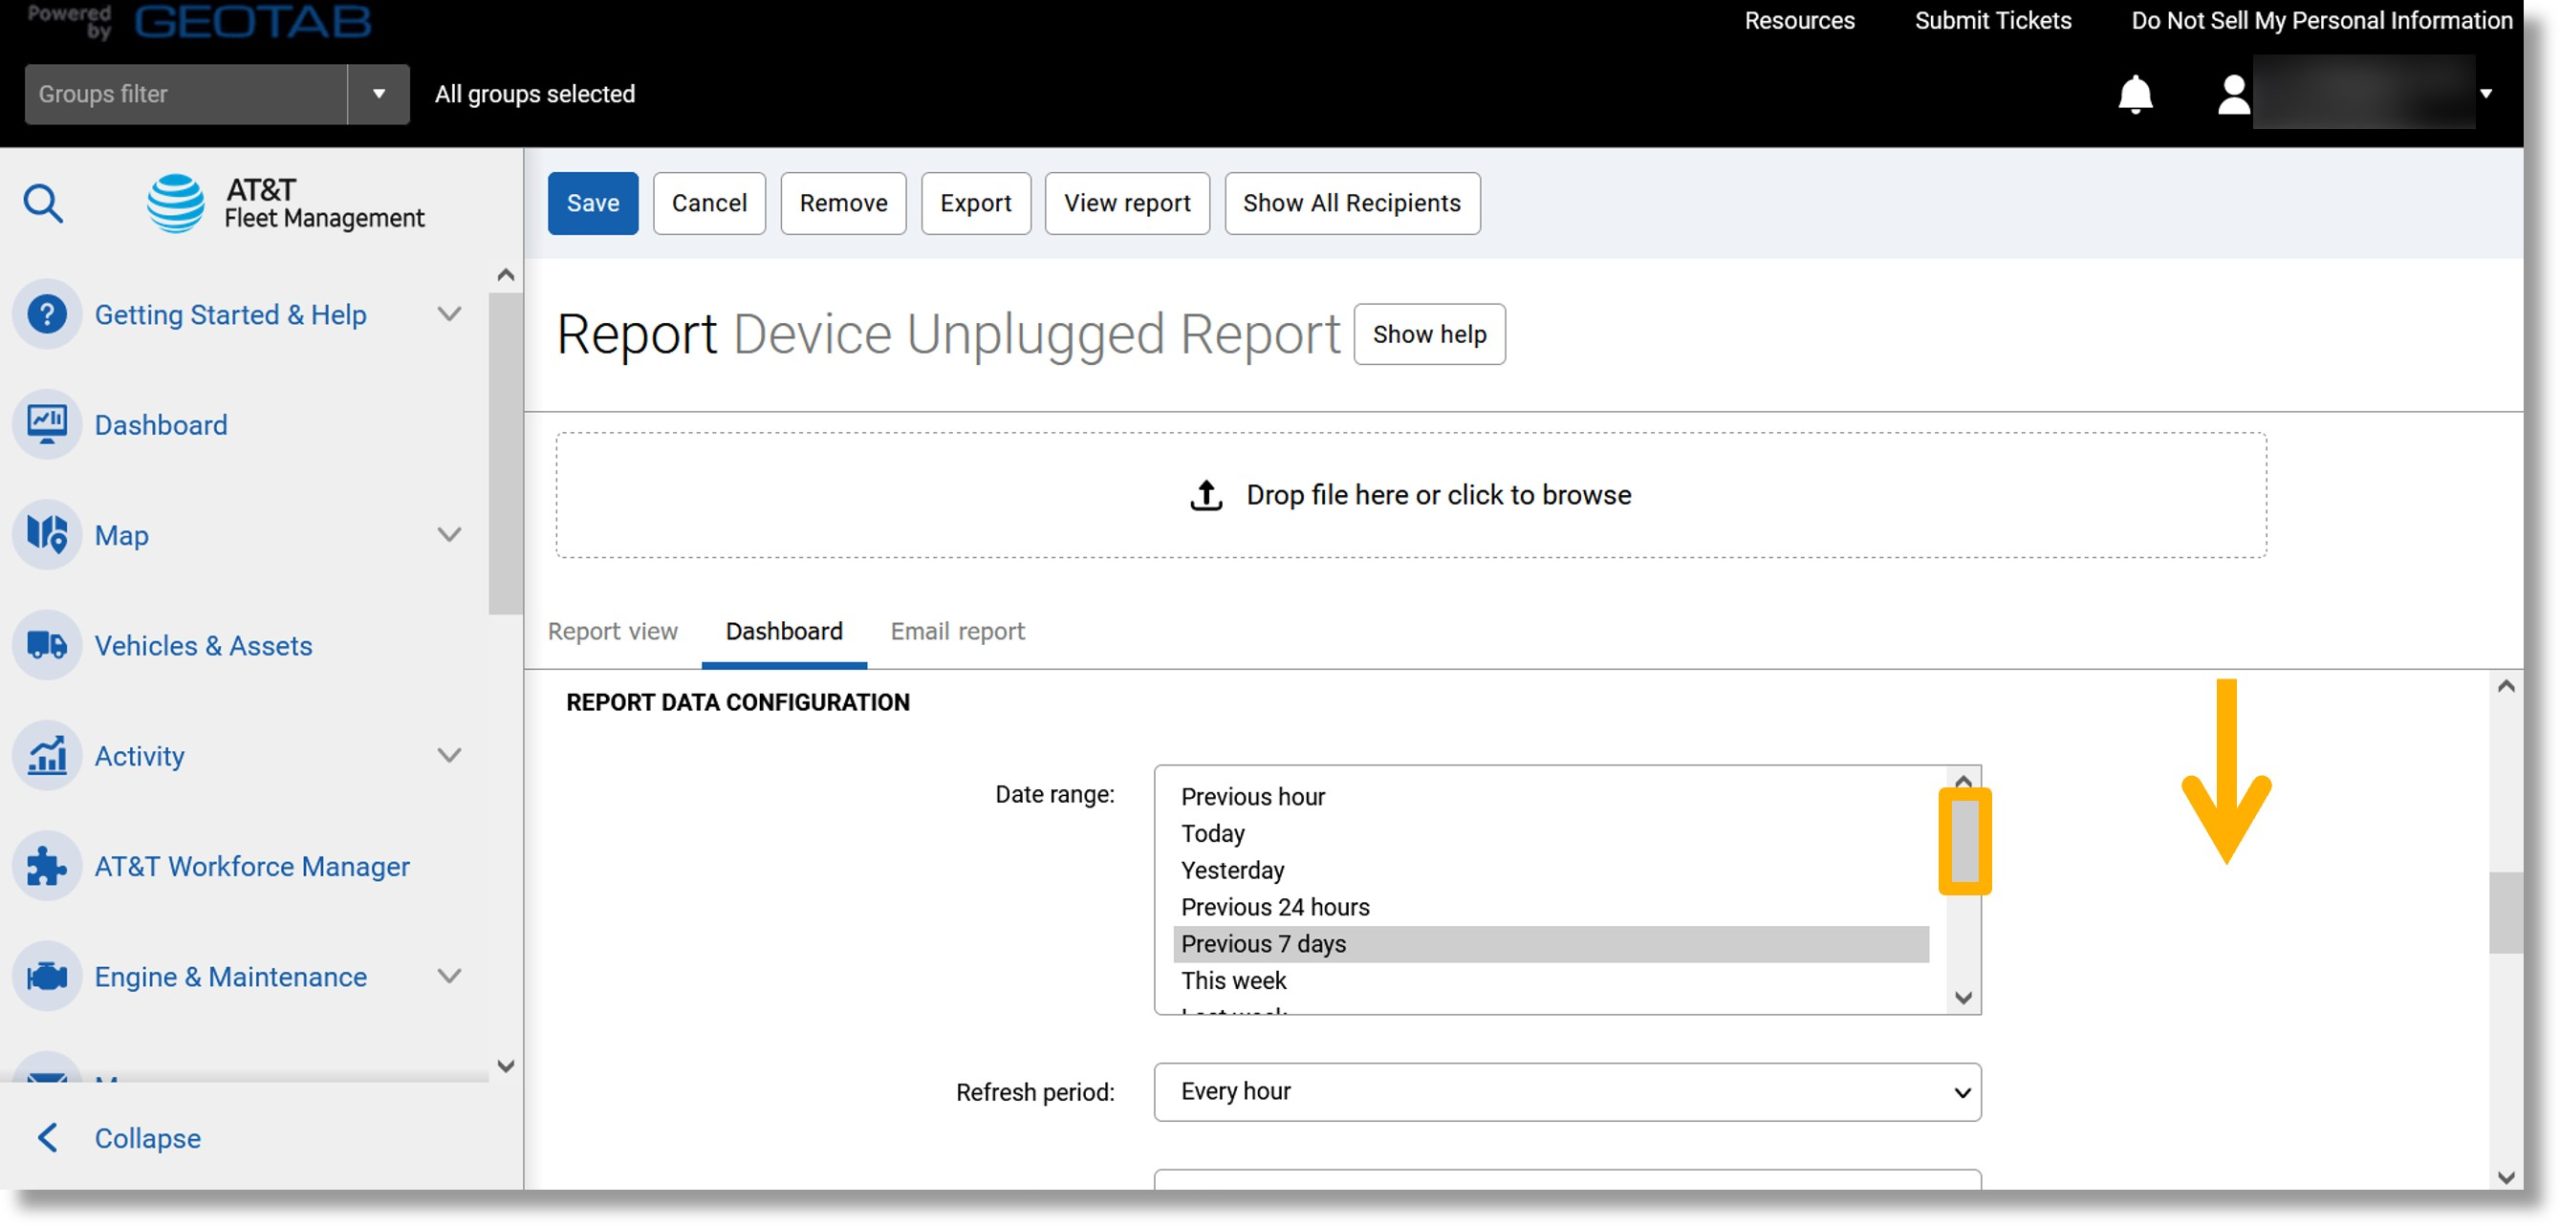
  18. Click on the desired setting to the right of “Date range”.
  19. Scroll down.

    Image of steps 18 and 19.

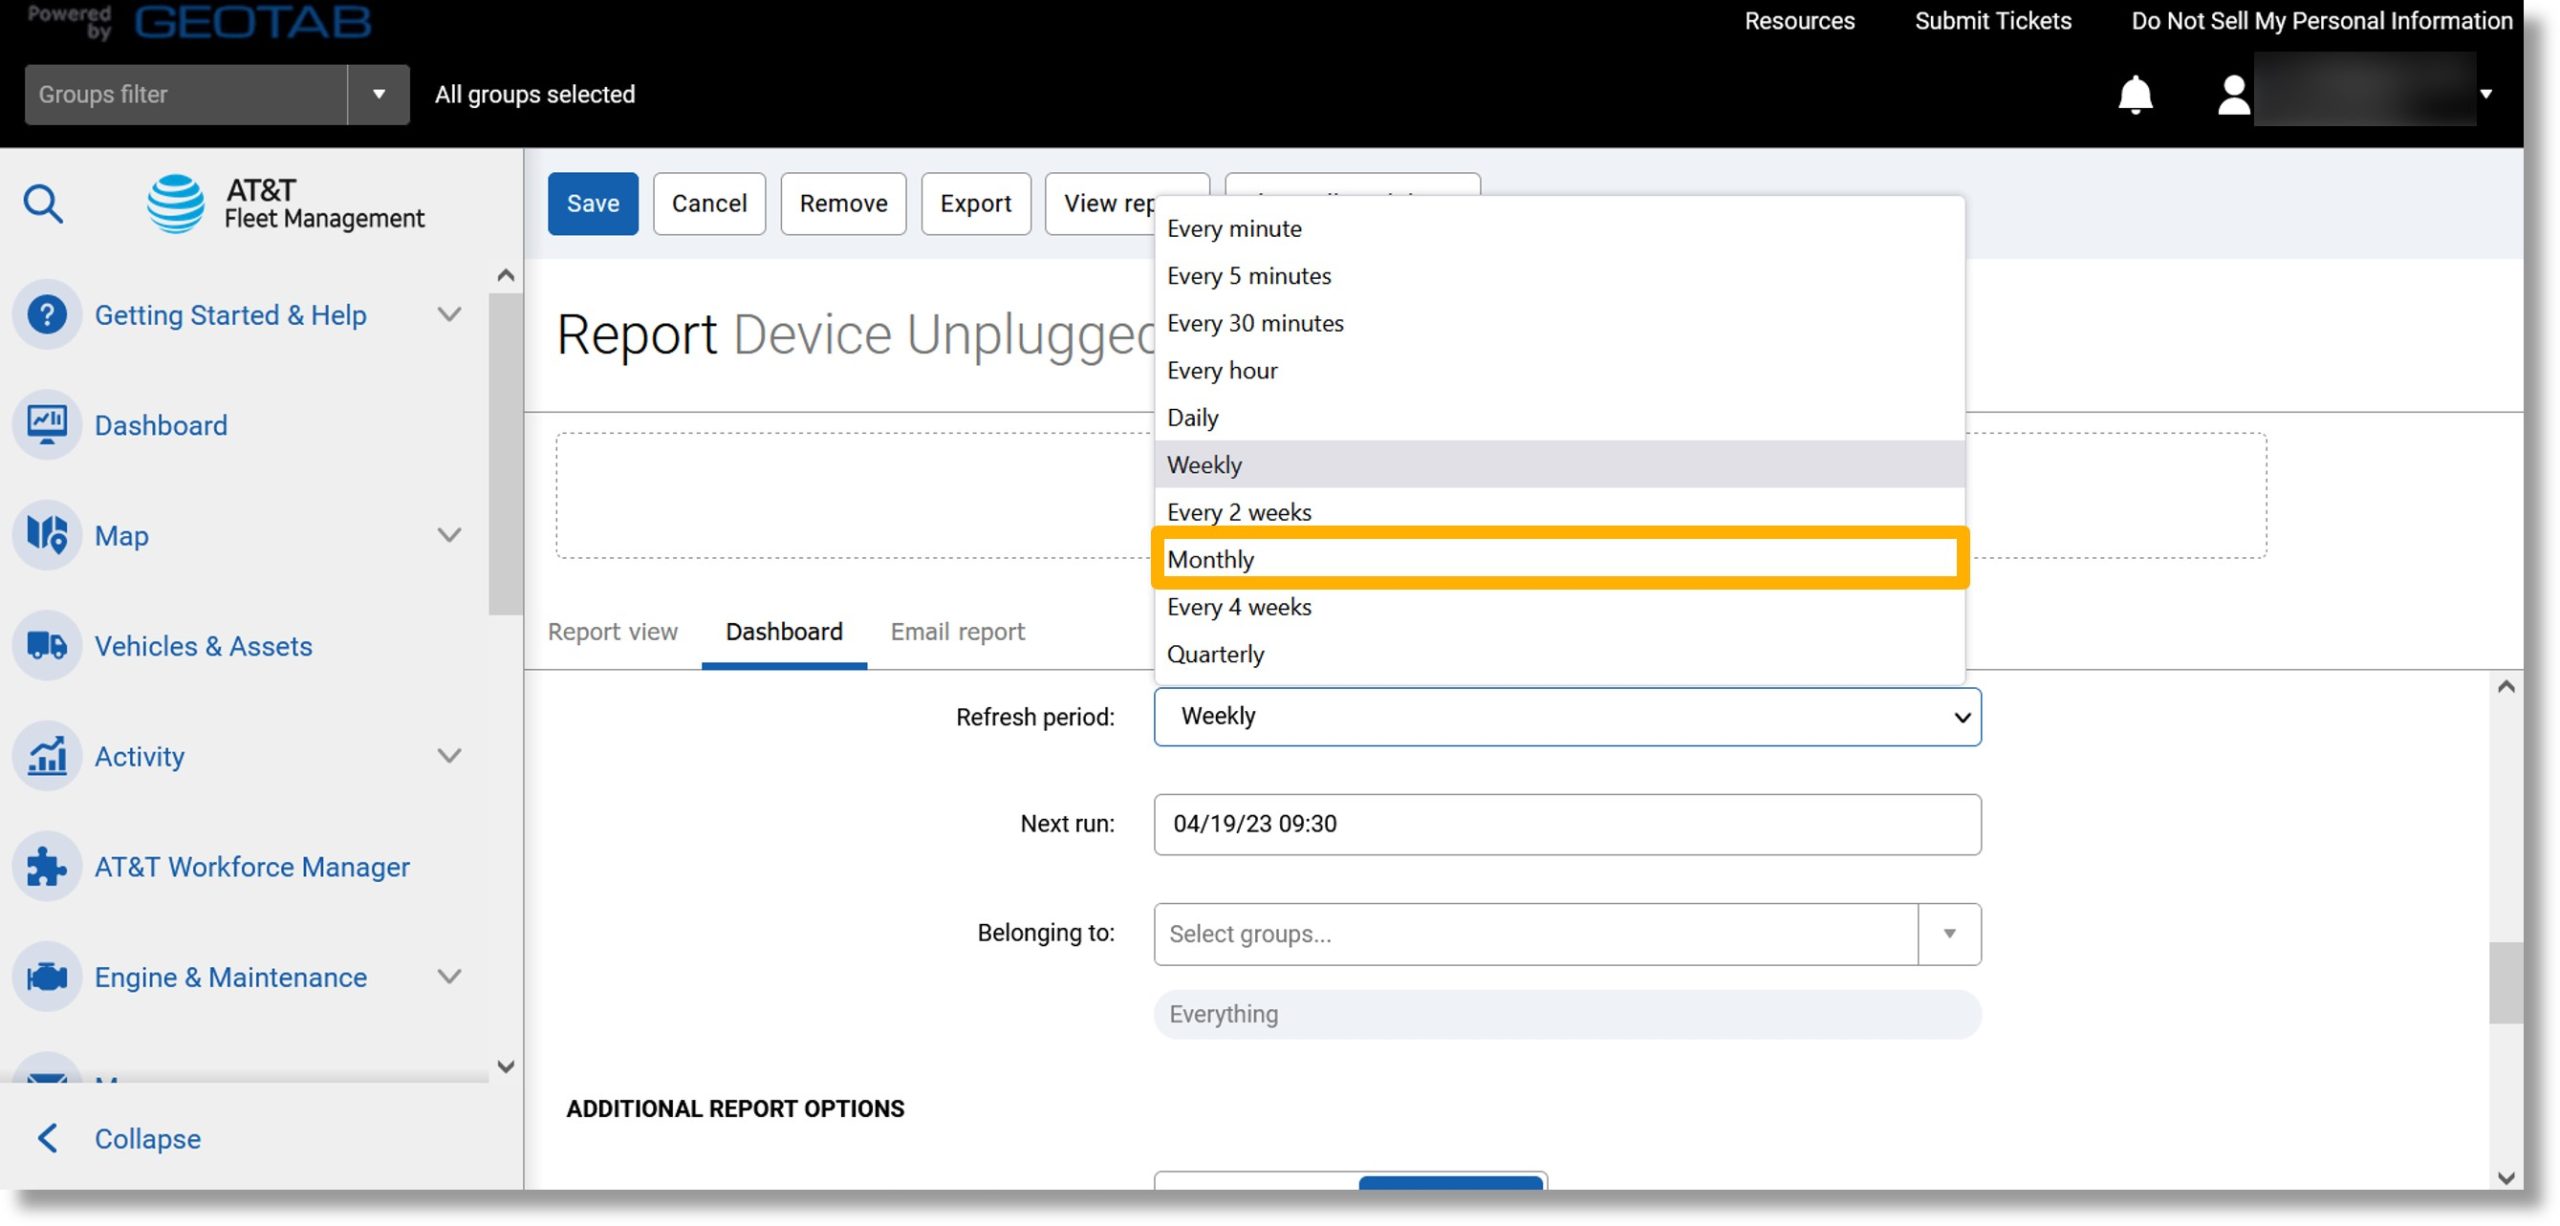
  20. Click on the drop down to the right of “Refresh period”.

    Image of step 20.

  21. Select how often the data will refresh from the list.

    Image of step 21.

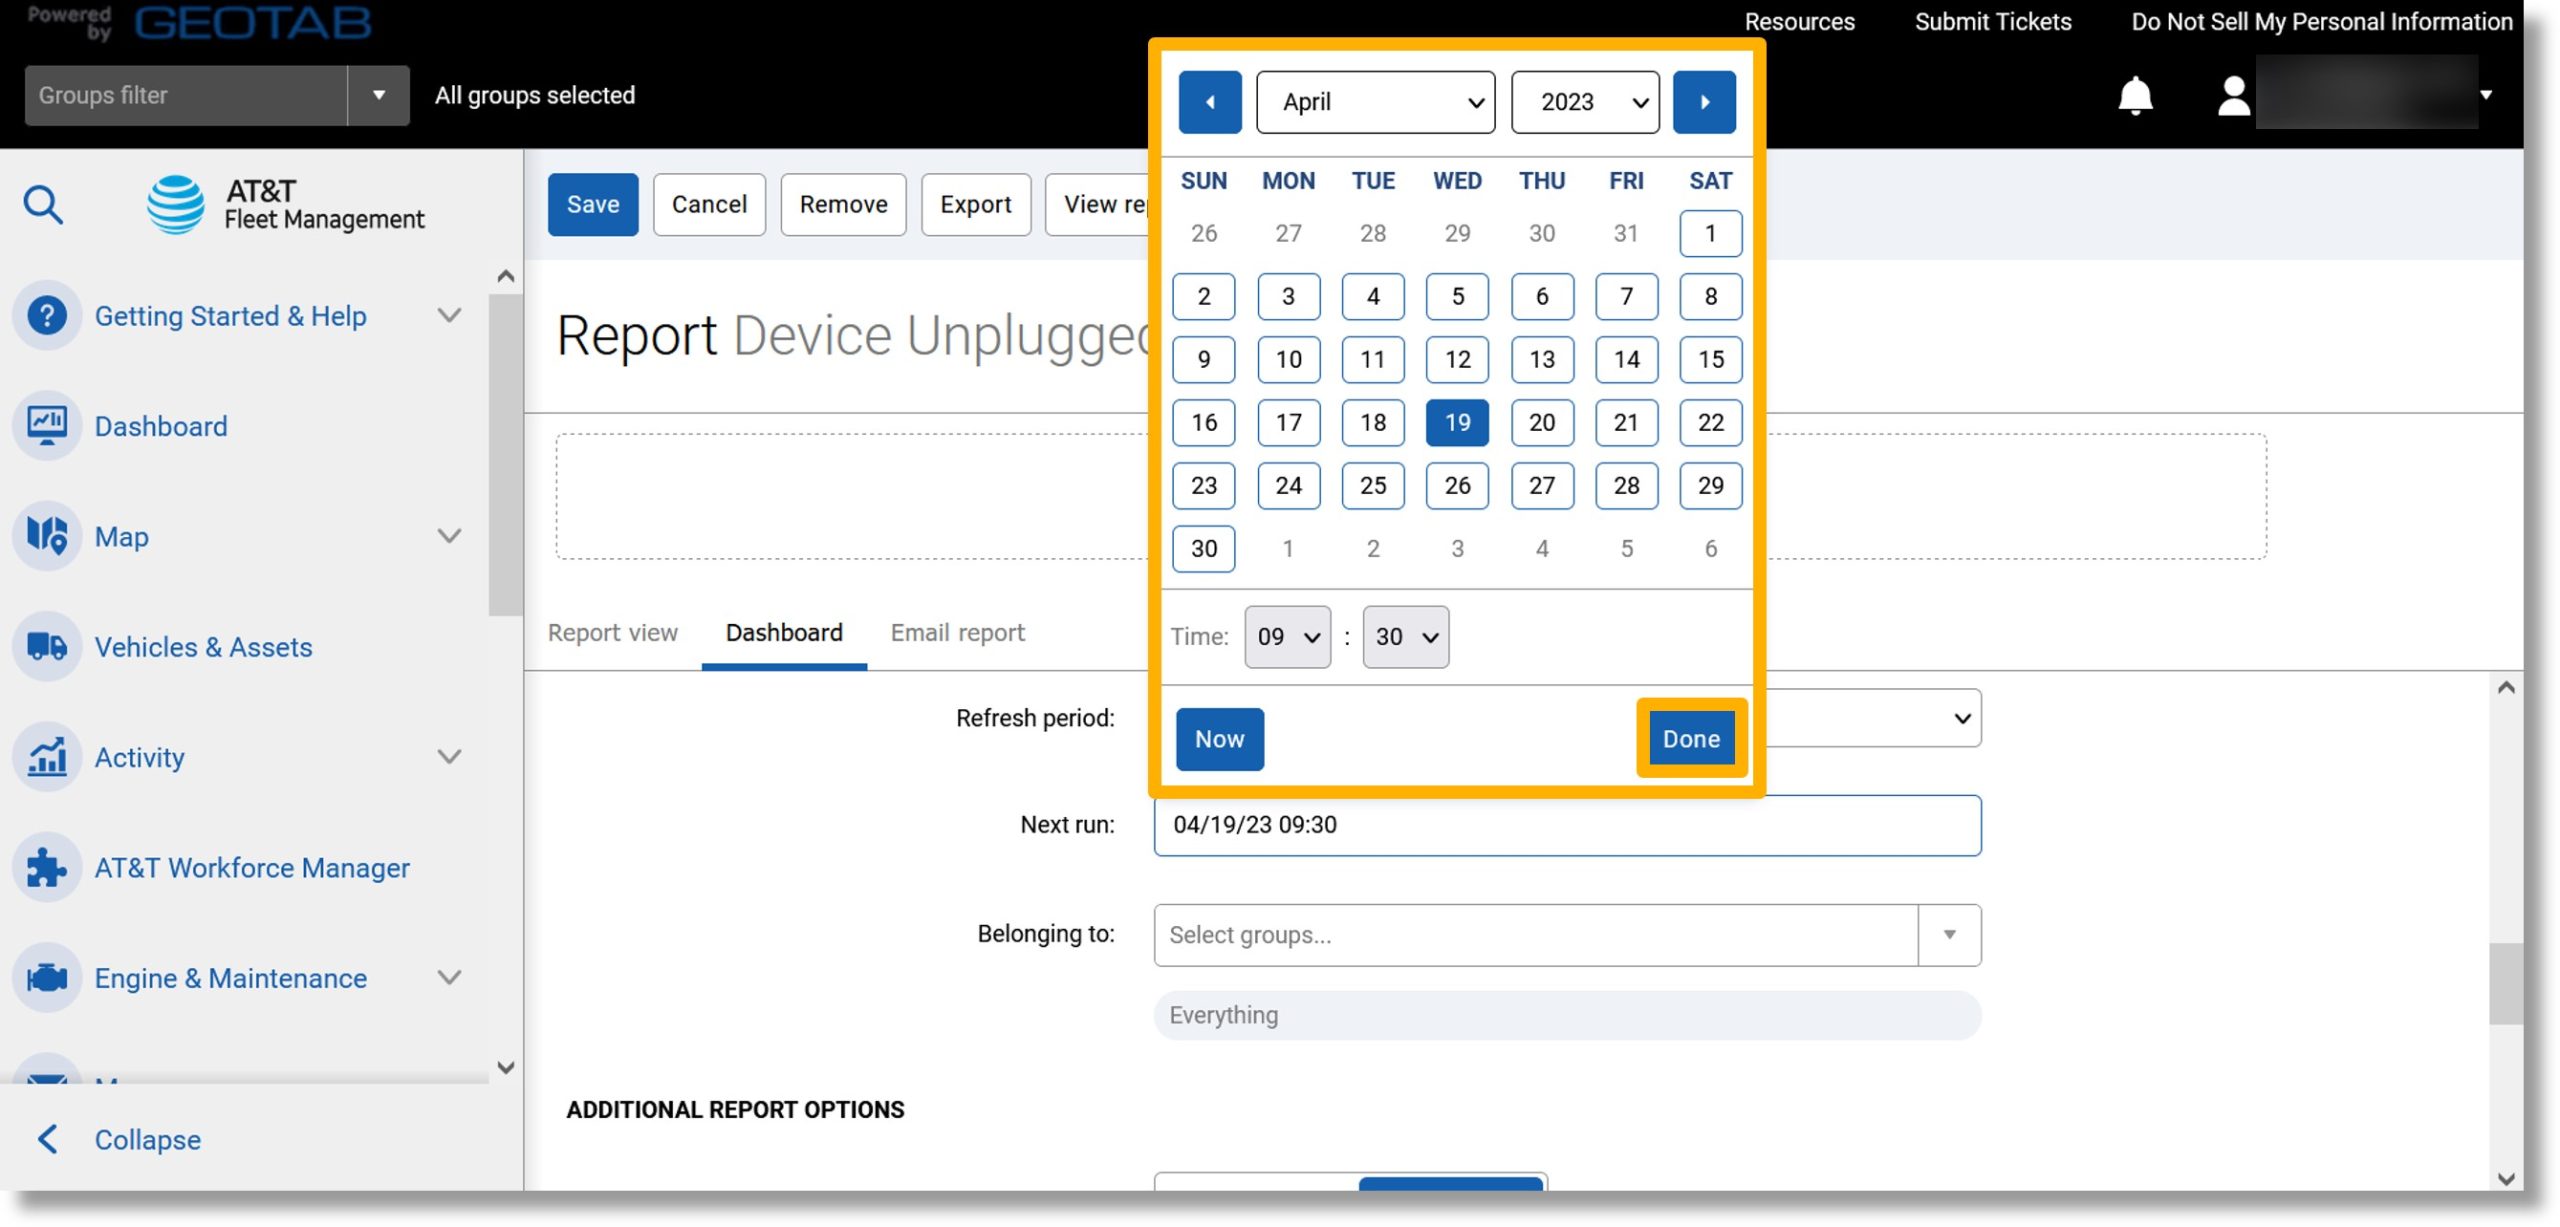
  22. Click in the field to the right of “Next run”.

    Image of step 22.

  23. Use the calendar that populates to set the report’s desired start time and date.
  24. Click on the Done button.

    Image of steps 23 and 24.

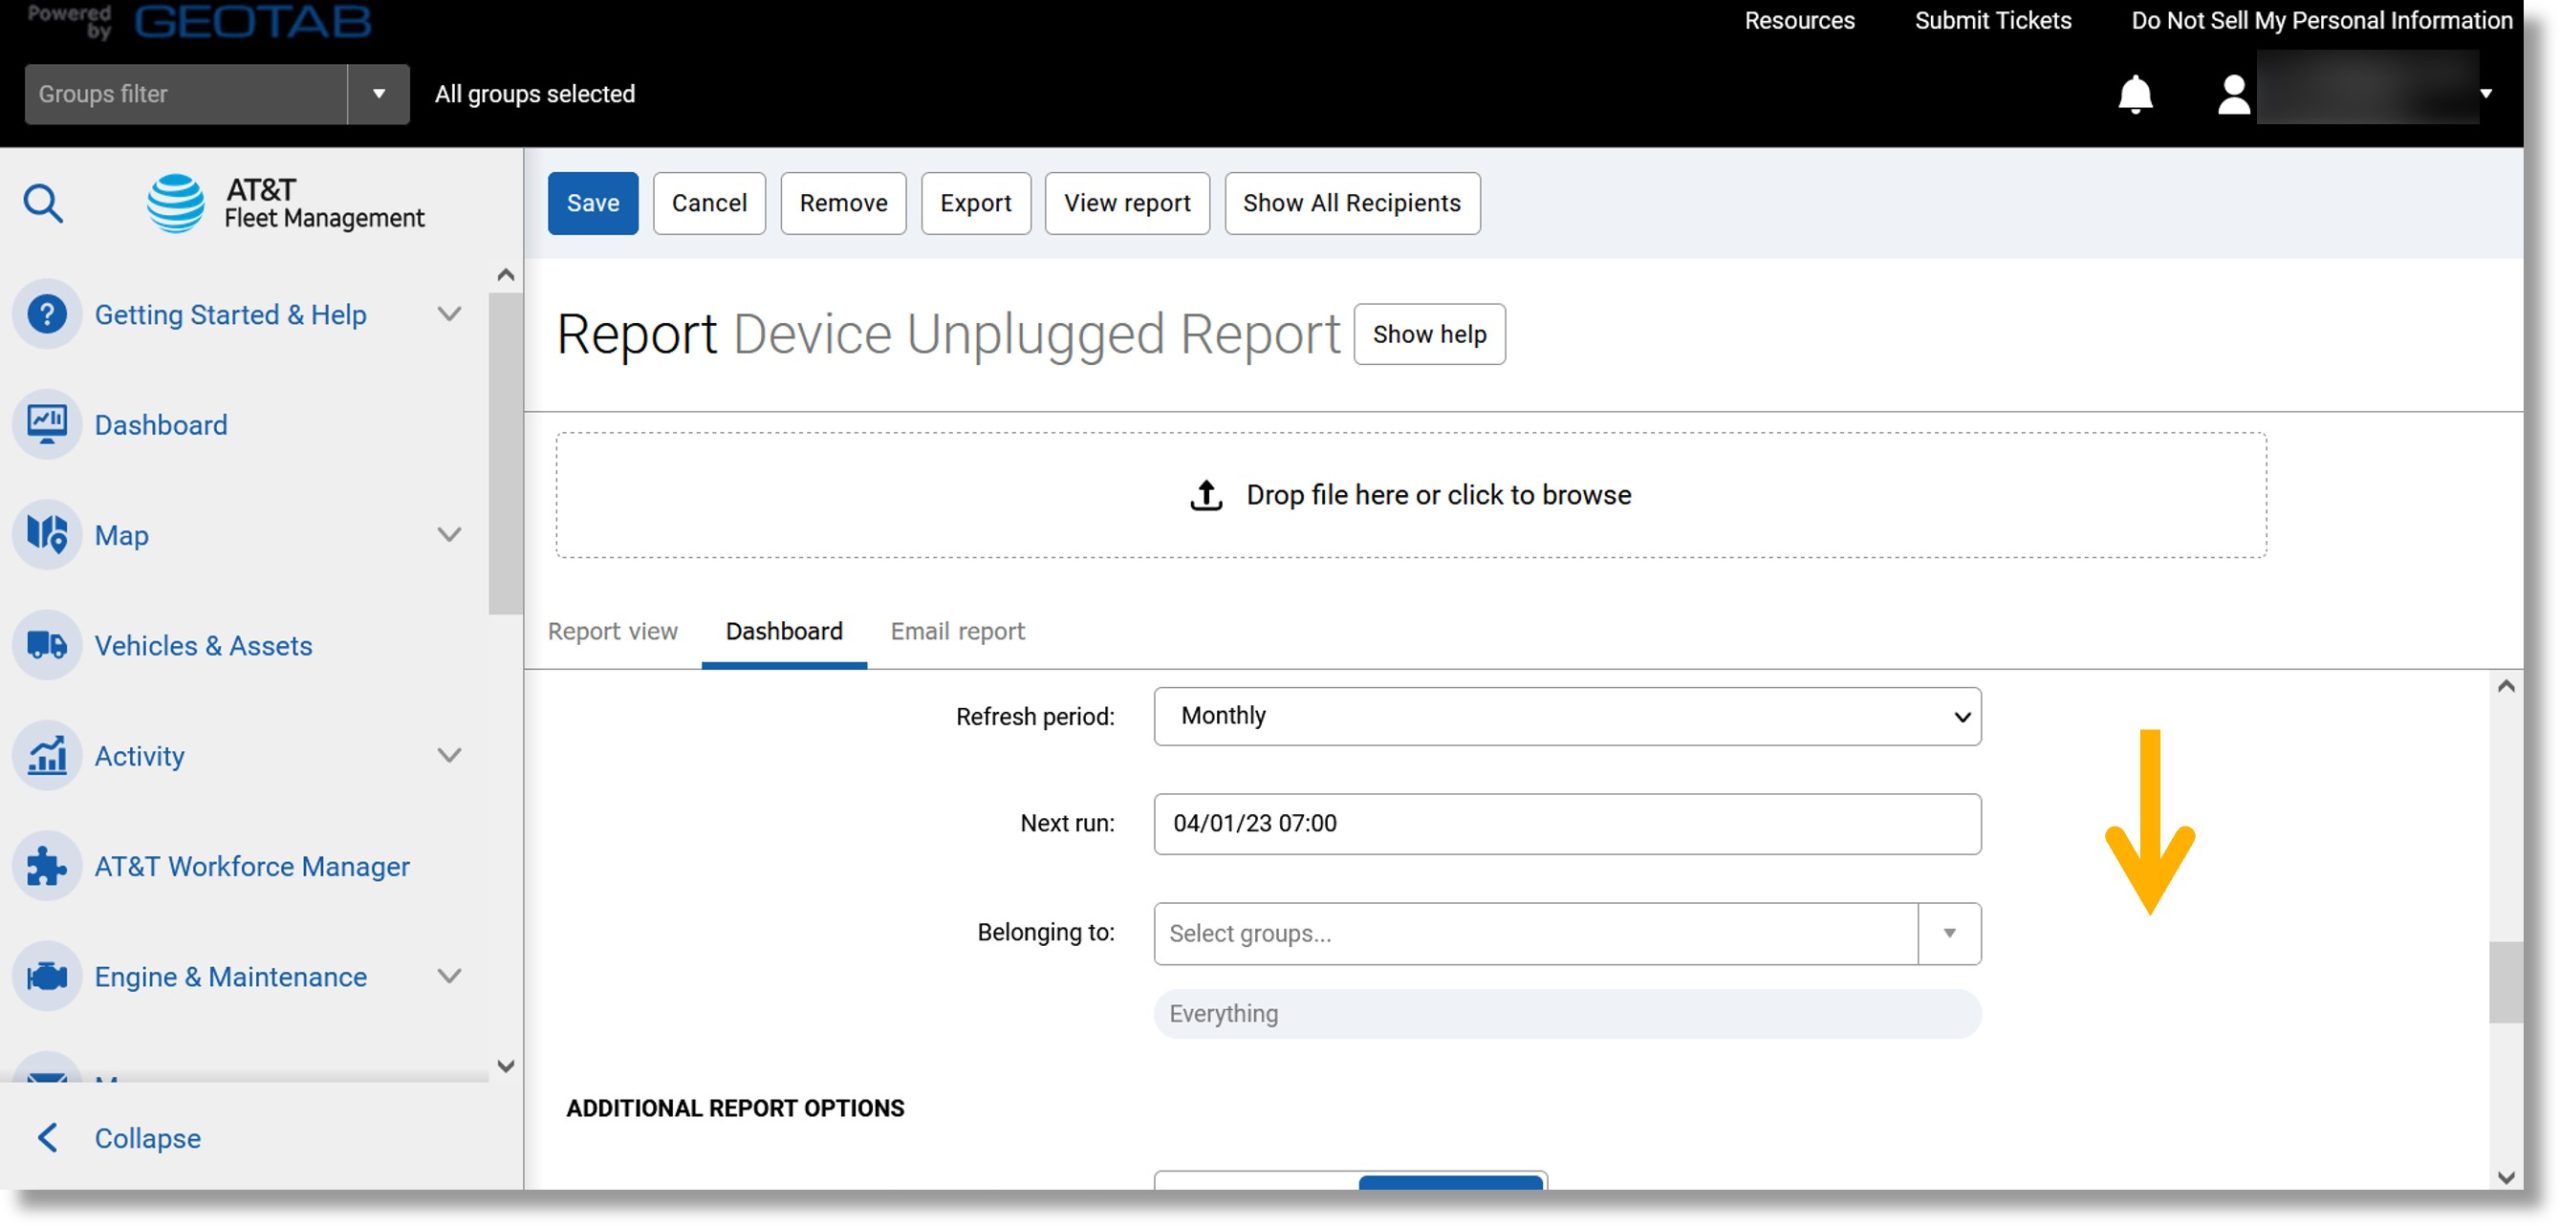
  25. Scroll down.

    Image of step 25.

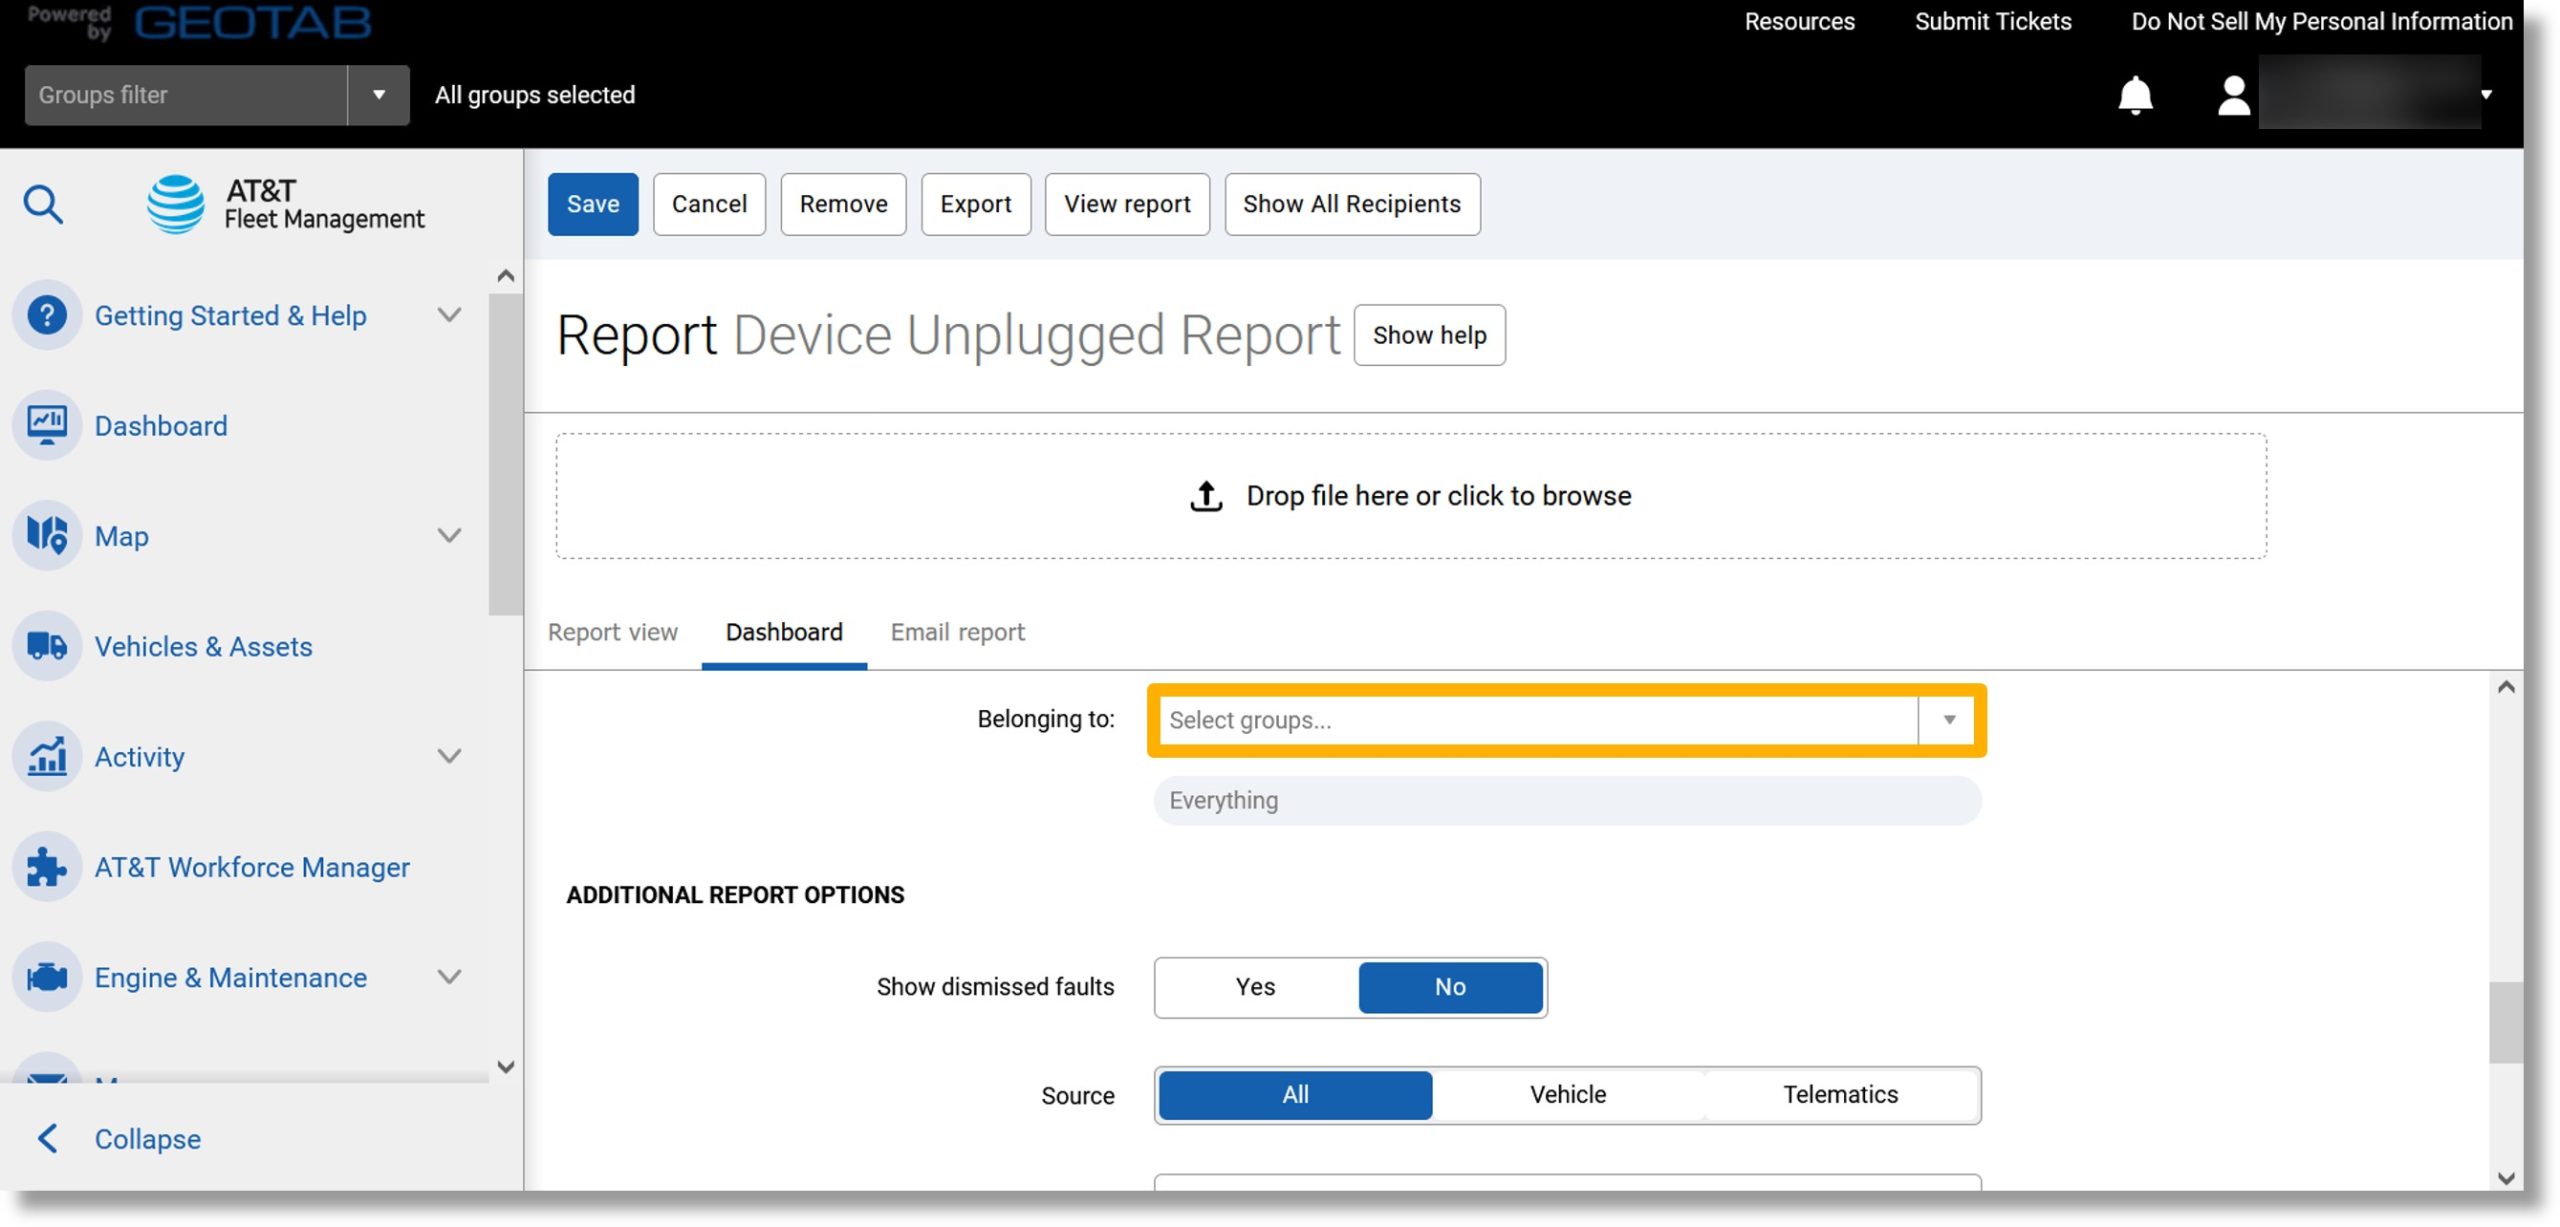
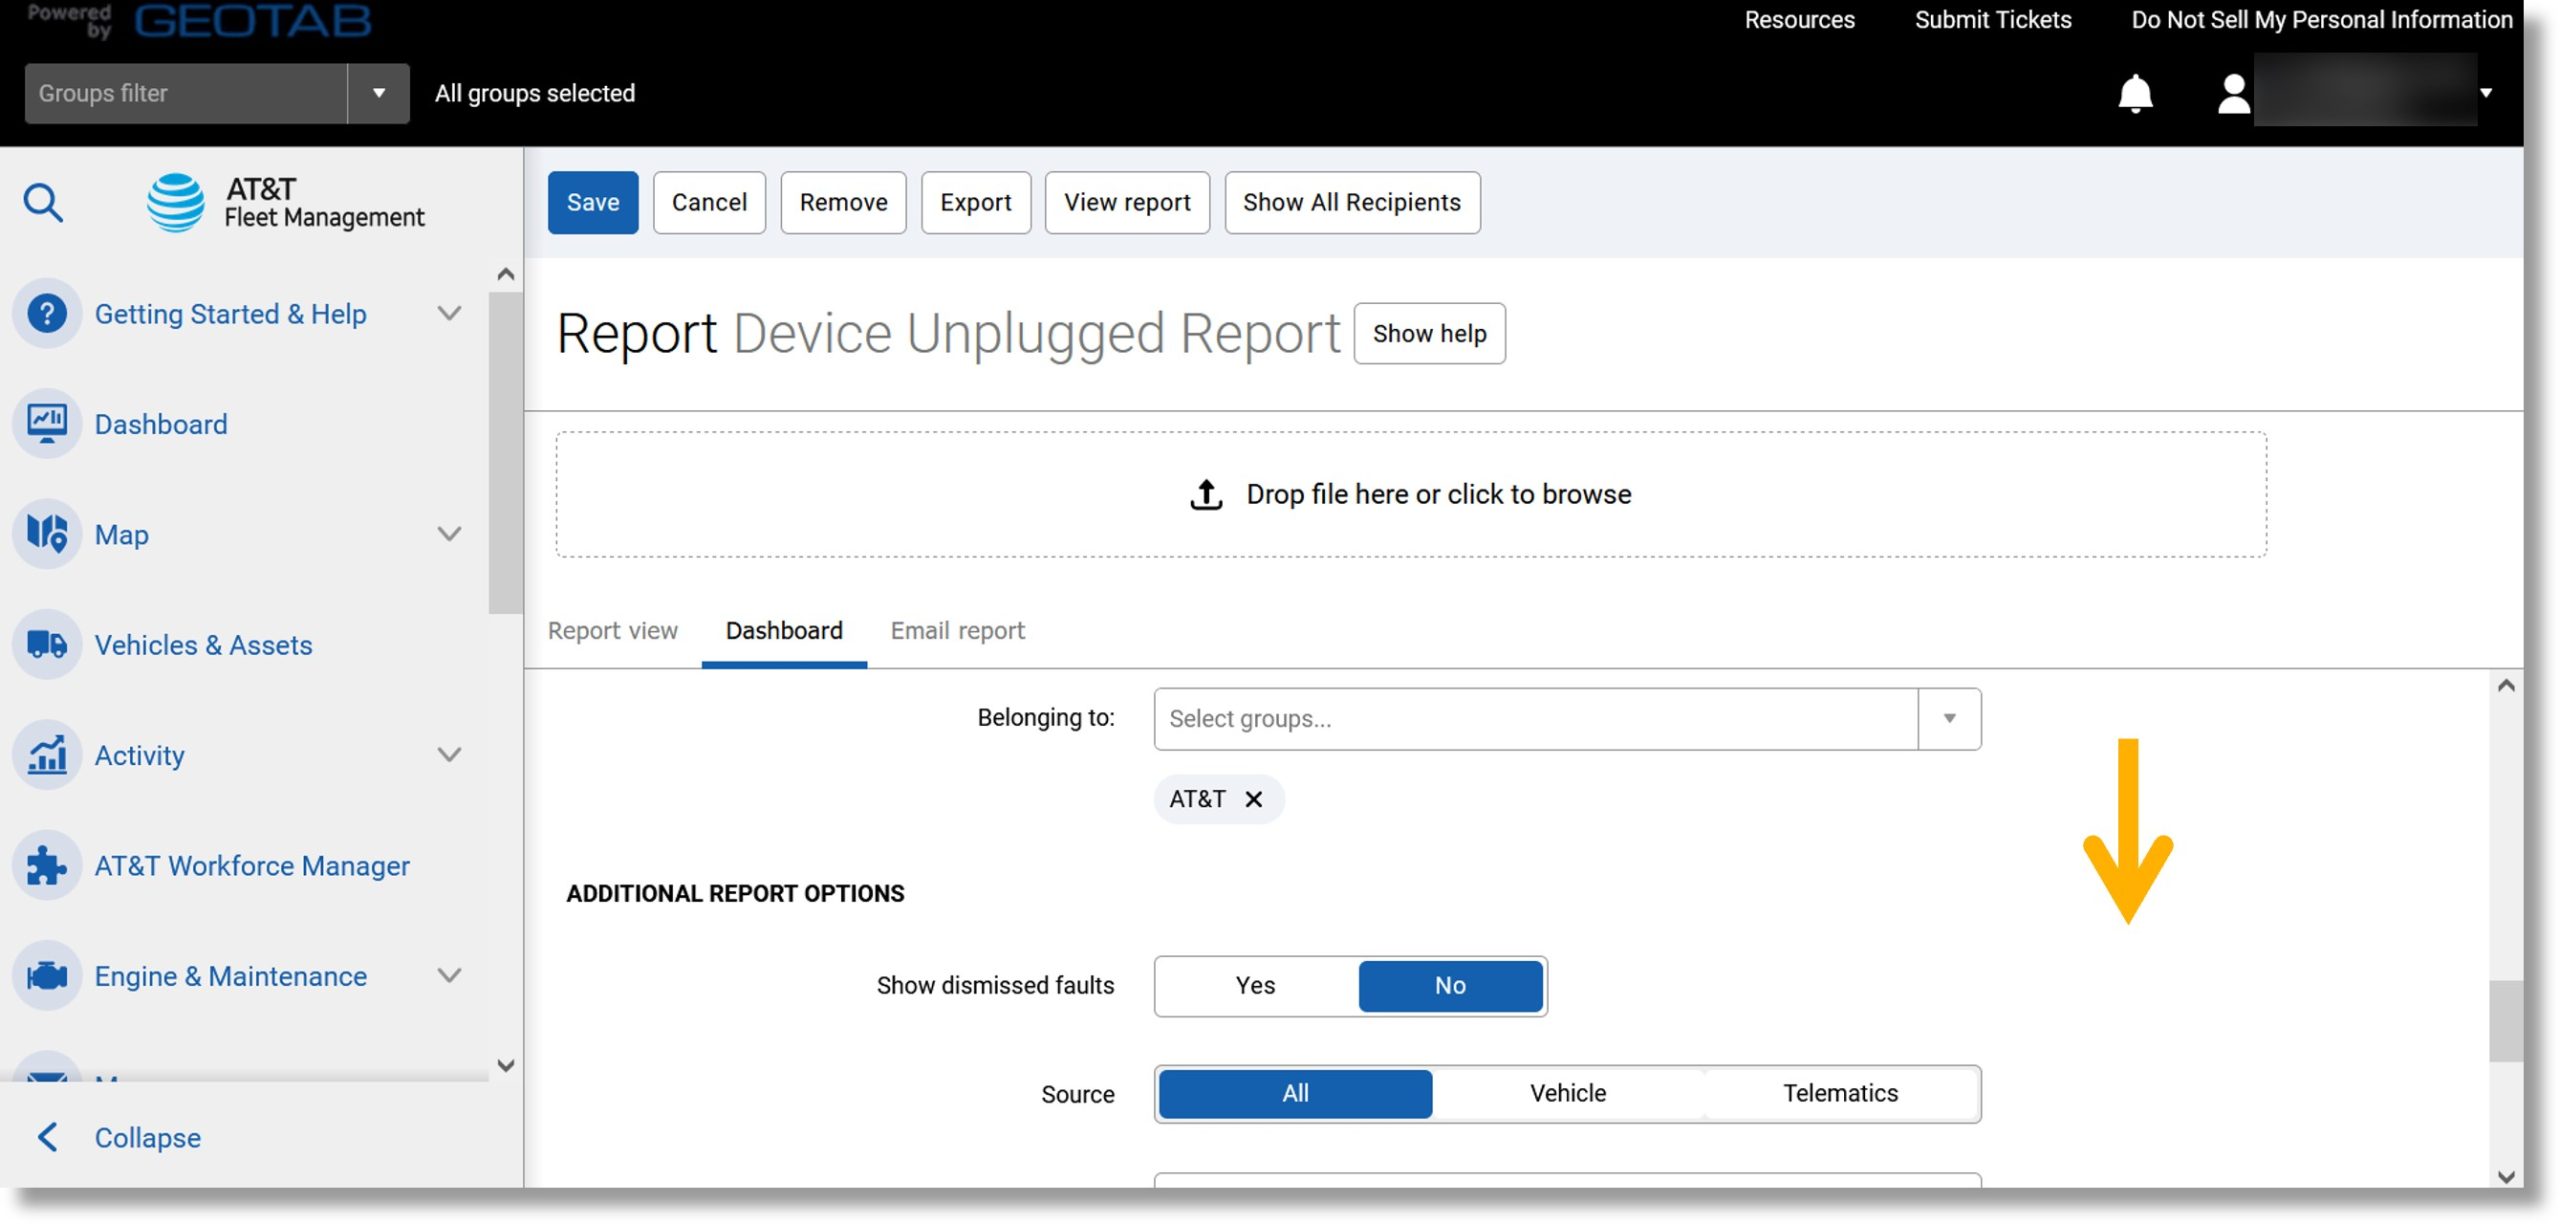
  26. Click in the field or on the drop down arrow to the right of “Belonging to”.
    Note: The default is “Everything” which will provide data for all configured groups.

    Image of step 26.

  27. Click on AND or OR and then select the desired group.

    Image of step 27.

    Note: Additional settings may display based on the report chosen.

  28. Scroll down.

    Image of step 28.

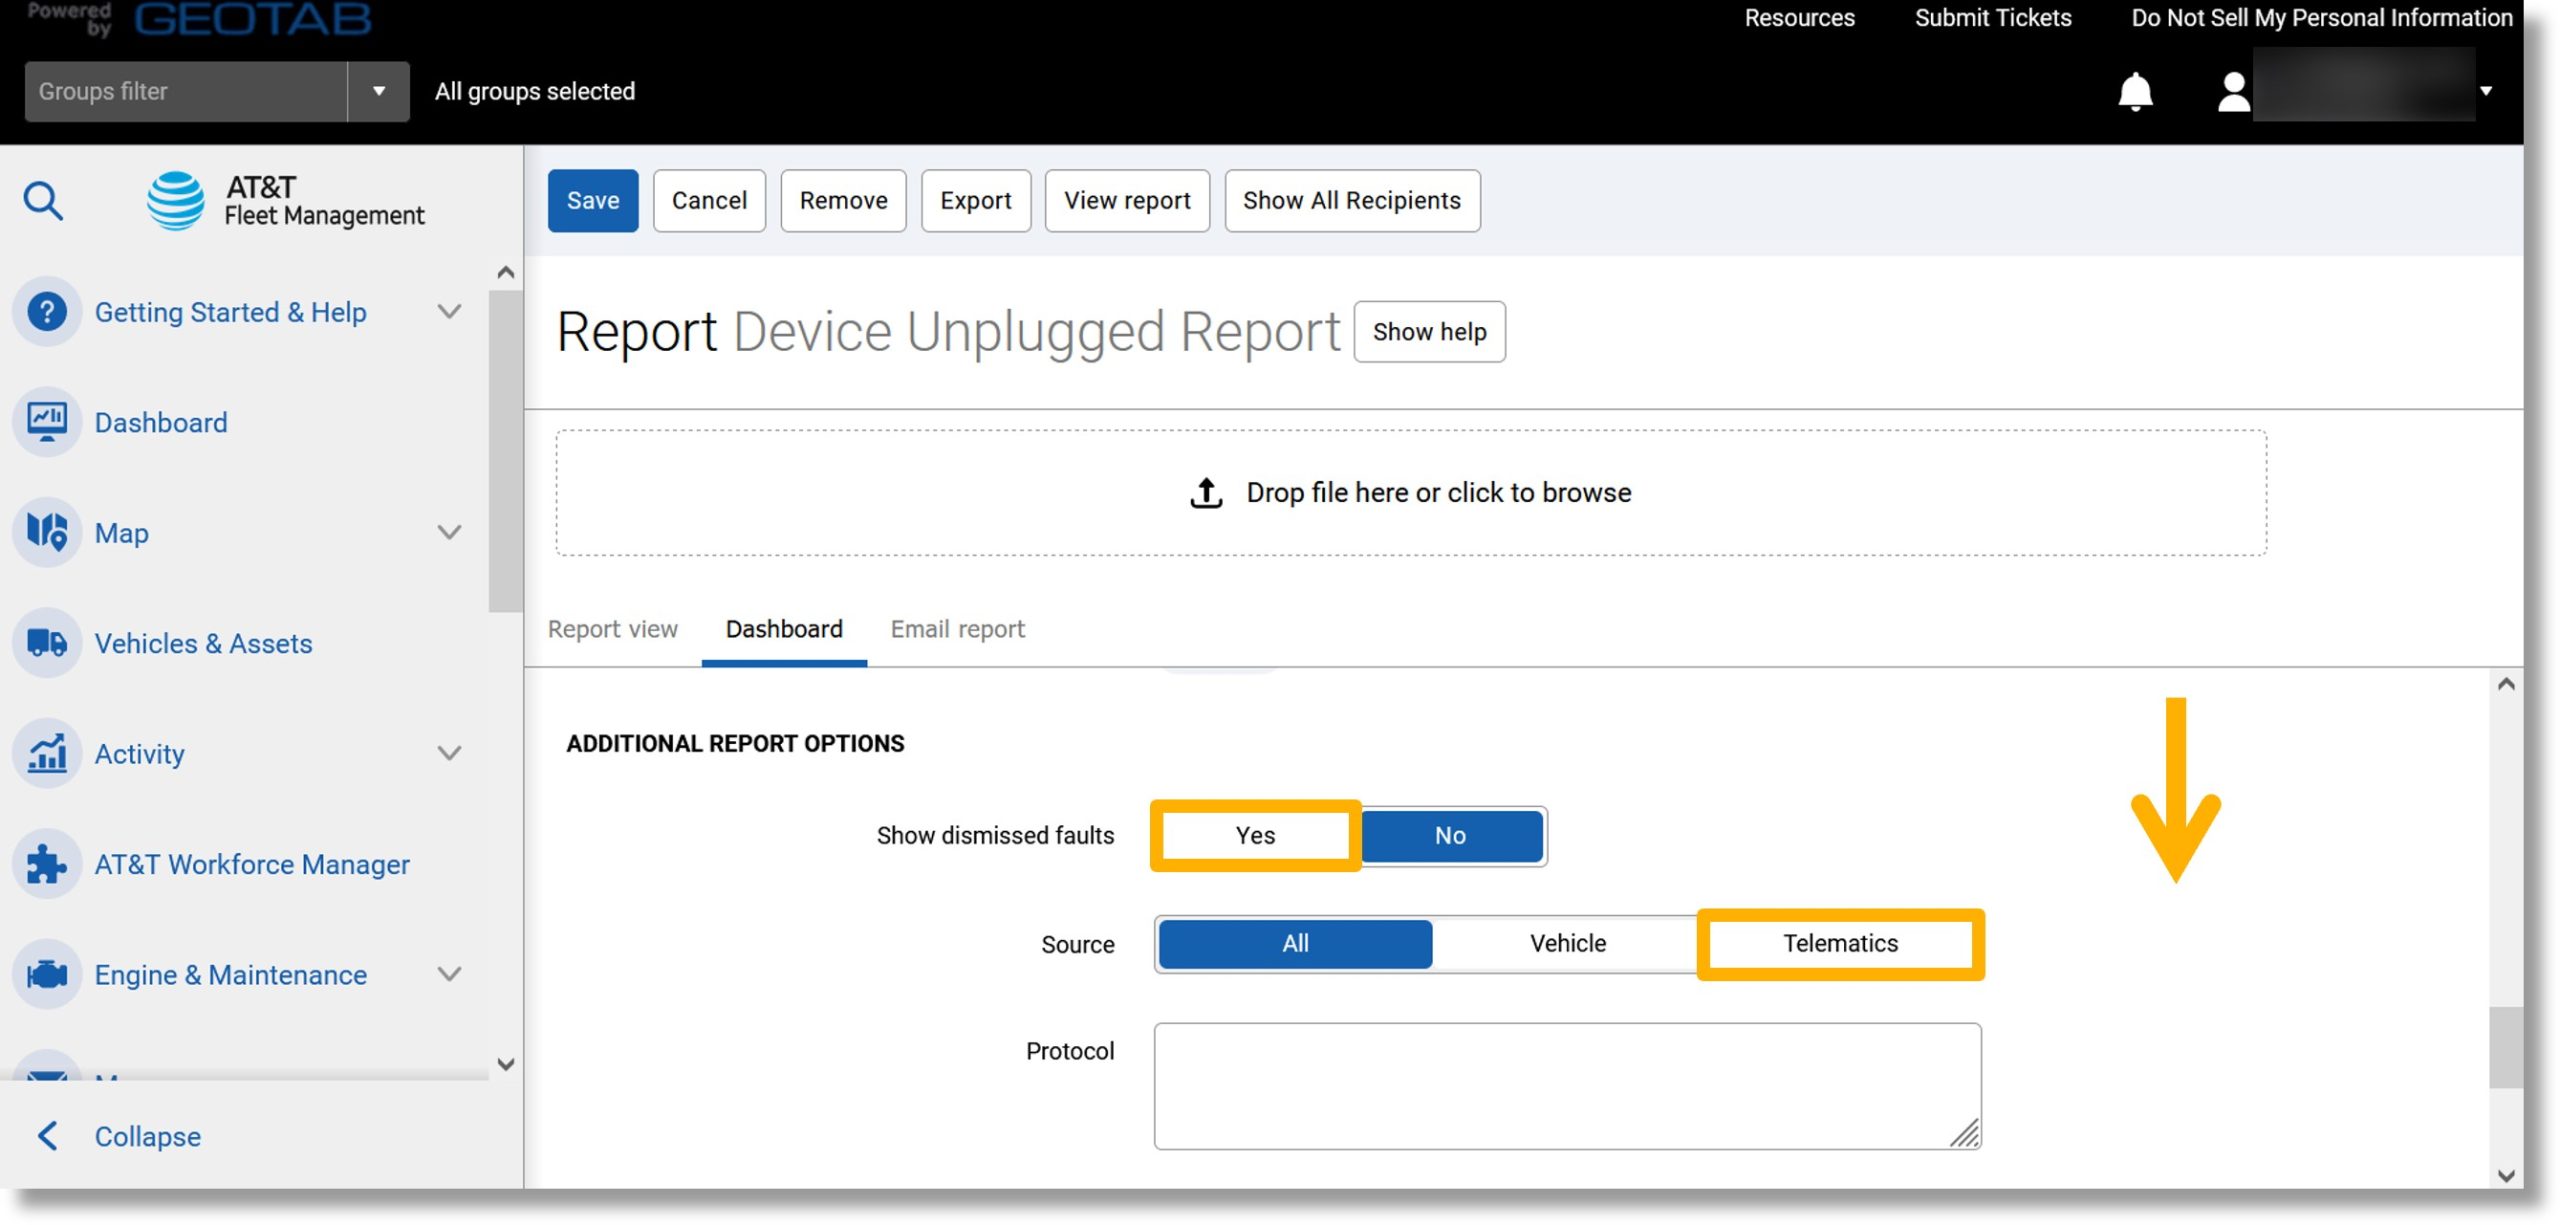
  29. Click on Yes or No to the right of “Show dismissed faults”.
  30. Click on the desired source to the right of “Sources”.
  31. Scroll down.

    Image of steps 29 through 31.

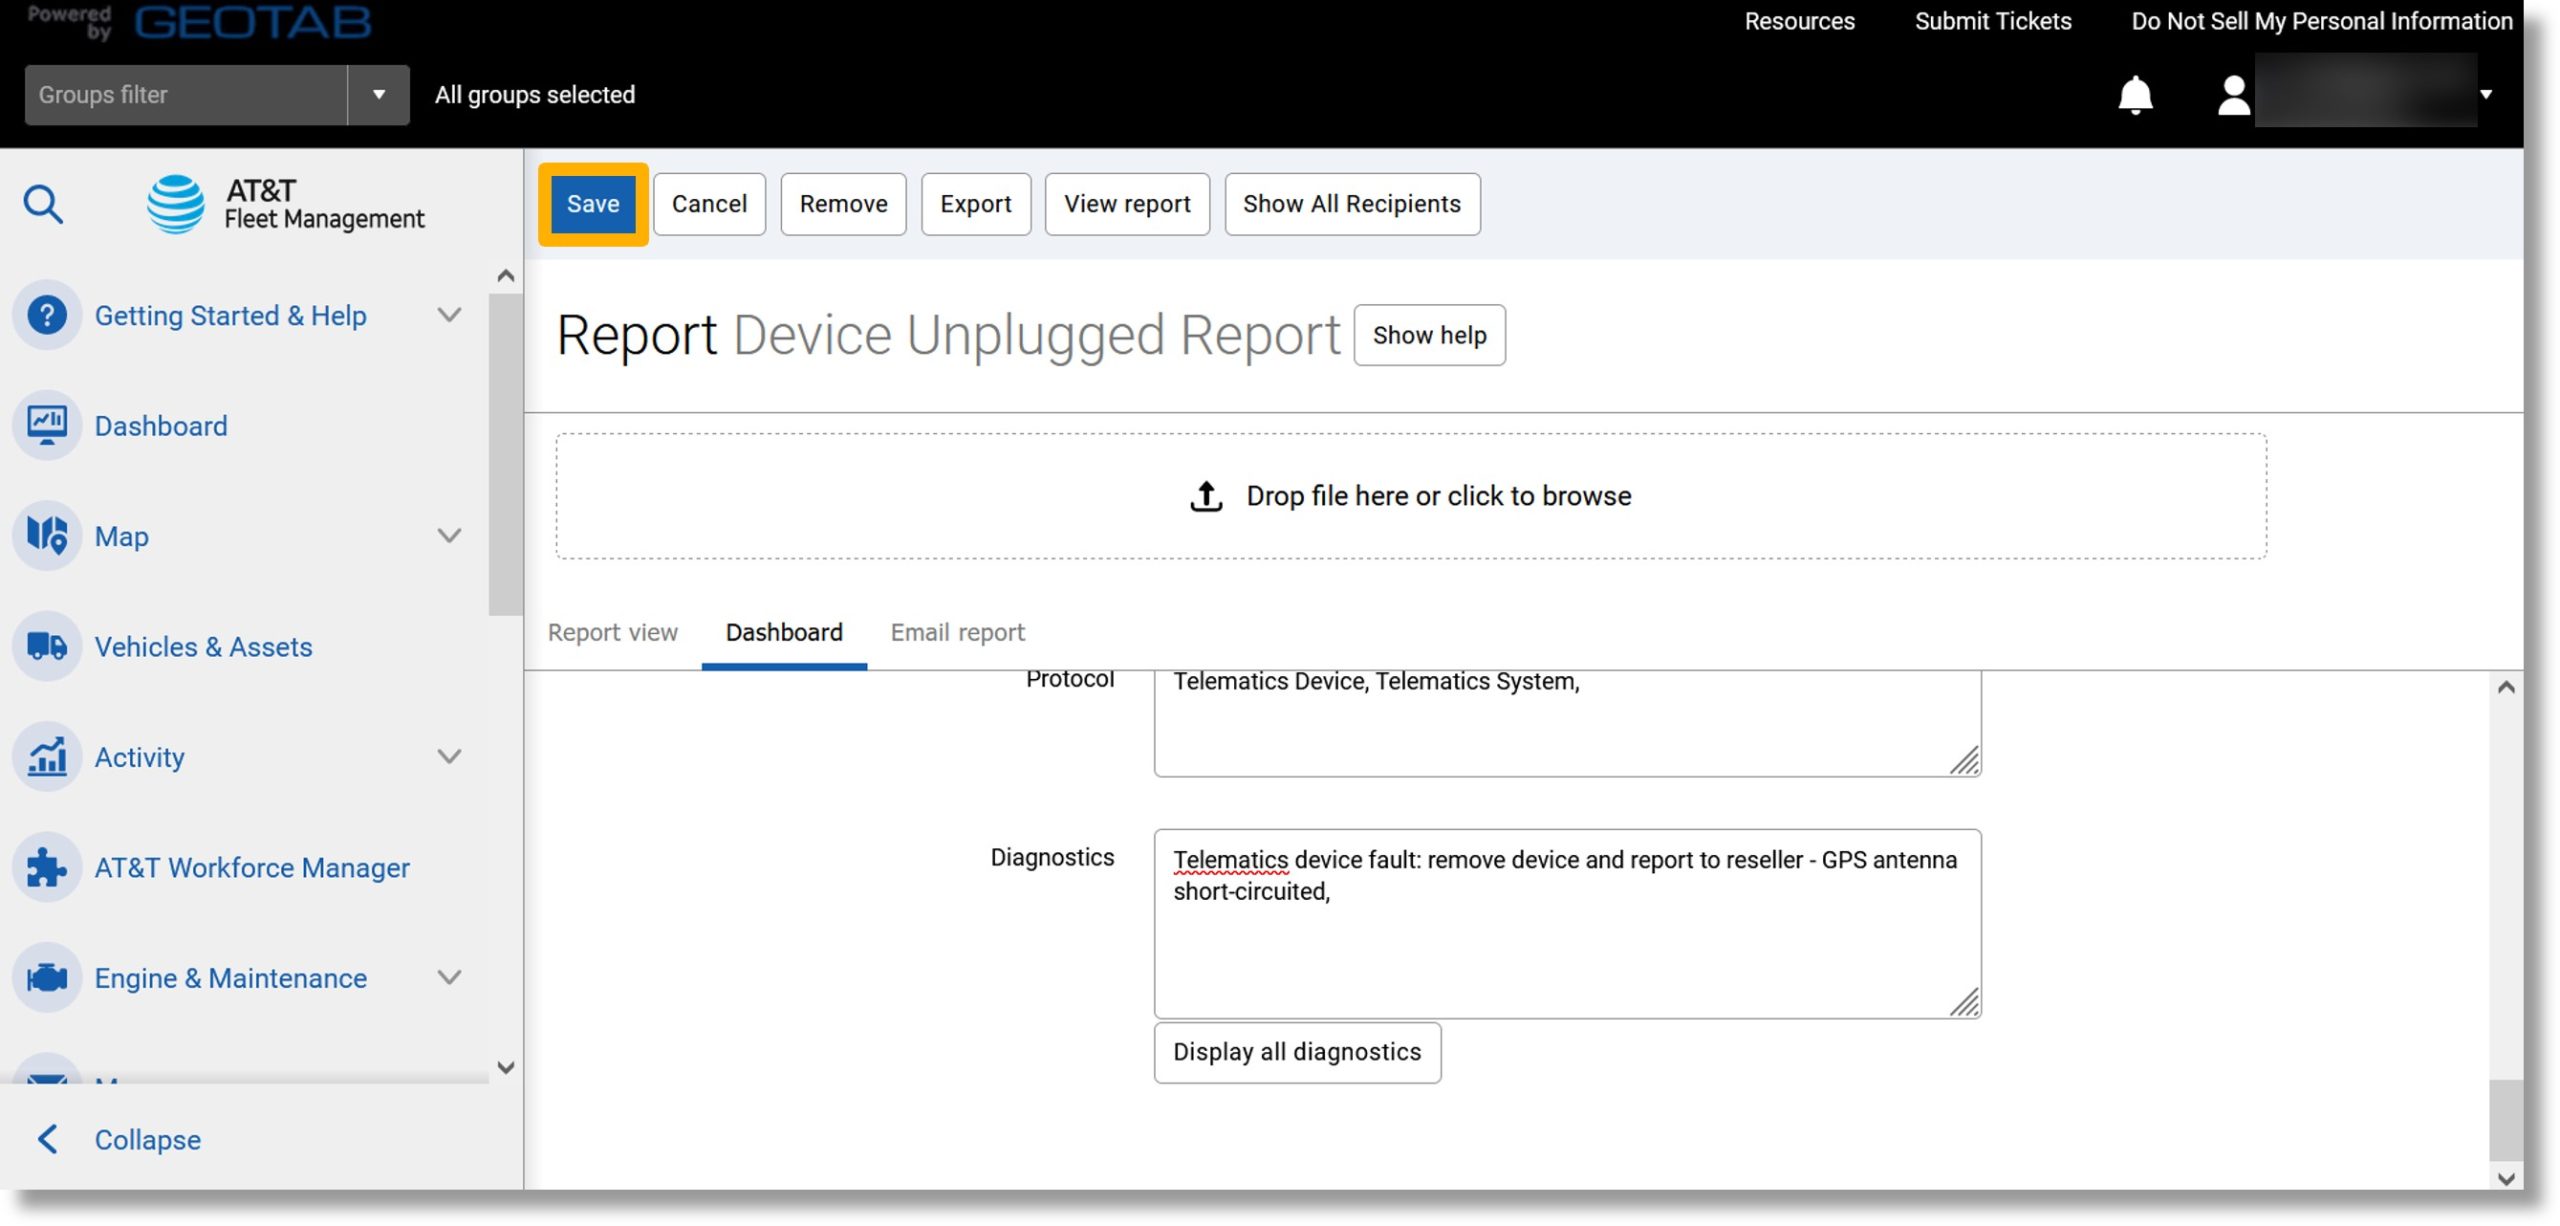
  32. Click on the Display all diagnostics button.

    Image of step 32.

  33. Click the Save button at the top of the page.

    Image of step 33.