Send a message in AT&T Global Smart Messaging Suite
- Click SMS, and then click Send a New SMS Order.
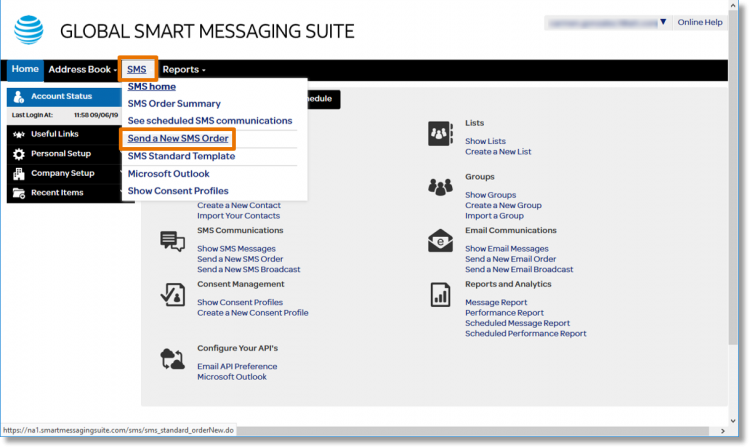
- The view defaults to the “Summary” tab. Here, you can type the description of the message.

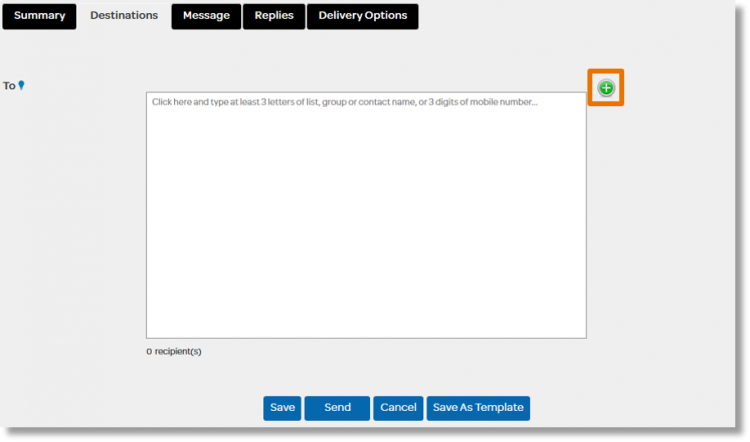
- After typing the description of the message, click the Destinations tab.

- On the “Destinations” tab, click the green plus
 icon.
icon.
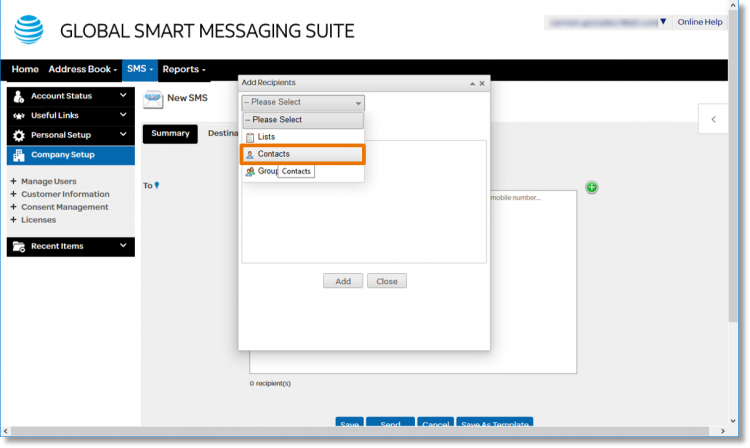
- The “Add Recipients” box populates. Click the Please Select drop-down arrow and select one of the following: Lists, Contacts, Groups. In this example, we use “Contacts”.
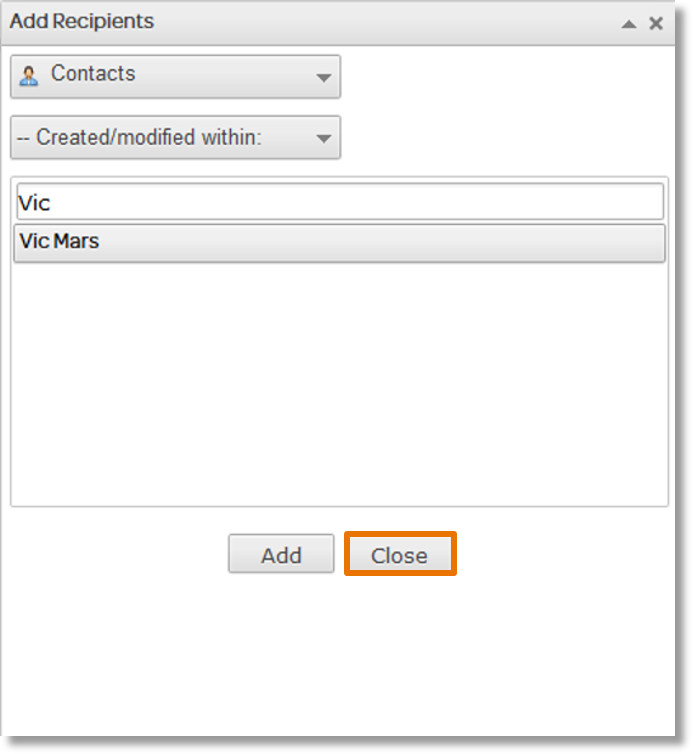
- Begin typing the first three letters of a contact name. Once the desired contact name populates, click the name to select it, and then click Add.
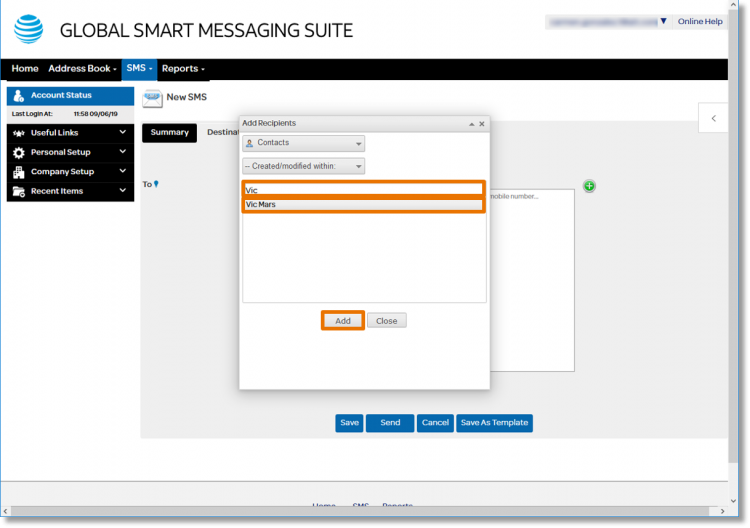
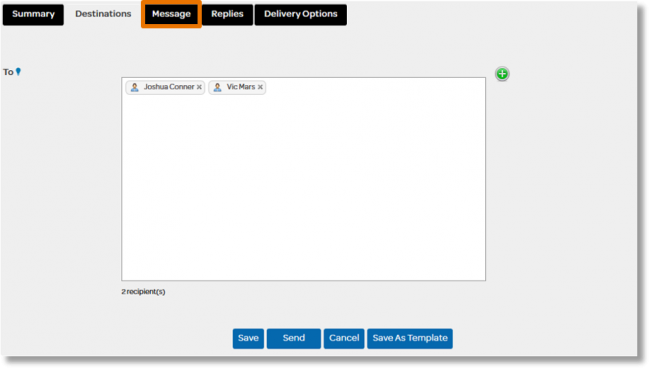
- Once all desired names are selected, click Close. The contact names will be listed in the field to the right of “To”.
- Click Message.
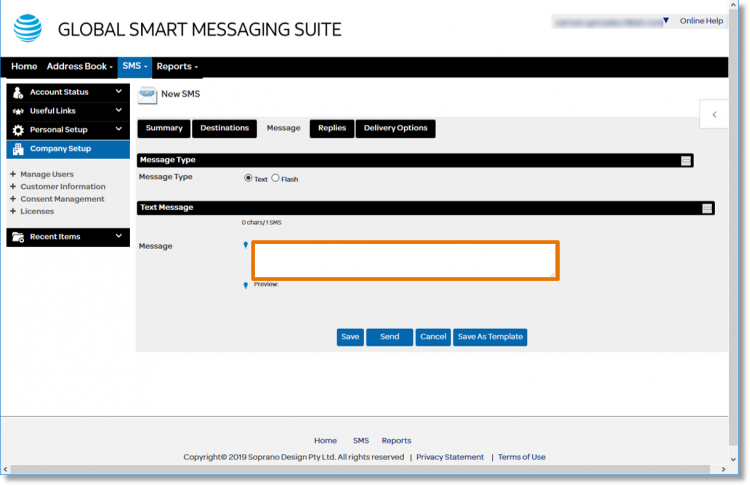
- The “Message Type” box defaults to “Text”.
- In the “Text Message” section, click inside the “Message” field and type the message.
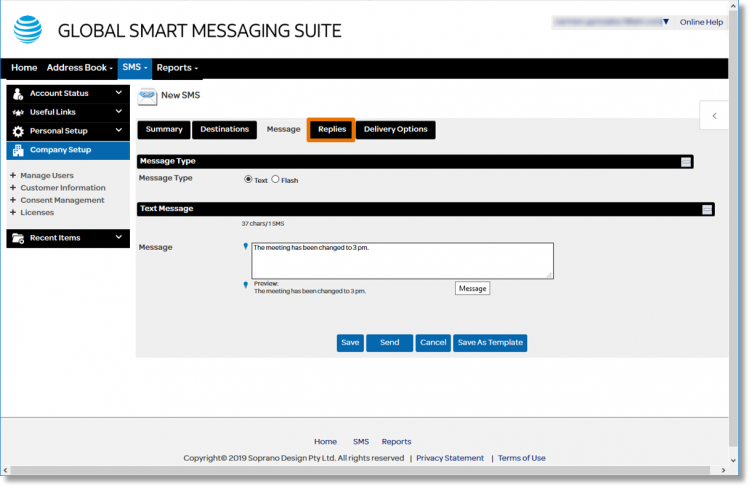
- Click the Replies tab.
- In the field to the right of “Reply to Address Type”, click the drop-down arrow and select an option to where the recipients can reply.
- Once the option of the reply is selected, enter the mobile number.
Note: The mobile number is entered in this case since the option selected is “Mobile”.

- Click Delivery Options.

- To the right of “Delivery Frequency”, click the drop-down arrow to the selected requested time or the frequency of delivery.
Note: Click here for details on scheduling a delivery.
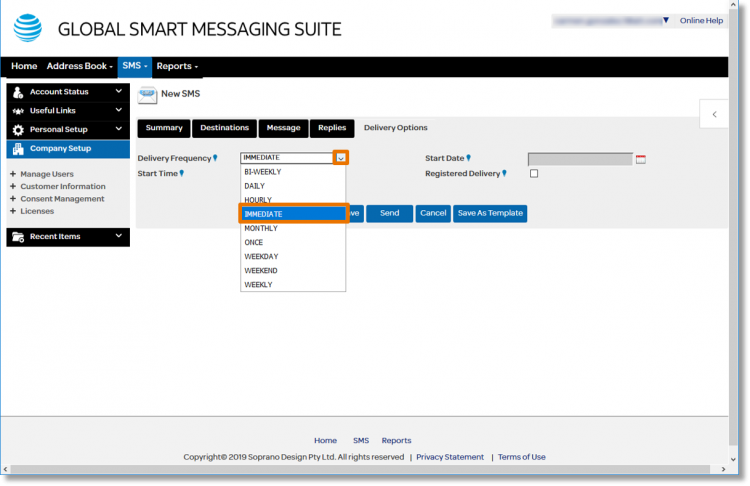
- Once all desired options are completed, click Send.

Schedule delivery for SMS communications
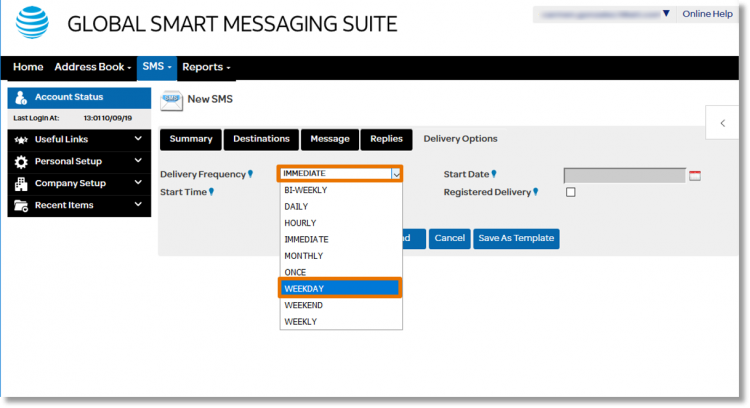
When choosing an option other than “Immediate”, it is necessary to update the “Start Date” field.
- In the field to the right of “Delivery Frequency”, select the desired delivery schedule.
- Click the calendar icon
 to select the desired date.

- Click Schedule.


