TOP

AT&T Fleet Complete

Learn how to set up AT&T Fleet Complete, your solution for a more efficient and responsive fleet. Find tips on how to use available dispatching, routing, tracking, and reporting features while engaging in two-way communications between your operations staff and couriers.

Back to Product Page
Use the dropdown to get support, or purchase this product

Related Content

No related content found

Schedule an open report in AT&T Fleet Complete

Note: Each report can contain different parameters based on the information in the report. This tutorial is about scheduling a report after it has been generated.

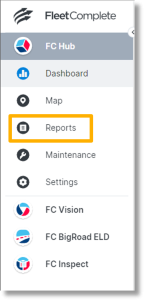
  1. Click Reports on the left side bar.

    Click Reports on the left side bar.

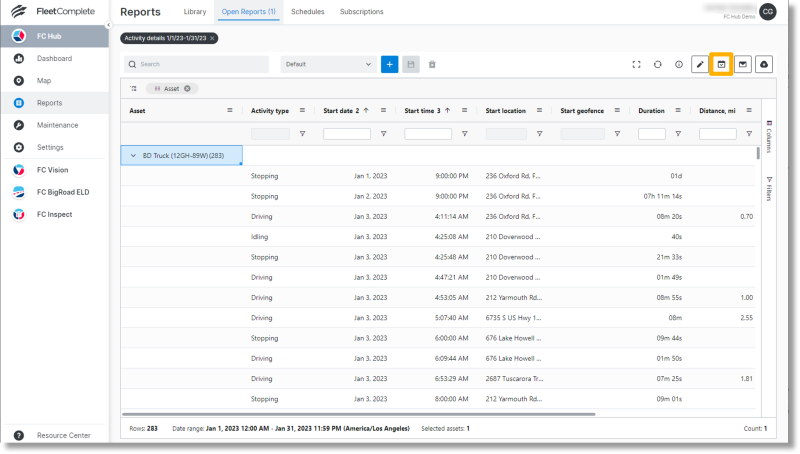
  2. Under the “Open Report” tab in Reports, click the schedule report icon.
    Note: To schedule a new report, the report must first be generated. The report is in the “Open Reports” tab.

    Under the “Open Report” tab in Reports, click the schedule report icon.

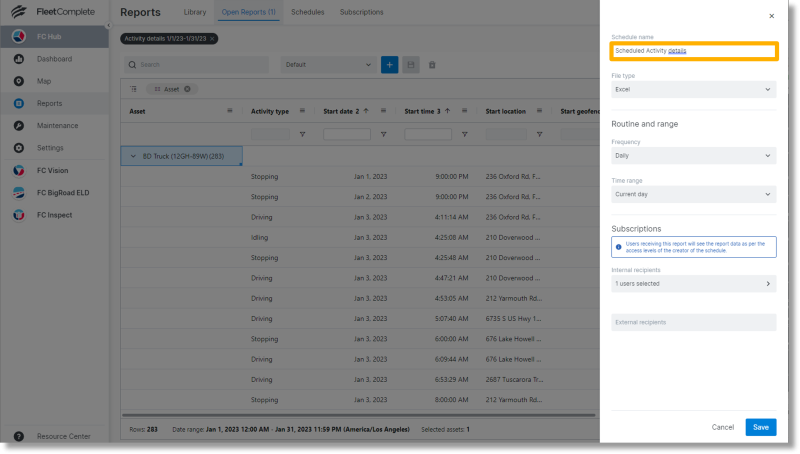
  3. Click inside the field below “Scheduled name”.

    Click inside the field below “Scheduled name”.

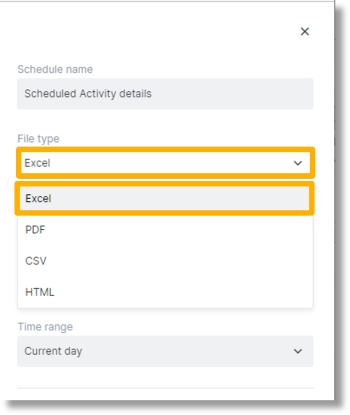
  4. Click inside the dropdown field below “File type” and select the file type for the report.

    Click inside the dropdown field below “File type” and select the file type for the report.

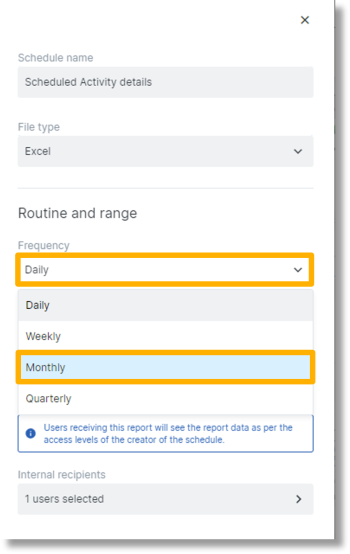
  5. Click inside the dropdown field below “Frequency” to select the frequency of the scheduled report.

    Click inside the dropdown field below “Frequency” to select the frequency of the scheduled report.

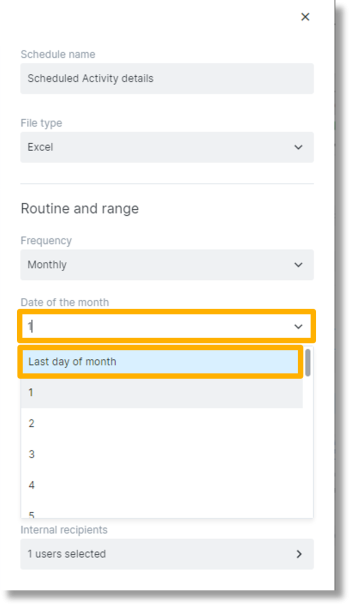
  6. In the dropdown field below “Date of the month”, select the day of the month or time of the month for the scheduled report.

    In the dropdown field below “Date of the month”, select the day of the month or time of the month for the scheduled report.

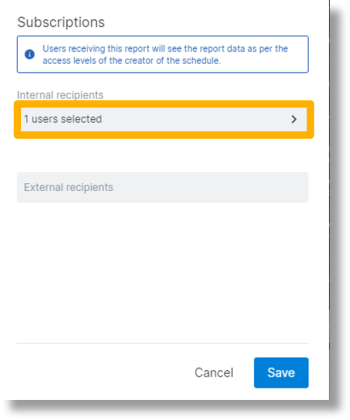
  7. Click the field below “Internal recipients”.

    Click the field below “Internal recipients”.

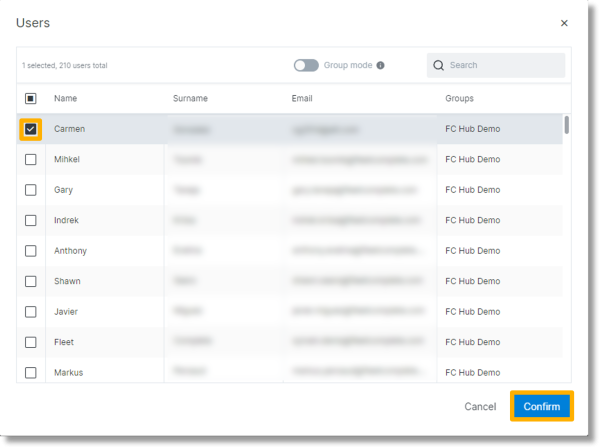
  8. Click the checkbox to the left of the names to select the user(s) that will receive the scheduled report and then, click Confirm.

    Click the checkbox to the left of the names to select the user(s) that will receive the scheduled report and then, click Confirm.

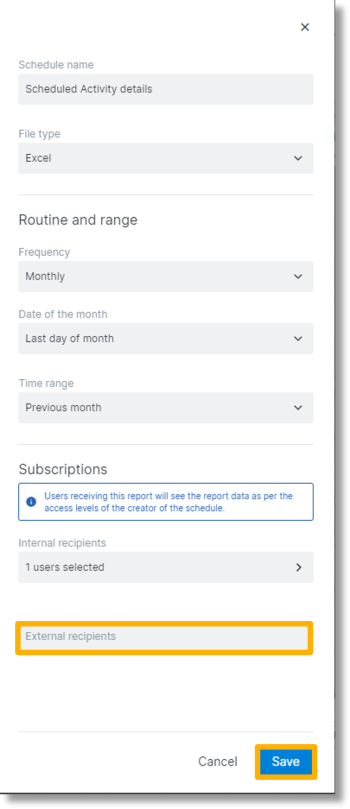
  9. Click inside the “External recipients” box and enter the email address of whom you wish to receive this report. As you type the email address, a plus sign will appear on the right of the text.
  10. Click the plus sign to add the recipient.
  11. Click Save.

    Make appropriate selectgions and click Save.