Masking numbers and location data in the Admin Portal
To meet country-specific compliance requirements, admins can hide location data or mask the last four digits of any external number in call logs and the analytics portal.
If specific users need to view unmasked phone numbers or location data, super admins can create a custom role and assign the necessary permissions so the users can access the data.
Note:
- Masked Numbers & Location Data is available in all countries.
- The Activate masked numbers and Hide location data features can be managed independently.
Turning on number masking and hiding location data
Super admins can activate the Masked numbers & location data feature in the Admin Portal.
Note: Super admins have the Unmasked Numbers & View Location Data permission by default.
- Sign in to the Admin Portal.
- Click the More tab in the top menu.
- Click Security and Compliance to expand the menu.
- Click Masked Numbers & Location Data.

- To mask numbers, check the box next to Activate Masked Numbers.
- To hide location data, check the box next to Hide Location Data.
- Hide location data removes user location information such as IP addresses and location maps from the analytics portal.
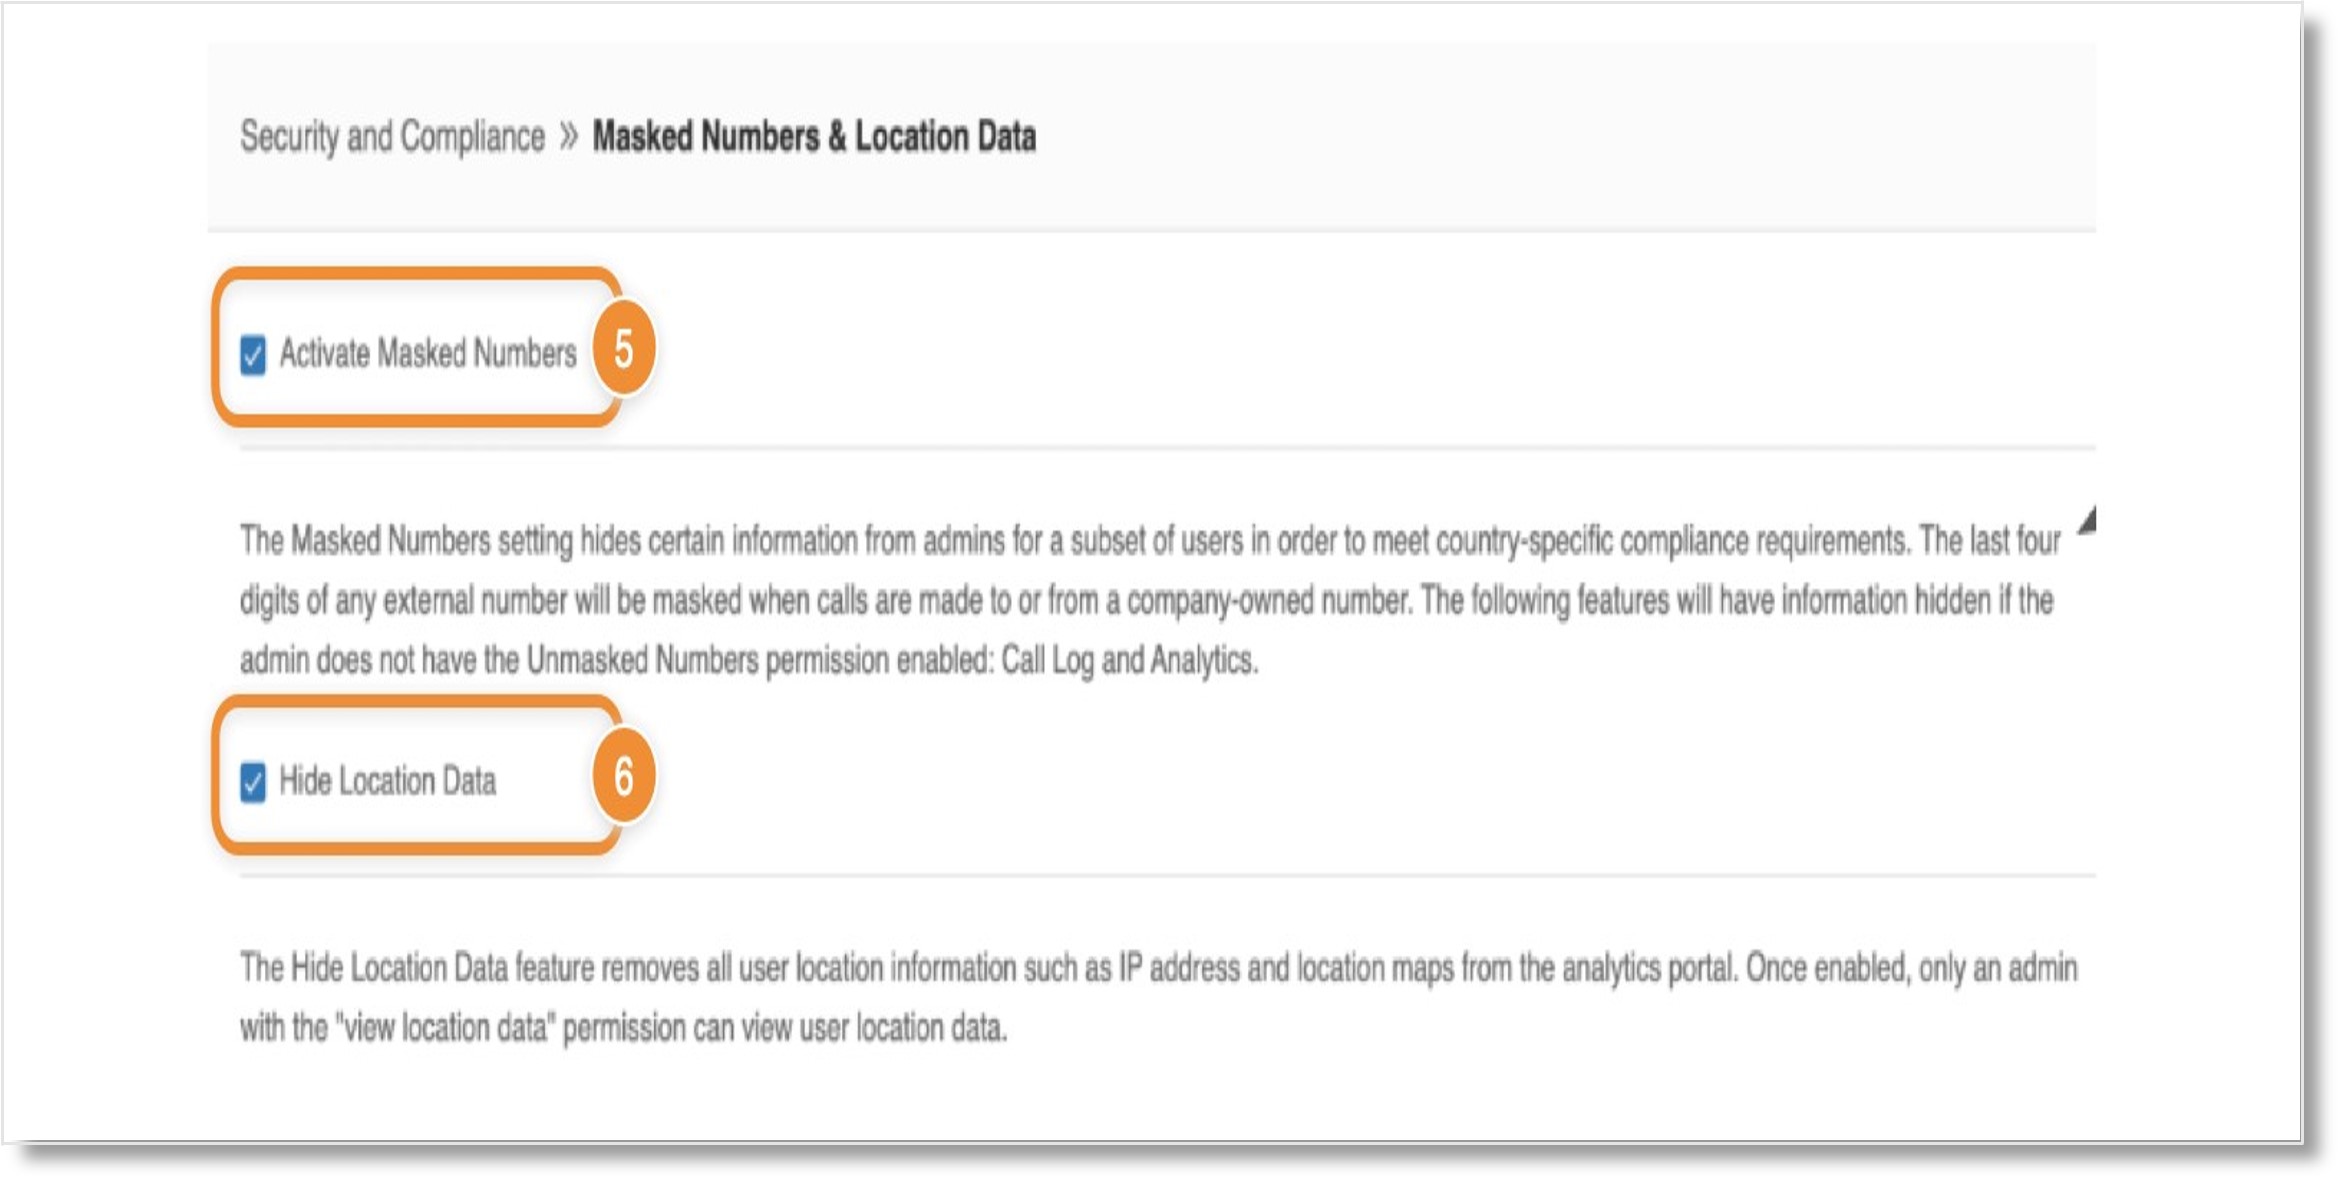
- Click Accept & Save.
Turning off number masking and showing location data for specific users
To override number masking and hide location for specific users, super admins can assign the Unmasked Numbers & View Location Data permission to a role or individual user.
Note: Super admins have the Unmasked Numbers & View Location Data permission by default.
- Sign in to the Admin Portal.
- Click the Users tab in the top menu.
- Select Roles.
- Click the New Role button in the upper right.
- In the left panel, select the role you want to create, then click Next.
- Under Describe Role, enter the role’s name and description.
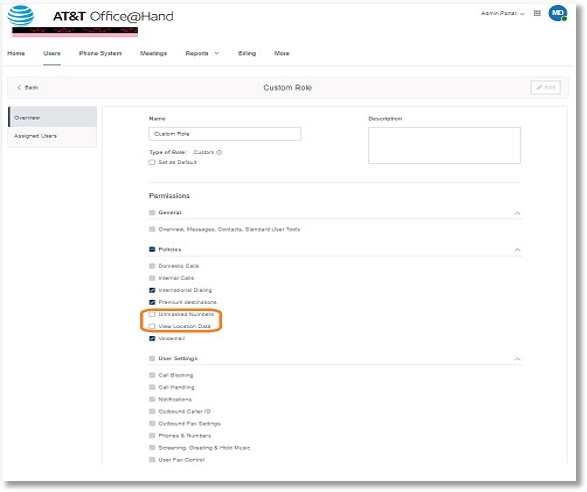
- Under Permissions, go to Policies.
- To unmask numbers for the role, click the checkmark next to Unmasked Numbers.
- Click the Create Role button.
The table below summarizes how this feature works:
Masked Numbers
| Masked Numbers Account Setting |
Unmasked Numbers Role Permission |
Information Masked |
| Checked |
Un-checked |
Yes |
| Checked |
Checked |
No |
| Un-checked |
N/A |
No |
Hide Location Data
| Hide Location Data Account Setting |
View Location Data Role Permission |
Information Masked |
| Checked |
Un-checked |
Yes |
| Checked |
Checked |
No |
| Un-checked |
N/A |
No |
If the unmasked numbers permission isn’t checked, numbers in the company call log and analytics portal will be masked for users assigned to that role.
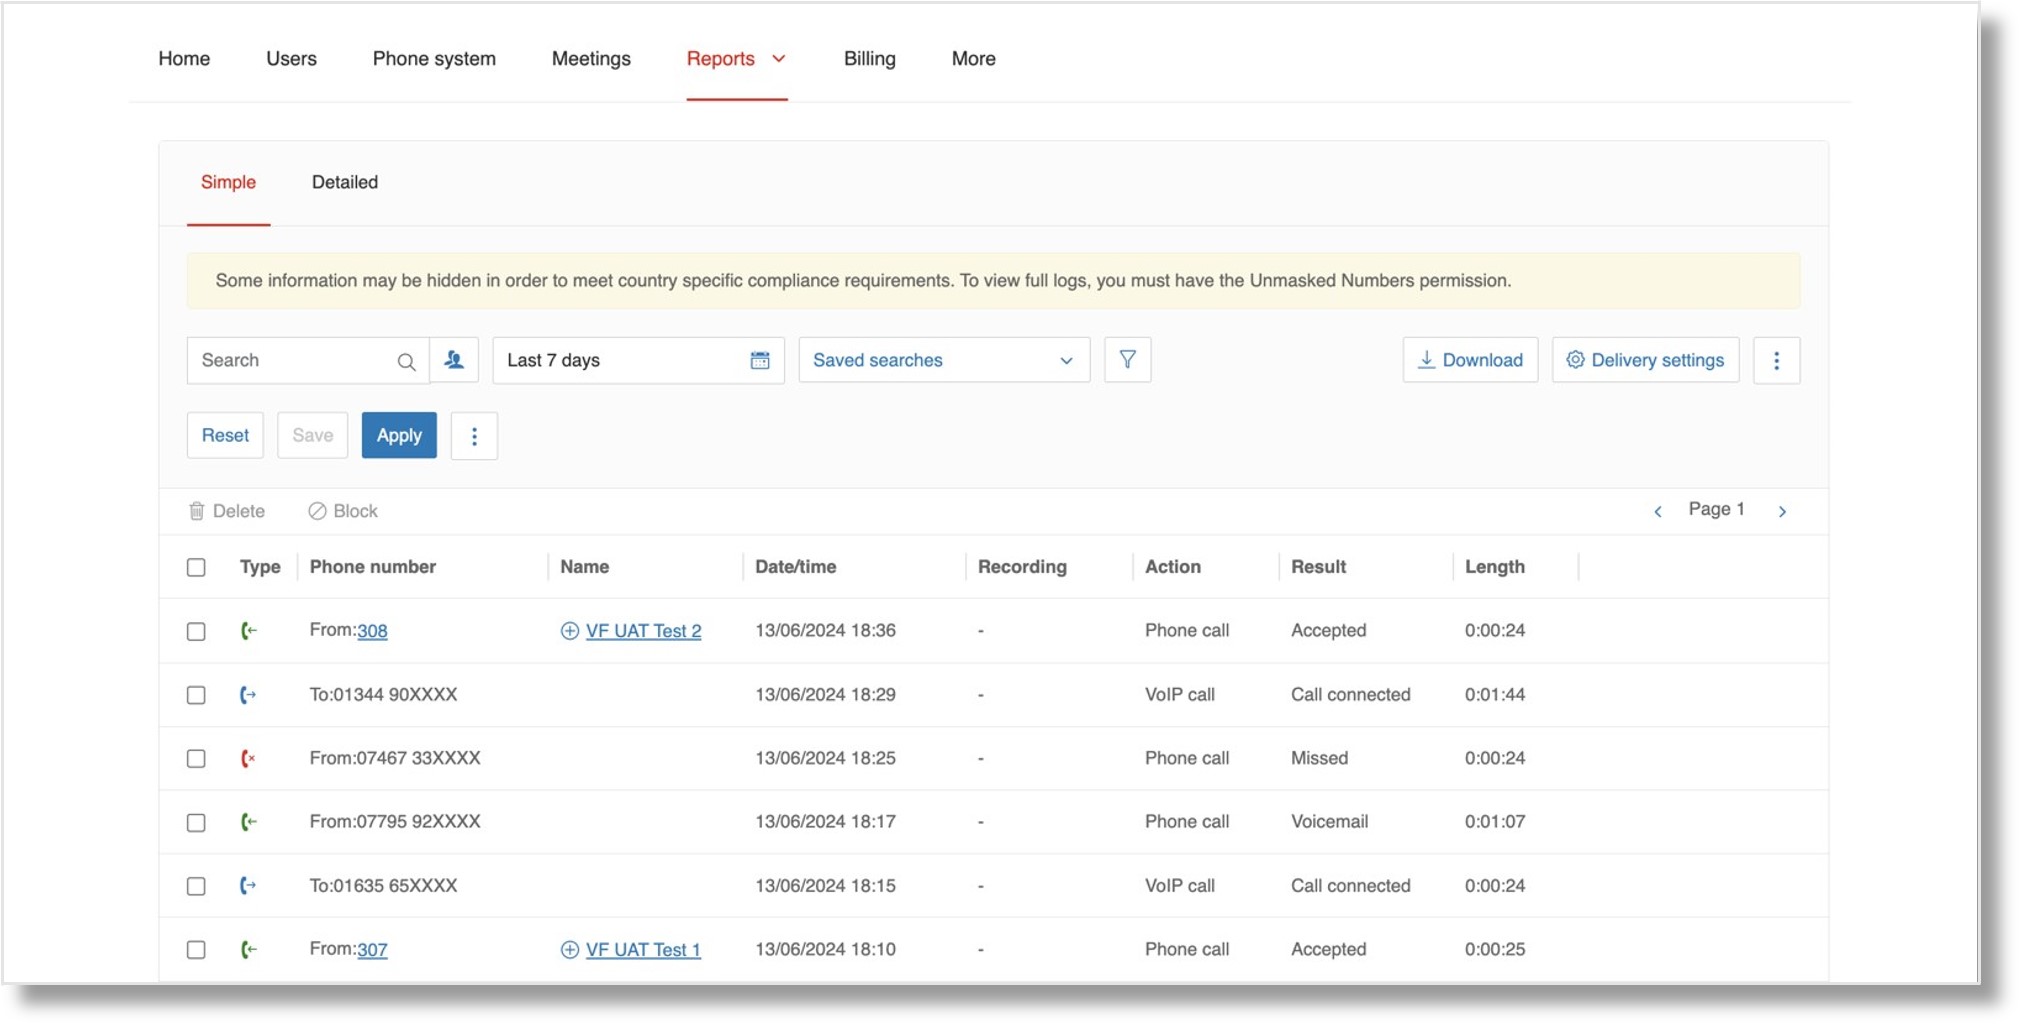
If the view location data permission isn’t checked, location data in the analytics portal will be removed. Note that the company call logs feature does not contain any location data.

Was this page helpful? Yes No