Managing Groups in the Business Notification Center with AT&T Business Messaging
Create a group
Edit a group
Add a contact to a group
Delete a contact from a group
Delete a group
Importing contacts or groups
Creating a New Group
- On the Groups screen, click + New Group.

The New Group screen opens.
- Select the contacts to add to the group by entering the names in the Search to add contacts field.
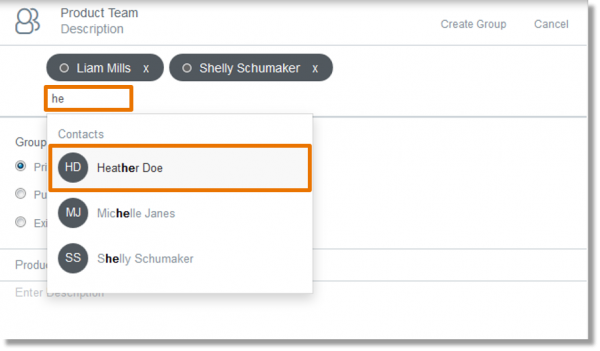
- Select the group type. Available options include:
- Private: A distribution list that a user creates and cannot be shared with others. The application is limited to 20 private groups.
- Public: A distribution list that a user creates and can be shared with others. When a user gives the group name to others, the group becomes a shared public group and anyone who uses it can send a message to everyone in the group. The application is limited to 100 public groups.
- Existing Public Group (Shared): This group name must exactly match an existing public group name. You may use the description box to further describe the group. Note that only the creator of the public group will be able to view or change the group recipient list and may do so at any time.
- Enter the group name.
- (Optional) Enter a description of the group.
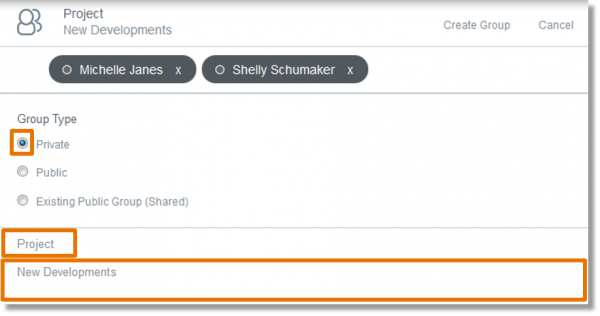
- Click Create Group.
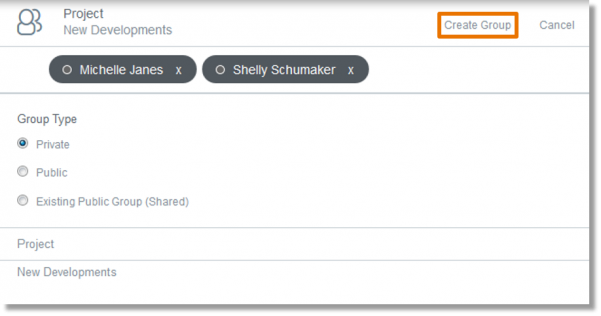
The new group appears on the Groups tab.
Editing a Group
- Select the group in the Groups list.

The selected group appears.
- Select Options or Groups, and then Edit.
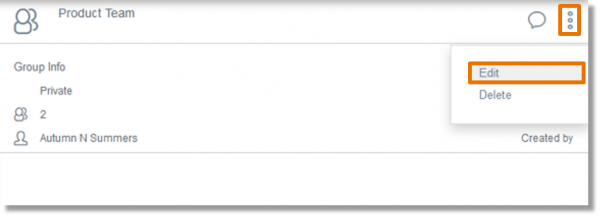
- Complete the appropriate edits.
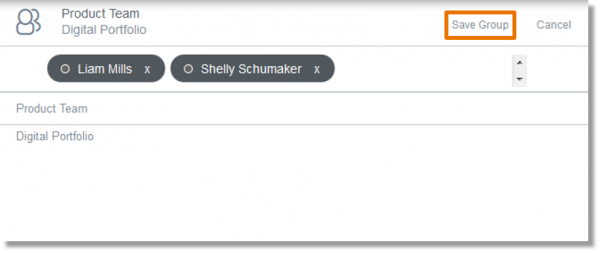
- Click Save Group.
Adding Contacts to an Existing Group
- Select the contact in the Contacts list.
- Select Options, and then Add to Group.

The Groups list appears.
- Select the group.
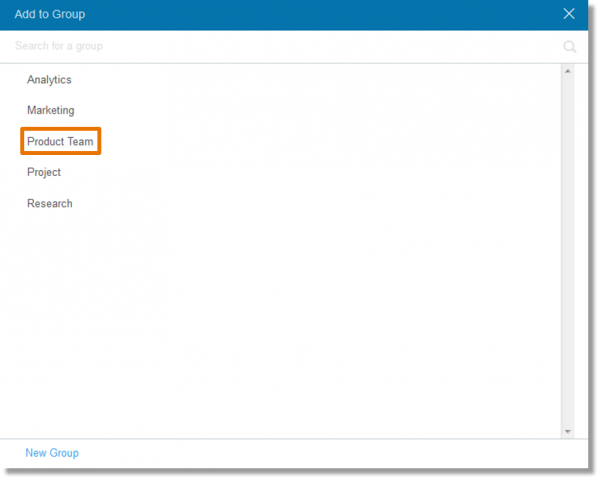
A message appears confirming that the selected contact was added to the group.

- Select the appropriate group in the Groups list.

The group appears.
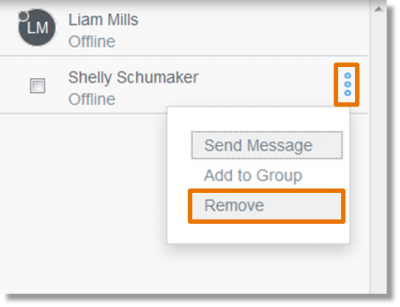
- Select the Options icon beside the appropriate contact in the list, and then click Remove.
Deleting a Group
- Select the group in the Groups list. The selected group appears.

- Select Options, and then Delete Group.

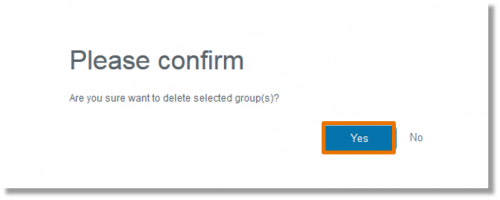
- Verify that you want to delete the selected group.
Importing Contacts or Groups
- On the Contacts or Groups screen, click the Import/Export.

The Import/Export screen opens.
- If you haven’t already done so, download the template by clicking this template to ensure correct format link.
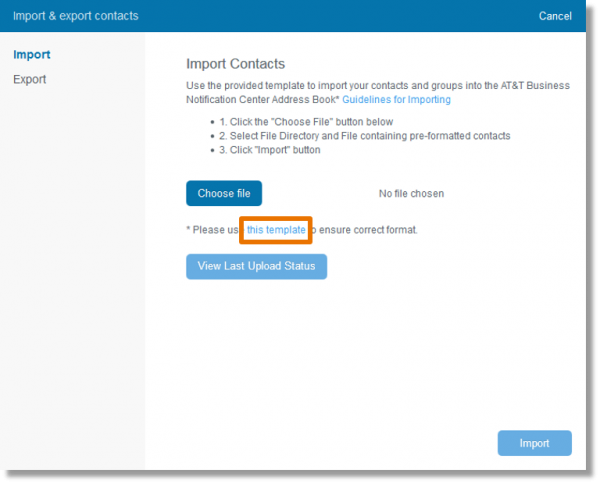
- Complete the template using the guidelines below.
- Click the Choose file button in the Import Contacts section.
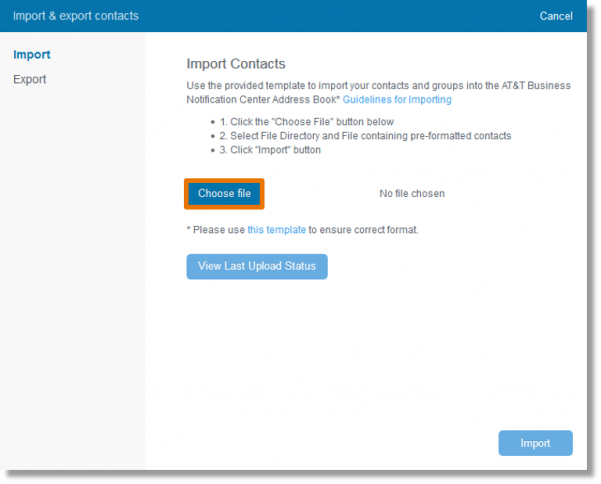
- Browse to the appropriate file directory and file that contains the list of pre-formatted contacts or groups.

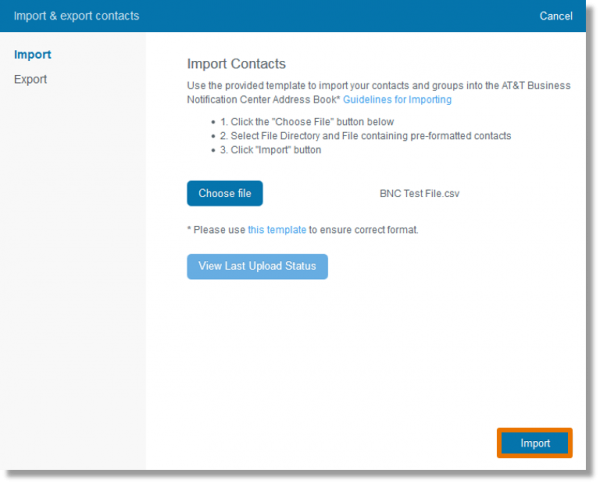
- Click the Import button.
Guidelines for Importing Contacts
- A contact in the template that does not exist in your address book will be created when you
import the template. The Username (Phone Number/Email Address) column is required. This
field must be entered with the phone number for mobile device users and the email address for
data-capable tablet users.
- A banner appears briefly to inform users that there has been a change to the template file. It
appears the first time the user logs in after the template change.
- Private and public group columns in the template are optional and can be removed.
- Private group columns with a prefix “private-” can be used to create new private groups and to
manage private group membership.
- Public group columns with a prefix “public-” can be used to create new public groups and to
manage public group membership.
- To create new private and public groups, replace the template group name examples with your
private and public group name(s).
- A new group in the file without a prefix of “public-” or “private-” will be created as a private
group.
- To add or remove contacts from existing private and public groups, replace the group name
examples (without a prefix) in the template with your existing group name(s).
- For each contact in the group column, add either:
- Yes: This will add the new or existing contact to the group.
- No: This will remove an existing contact from the group or will not add a new contact to the group.
- Public group names cannot contain special characters and should only include upper and lower
case letters from a-z and/or digits from 0 to 9.
- Private group names cannot start with a digit.
- Private Group Name, First Name, Last Name and Alias cannot contain special characters
backslash “\” and comma “,.”


