TOP

AT&T Global Smart Messaging Suite

Learn how to use the AT&T Global Smart Messaging Suite portal. Send SMS and binary messages of limited size to and from your application via API gateway, email server or website. Our convenient resources will help you better understand your billing and other questions.

Back to Product Page
Use the dropdown to get support, or purchase this product

Related Content

No related content found

Manage users in AT&T Global Smart Messaging Suite

Create a user+

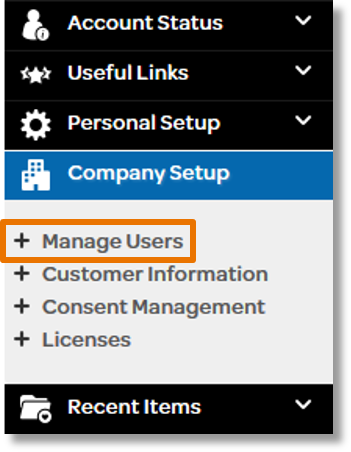
  1. In the left menu under “Company Setup”, click Manage Users.

    In the left menu under "Company Setup", click Manage Users.

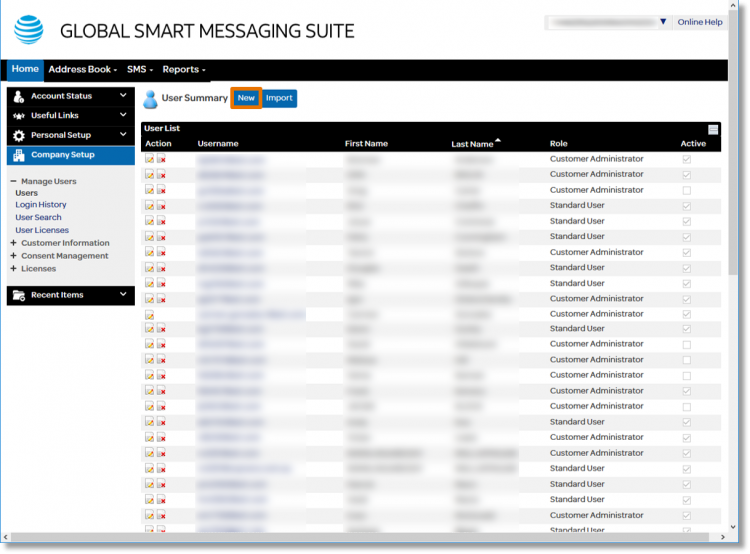
  2. Click Users.

    Click Users.

  3. Click New.

    Click New.

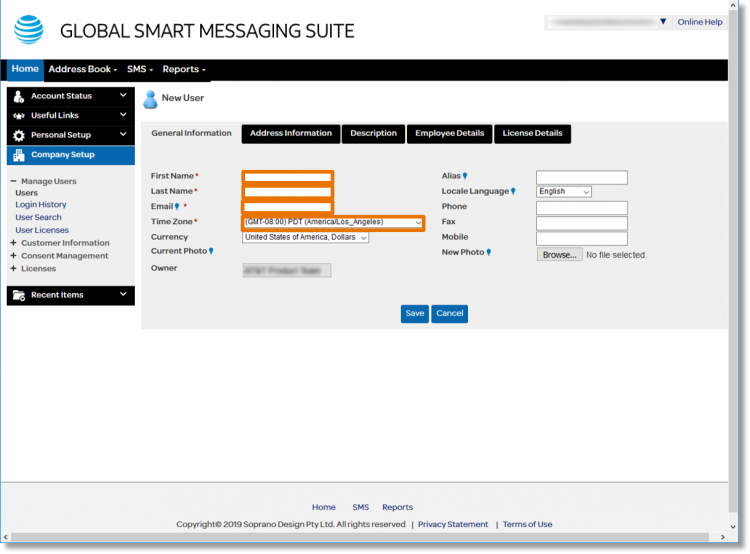
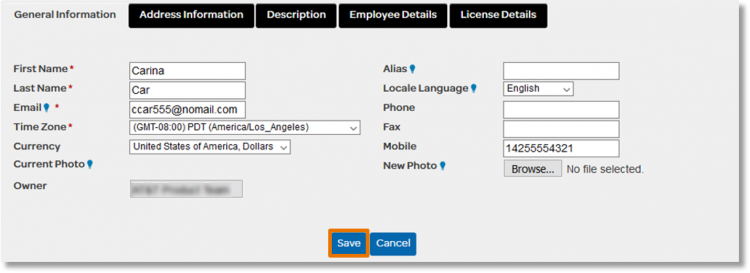
  4. The General Information tab has four mandatory fields.
    1. Complete the “First Name” field.
    2. Complete the “Last Name” field.
    3. Complete the “Email” field.
    4. Select the correct time zone in the field to the right of “Time Zone”.

      The General Information tab has four mandatory fields.

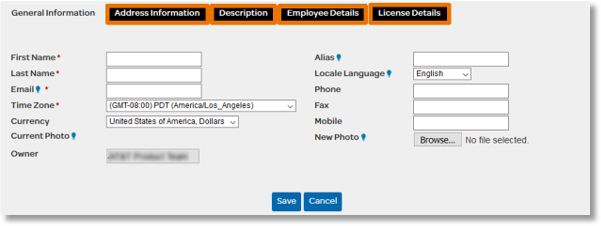
  5. Click on the additional tabs to enter address information, a description for the user, employee details or license details.

    Click on the additional tabs to enter address information, a description for the user, employee details or license details.

  6. Once all required and necessary information is entered, click Save.

    Once all required and necessary information is entered, click Save.

Edit a user+

  1. In the left menu under “Company Setup”, click Manage Users.

    In the left menu under "Company Setup", click Manage Users.

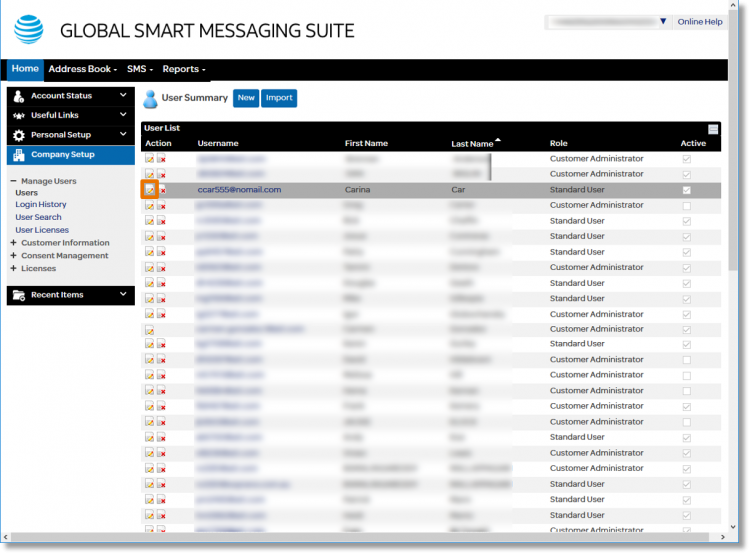
  2. Find the user’s name or email in the displayed list.

    Find the user's name or email in the displayed list.

  3. Click the Edit icon Edit icon in the “Action” list to the left of the “Username”.
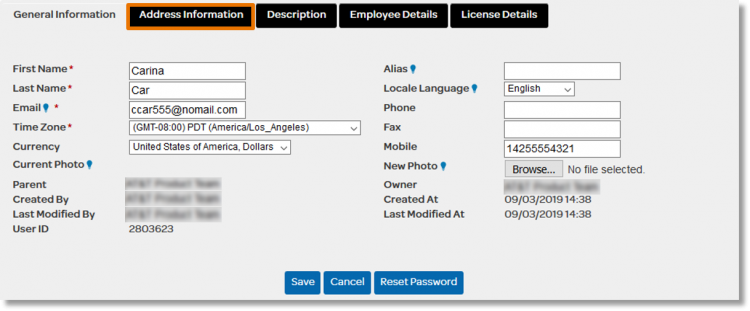
  4. The user’s information displays in various tabs:
    • General Information
    • Address Information
    • Description
    • Employee Details
    • License Details
      Note: In this example, the “Address Information” tab is selected.

      In this example, the "Address Information" tab is selected.

  5. Update the desired fields and any other tabs, and then click Save.

    Update the desired fields and any other tabs, and then click Save.

  6. The user’s profile now shows the updated information.

    The user's profile now shows the updated information.

Delete a user+

  1. In the left menu under “Company Setup”, click Manage Users.

    In the left menu under "Company Setup", click Manage Users.

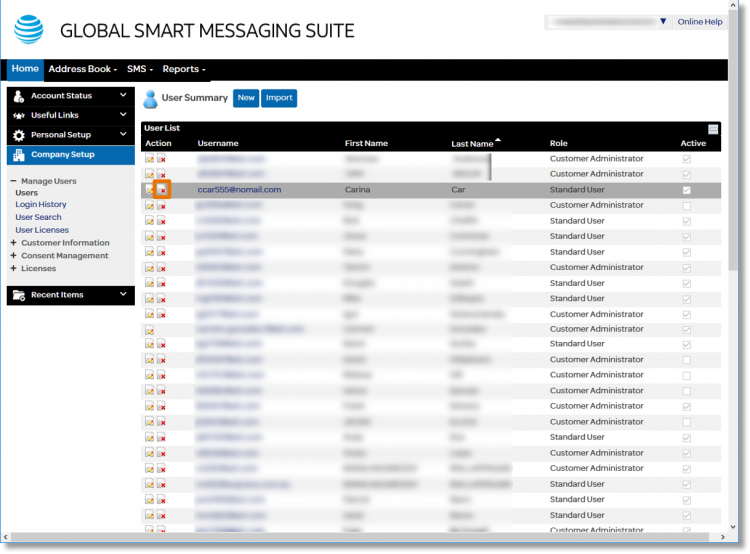
  2. Find the user’s name or email in the displayed list.

    Find the user's name or email in the displayed list.

  3. Click the Delete icon Delete icon in the “Action” list to the left of the “Username”.
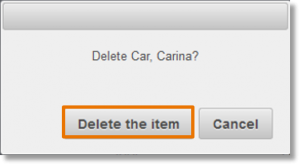
  4. A message box populates to confirm the user that is to be deleted.
  5. Click Delete the item.

    Click Delete the item.

  6. A message box populates to confirm that the user has successfully been deleted.

    A message box populates to confirm that the user has successfully been deleted.