Integration – Using Office 365 with Google Chrome | AT&T Office@Hand
Article #11153
How to use AT&T Office@Hand with Office 365 using Google Chrome
AT&T Office@Hand for Office 365 seamlessly integrates business communications into your cloud work environment, transforming Microsoft Office 365 into an enterprise-grade communications hub with a powerful and easy-to-use interface that makes it easy for end-users to deploy and for IT to manage.
AT&T Office@Hand for Office 365 integration is available for Mail, Calendar, Contacts and Tasks.
Default View Interface
Placing a Call
Sending a Text Message
Checking your Office@Hand messages
Browsing your Contacts list
Checking the Call Log
Default View Interface
AT&T Office@Hand for Office 365 displays the dialer menu by default after you have logged in. You will see the following buttons on top of the screen:
- Use the Collapse button to minimize AT&T Office@Hand for Office 365 to have more reading area.

- Click the Expand button to restore the app back to its position.

- The Logout button logs you out of AT&T Office@Hand for Office 365.

Note: Clicking this button does not sign you out of Office 365.
Navigation Bar Buttons
The navigation bar is located on the left side of the AT&T Office@Hand for Office 365 pane.
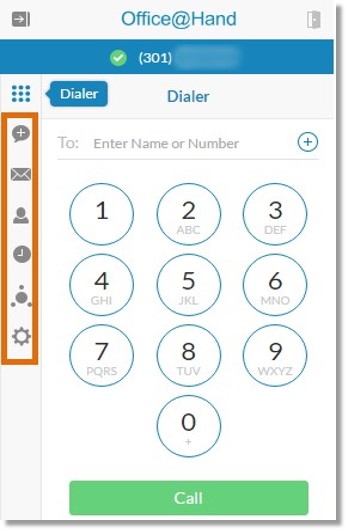
It is composed of the following buttons:
 Dialer
 Compose text
 Messages
 Contacts
 Call Log
 Schedule Conference
 Settings
[Back to Top]
Placing a Call
Note: In case you do not have ready access to your AT&T Office@Hand desk phone or AT&T softphone, you can use a non AT&T device such as your cell phone or home phone.
Outbound calling is only available via WebRTC to an AT&T Office@Hand provisioned device (either desktop app or deskphone) available on your account. Custom numbers cannot be used.
- Click the Dialer icon.
- Click the drop-down arrow to choose a device for making an outbound call.

- Click the number you want to use for making a call.
- Dial the number you would like to call using any of the following methods below:
Using the Dial pad
Typing the number in the To: text box
Clicking the Contacts button
Using Click to Dial
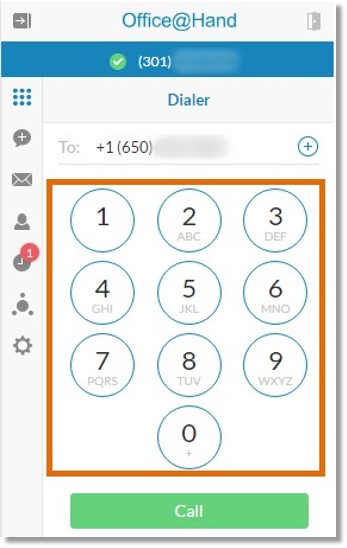
- Using the Dial pad
Enter the number by clicking the numbers on the dial pad.
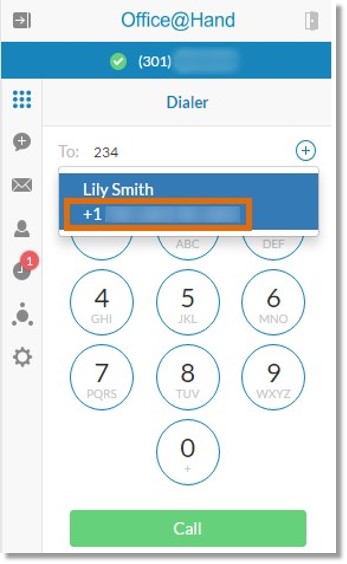
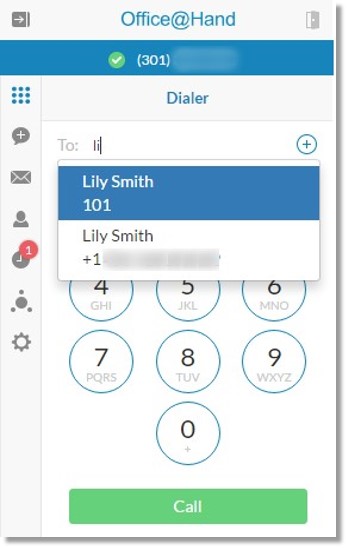
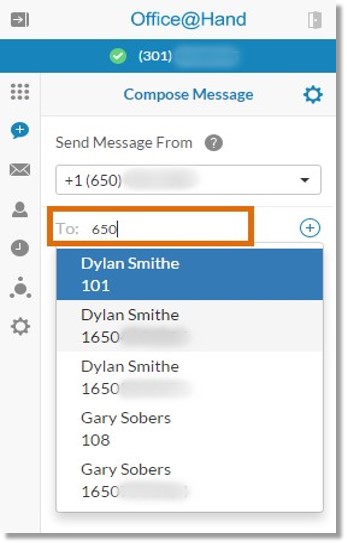
- Typing the number in the To: text box
Type the number or name of the contact you want to call in the To: text box.

Notice that as your start typing, AT&T Office@Hand for Office 365 will search across your AT&T Office@Hand Corporate Directory, Personal Contacts, and your Office 365 Contacts to try to find a match.
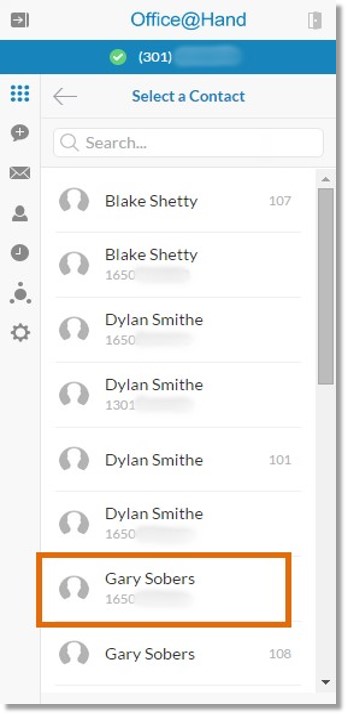
- Clicking the Contacts button.
Clicking the Contacts  button opens up your Contacts list. Click the name of the person you want to call.
- Using Click to Dial
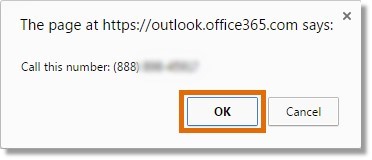
All phone numbers in your email become clickable links which can be dialed and called right from your Office 365 window. Click the number you want to call, then click Ok on the confirmation window.
- Enable Press 1 to start a call if you want to be prompted to press 1 first before ringing the phone you dialed. This step is optional.
- Click the Call button to make a call.
Note: If you choose to call a number using Click to Dial, this button will be unavailable.
[Back to Top]
Sending a Text Message
- Click the Compose text icon.
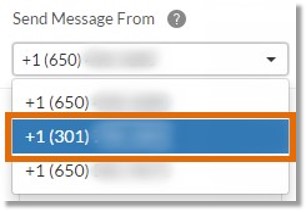
- Click the drop-down arrow to choose a number to send a message from.
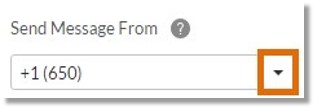
- Click the number you want to use for sending a message.
- Enter the number you would like to send a message to by using any of the following procedures below:
- Typing in the To: text box
Type the number or name of your message’s recipient in the To: text box.
- Clicking the Contacts button
Clicking the Contacts button opens up your Contacts list. Click the name of the person you want to message.
- Type your message in the Type text box.
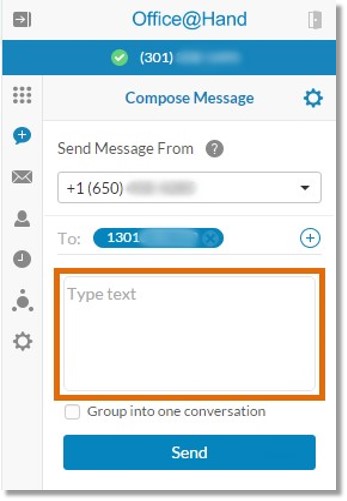
Put a check on Group into one conversation to group extension numbers into one conversation.
Click Send to send message.
[Back to Top]
Checking your Office@Hand messages
You can view all your Voice, Fax, and Text messages in the Messages screen. It displays all the messages you have received for the past week. Messages are organized in tabs, such as All, Voice, Fax, and Text.
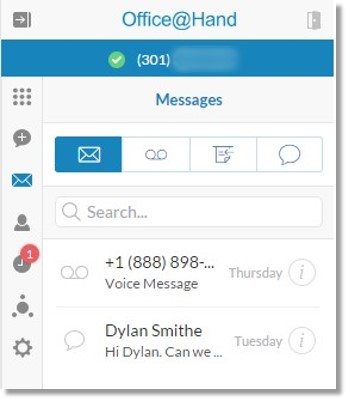
- Click the Messages icon.
- Click a specific tab to view your messages of that type. You may also type keywords in the search box to look for your messages.

- Click the message you want to view.
[Back to Top]
Browsing through your Contacts list
- Click the Contacts icon .
- The Contacts screen appears with the list of all your corporate and personal contacts.
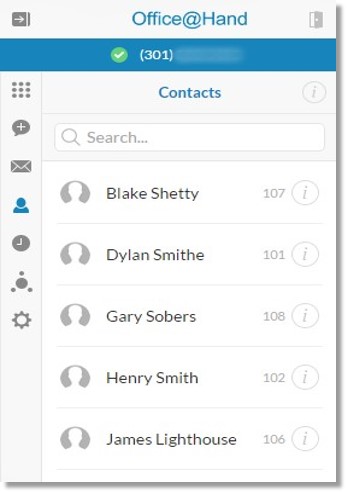
- Finding a contact can be easily done by typing keywords in the search box.
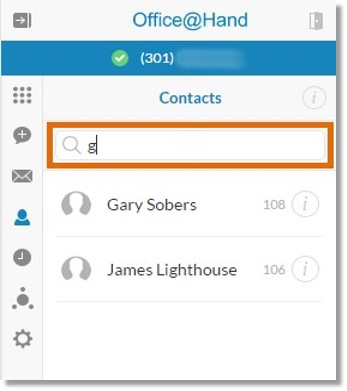
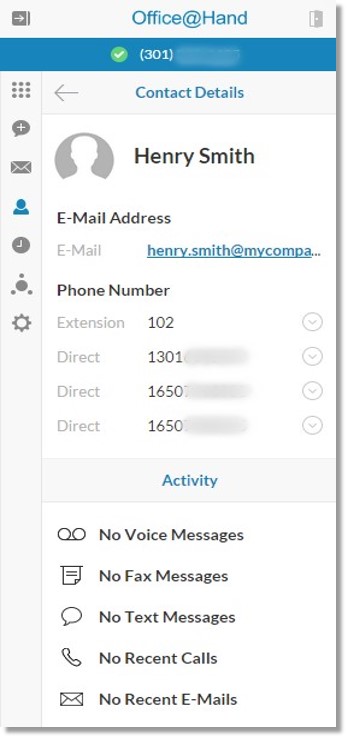
- View your contact’s details by clicking the Info
 icon.
icon.
[Back to Top]
Checking the Call Log
Your Call Log is organized into two views, namely: All and Missed. Clicking the All tab displays all the calls. The Missed tab displays only the calls you have missed.
- Click the Call Log icon.
- The Call Log screen appears with the list of all your corporate and personal contacts.
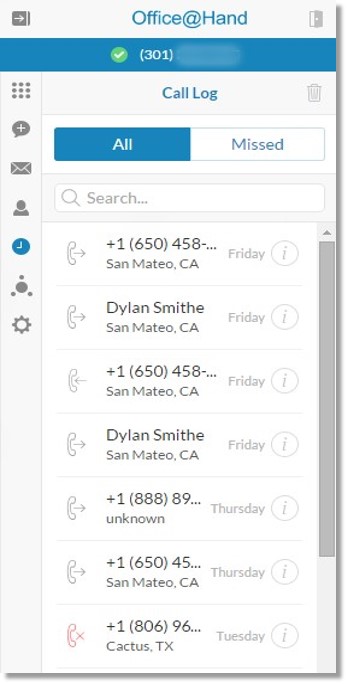
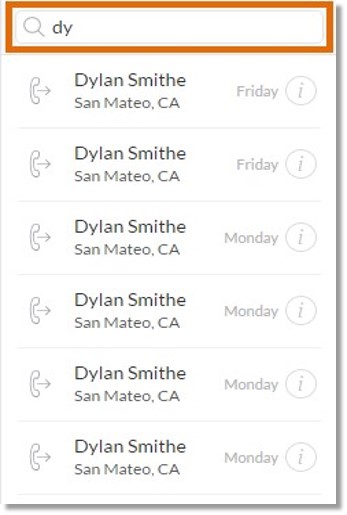
- Click a specific tab to view your messages of that type. You may also type the phone number or name of your contact in the search box to filter the contacts view.
- The Call Log screen appears with the list of all your corporate and personal contacts.
[Back to Top]
Key Words: 11153, 8362, Office@Hand, Office 365, installation, Chrome, extension, web store, logging in, authorize, outbound call, send message, check message, voice, fax, text, settings, dial from extension, desktop notifications, click to dial, logging out
Was this page helpful? Yes No