TOP

AT&T Fleet Management for Enterprise/Government

AT&T Fleet Management for Enterprise (AFMFE) delivers real results with GPS tracking information to enable fleets to be more efficient, profitable and customer focused. Vehicle tracking, optional vehicle engine and performance data, and extensive reporting assist in optimizing business operations.

Back to Product Page
Use the dropdown to get support, or purchase this product

Configure the Company Profile

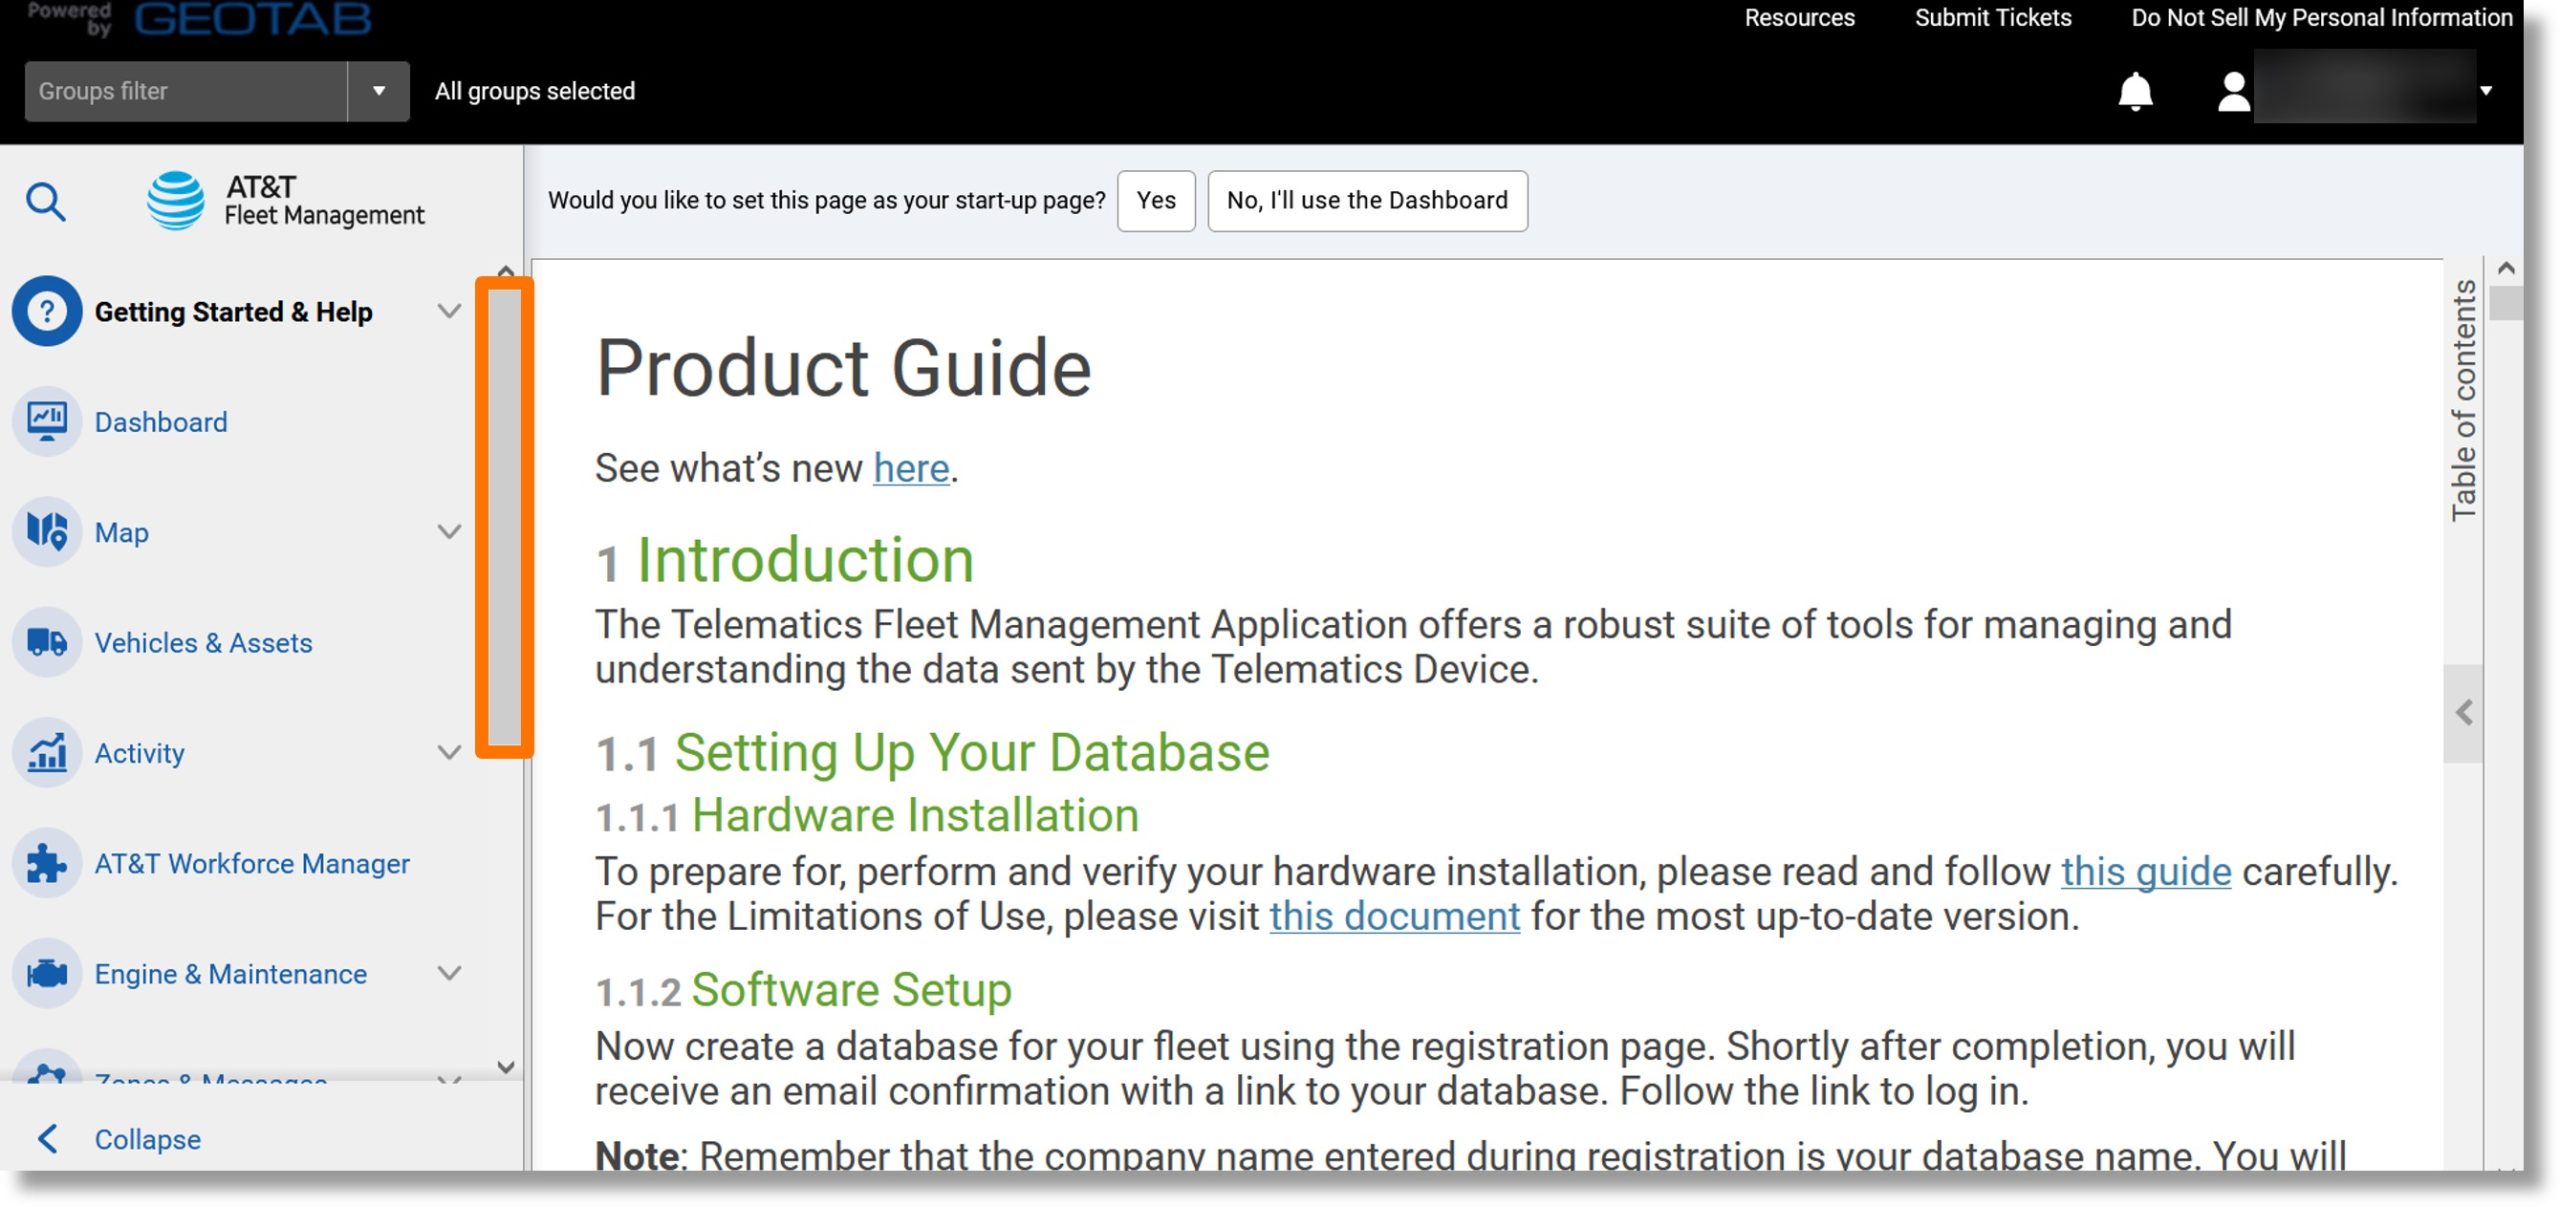
  1. Scroll to Administration in the menu on the left.

    Image of step 1.

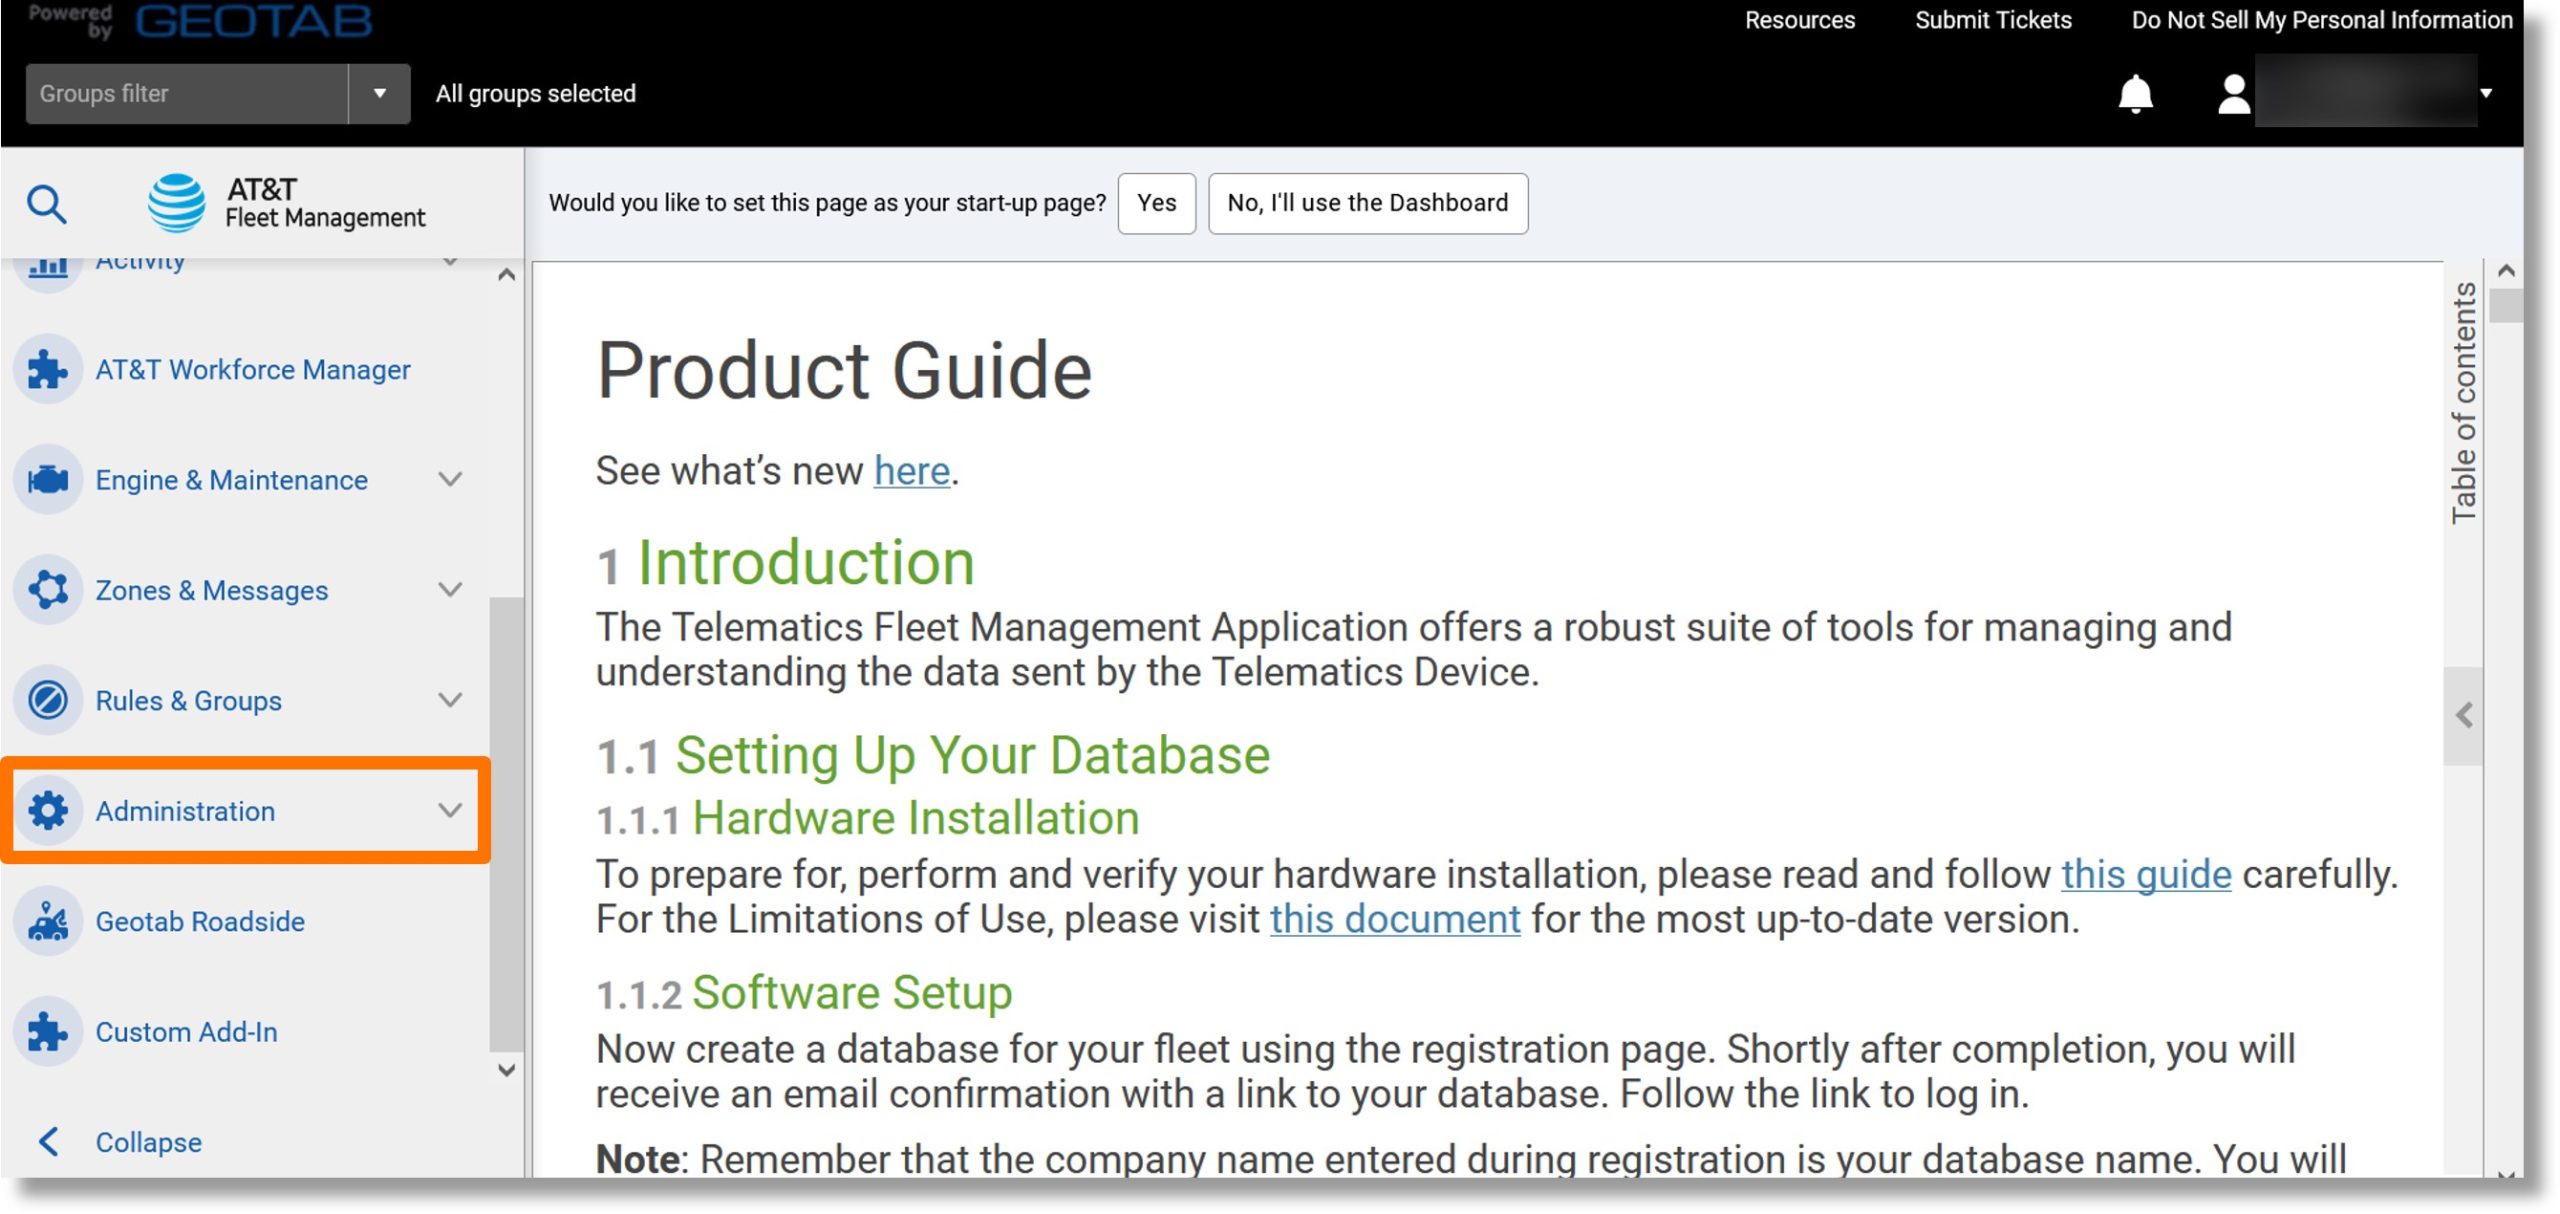
  2. Click on Administration.

    Image of step 2.

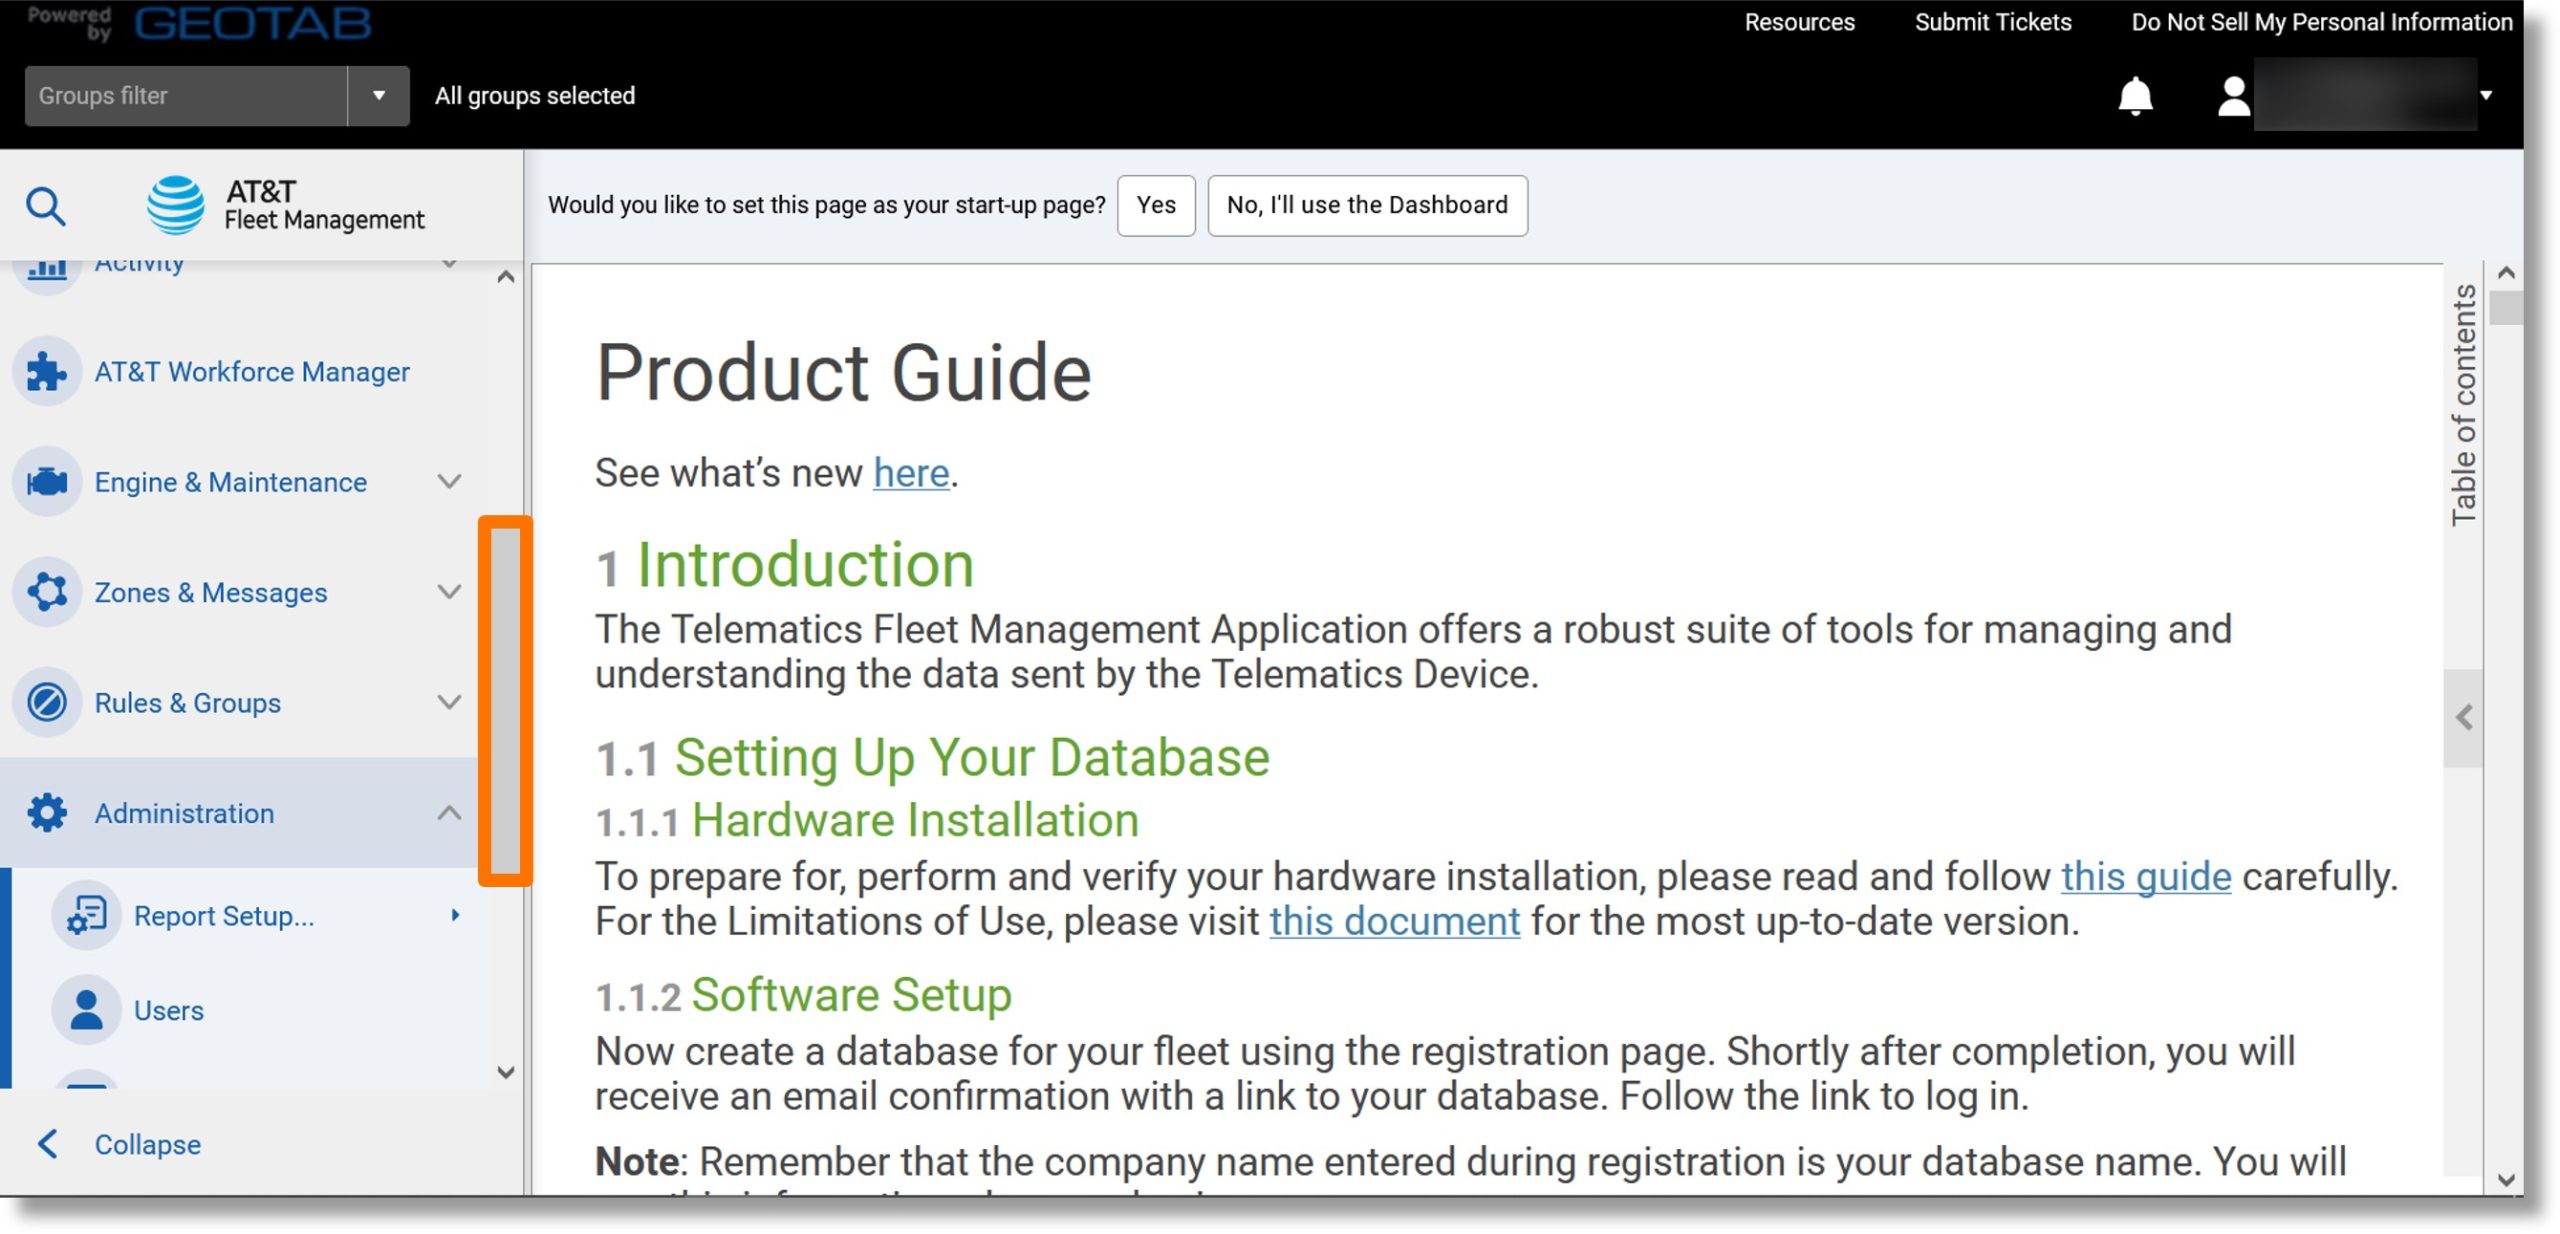
  3. Scroll down to System….

    Image of step 3.

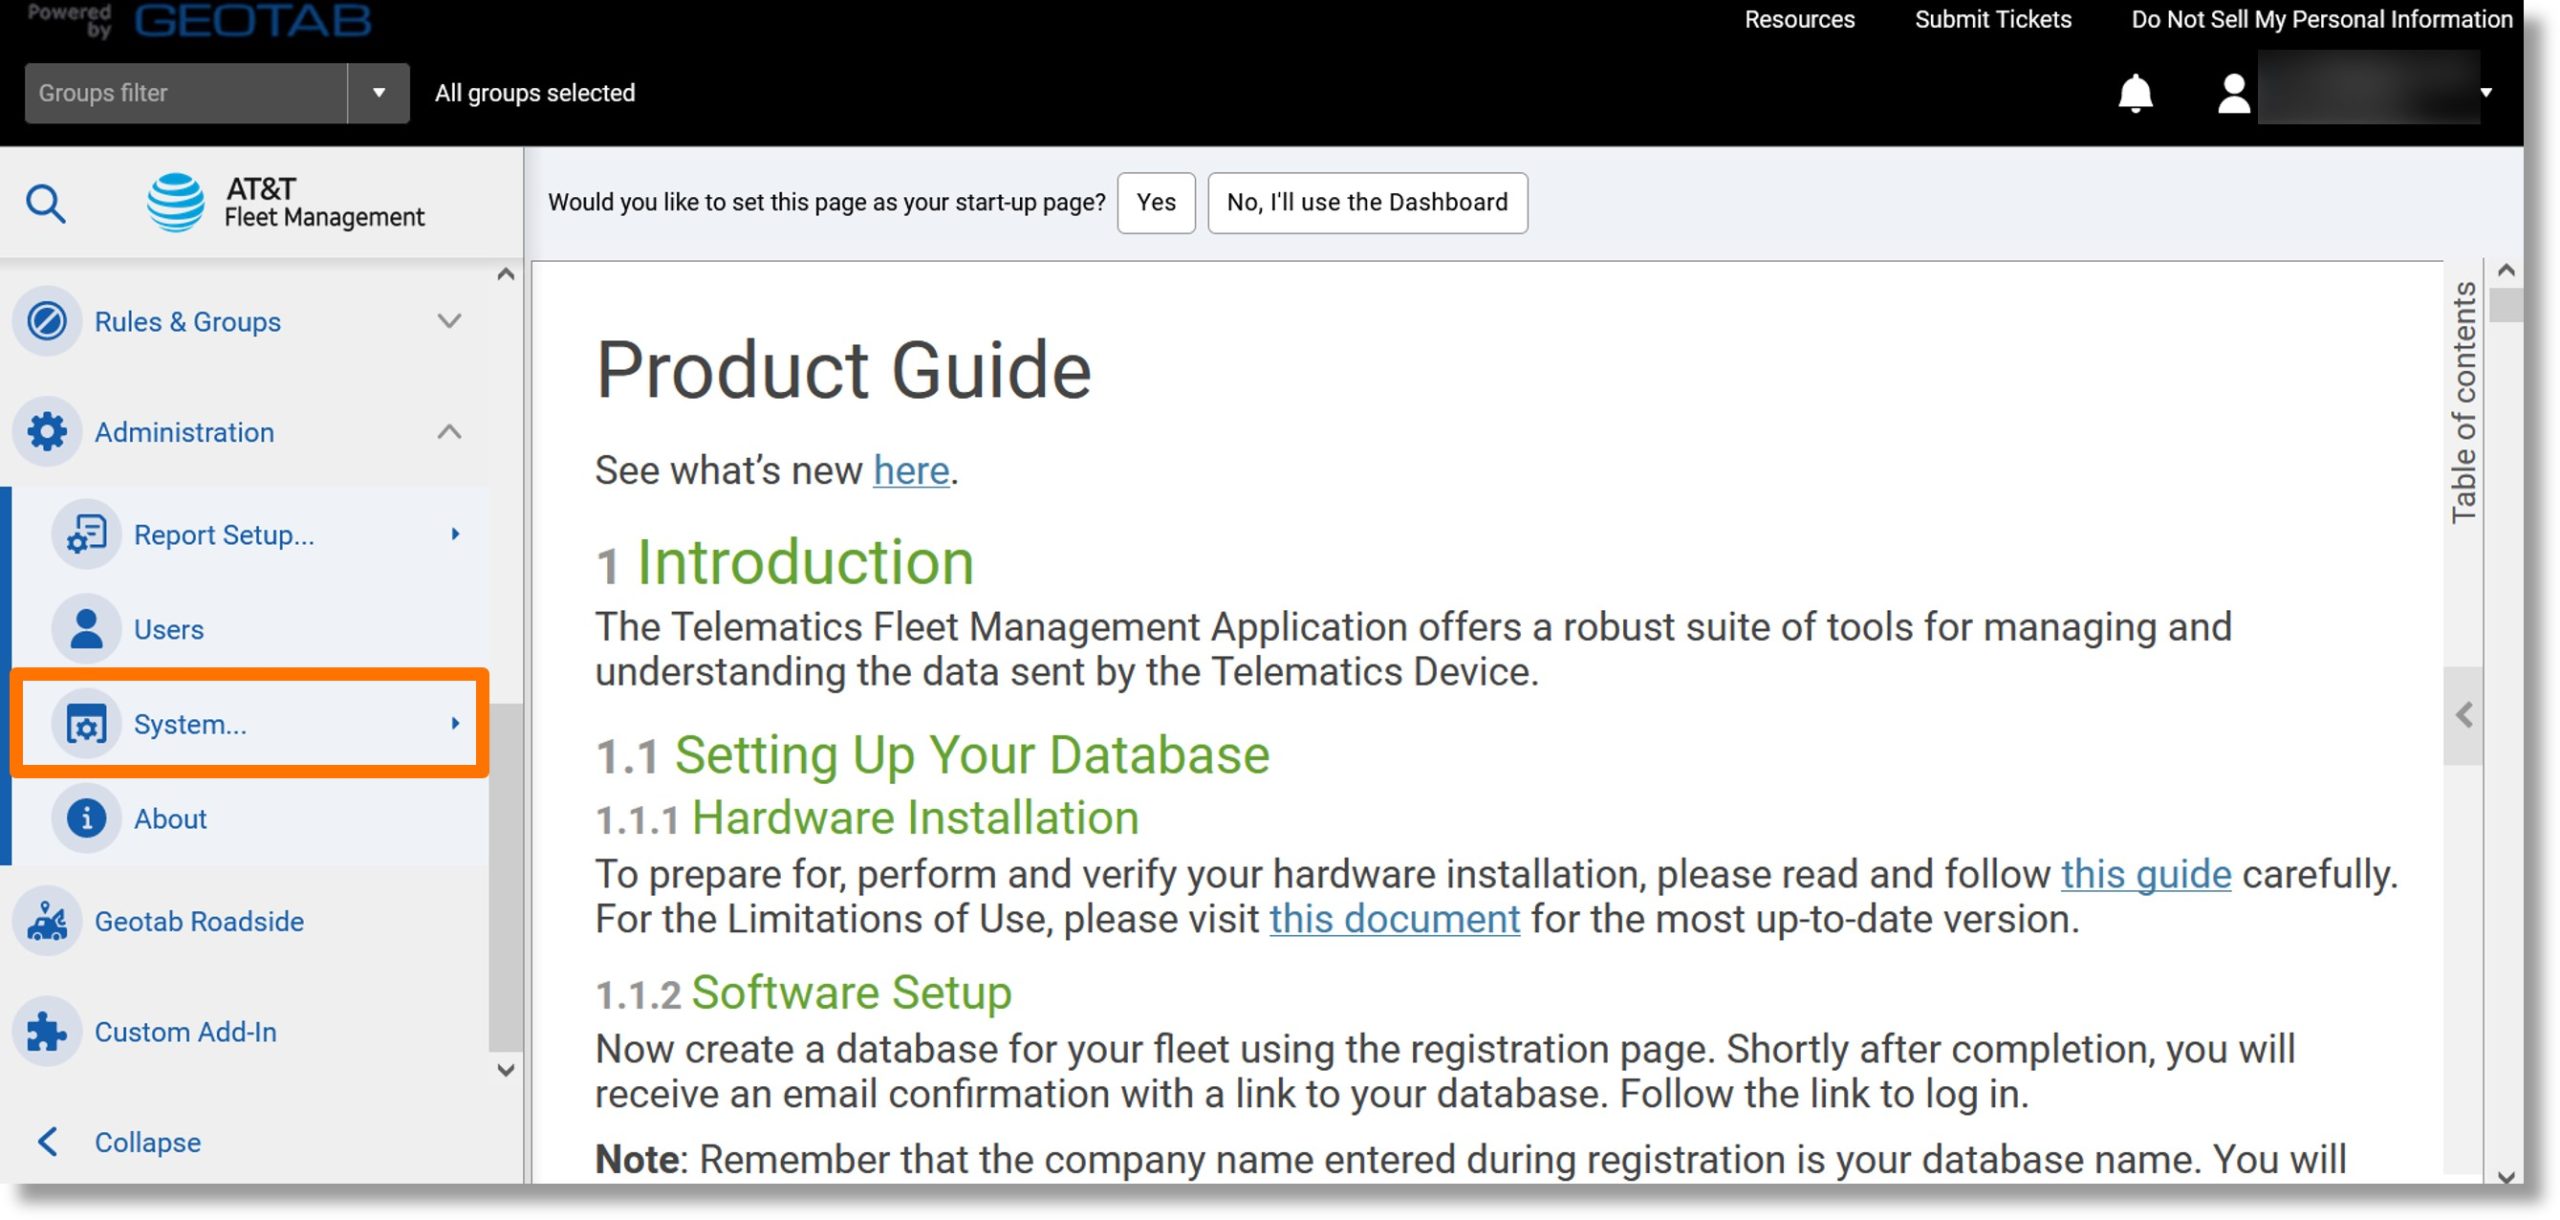
  4. Click on System….

    Image of step 4.

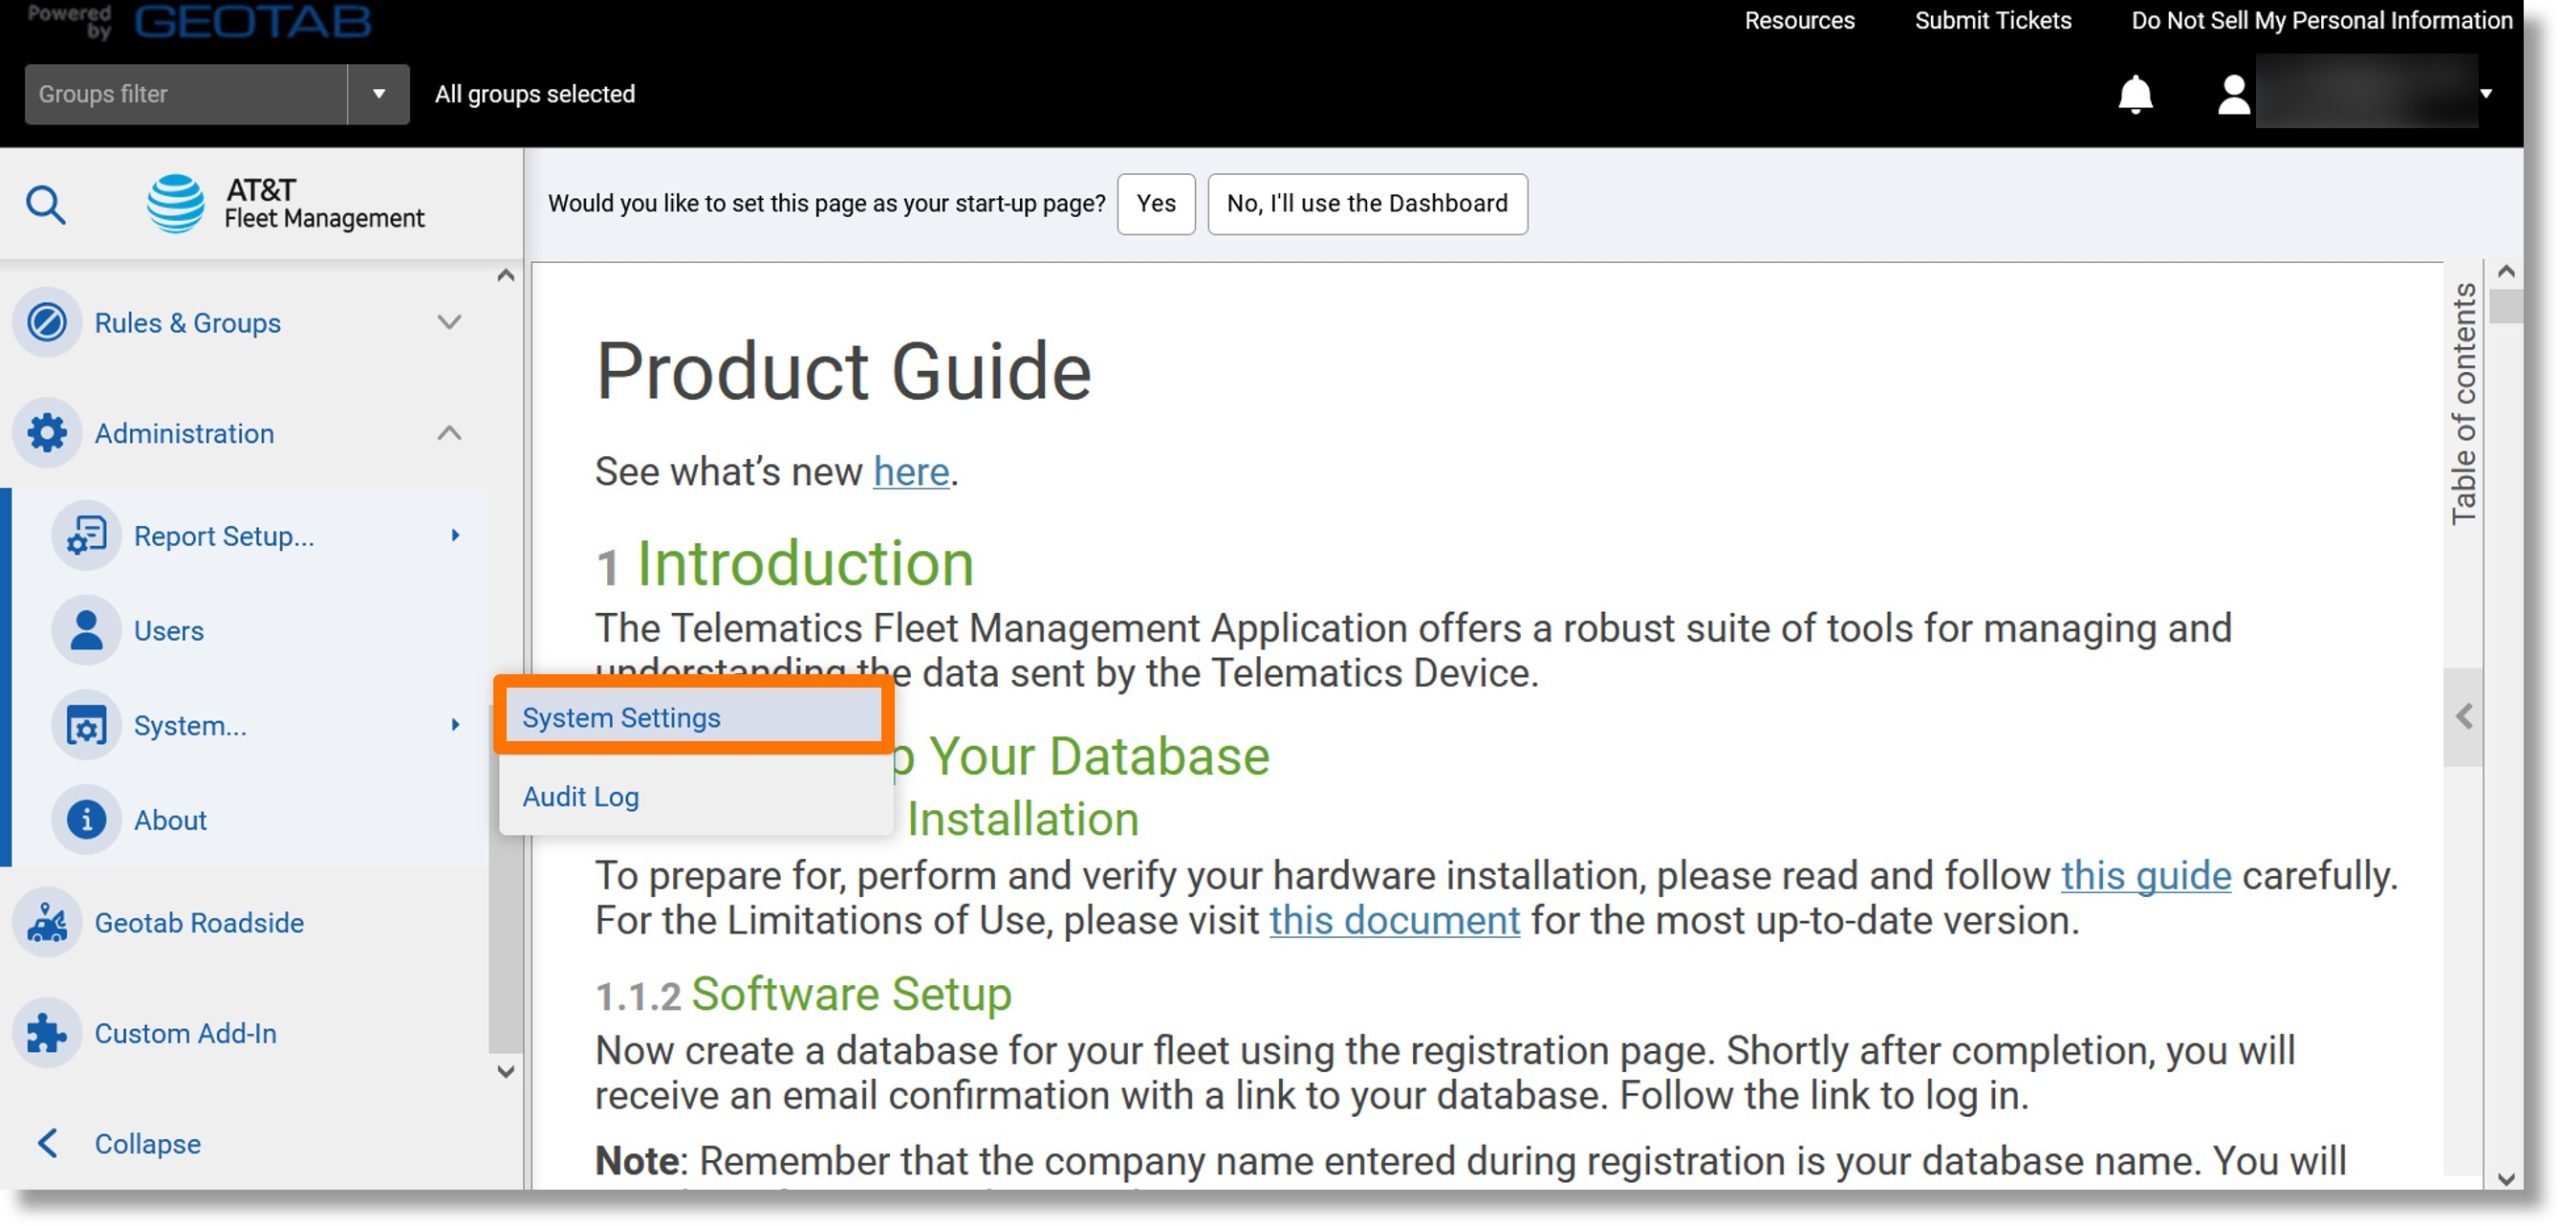
  5. Click on System Settings.

    Image of step 5.

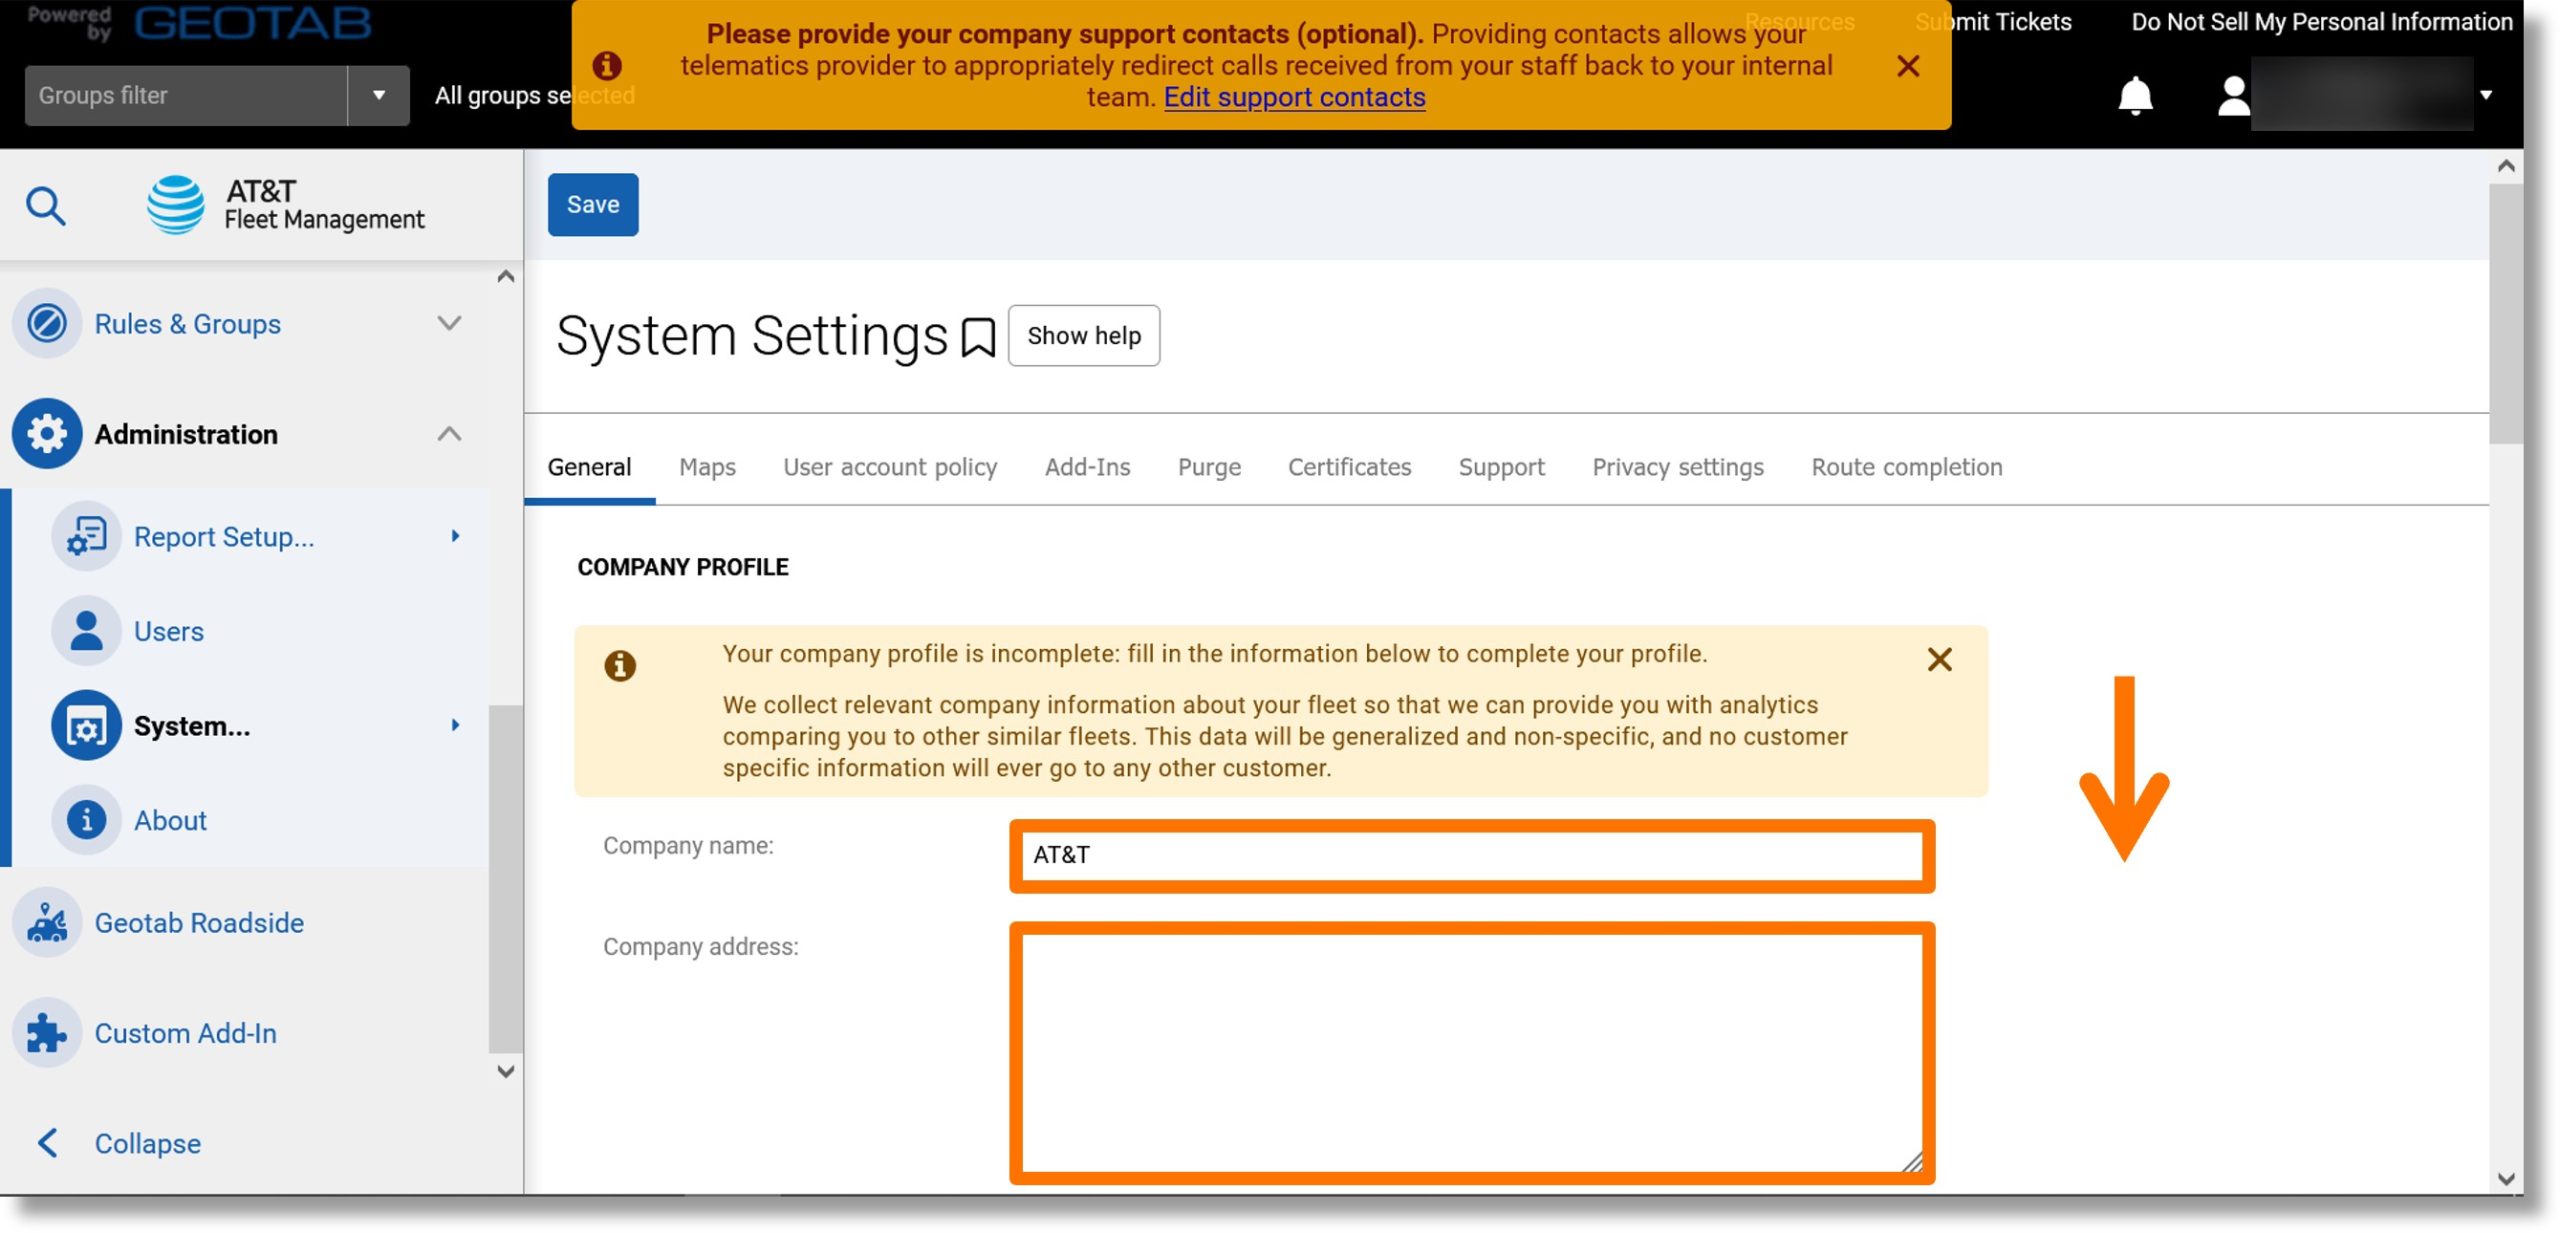
  6. Click on the General tab.
    Note: In this case, the General tab was already selected.
  7. Click on the field to the right of “Company name:” and enter your desired company name.
  8. Click on the field to the right of “Company address:” and enter your company’s address.
  9. Scroll down.

    Image of steps 6 through 9.

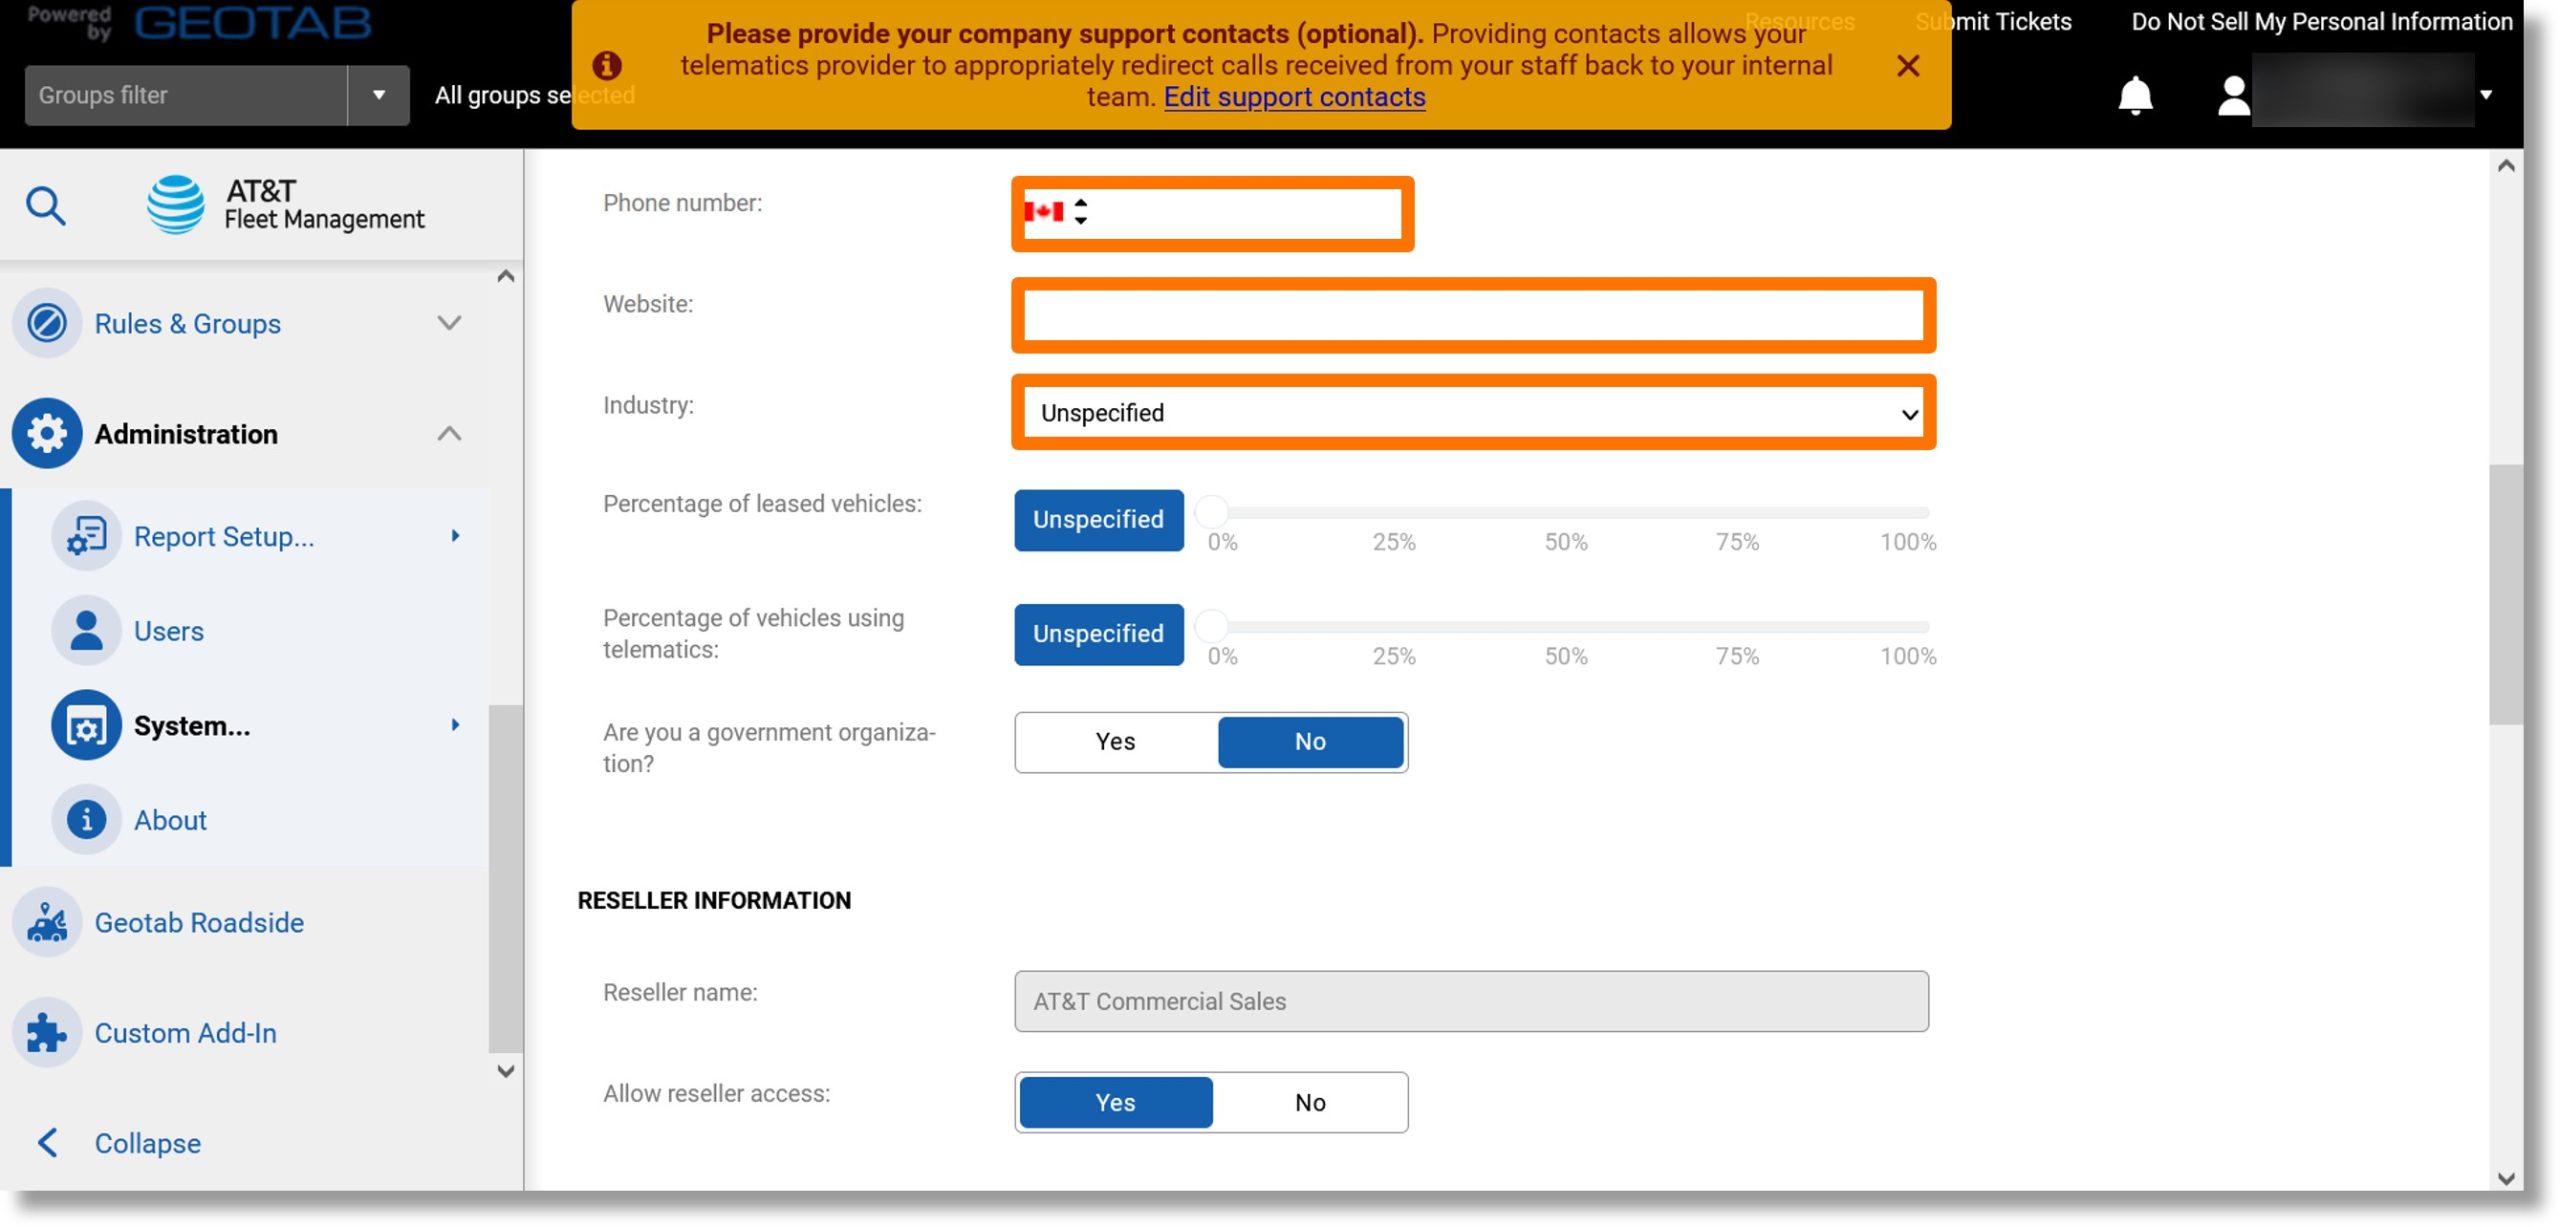
  10. Click in the field to the right of “Phone number:”. Select the desired country and enter your company’s phone number.
  11. Click on the field to the right of “Website” and enter your company’s website.
  12. Click on the dropdown to the right of “Industry:”.

    Image of steps 10 though 12.

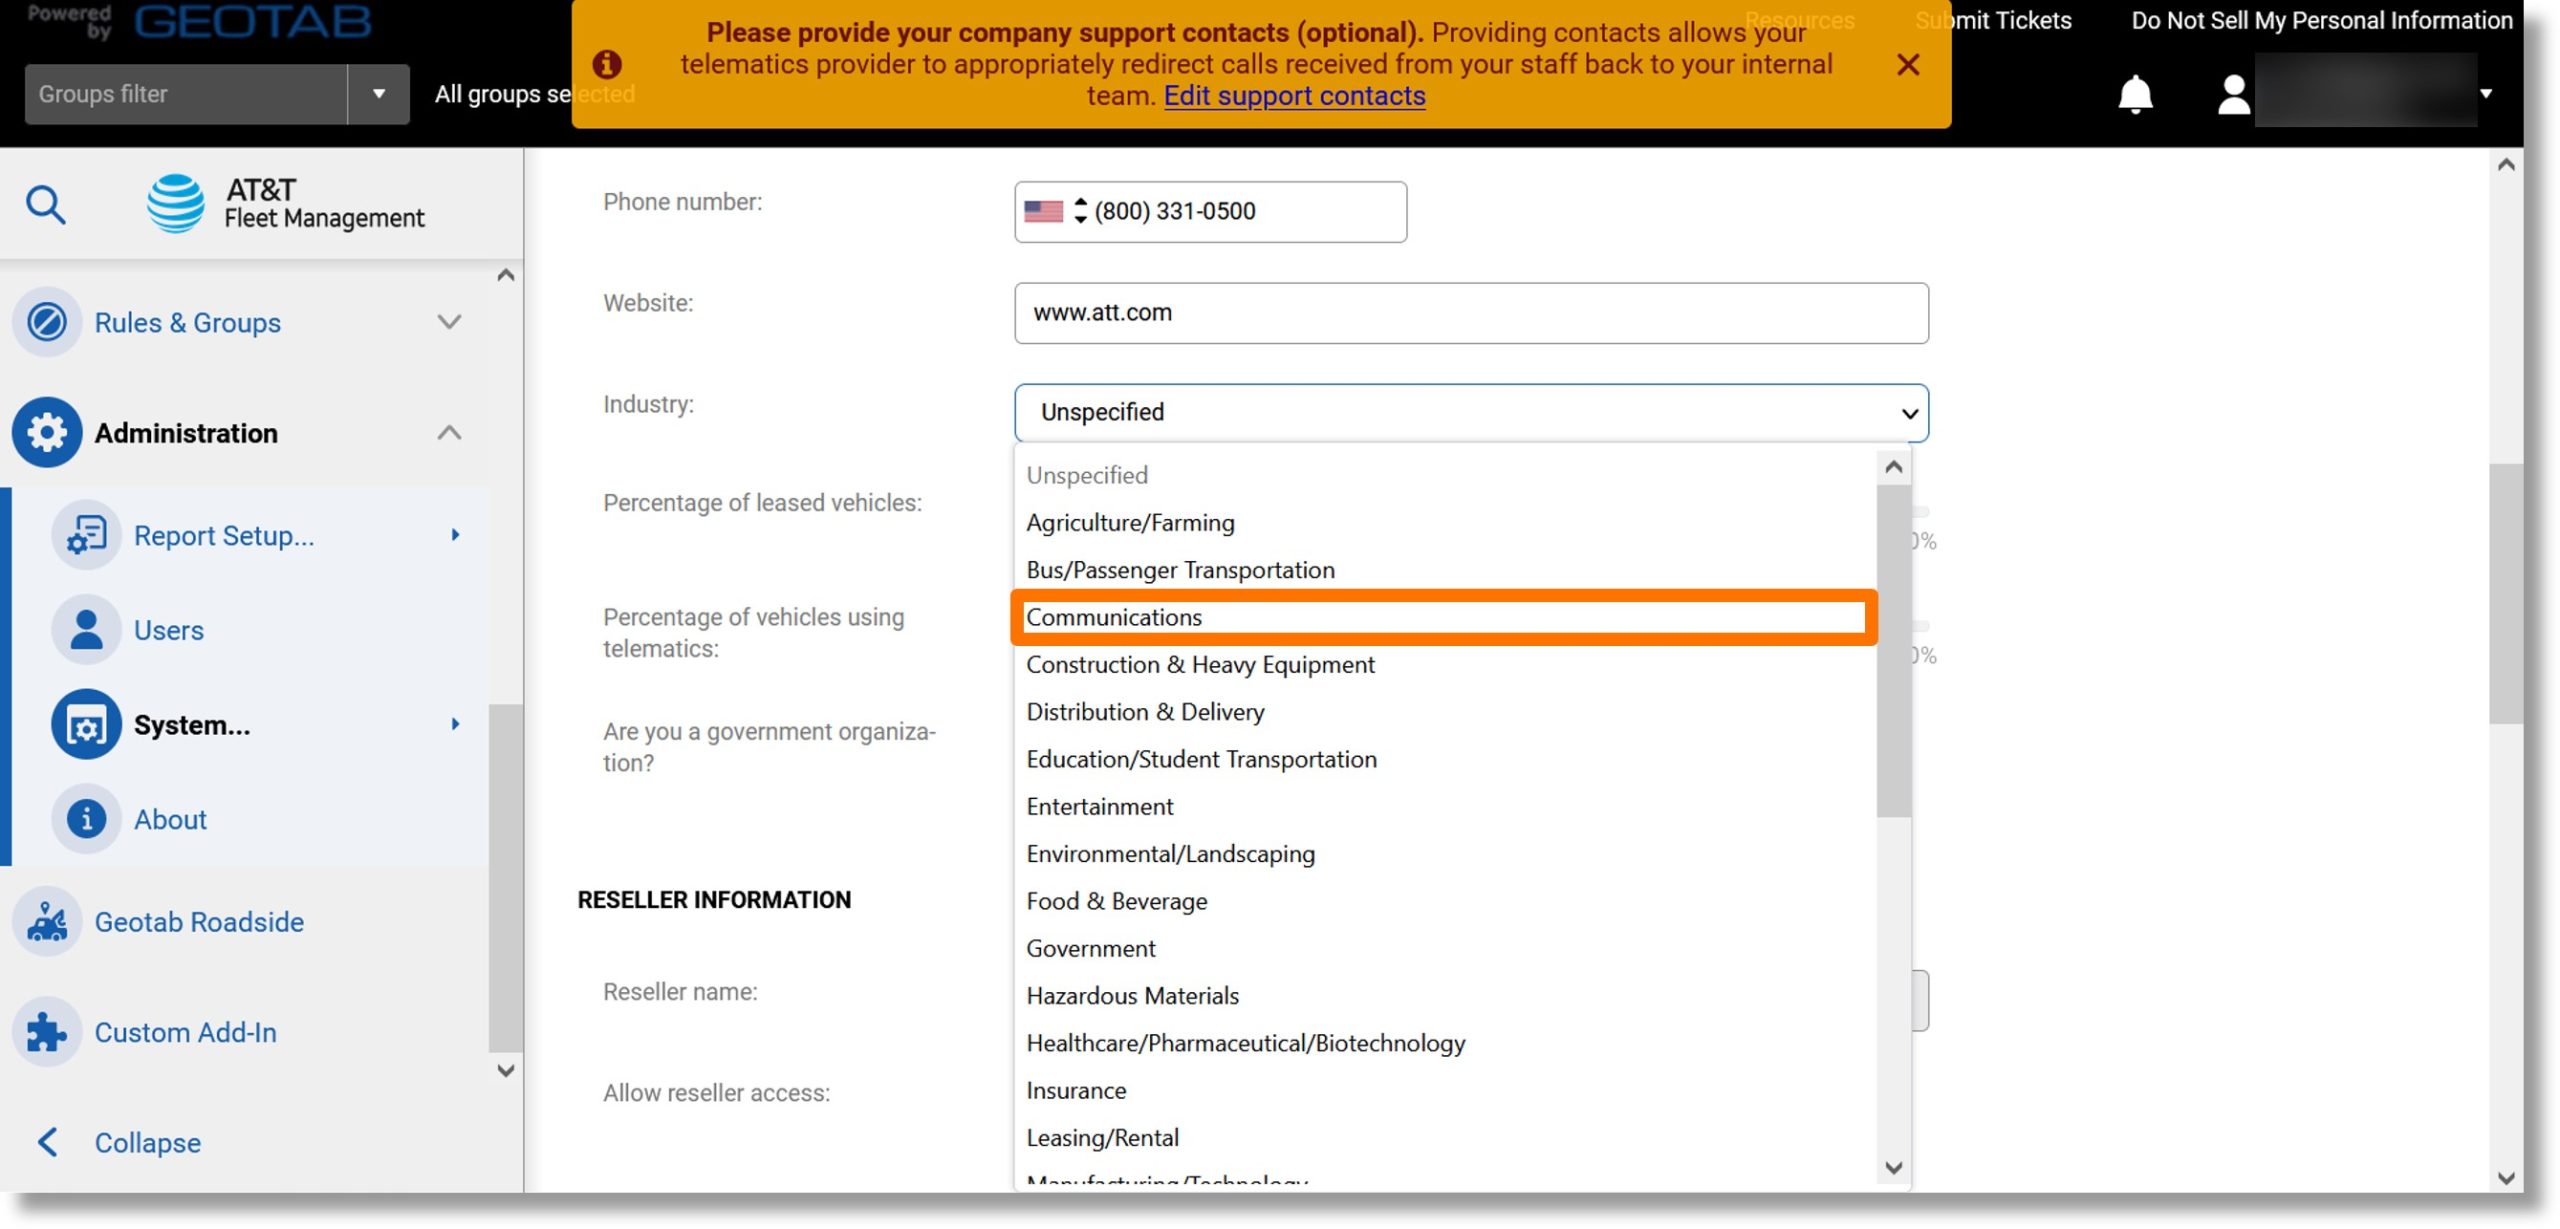
  13. Scroll to and click on the desired industry.

    Image of step 13.

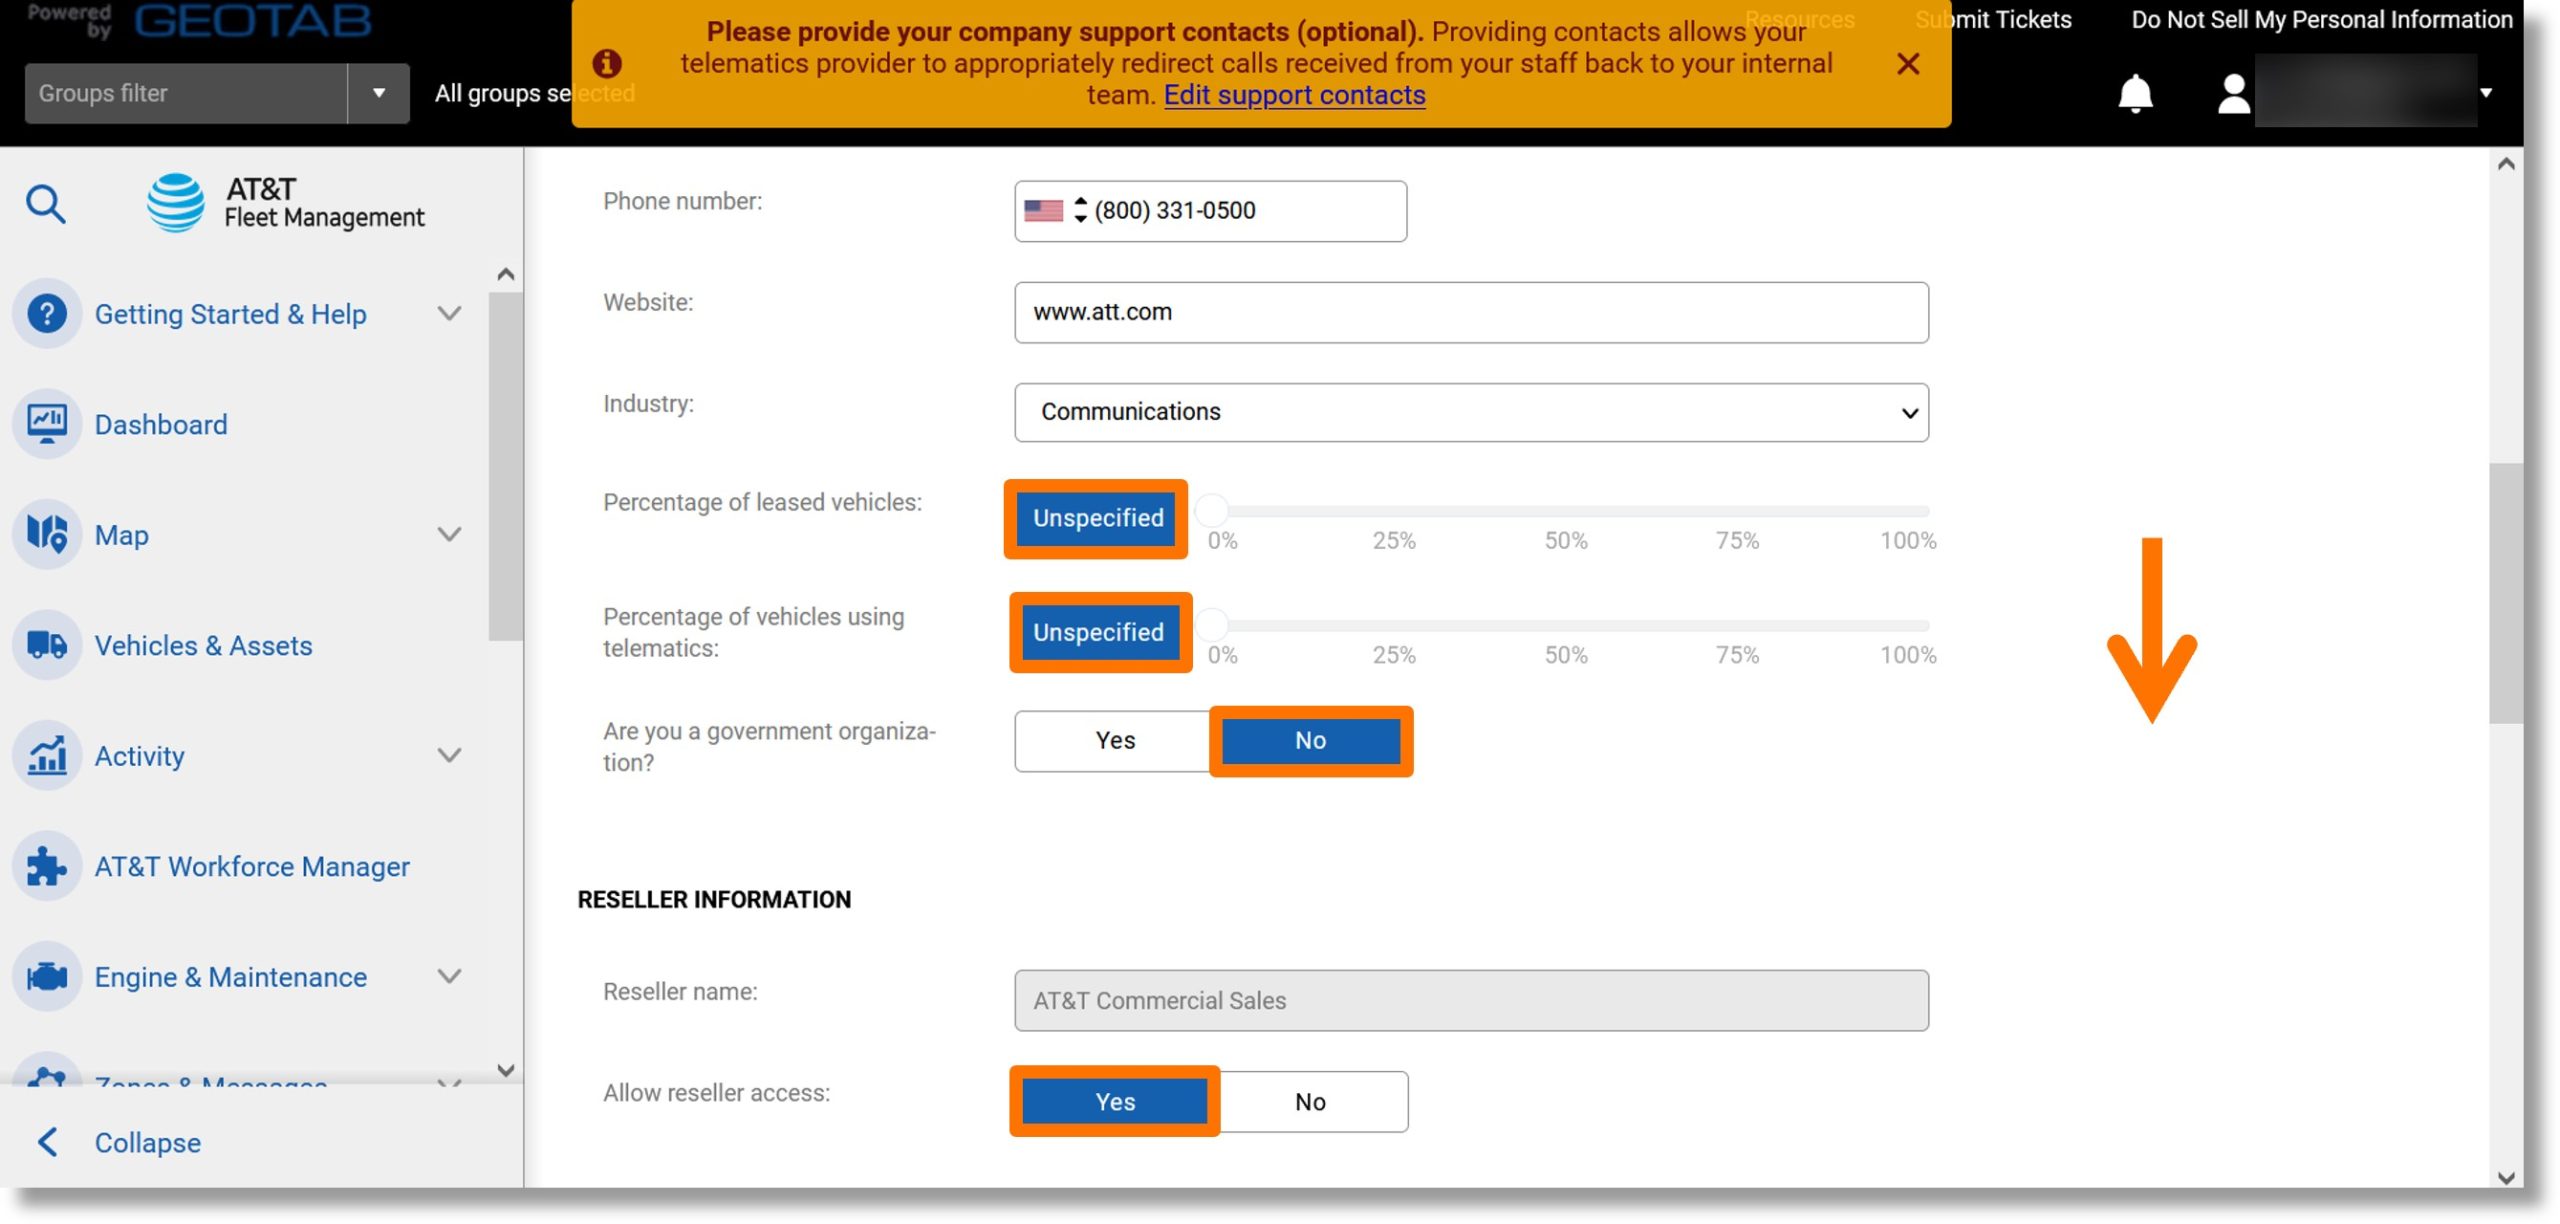
  14. Click on the Unspecified button to the left of “Percentage of leased vehicles:” and “Percentage of vehicles using telemetrics”.
  15. Use the slider to set the desired percentage for the settings.
  16. Click on the Yes or No button to the right of “Are you a government organization?”.
  17. The Reseller name field automatically populates.
  18. Click either the Yes or No button to the right of “Allow reseller access:”, to set the desired access for resellers.
  19. Scroll down.

    Image of steps 14 through 19.

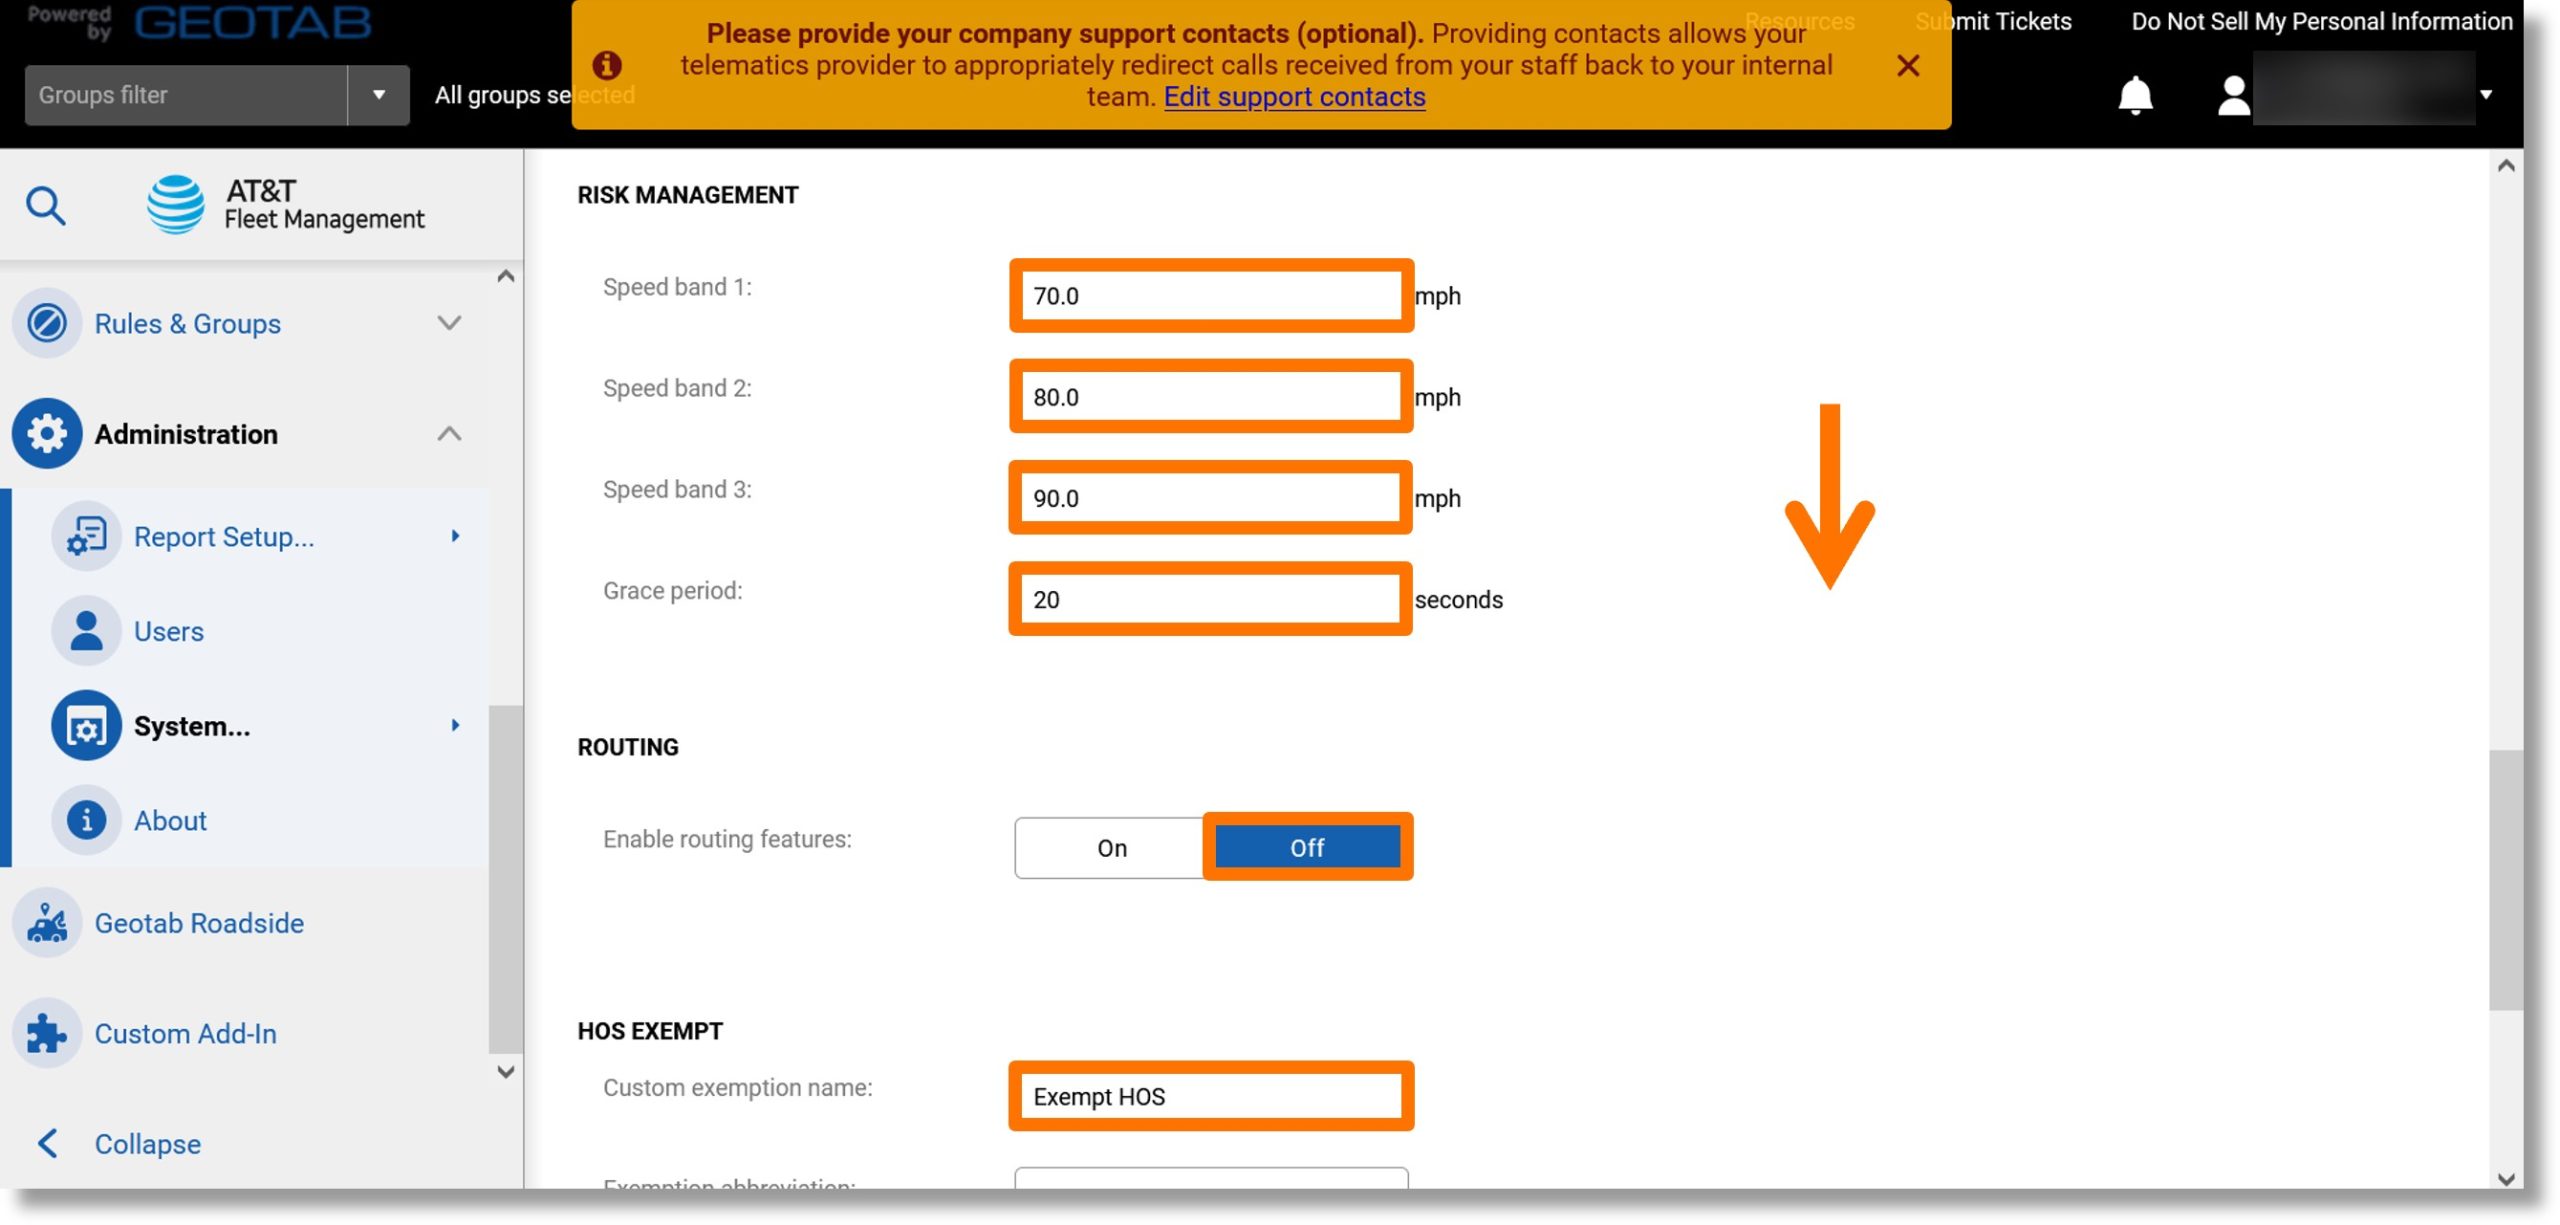
  20. Click on the fields to the right of “Speed band 1:”, “Speed band 2:”, and “Speed band 3:”, and enter the desired speeds.
  21. Click on the field to the right of “Grace period:”, and enter the desired amount of seconds.
  22. Click on the On or Off button to the right of “Enable routing features:”, to enable or disable the route features.
  23. Click on the field to the right of “Custom exemption name” to change the exemption name.
  24. Scroll down.

    Image of steps 20 through 24.

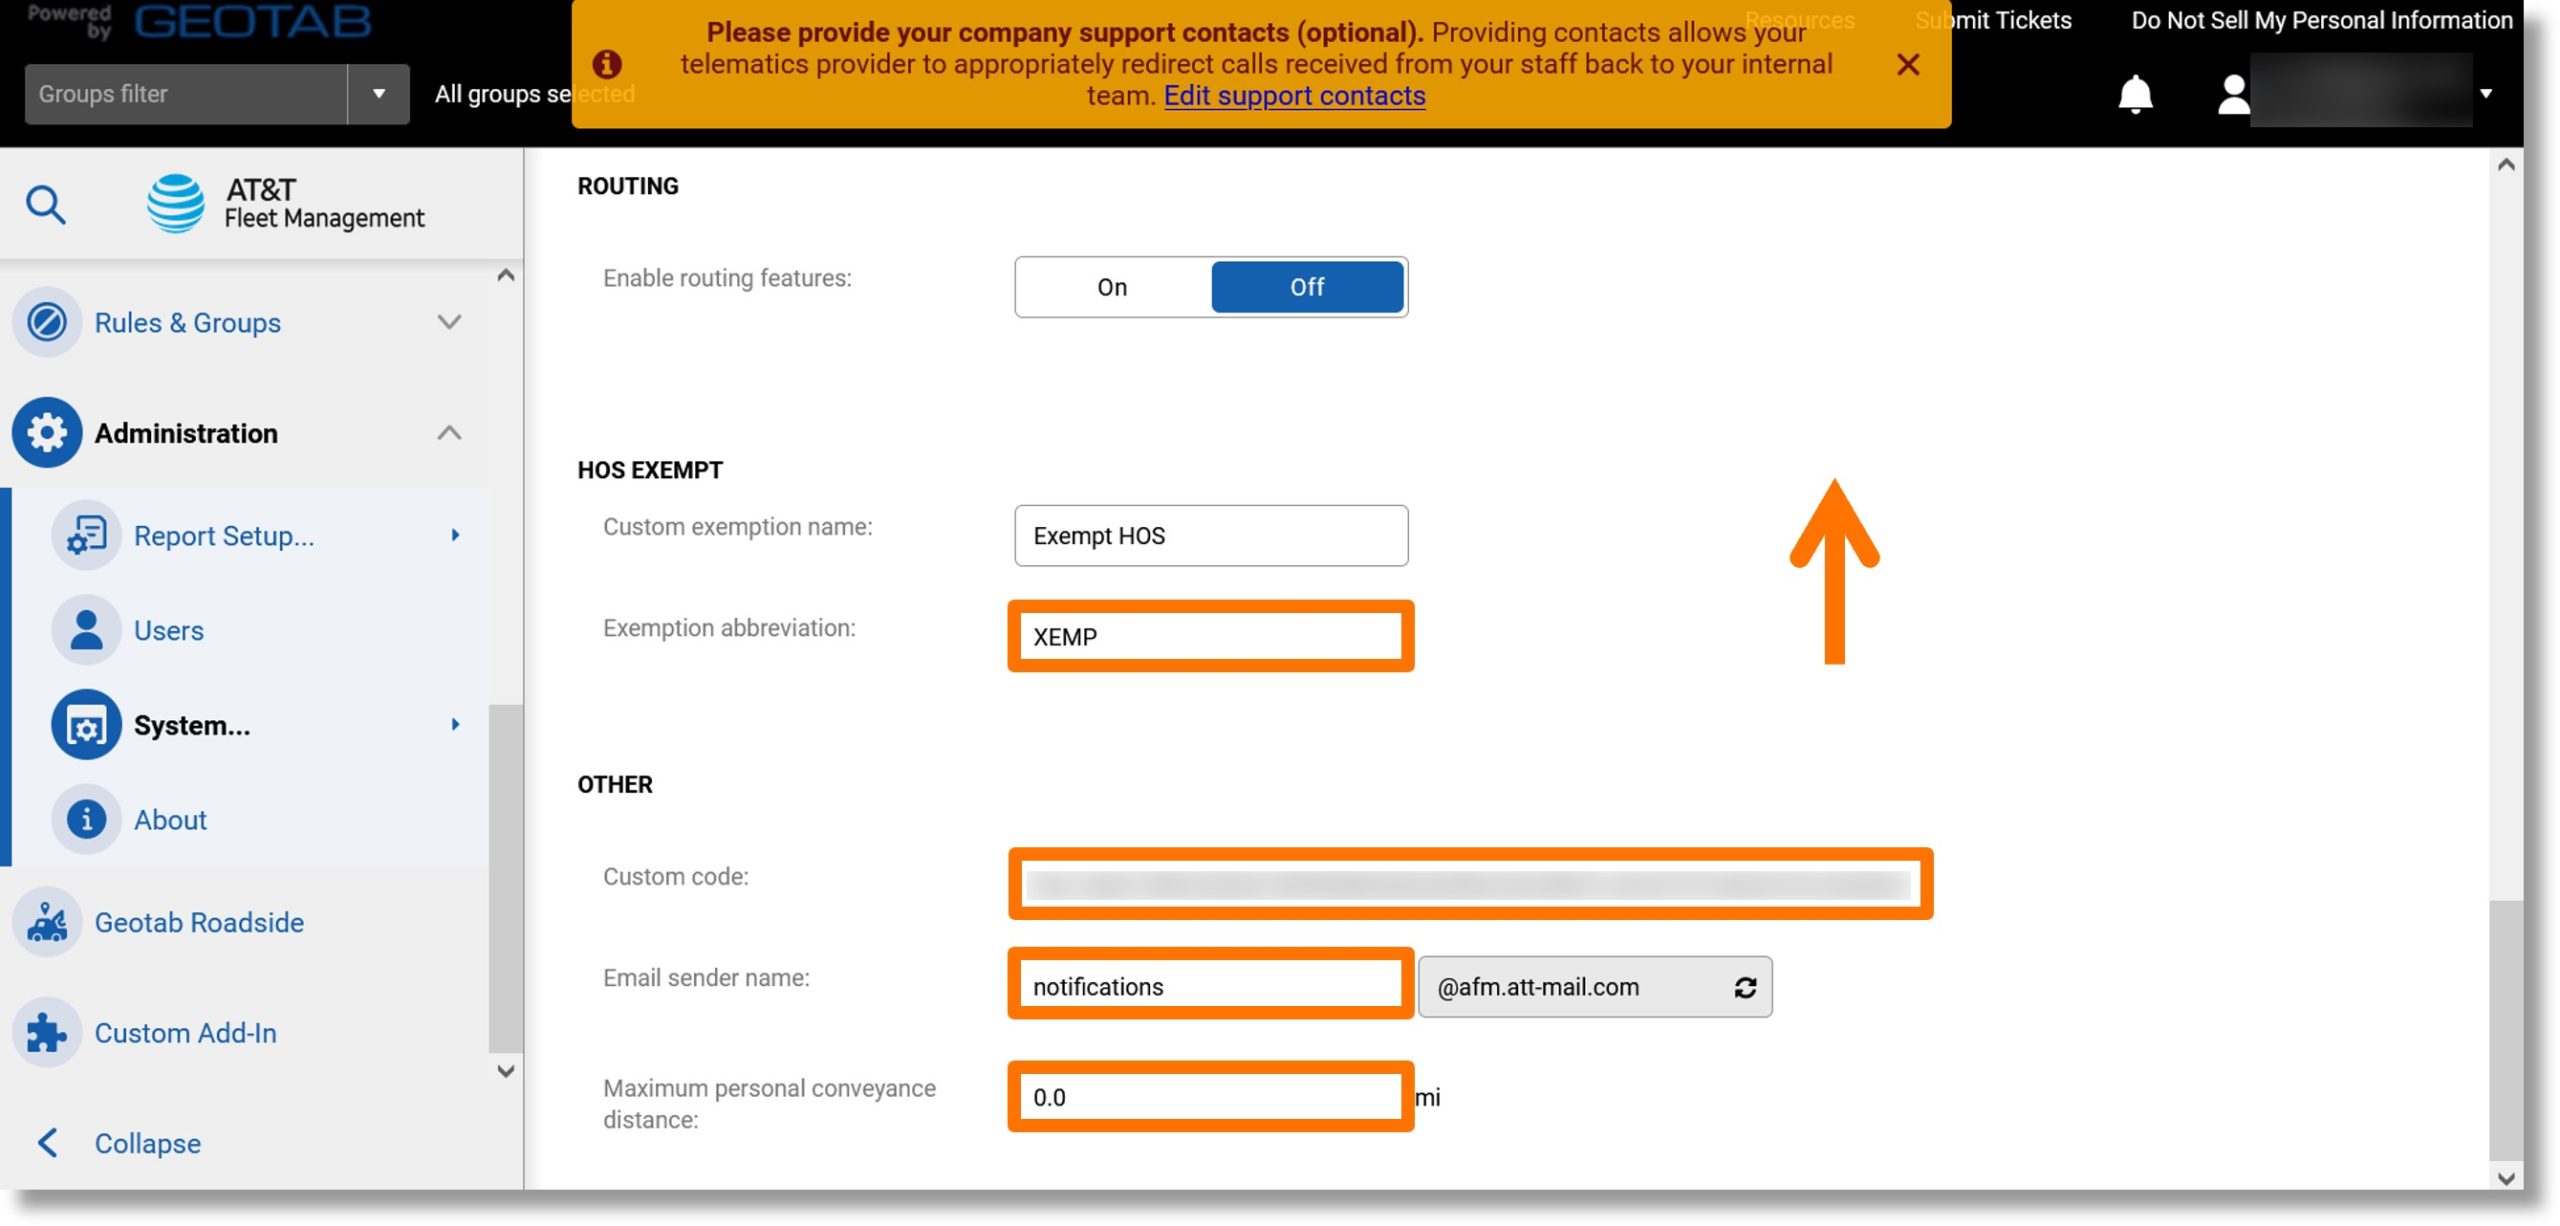
  25. Click on the field to the right of “Exemption abbreviation” to edit the exemption abbreviation.
  26. Click on the field to the right of “Custom code:” and enter your desired code.
  27. Click on the field to the right of “Email sender name:” and enter the desired sender name.
  28. Click on the field to the right of “Maximum personal conveyance distance:” and enter the desired distance.
  29. Scroll to the top of the page.

    Image of steps 25 through 29.

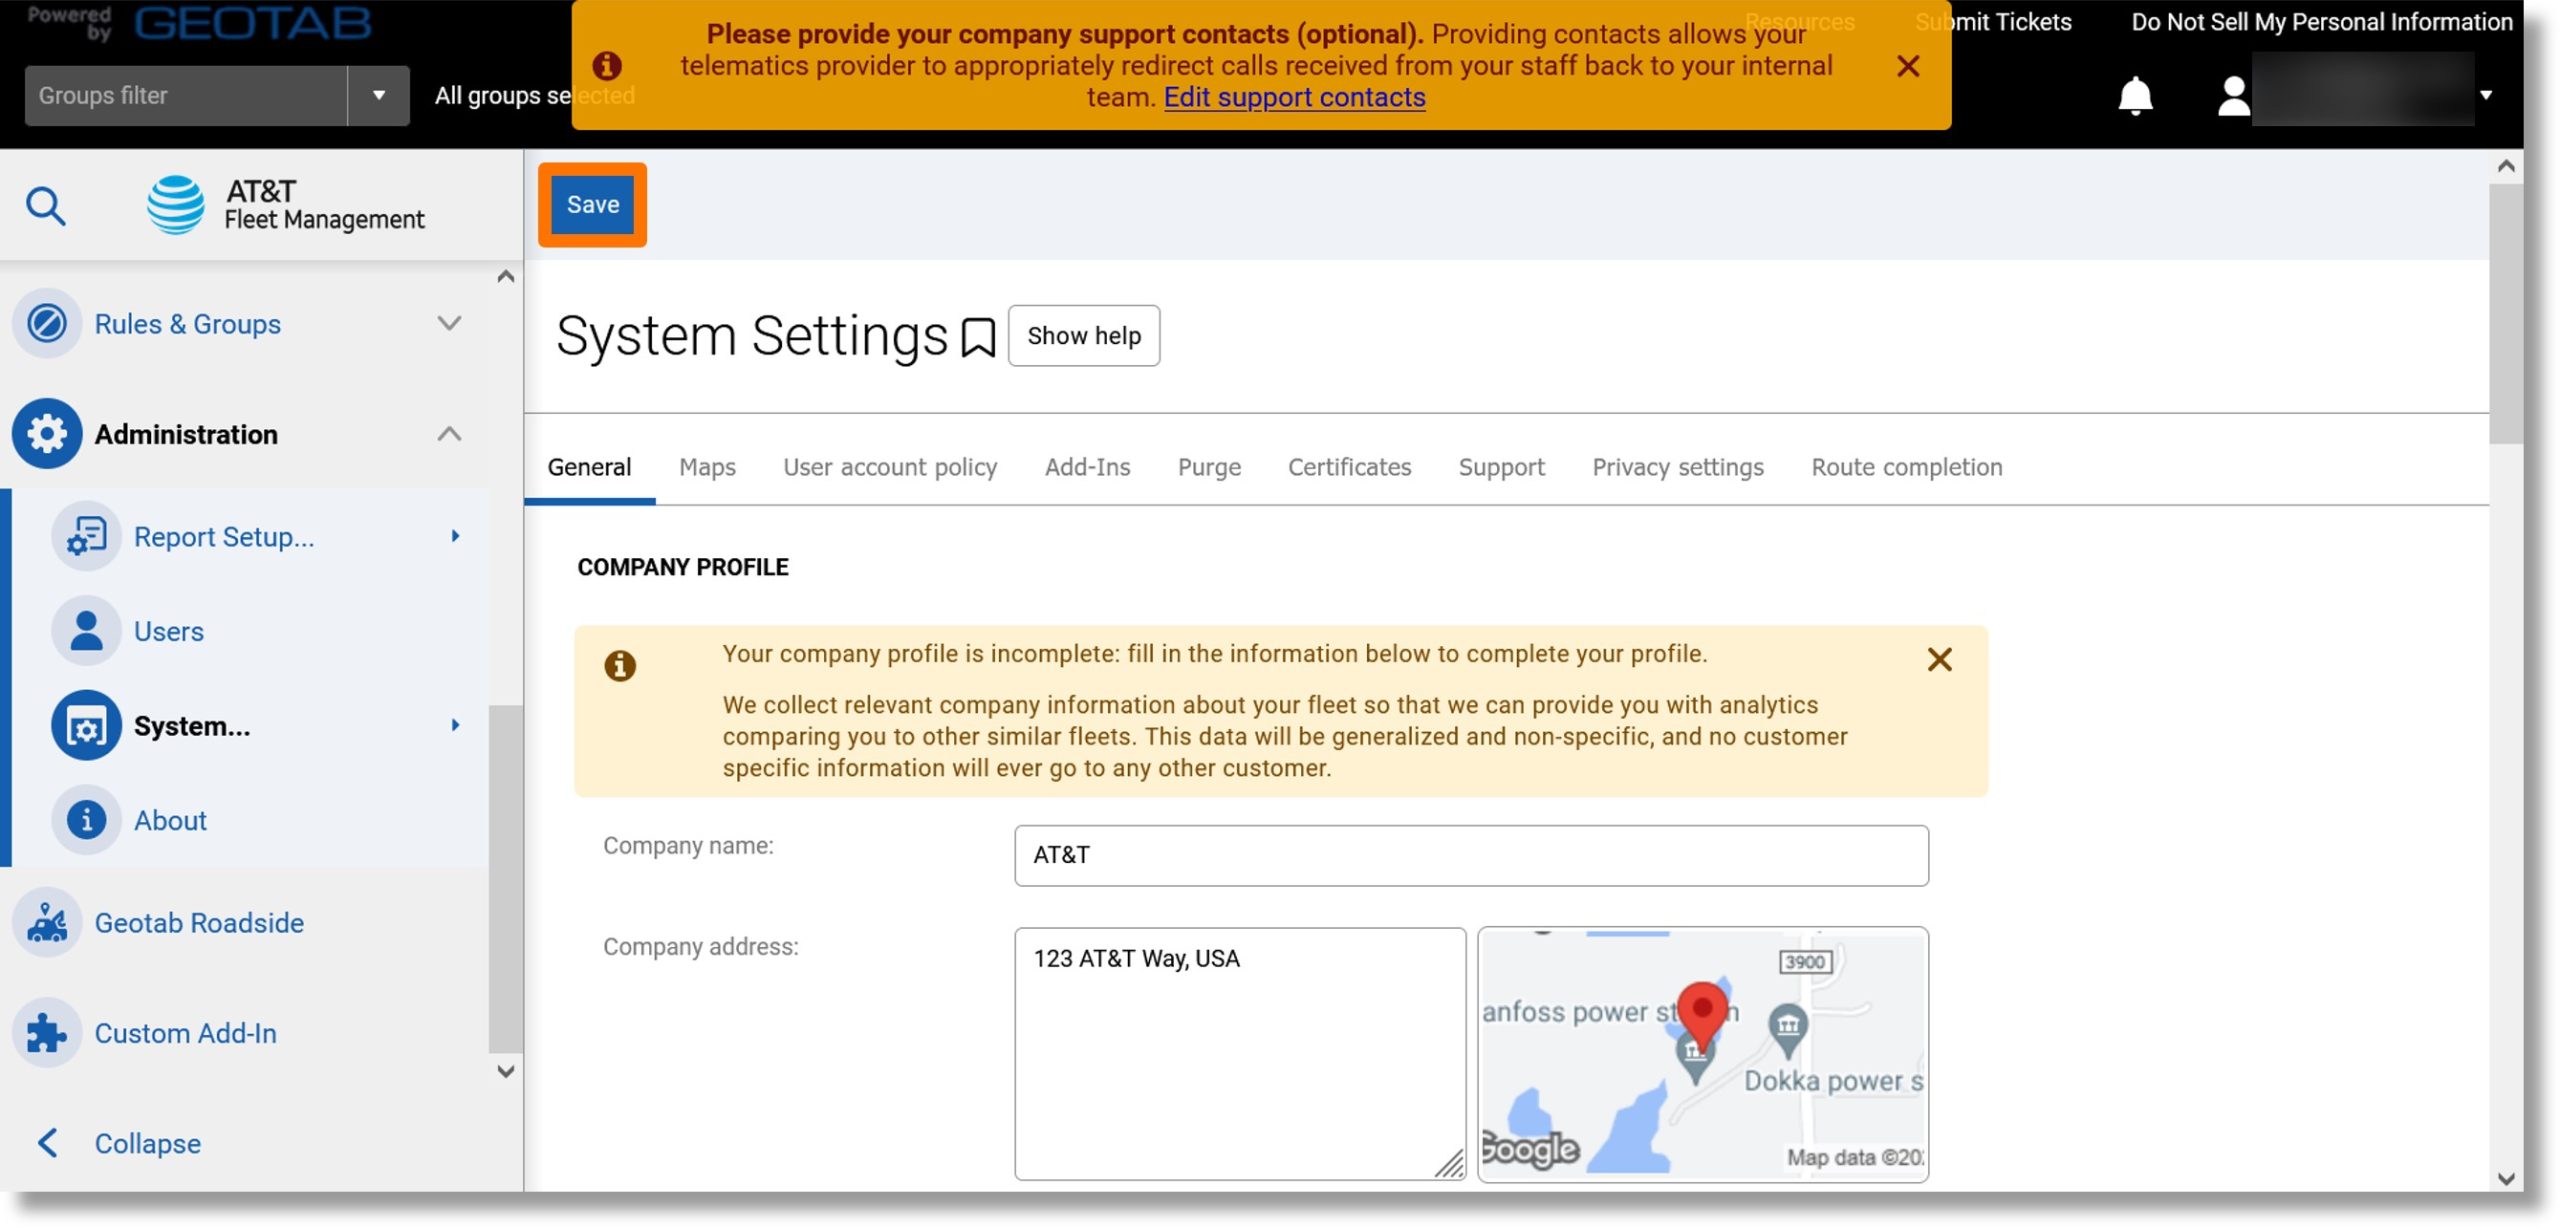
  30. Click the Save.

    Image of step 30.