Creating Call Queue Templates in the Admin Portal │ AT&T Office@Hand #96432
This article provides information on how to create and apply call queue templates in the AT&T Office@Hand Online Account.
AT&T Office@Hand templates let admins use the AT&T Office@Hand Online Account to apply a set of configurations for multiple users at once. Applying call queue templates to your call queue groups will allow quick configuration changes to how calls will be queued once a set condition has been met.
- Go to the Admin Portal and sign in.
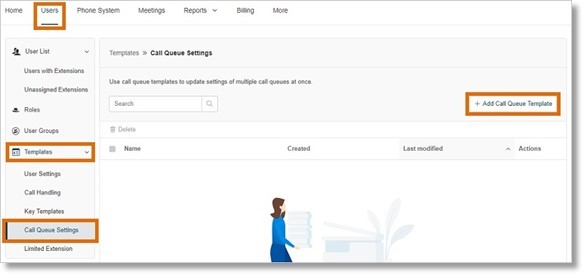
- Go to Users > Templates > Call Queue Settings.
- Click the Add Call Queue Template button.
- Enter a name for the call queue template and click Save.
You will be taken to the call queue template’s settings and configure its call handling rules.
Applying a Call Queue template
- Go to the Admin Portal and sign in.
- Go to Users > Templates > Call Queue Settings.
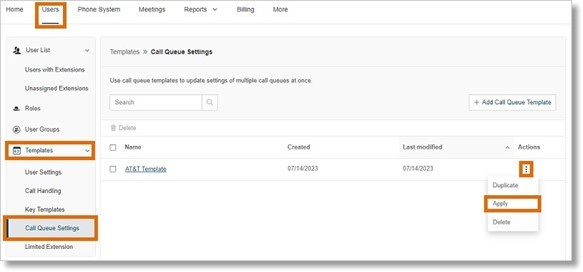
- Click the More icon at the far right of the template, then select Apply.
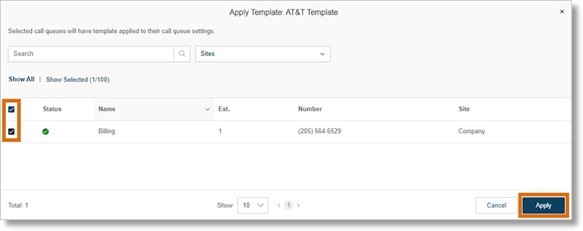
- Check the box(es) next to the Call Queue group you want to apply the template, then click Apply.
- Click Continue.
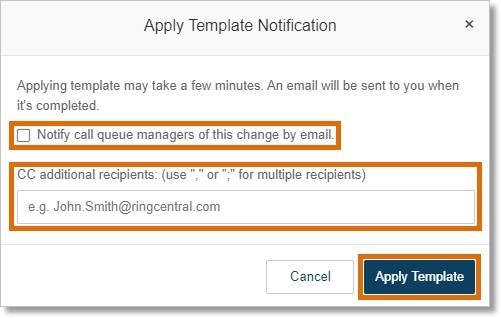
- Check the box for Notify managers of this change by email to send a notification email to the call queue manager(s) that they’ve been assigned or removed as a manager of a call queue group. Enter additional email addresses who will receive a notification email when the template assignment is complete.
- Click Apply Template.
Duplicating Call Queue templates
- Go to the Admin Portal and sign in.
- Go to Users > Templates > Call Queue Settings.
- Click the More icon at the far right of the template and select Duplicate.
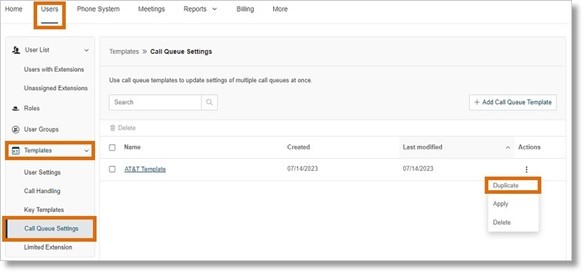
- Enter the name of the template, then click Save.
Deleting Call Queue templates
- Go to the Admin Portal and sign in.
- Go to Users > Templates > Call Queue Settings.
- Click the More icon at the far right of the template and select Delete.
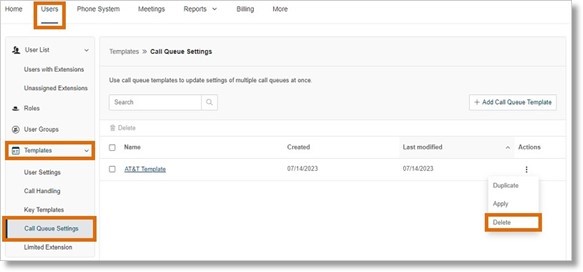
- Click Yes to confirm deletion.
You can also delete a template by selecting the template and clicking Delete Template at the bottom.
Key Words: AT&T Office@Hand, Online Account, Admin Portal, call queue, templates, create call queue template, 96432
Was this page helpful? Yes No


