Creating and managing call queue call handling templates in the AT&T Office@Hand Admin Portal
Admins can create and apply a custom rule to multiple company call queues at once by creating a call queue call handling template. Custom rules take priority over standard incoming call rules when the template conditions are met, such as during a specific date and timeframe. You can edit and manage the templates as needed.
Call handling templates can also be created and applied to multiple users, and across company sites.
Creating call queue call handling templates
- Sign in to the Admin Portal.
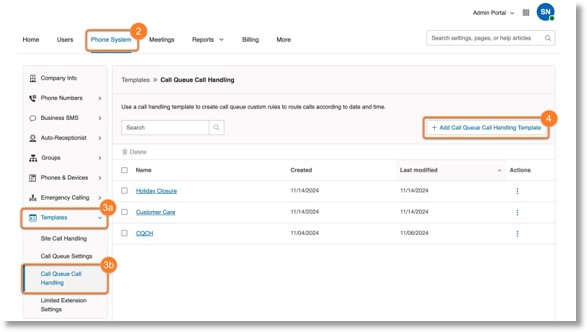
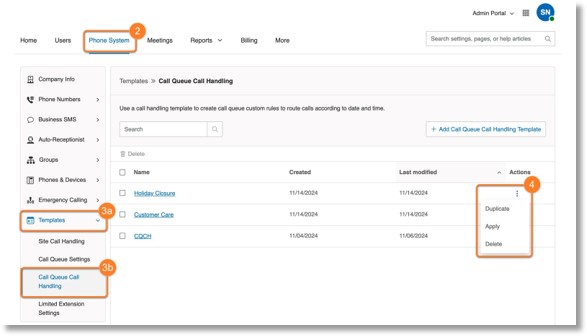
- Click the Phone System tab.
- In the left panel, click Templates (a), then Call Queue Call Handling (b).
- Click Add Call Queue Call Handling Template.
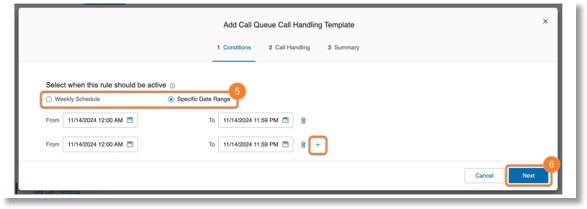
- By default, you’ll be in the Conditions tab. Select when the rule should be active. You can choose between two options:
- Weekly Schedule: Select the days and times when the custom rule should apply.
- Specific Date Range: Specify a date and time window when the custom rule should apply. Click the Add icon to add another date range.
- Click Next.
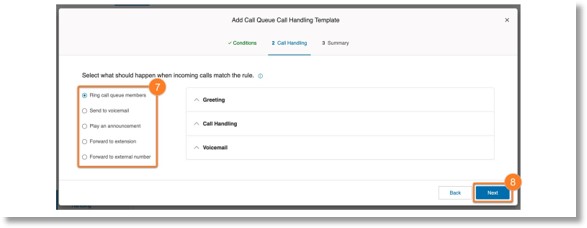
- In the Call Handling tab, select where to route incoming calls and adjust any related settings. Your options include:
- Ring call queue members: Distributes the calls among the members of your call queue.
- Send to voicemail: Sends callers to the voicemail inbox of a message-only extension.
- Play an announcement: Plays a pre-recorded or custom announcement, then ends the call.
- Forward to extension: Forwards the calls to a different extension.
- Forward to external number: Forwards the calls to the specified phone number.
- Click Next.
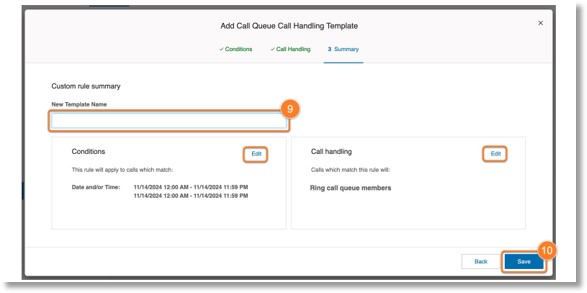
- Enter a name for the template, then review your conditions and call handling selections. To make any changes, click Edit.
- When finished, click Save.
Managing call queue call handling templates
To manage existing templates:
- Sign in to the Admin Portal.
- Click the Phone System tab.
- In the left panel, click Templates (a), then Call Queue Call Handling (b).
- In the Actions column, click the three-dot More icon and select: Duplicate, Apply, or Delete.
Duplicating a call queue call handling template
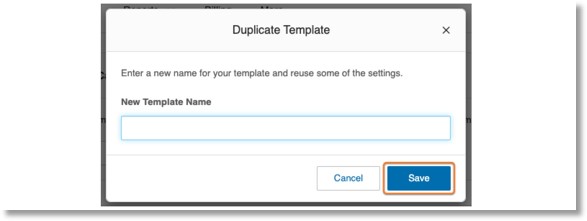
You can copy an existing template to apply to a different group of call queues. After selecting Duplicate from the dropdown:
- Enter a name for the template, then click Save.
- Once copied, click the dropdowns to make changes from the original template, then click Save in the bottom right.
Note: You can’t change the template’s call handling type (e.g., Ring call queue members, Send to voicemail, Forward to extension, etc.), but you can customize the options associated with that type of call handling.
Applying a call queue call handling template
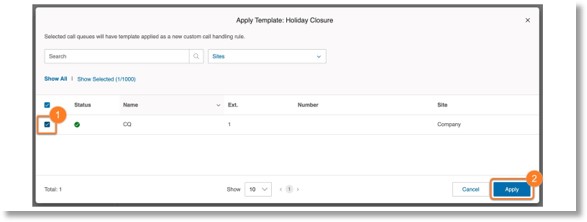
After creating a template, you’ll need to apply it to the call queues where you want the custom rule to take effect. The rule becomes active as soon as the template is applied. Once you’ve selected Apply from the dropdown:
- Check the boxes next to the call queues you want to apply the template to.
- Click Apply.
- Click Continue in the confirmation window.
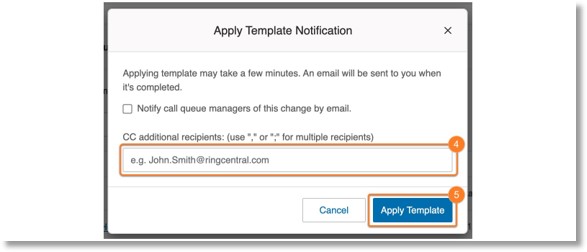
- You’ll receive an email once it’s completed. Add additional email addresses to notify others that the template was applied.
- Click Apply Template.
Deleting a call queue call handling template
If a template, or the associated custom call rule, is no longer needed, you can delete it.
- Select Delete from the dropdown, or click the box next to the template, then the Delete icon at the top.
- In the confirmation window, click one option:
- No, delete template only
- Yes, delete template and associated rules
Editing call queue call handling templates
You can’t change the template’s call handling type (e.g., Ring call queue members, Send to voicemail, Play and announcement, etc.), but you can edit the options associated with that type of call handling.
- Sign in to the Admin Portal.
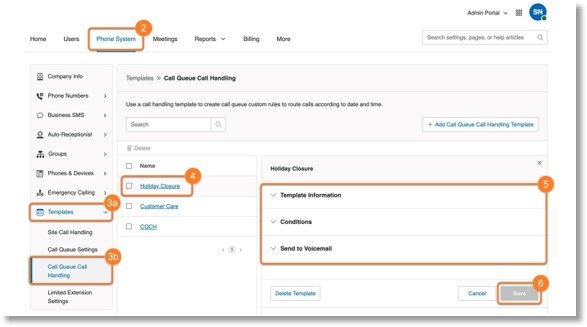
- Click the Phone System tab.
- In the left panel, click Templates (a), then Call Queue Call Handling (b).
- Click the template that you wish to modify.
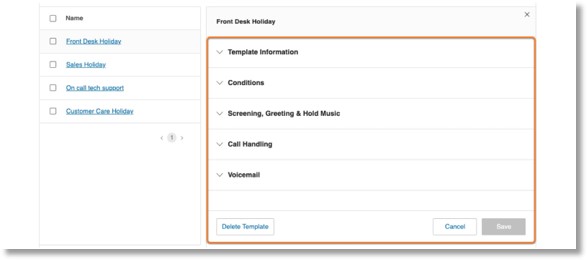
- Click the appropriate dropdown to edit the Template information, Conditions, or the settings for the selected action.
- When done, click Save in the bottom right corner.
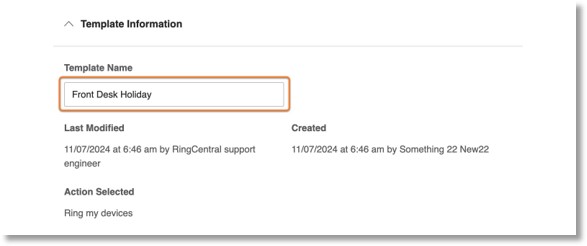
Template information
Here you can change the template name. You can also review who created the template, when it was created, and when it was last modified. Under Action Selected, you can determine what type of call handling was applied to the template.
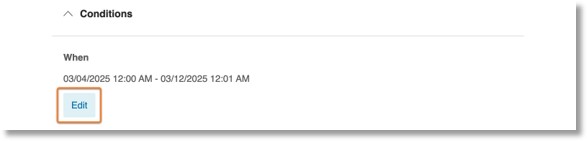
Conditions
In the Conditions dropdown, click Edit to change the date/time conditions of the template’s activation. Click Done once you’ve made your edits, then click Save at the bottom right.
Editing the options for the selected call handling action
Existing templates have an action selected which defines how an incoming call will be routed when the conditions have been met. Depending on the action that was originally selected, different dropdown options will be displayed and can be edited.
- Ring call queue members
- Send to voicemail
- Play an announcement
- Forward to extension
- Forward to external number
Ring call queue members
If Ring call queue members was selected, you can change your preferred routing method to: Longest idle, Simultaneous, or Fixed order. Click the dropdowns to update the call handling settings associated with each method.
Send to voicemail
If Send to voicemail was selected, you can modify:
- Voicemail Greeting. Click Edit, then the Set Greeting dropdown and select:
- Default: Plays the system default greeting.
- Custom: Choose if you want to record a custom greeting using your computer microphone, or upload a WAV or MP3. file from your computer.
- Send voicemail to:
- My voicemail: Send the voicemail to the inbox of all template users.
- Another extension: Send the voicemail to a specific user’s extension.
Play an announcement
If Play an announcement is selected, click Edit, then the Set Greeting dropdown and select:
- Default: Plays system-default announcement. To select this option, click Done.
- Custom: Choose if you want to record an announcement using your computer microphone, or upload a WAV or MP3 file from your computer. To choose this option, click Done after uploading your file.
Forward to extension
Click the Forward to extension dropdown, then click Edit under Extension. Select the user you want to forward the calls to, then click Select at the bottom right.
Forward to external number
Click the Forward to External Number dropdown, then change the number on the Number field. Calls will be forwarded to the number you enter.
Was this page helpful? Yes No