User Templates | AT&T Office@Hand
Article #7110
This article provides information on how to configure User Templates. Templates allow Account Administrators to implement a set of configuration to multiple users at once through the AT&T Office@Hand account, reducing repetitive actions by applying same settings to a group of users.
User Templates | AT&T Office@Hand
IMPORTANT: Only Super Admins, User Admins, and Users with User Admin access can customize the Template settings. See User Roles and Permissions | AT&T Office@Hand for more information.
The Administrator should Log in to your Office@Hand account and go to the Users > Templates section on the Admin Portal.
Note: Your settings will override any configuration the affected users might have previously done.
User Templates – Create a template | AT&T Office@Hand
User Templates – Set a template | AT&T Office@Hand
User Templates – Duplicate a template | AT&T Office@Hand
User Templates – Apply a template | AT&T Office@Hand
User Templates – Delete a template | AT&T Office@Hand
User Templates – Create a template | AT&T Office@Hand
- Click on the Users tab, and then click Templates.
- Click Add User Settings Template.
- Enter the name of your Template, and then click Save.
- You will be redirected to setting up your created Template. go to User Templates – Set a template, for more information.
User Templates – Set a user template | AT&T Office@Hand
This section provides information on how to set a template. Templates allow Account Administrators to implement a set of configurations to multiple users at once through your AT&T Office@Hand, reducing repetitive actions by applying same settings to a group of users.
- Log in as Administrator to AT&T Office@Hand.
- Go to User > Templates > User Settings.
- Select a template from the list.
- Configure the following settings:
| INBOUND TAB |
| Template Information |
Let’s you edit the Template name, and view when it was created and last modified. |
| User Details |
Allows you to customize the following: |
| Regional Settings |
Set the time zone, time format, and home country for the user/s. |
| Roles |
Set roles and permissions for users or departments in your company. |
| User Hours |
Set user hours to 24 hours or custom hours. |
| User Groups |
A grouping of users based on their organization hierarchy. A User Group would have a Group Manager, who has access to modify group member’s settings and view their call logs. |
| Confirmation Message |
This option specifies how long the confirmation message will appear. The user has the option to disable the confirmation message. |
| Job Title |
Allows you to enter your job title in the text box provided. |
| Automatic Call Recording |
Set the recording direction either inbound or outbound. |
Phones
|
Presence Settings |
Allows you to edit the appearance and permissions to allow other user to see the presence status. |
| Emergency Address |
Provide a physical address for First Responders. |
| Bandwidth Settings |
Allows you to change the bandwidth usage of a desk phone or for the AT&T Office@Hand Phone for better call quality. You can switch between High and Low. High Bandwidth gives you better sound quality, but calls can become choppy when it is not available. Low Bandwidth gives you lower sound quality but ensures no interruptions during your conversation. |
| Screening, Greeting & Hold Music |
Users Greeting |
Turn on this option when you want the system to answer the call with a recorded welcome message, so callers know they’ve reached the right person. This is not a personal voicemail announcement. |
| Connecting Message |
Set the default message or create a custom message for callers to hear while the call is being connected. |
| Hold Music |
Turn hold music on or off and choose from 16 musical styles. |
| Call Screening |
Turn on this option when you want callers to announce their name before continuing to connect the call. This option lets you identify the caller so you can pick up the call immediately. |
| Audio While Connecting |
Select the music or ringtone callers will hear while connecting. |
| Call Handling & Forwarding |
Desktop Apps & Smartphones |
Enable this feature to notify your AT&T Office@Hand Phone and smartphones before forwarding the incoming call to your desk phones and forwarding numbers. |
| Incoming Call Information |
Choose which information will be displayed for incoming calls, and on which phones the information will be shown. Set the announcement before connecting Direct calls and Call Queue calls. |
| Messages & Notifications |
Take Messages |
Allow or deny users to take voicemail messages. |
| Voicemail Greeting |
Select the default or create a custom voicemail greeting. |
| Message Recipient |
Choose users or specific extension to be included as message recipients when applying template. |
| OUTBOUND TAB |
Caller ID
|
By phone |
Choose the phone number to display as your outbound caller ID for each type of outgoing call. |
| By Feature |
Different Caller IDs may be set when making calls using RingOut, RingMe, Call Flip, Fax, Mobile App, Common Phone, Delegated Caller ID, and Alternate Caller ID. |
| Internal Calls |
Select this option if you want to display your extension as your Caller ID when making internal calls. All AT&T Office@Hand and IP phones will see the extension. Calls forwarded to external phones, like a mobile phone, will still show your complete direct phone number. |
| Fax Settings |
Cover Page Info |
Customize the information that will be printed out on your fax cover page. |
| Faxes Sent via Email |
If this option is selected, when you send a fax via email with a subject line the cover page will be used. If you send it without a subject line a cover page will not be used. |
NOTIFICATIONS TAB
|
| Voicemail Messages |
|
Allows you to set how you will be notified for voicemail messages either notify by email, include attachment with email, and/or mark message as read once emailed. |
| Received Faxes |
|
Set your notifications settings for received faxes either notify by email, include attachment with email, and/or mark message as read once emailed. |
| Missed Calls |
|
Enable or disable notification by email for missed calls. |
| Fax Transmission Results |
|
Gives option to enable or disable notification by email for fax transmission results. |
| Received Text Messages |
|
Allows you to enable or disable notifications by email for received text messages. |
back to top
User Templates – Duplicate a template
- Click Copy on the template that needs to be duplicated.
- Enter the name for the new template, then click Save.
User Templates – Apply a template
After a template has been created and configured, you can assign it to a group of users right away.
- Click Apply opposite the template that needs to be duplicated.
- Select the users that need to be assigned to the selected template, Click Apply.
back to top
User Templates – Delete a template
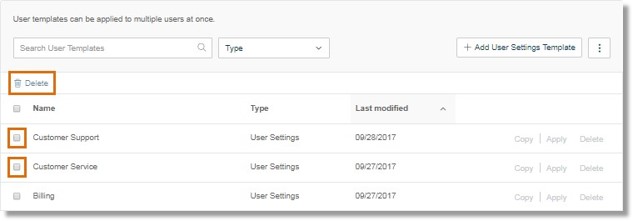
There are several ways of deleting Templates.
Method 1: Select the Templates to be deleted from the list, then click the Delete button.
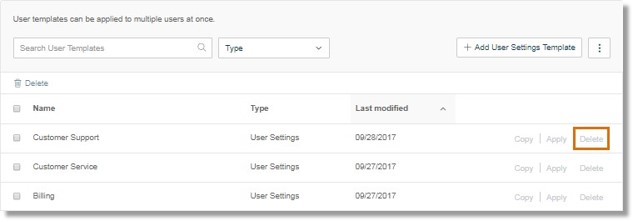
Method 2: To delete a template from the Templates list, click Delete opposite the one that needs to be deleted.
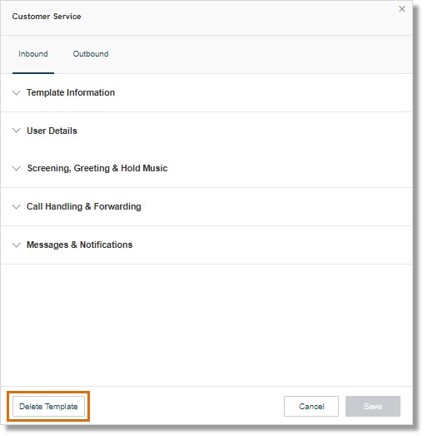
Method 3: While editing the Template settings, you can click Delete Template at the bottom left of the page.
back to top
Key Words: templates, User templates, template, user template, 7110, 10935, 10936, 10937, 10938, 10939
Was this page helpful? Yes No