TOP

AT&T Workforce Manager

AT&T Workforce Manager strengthens communications between dispatchers and mobile workers, improves control over field operations, and delivers services faster and more efficiently. Make near real-time decisions about your mobile operations so you can save time and increase productivity.

Back to Product Page
Use the dropdown to get support, or purchase this product

Create an order for a new client in AT&T Workforce Manager

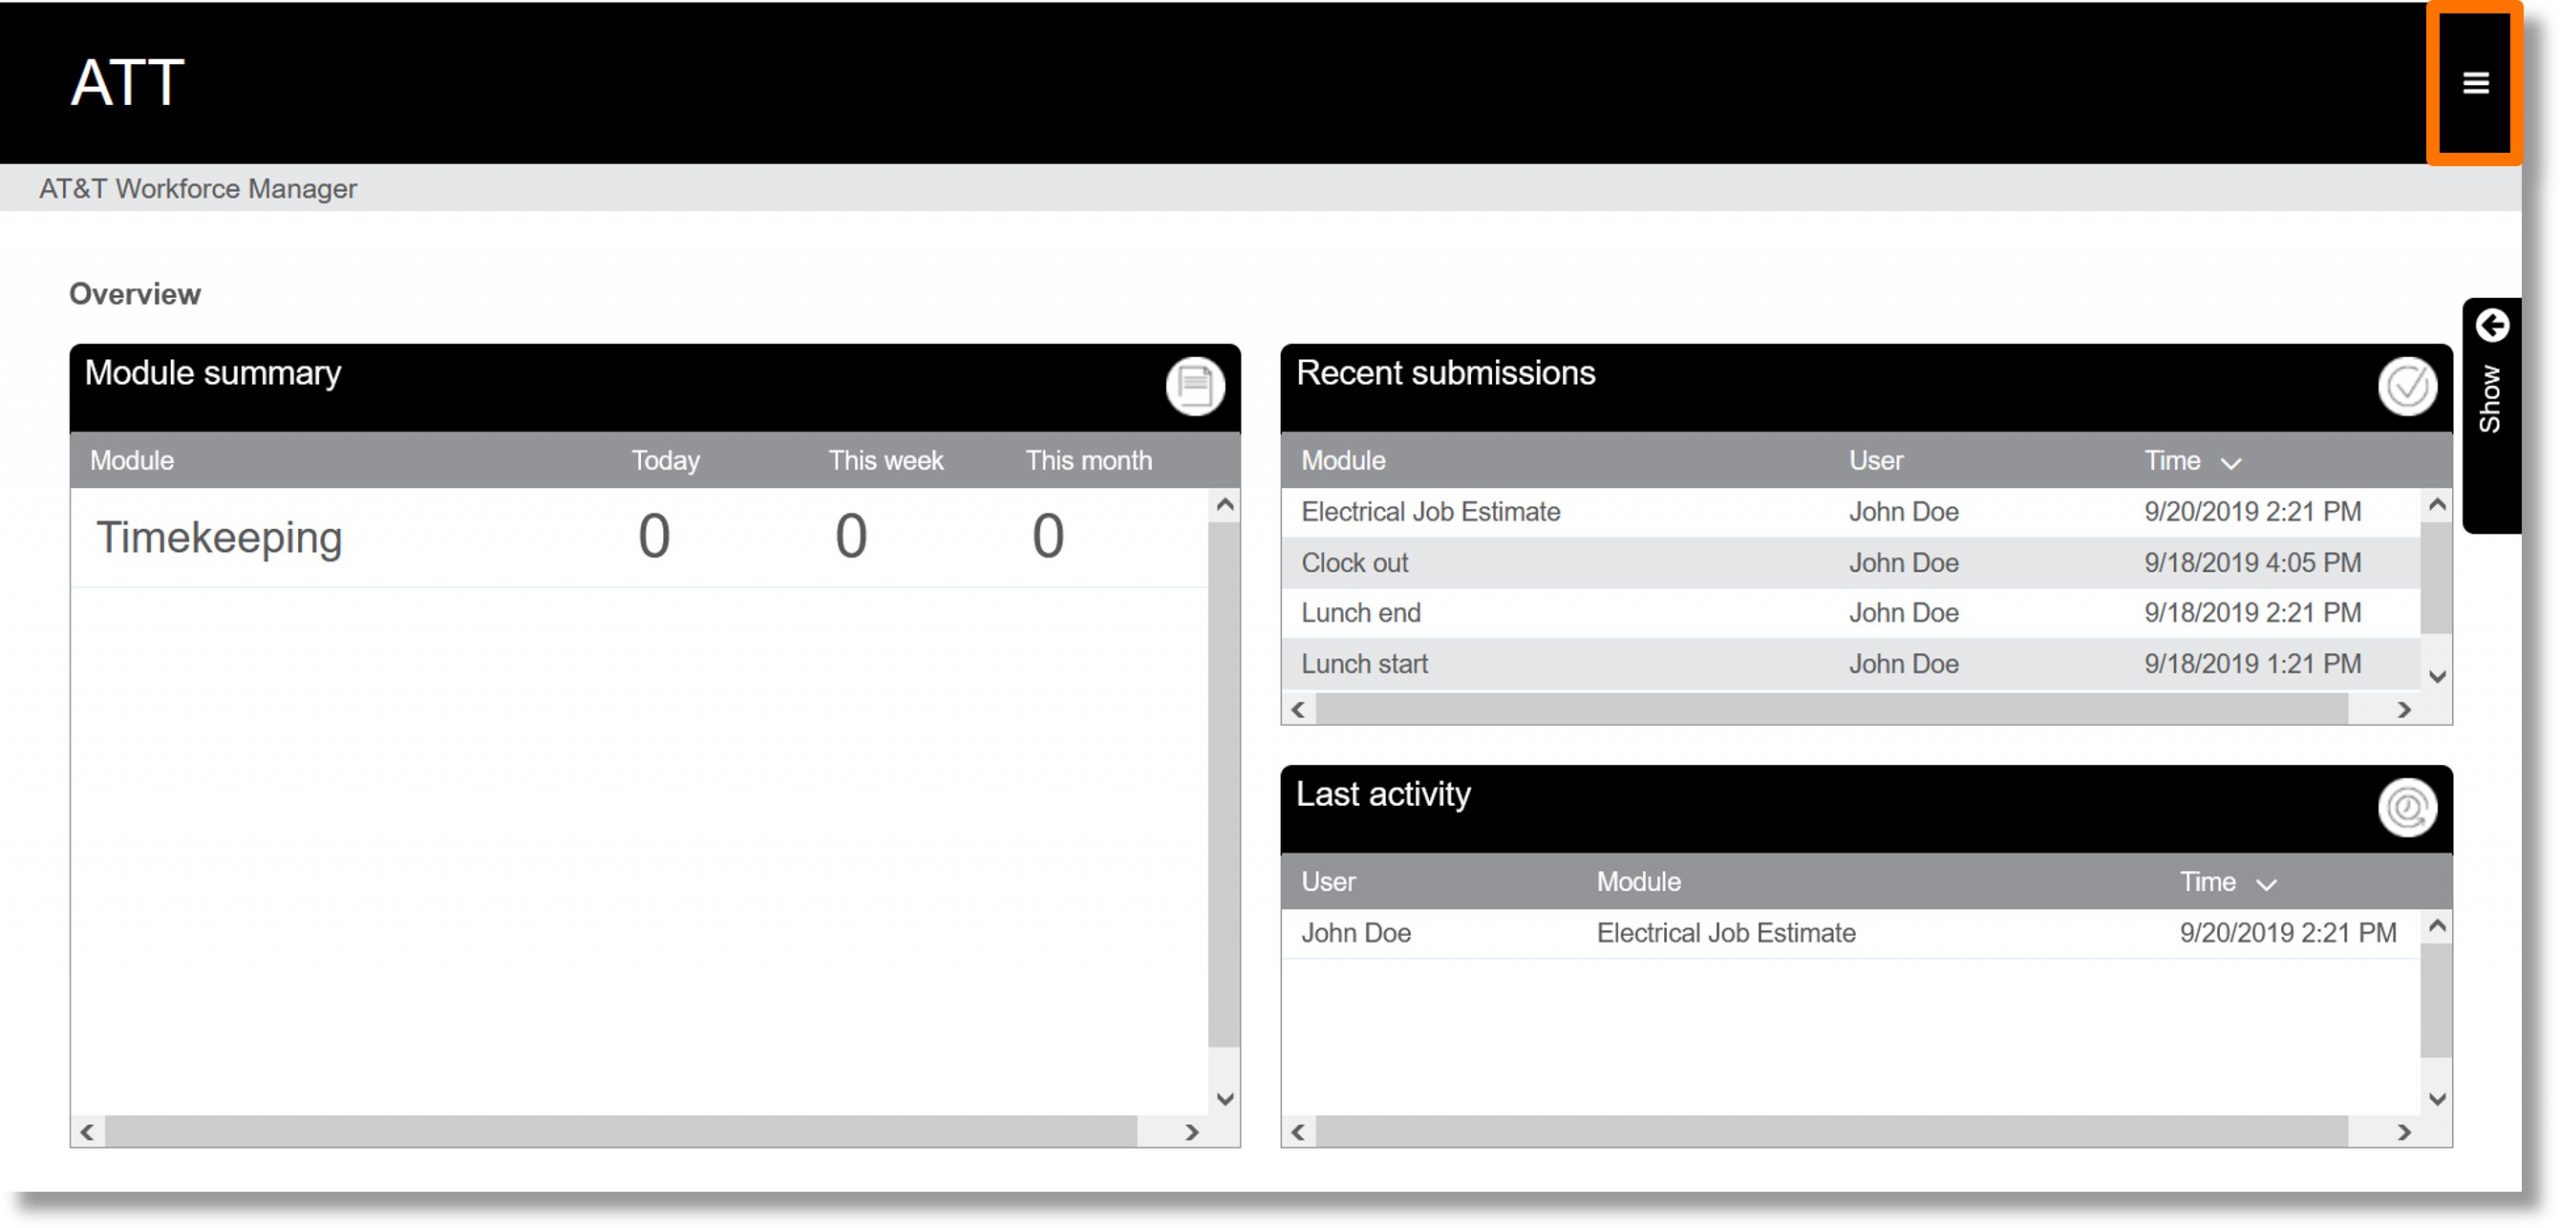
  1. Click on the menu icon Image of the menu icon. at the top right.

    Image of step 1.

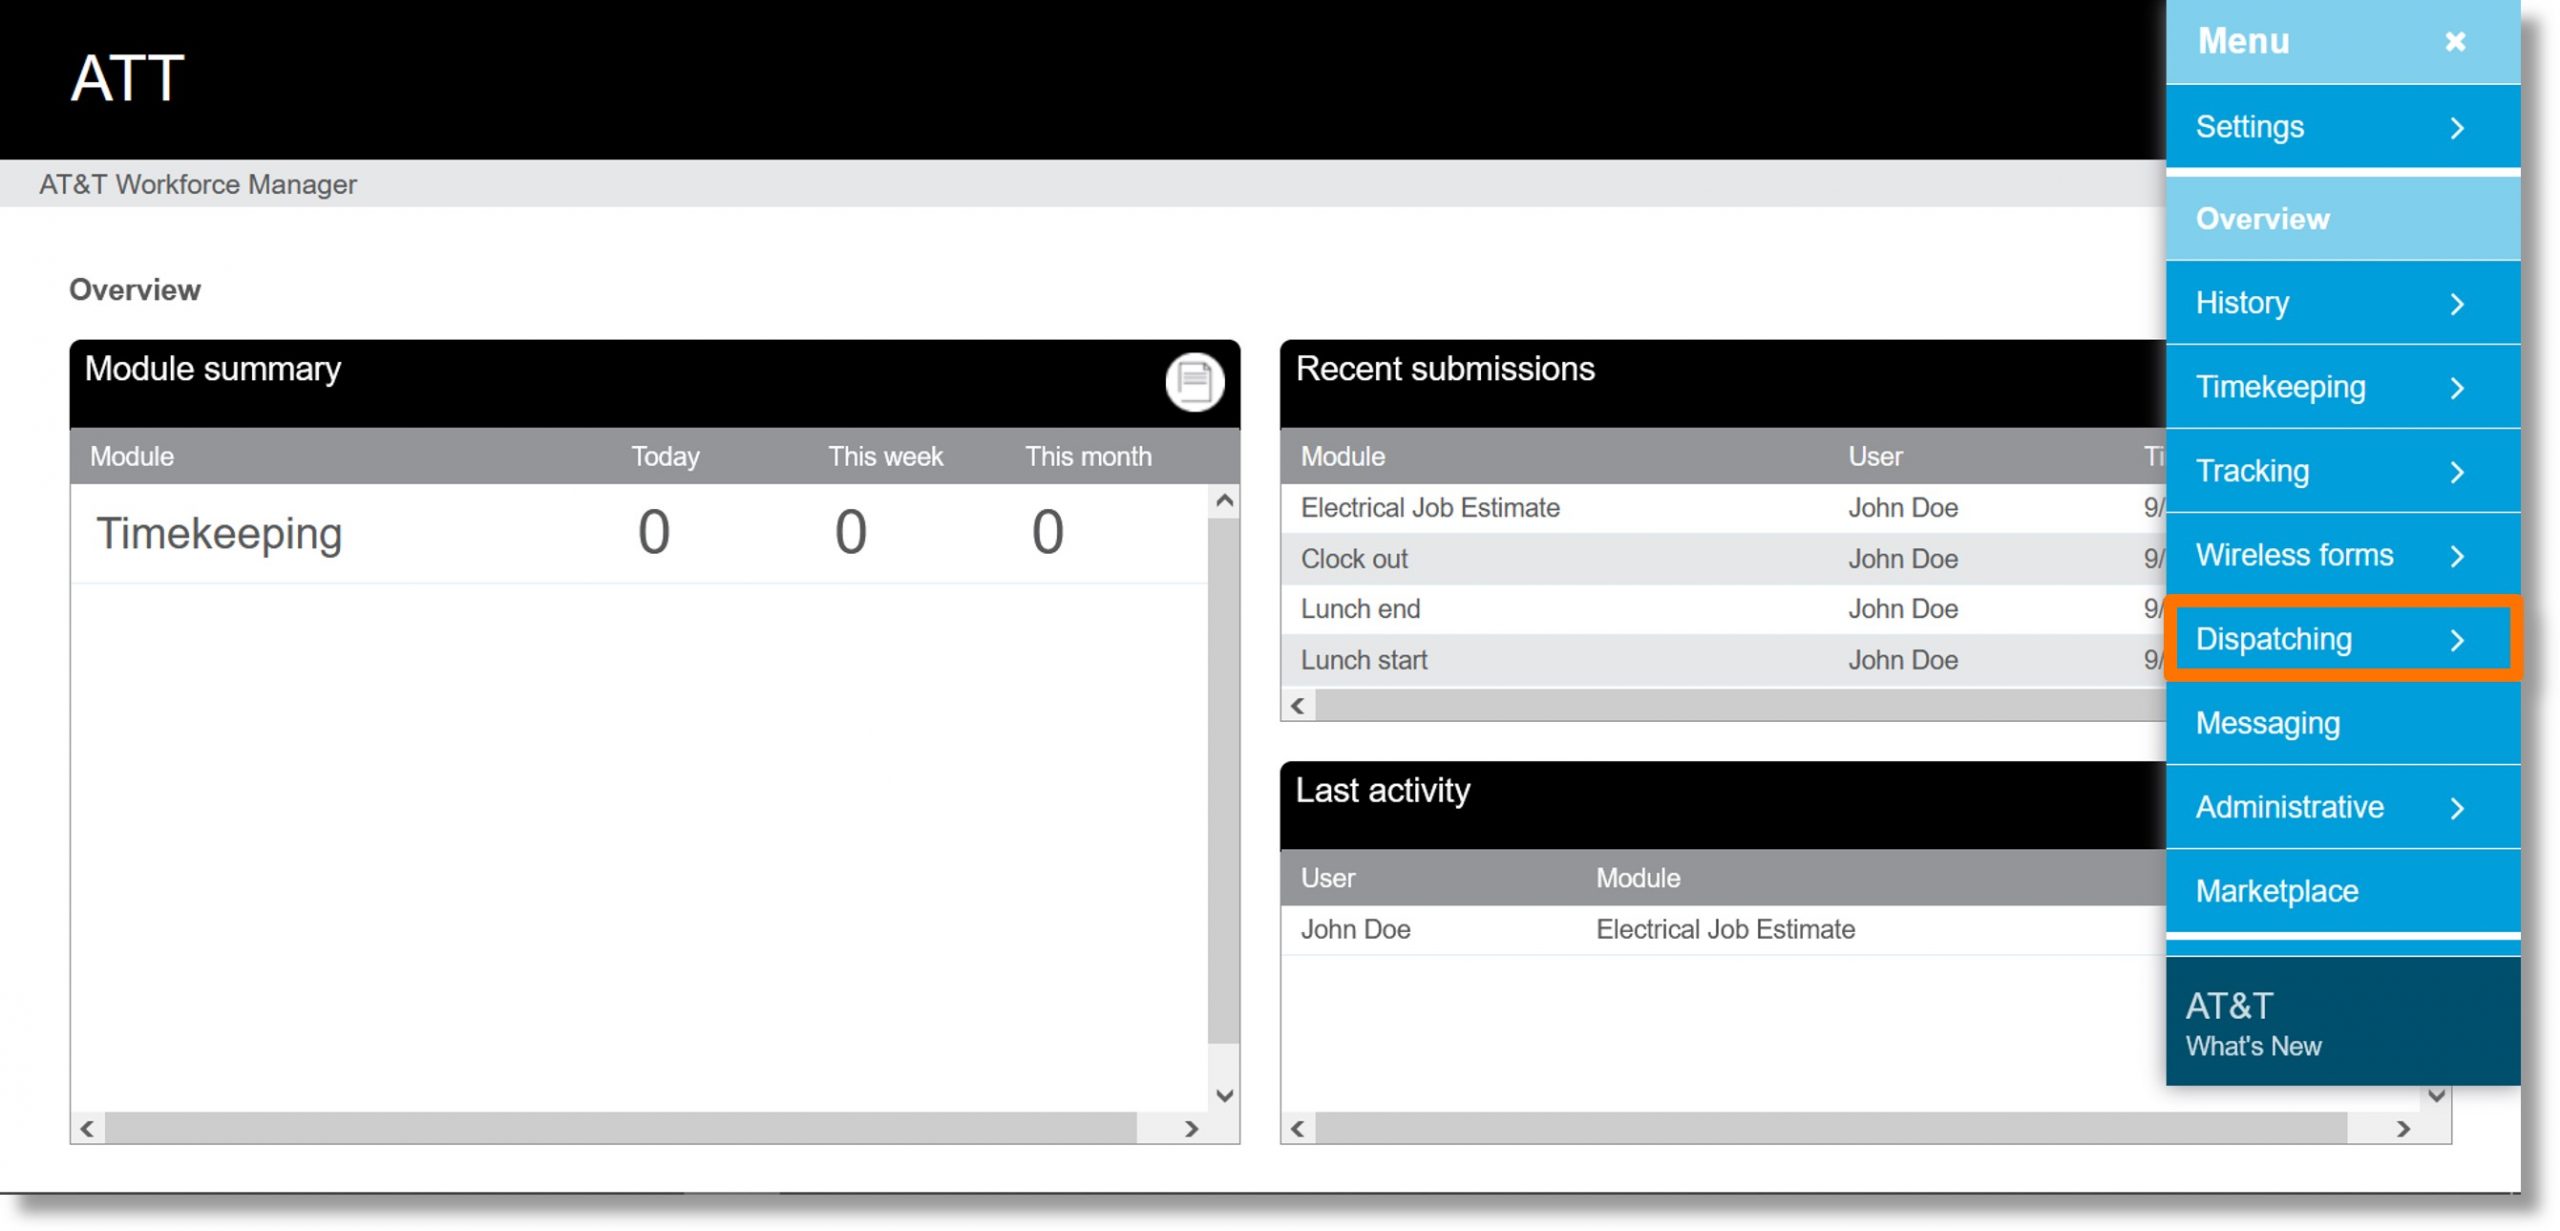
  2. Click on Dispatching.

    Image of step 2.

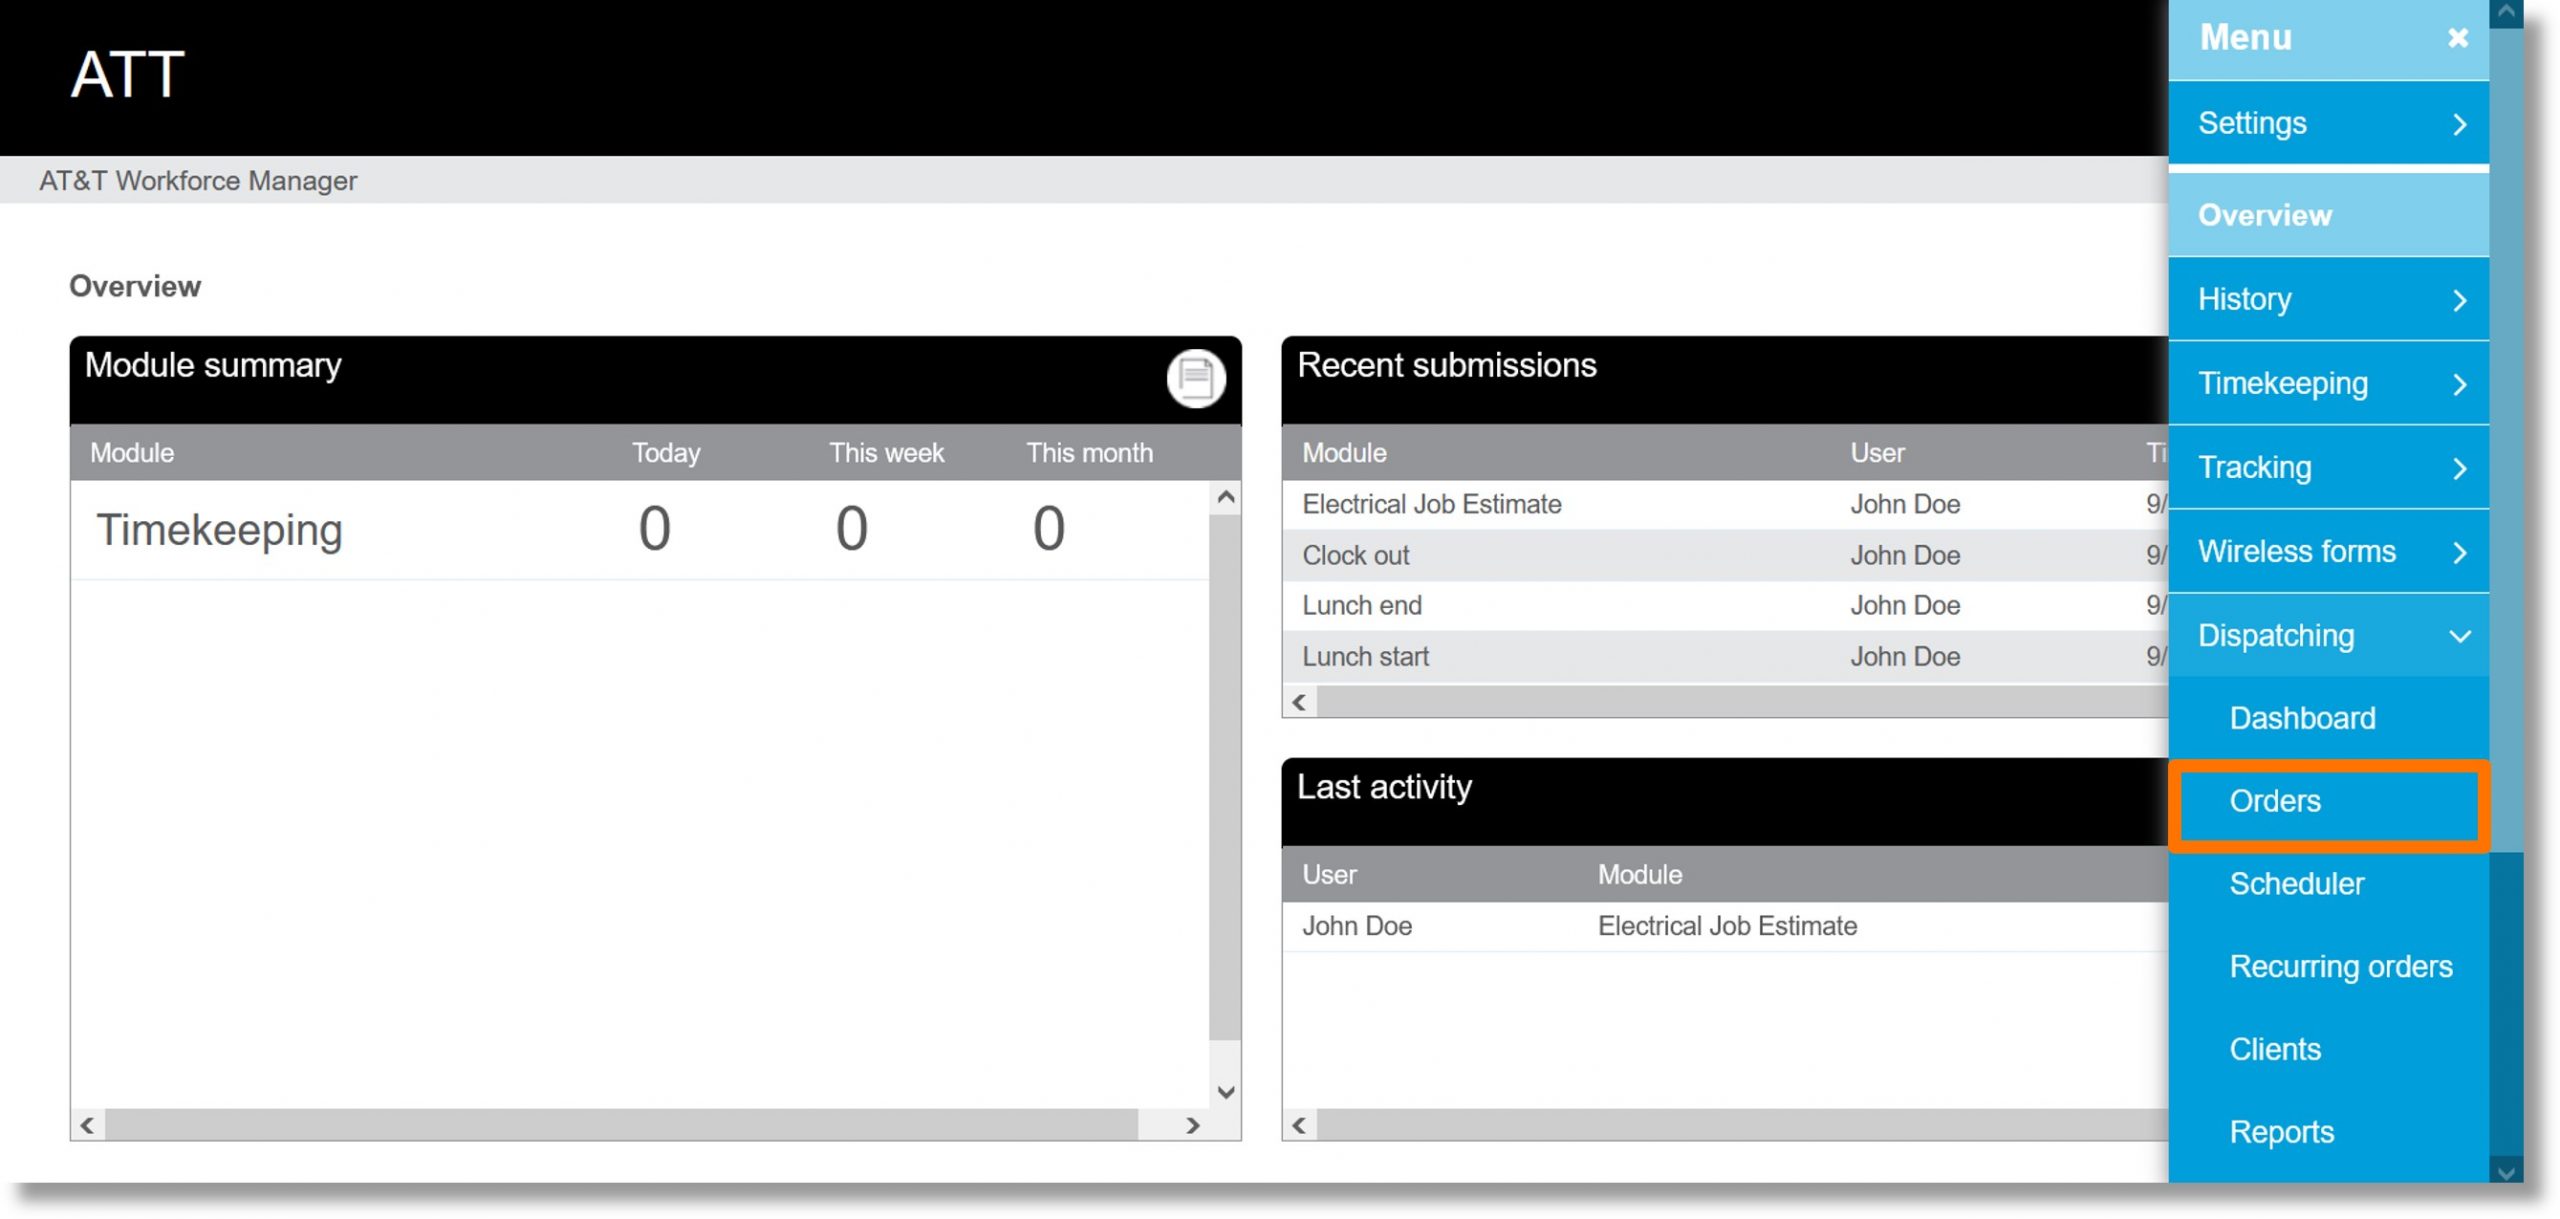
  3. Click Orders.

    Image of step 3.

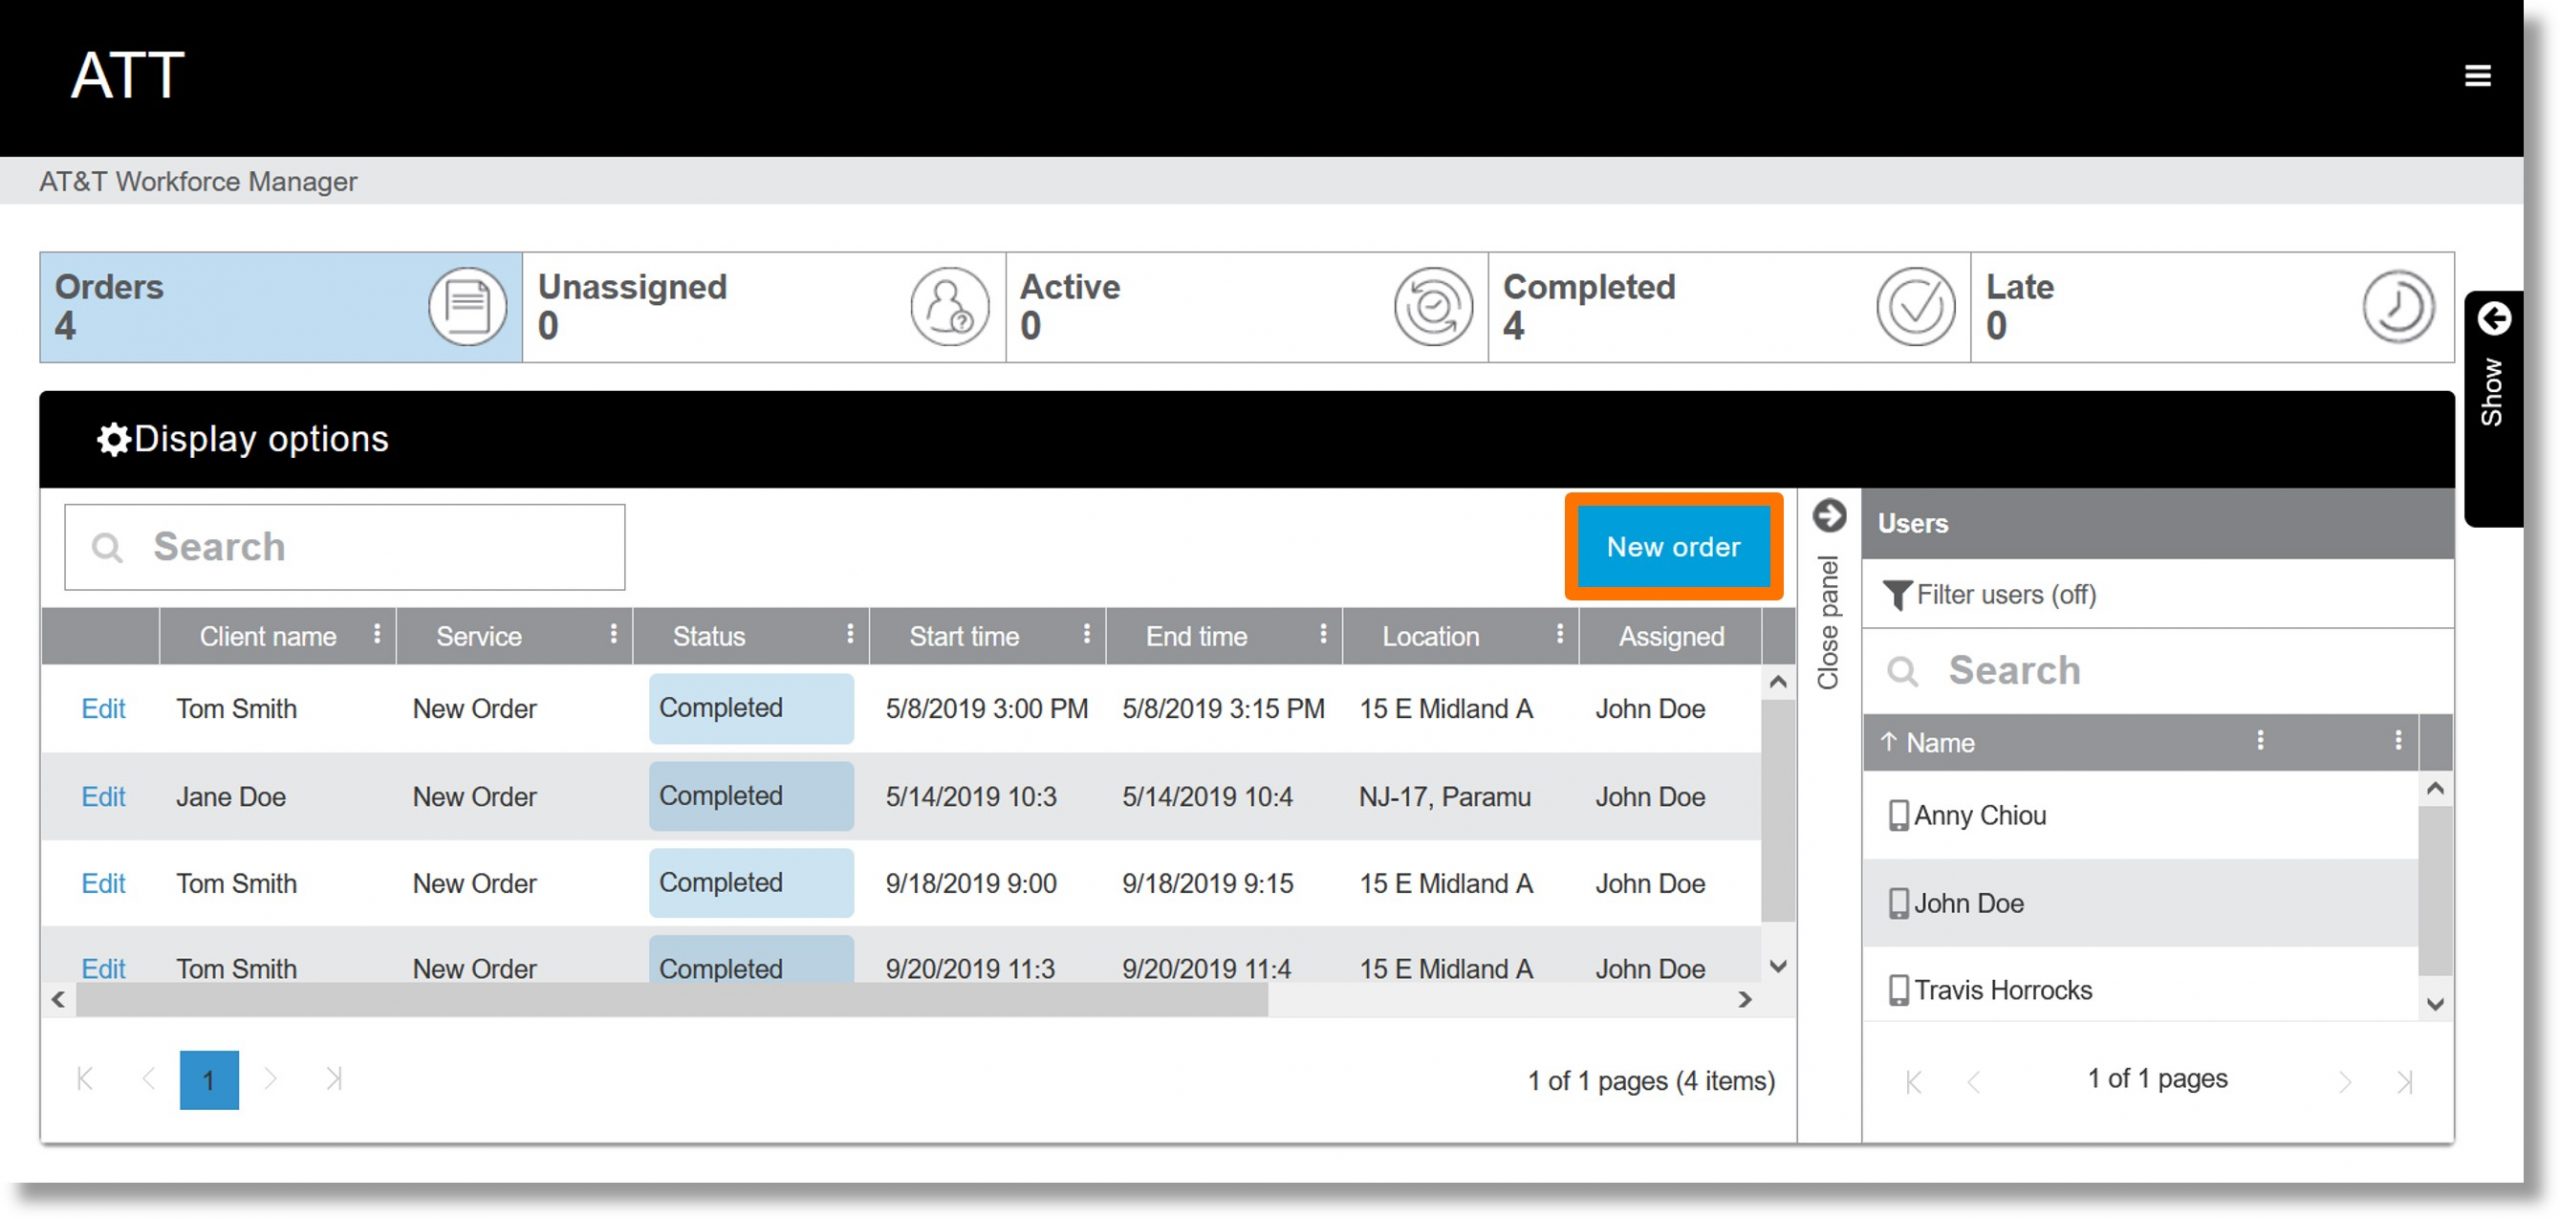
  4. Click on the New order button.

    Image of step 4.

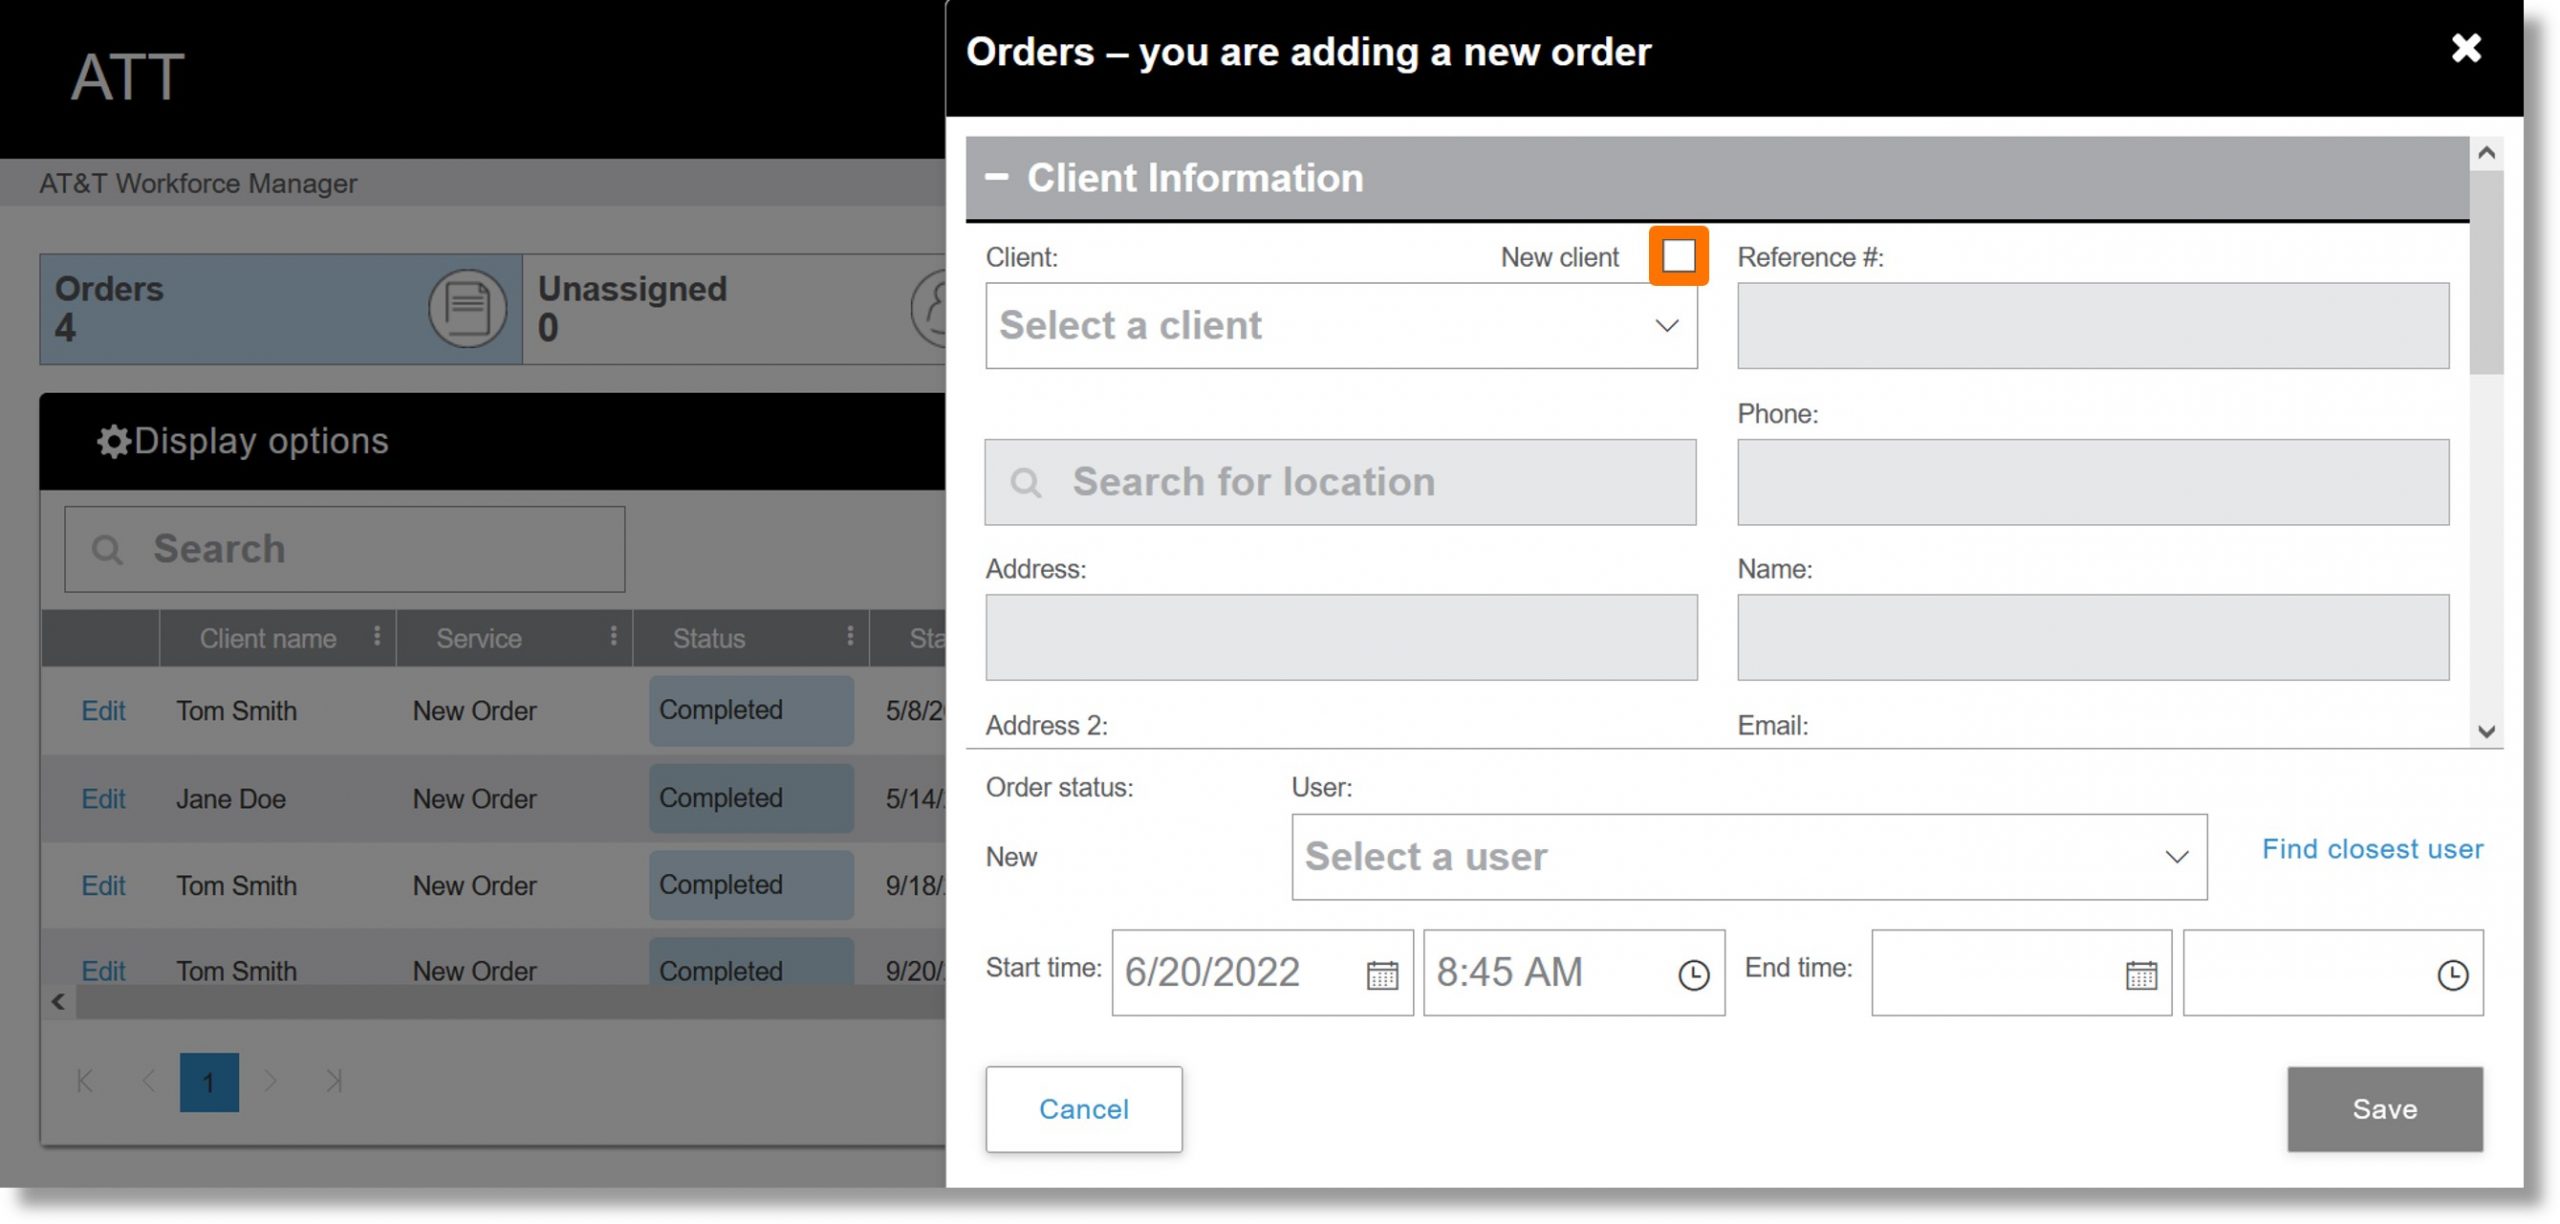
  5. Click the checkbox to the right of “New client”.

    Image of step 5.

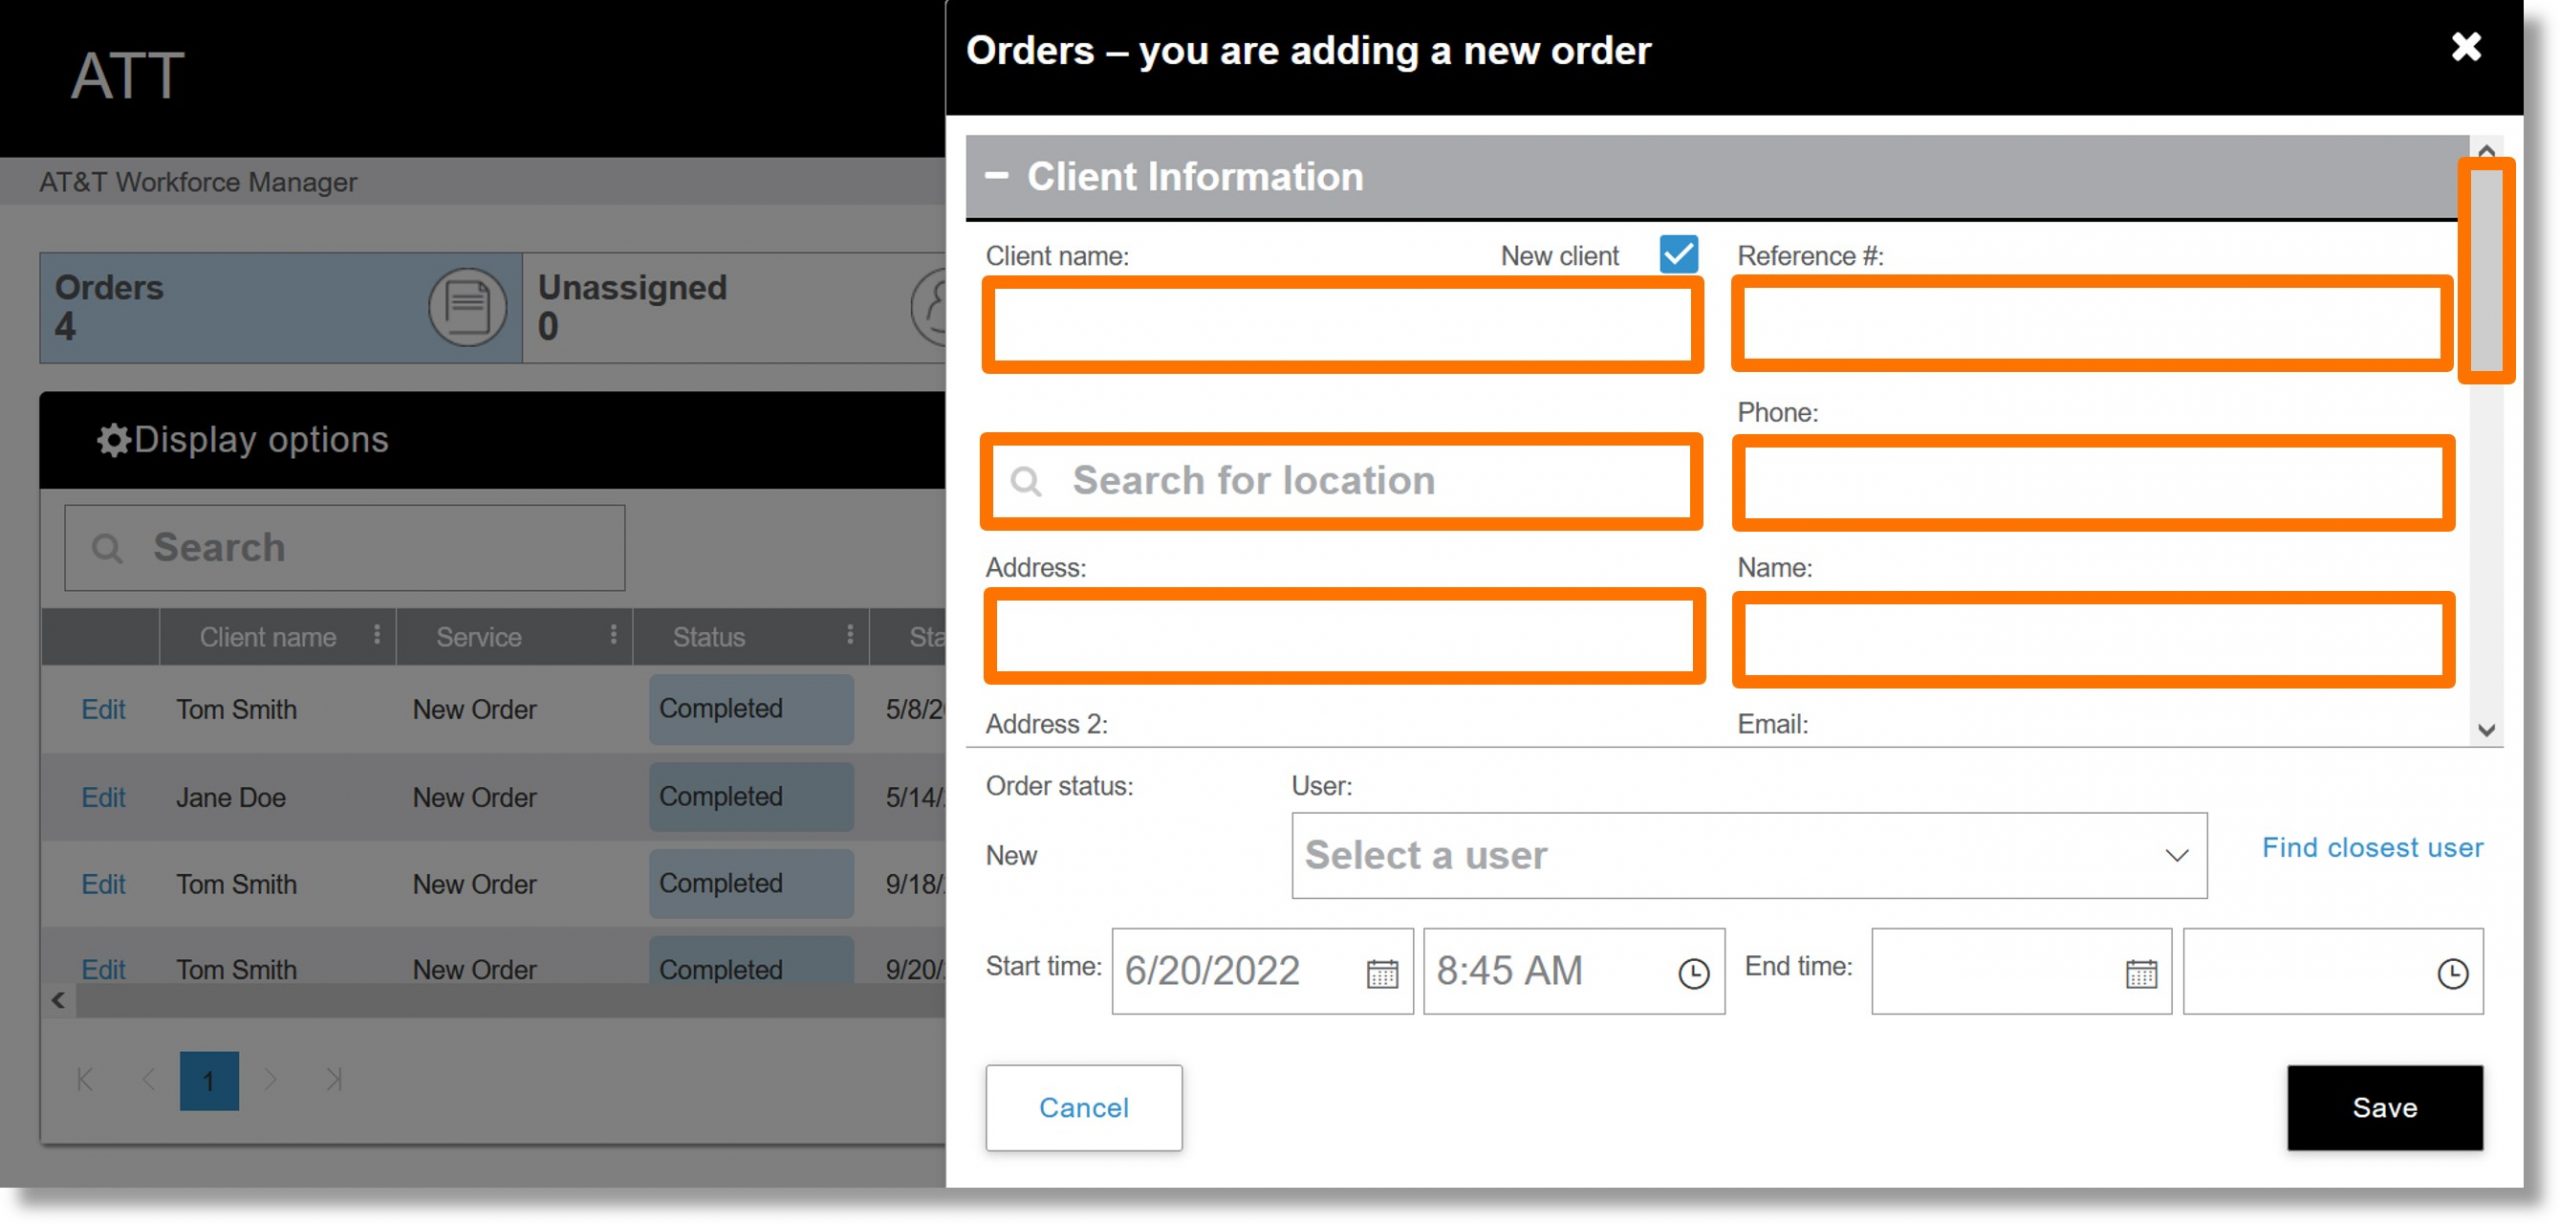
  6. Click on the field under “Client name” and enter the client’s contact name.
  7. Click on the field under “Reference #” and enter the reference number if you have one.
  8. Click on the field labeled “Search for location” and enter the desired location.
  9. Click on the field under “Phone” and enter the client’s phone number.
  10. Click on the field under “Address” to edit the street address populated earlier.
  11. Click on the field under “Name” and enter a name.
  12. Scroll down.

    Image of steps 6 through 12.

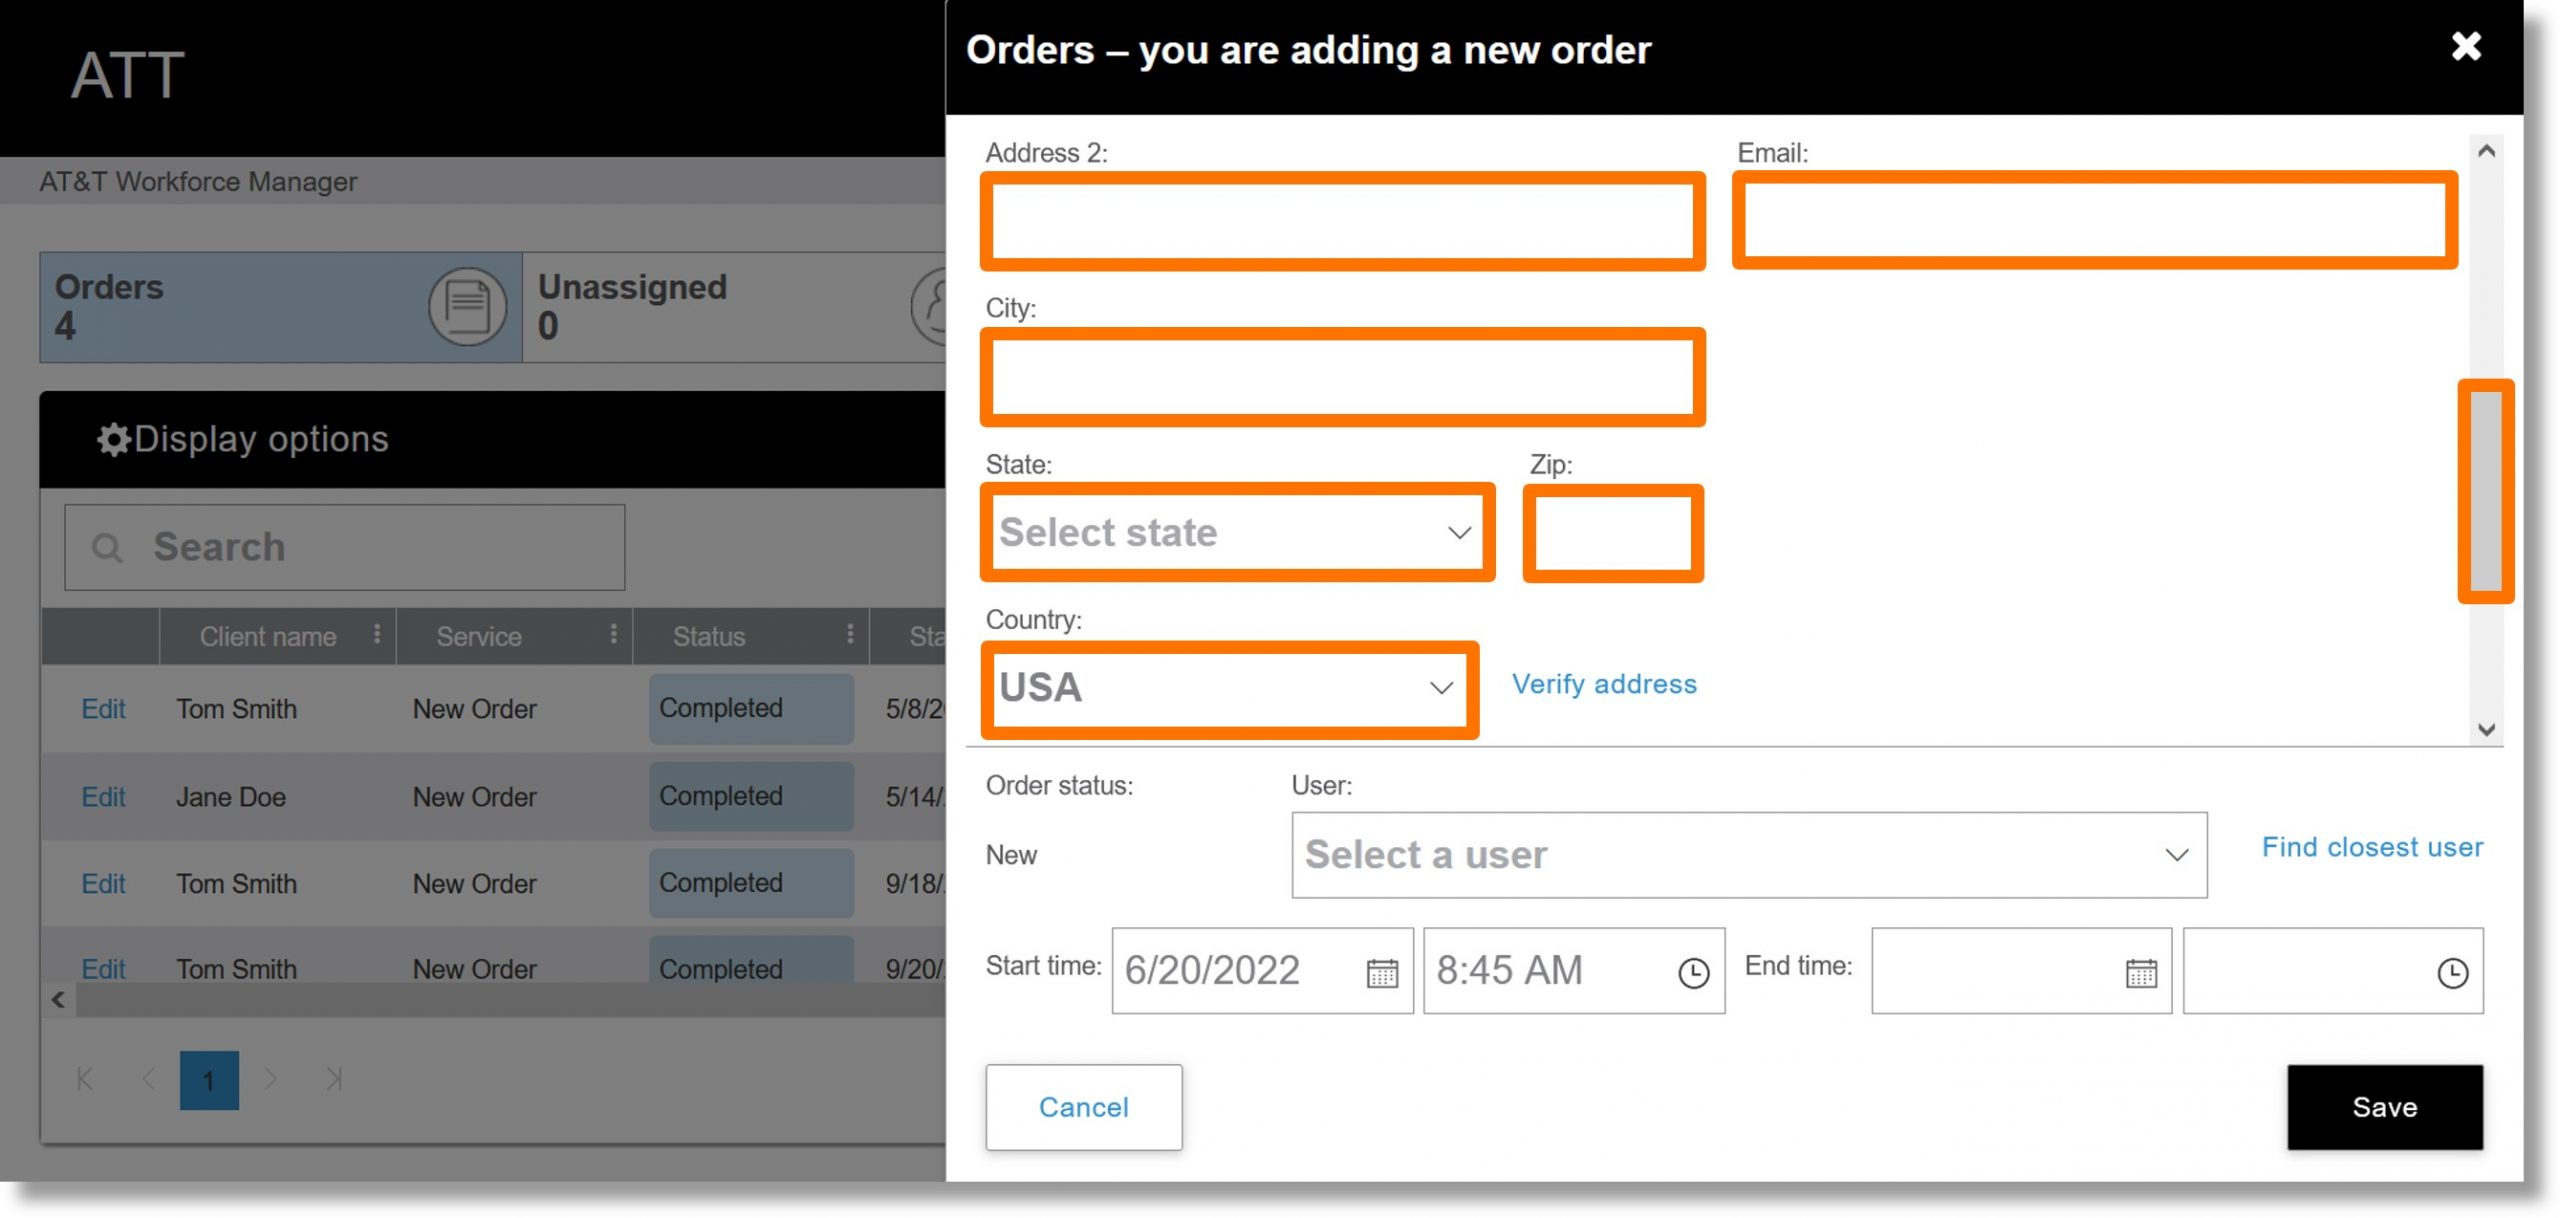
  13. Click on the field under “Address 2” if you want to change the address populated earlier.
  14. Click on the field under “Email” and enter the client’s email address.
  15. Click on the field to Under “City” to make changes to the city populated earlier.
  16. Click on the dropdown under “State” to change the state populated earlier.
  17. Click on the field under “Zip” to change the zip code populated earlier.
  18. Click on the dropdown under “Country” to change the country populated earlier.
  19. Scroll down.

    Image of steps 13 through 19.

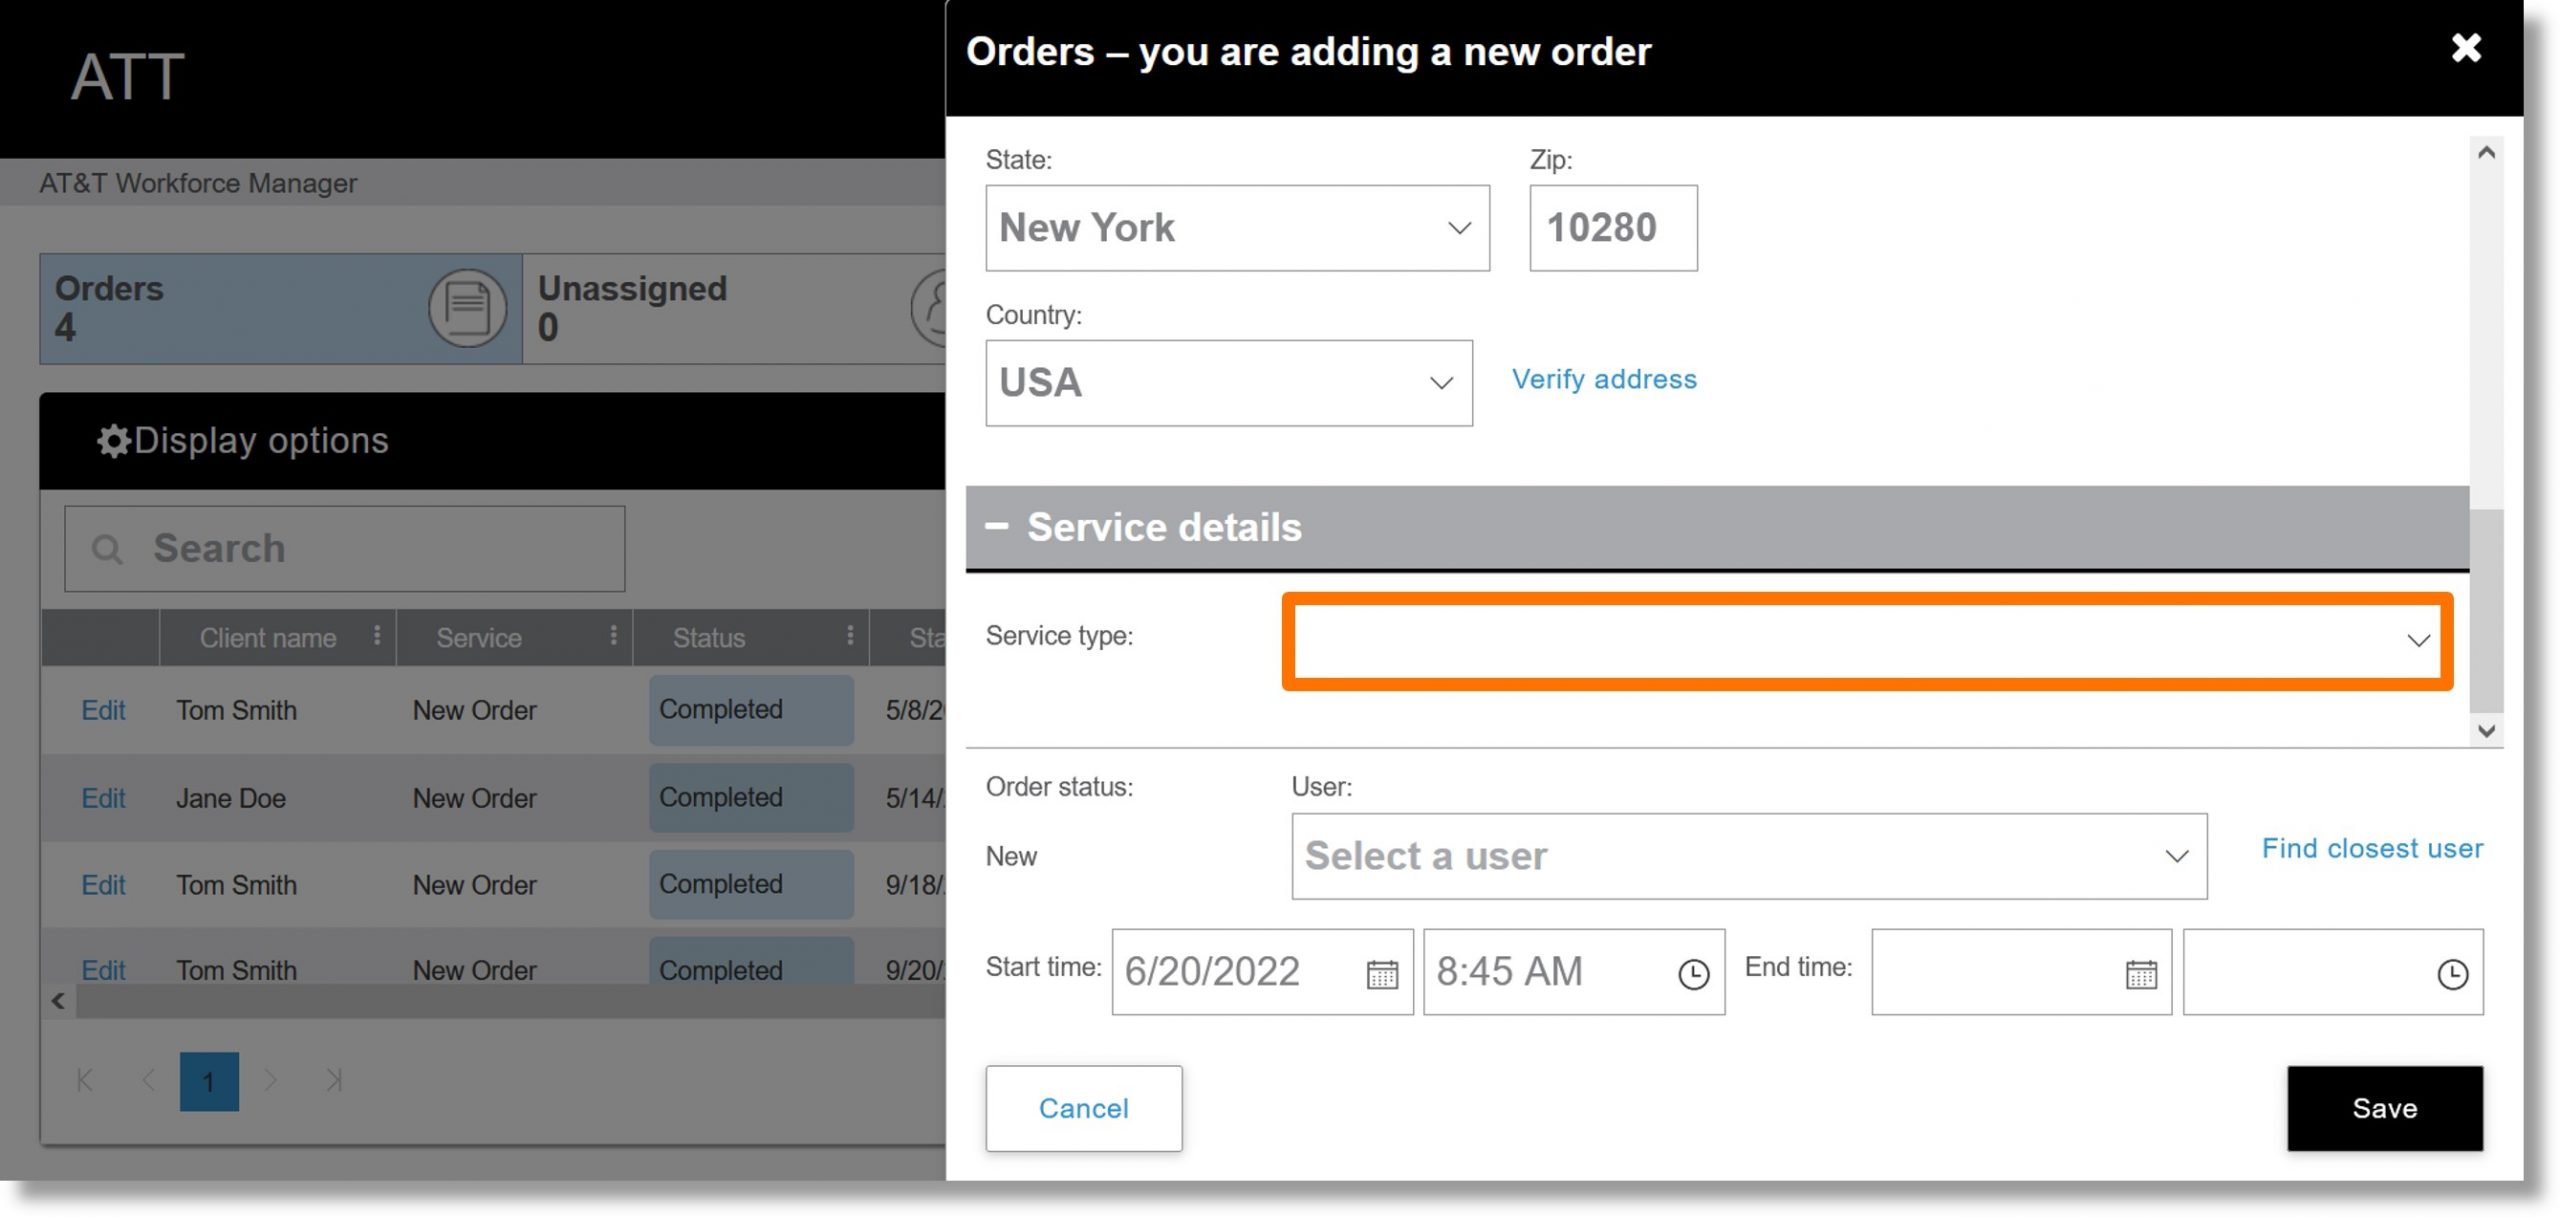
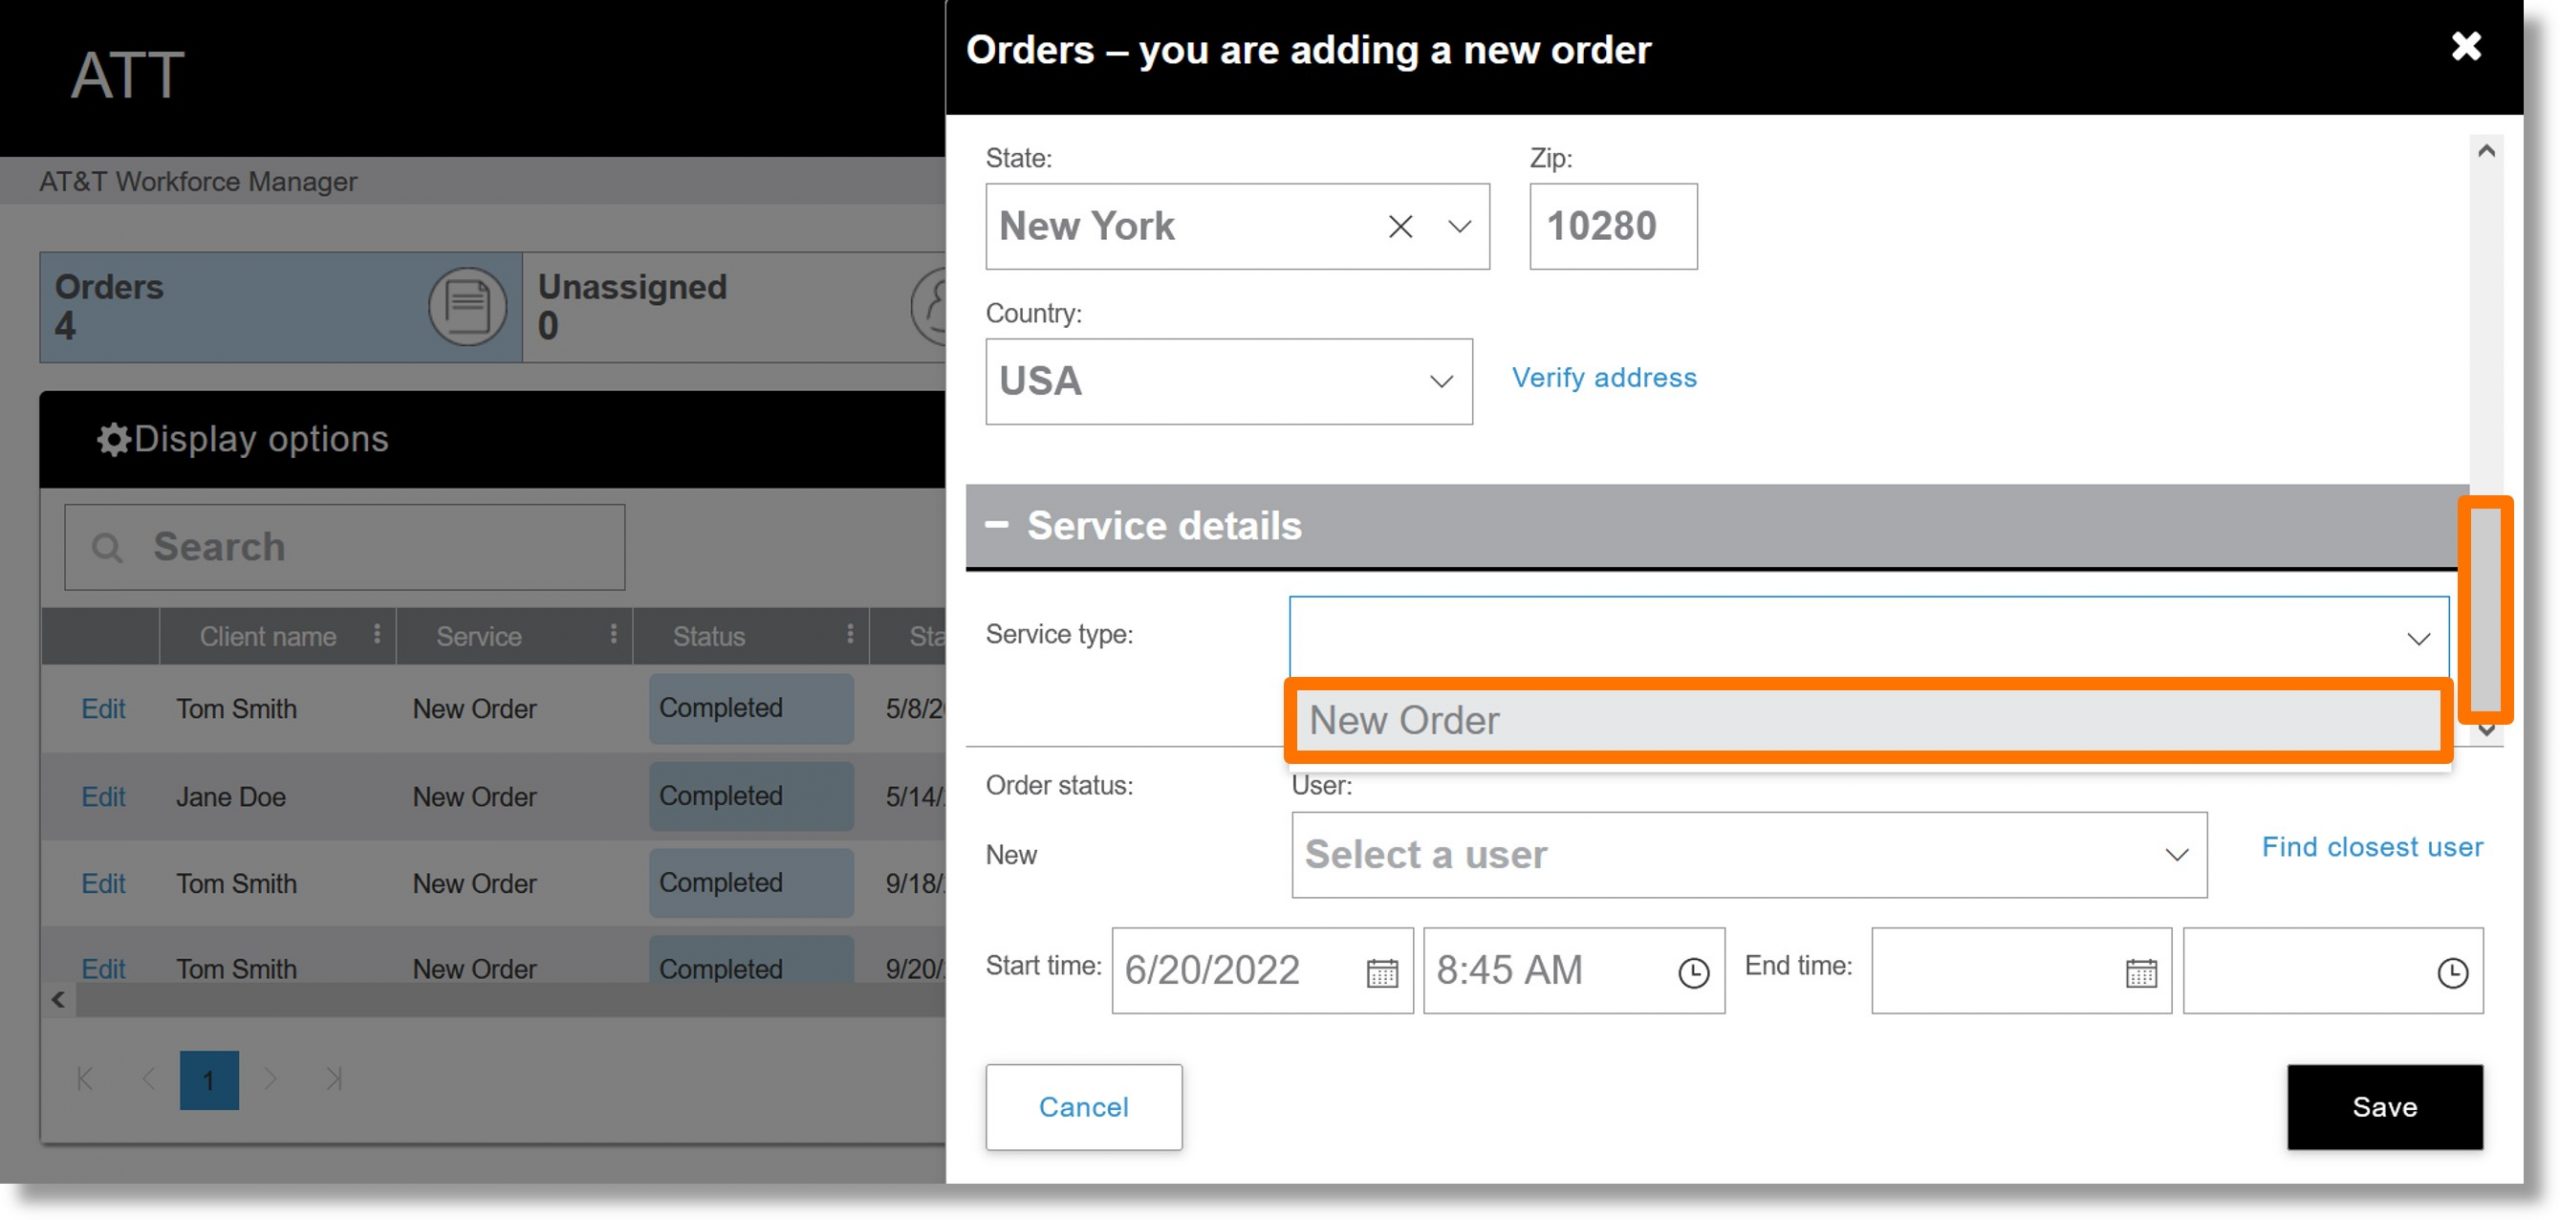
  20. Click on the dropdown to the right of “Service type”.

    Image of step 20.

  21. Click on New Order.
  22. Scroll down.

    Image of steps 21 and 22.

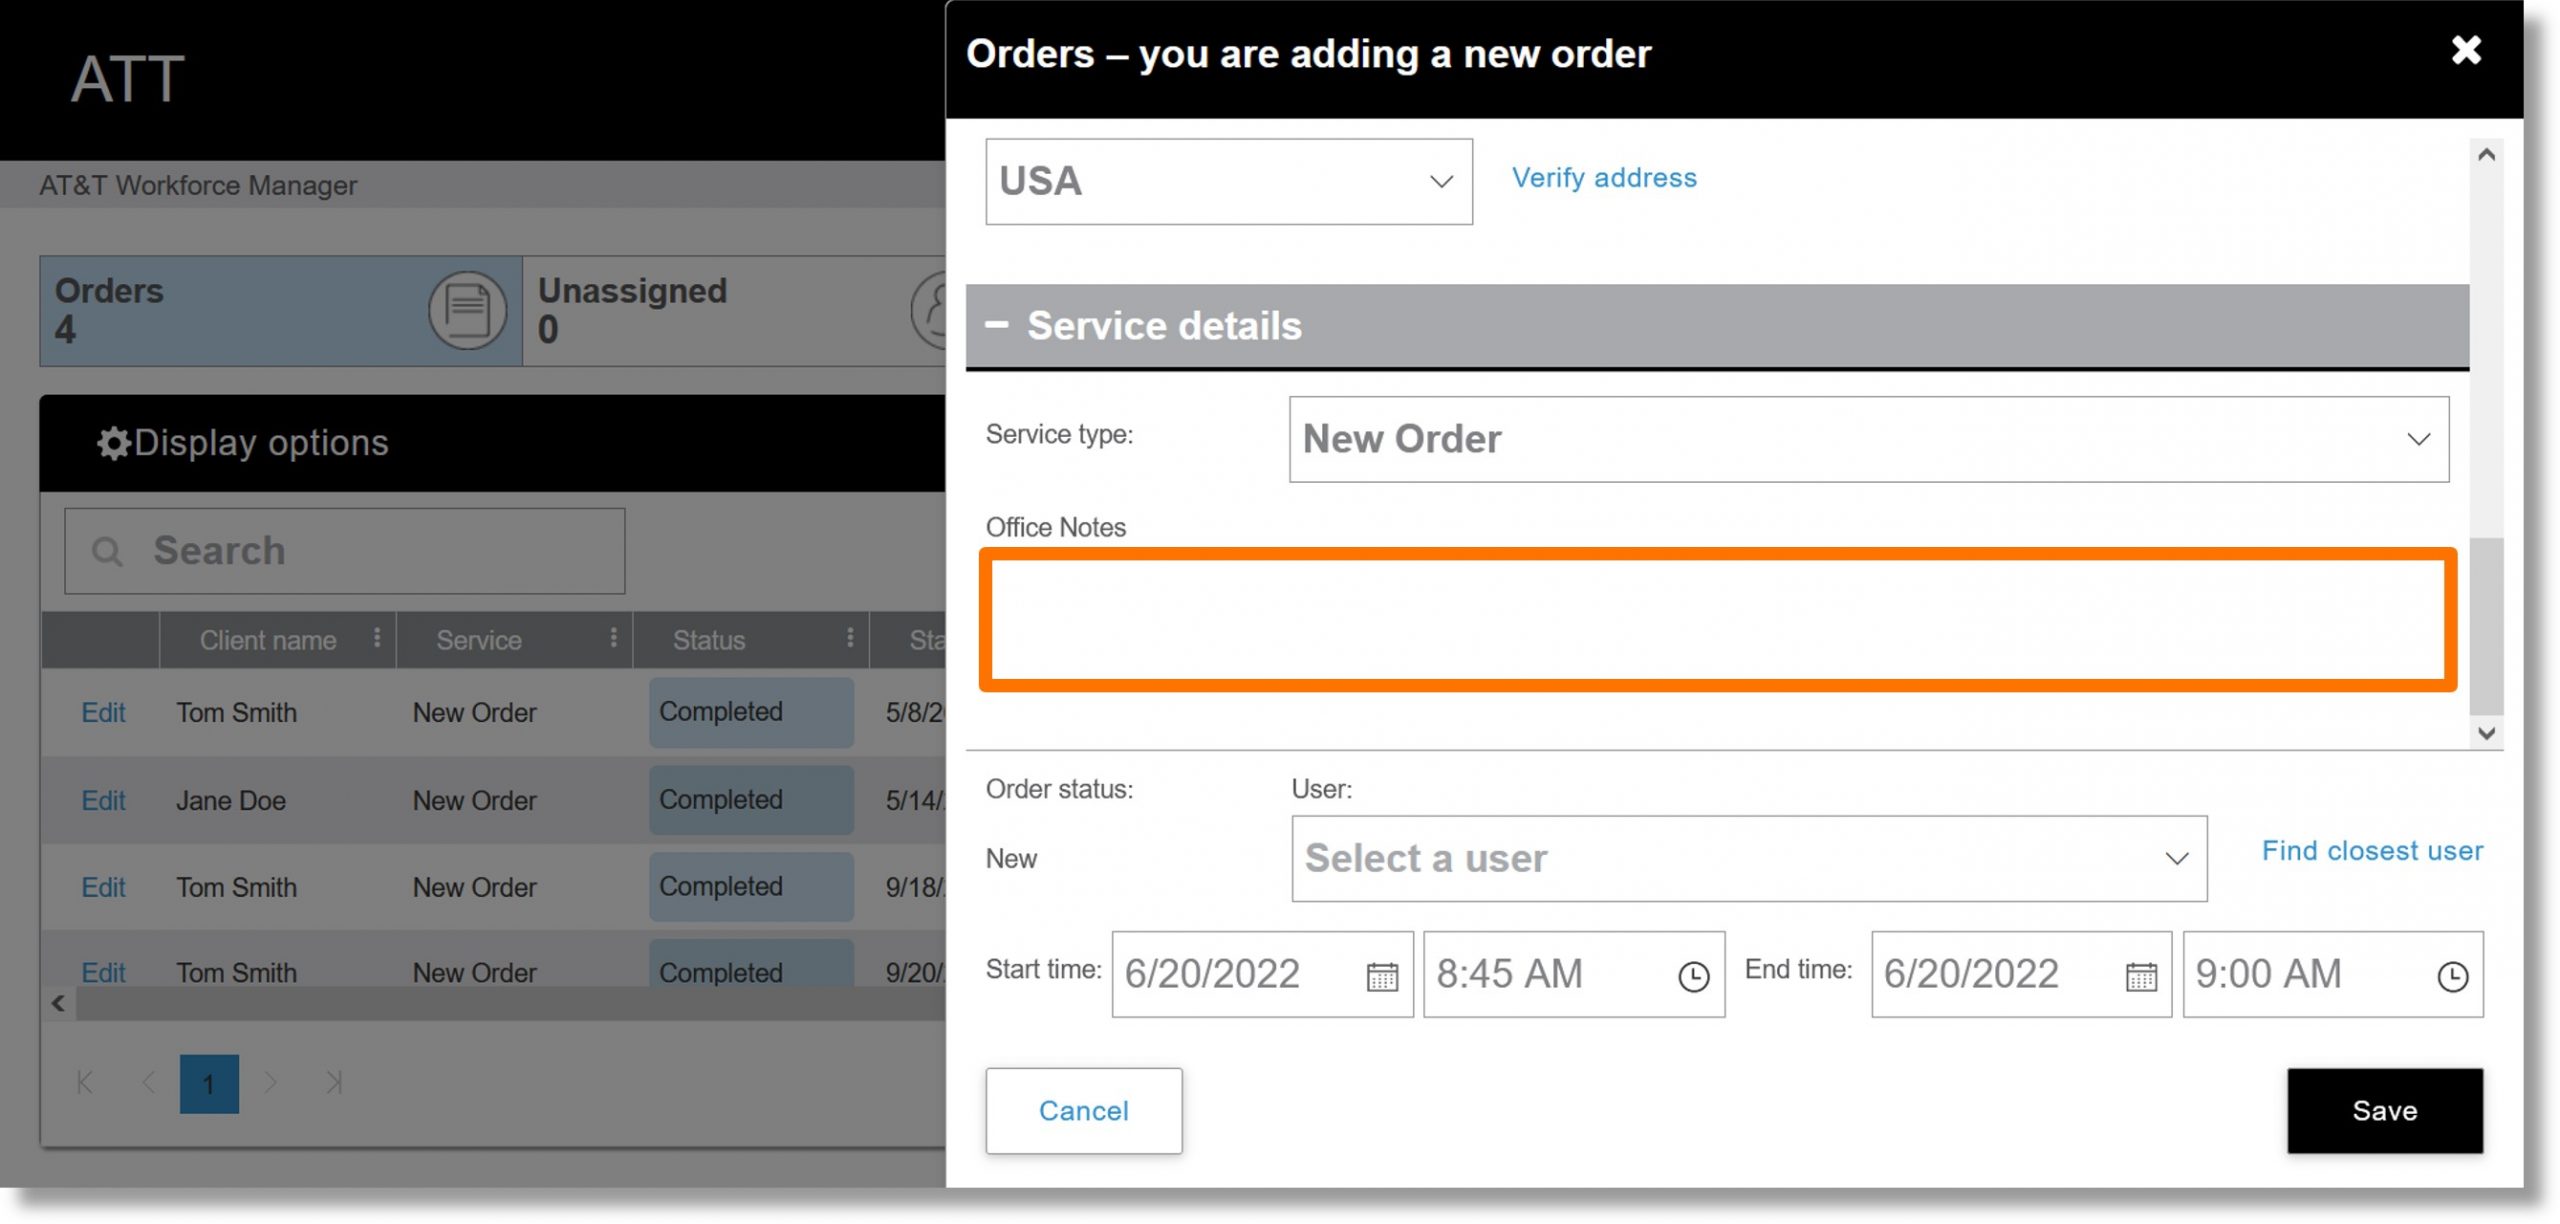
  23. Click on the field under “Office Notes” and enter the desired order note.

    Image of step 23.

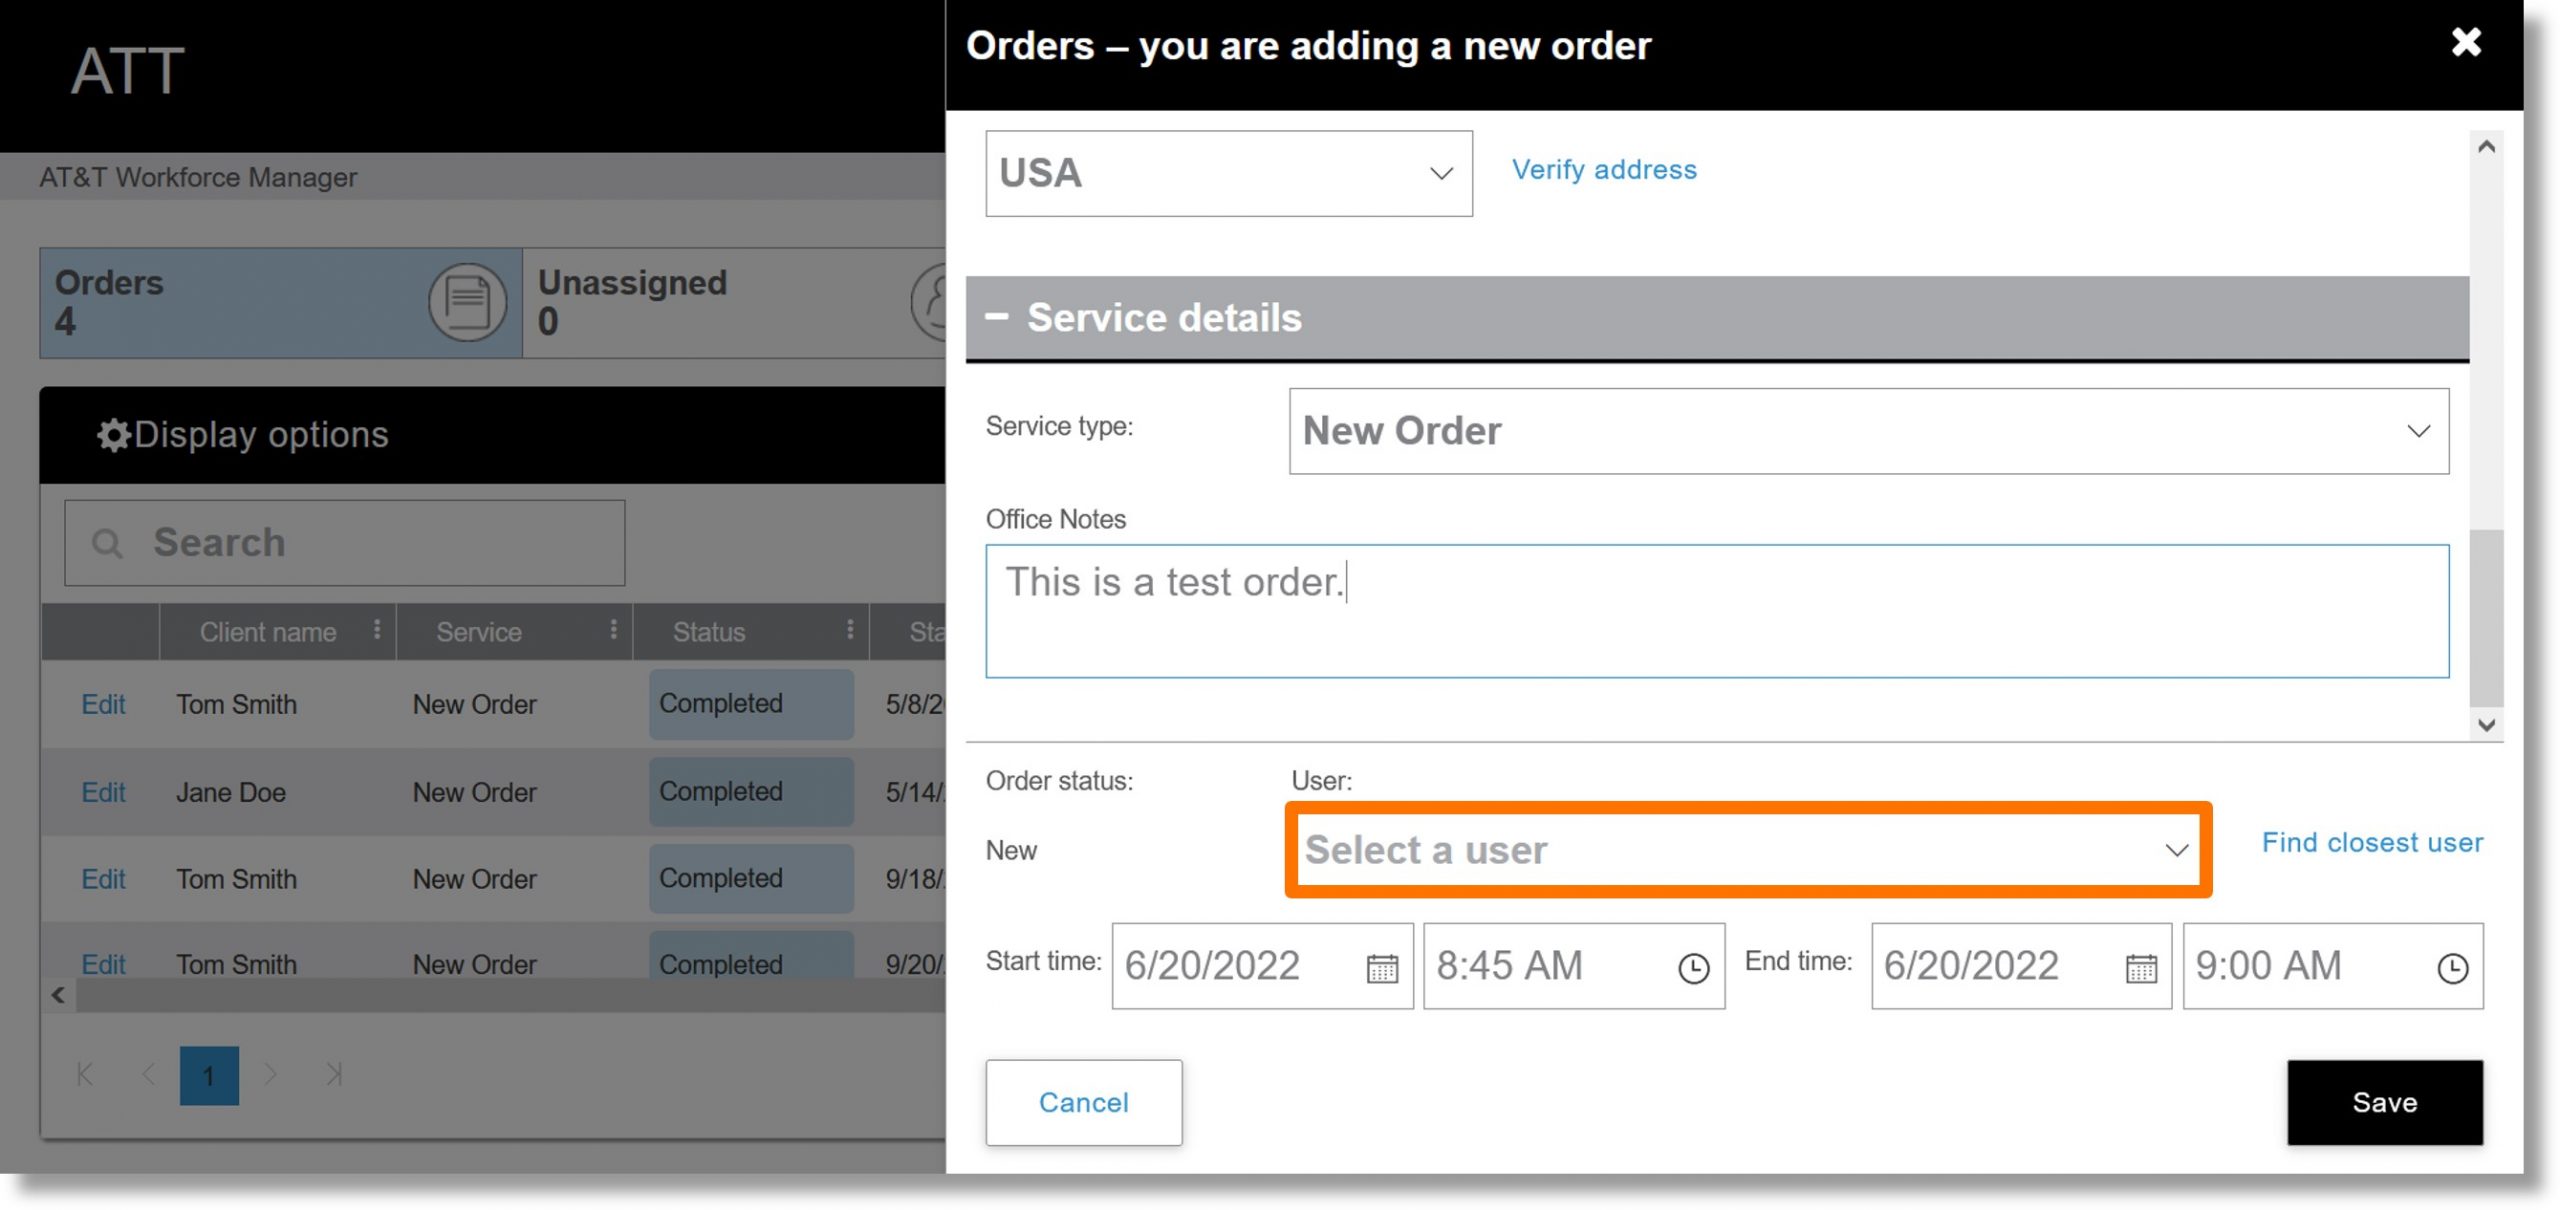
  24. Click on the dropdown under “User” and select the desired system user.

    Image of step 24.

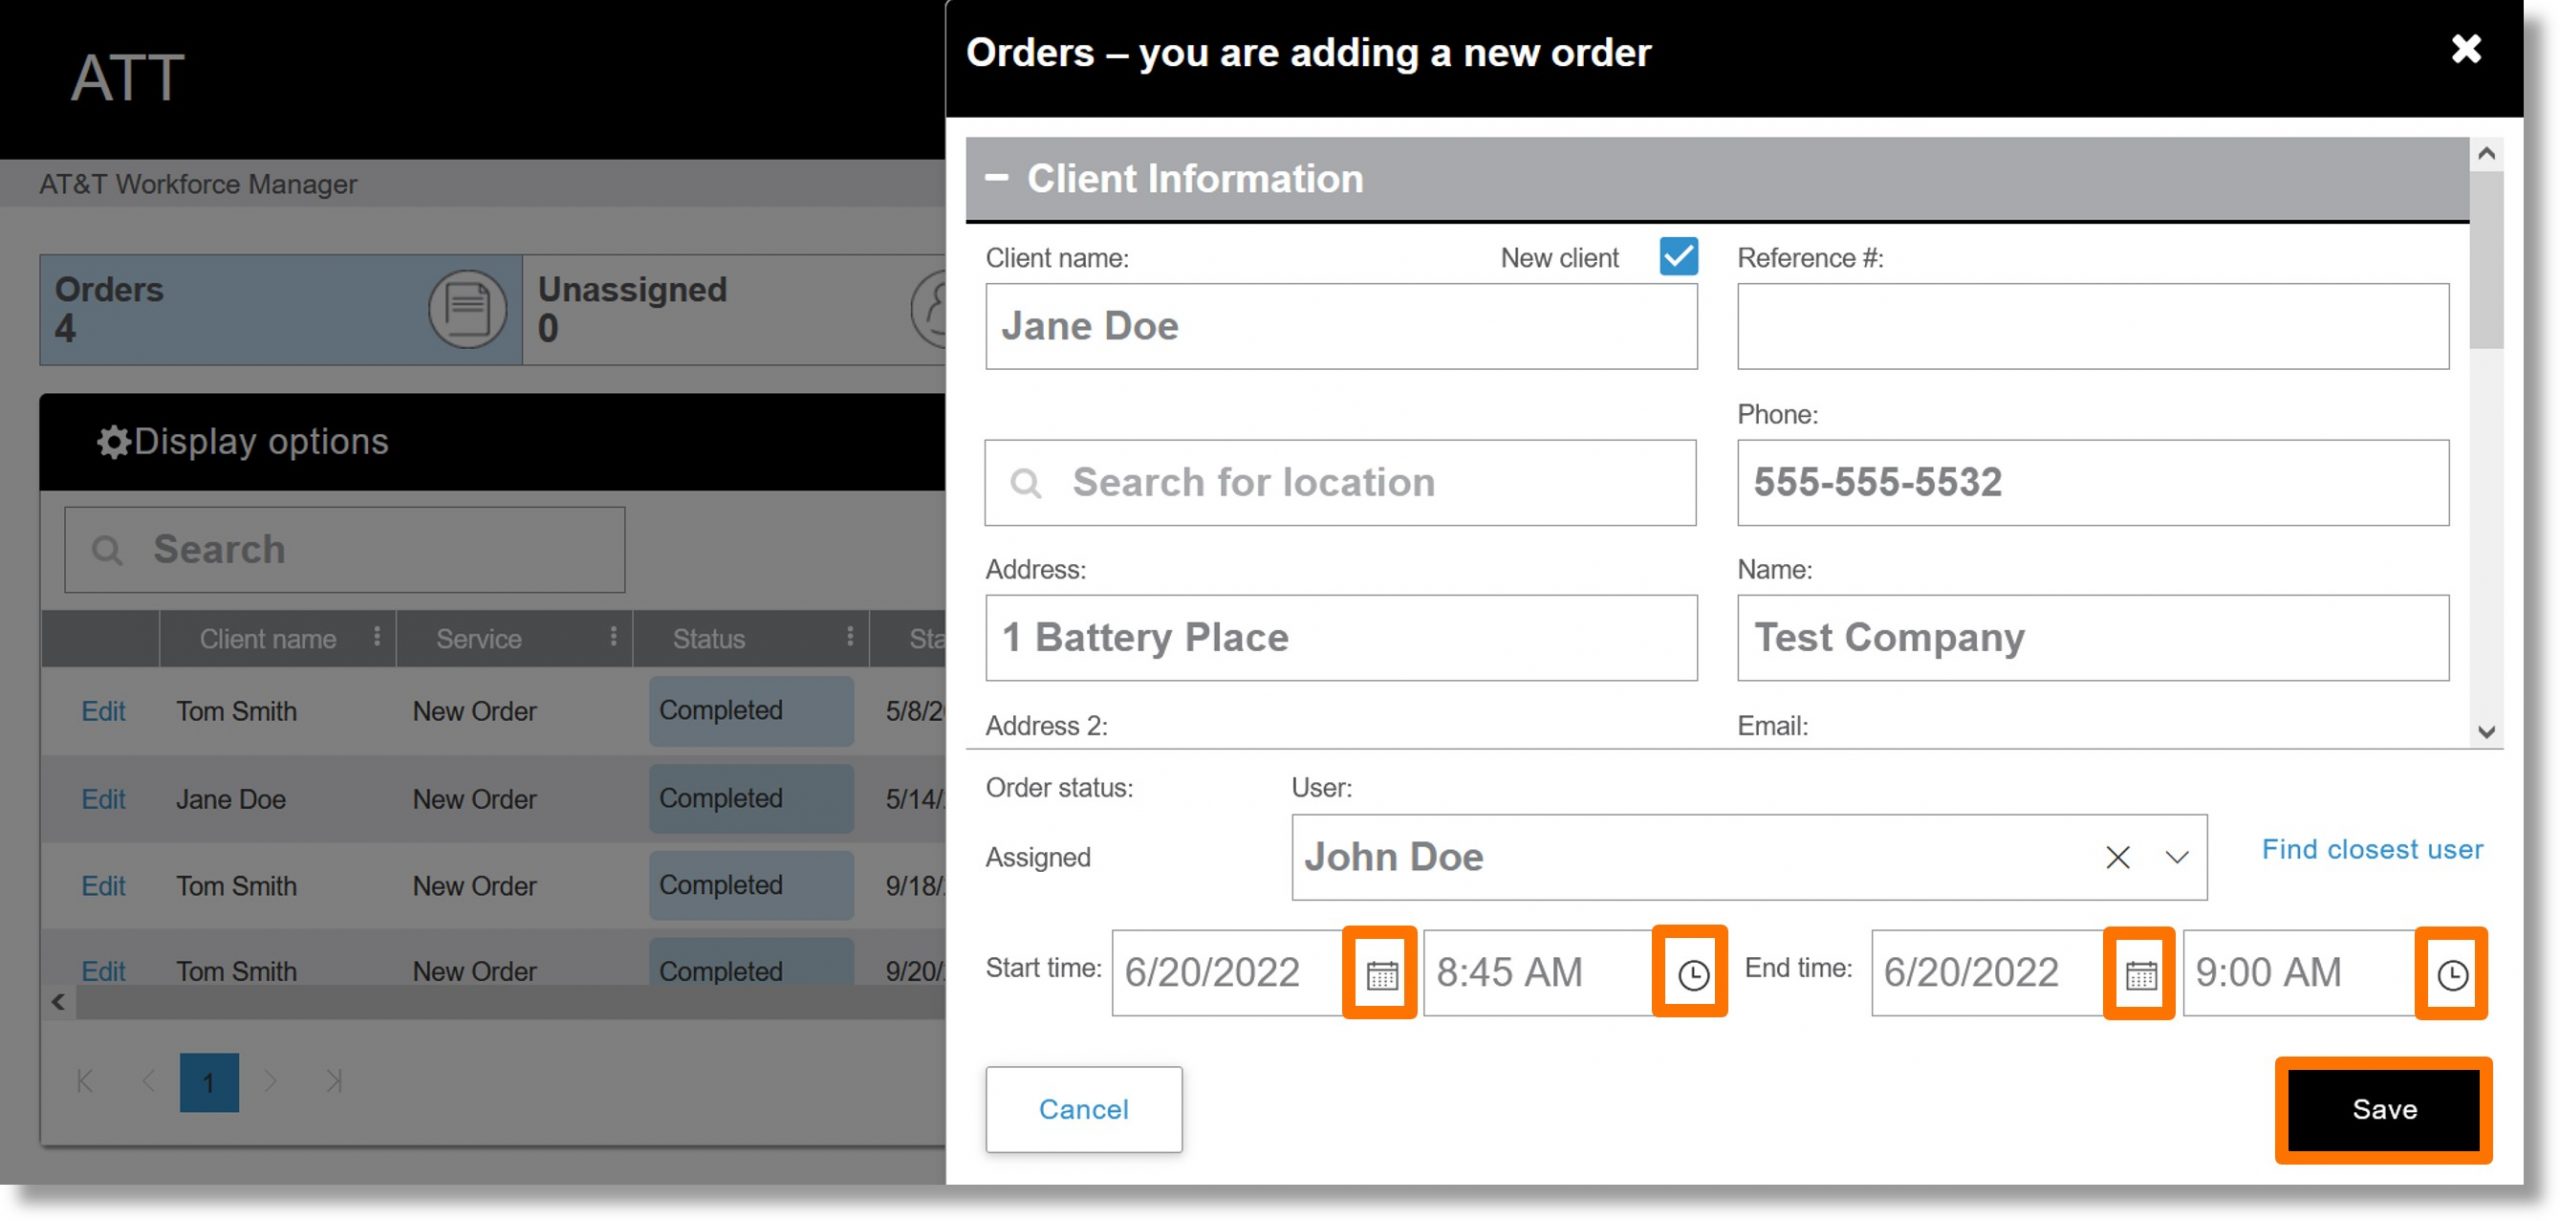
  25. Click on the calendar icon Image of the calendar icon. and clock icon Image of the clock icon. to the right of “Start time” to set the order’s start date and time.
  26. Click on the calendar icon Image of the calendar icon. and clock icon Image of the clock icon. to the right of “End time” to set the order’s end date and time.
  27. Click on the Submit button.

    Image of steps 25 through 27.