TOP

AT&T Workforce Manager

AT&T Workforce Manager strengthens communications between dispatchers and mobile workers, improves control over field operations, and delivers services faster and more efficiently. Make near real-time decisions about your mobile operations so you can save time and increase productivity.

Back to Product Page
Use the dropdown to get support, or purchase this product

Create a scheduled User report in AT&T Workforce Manager

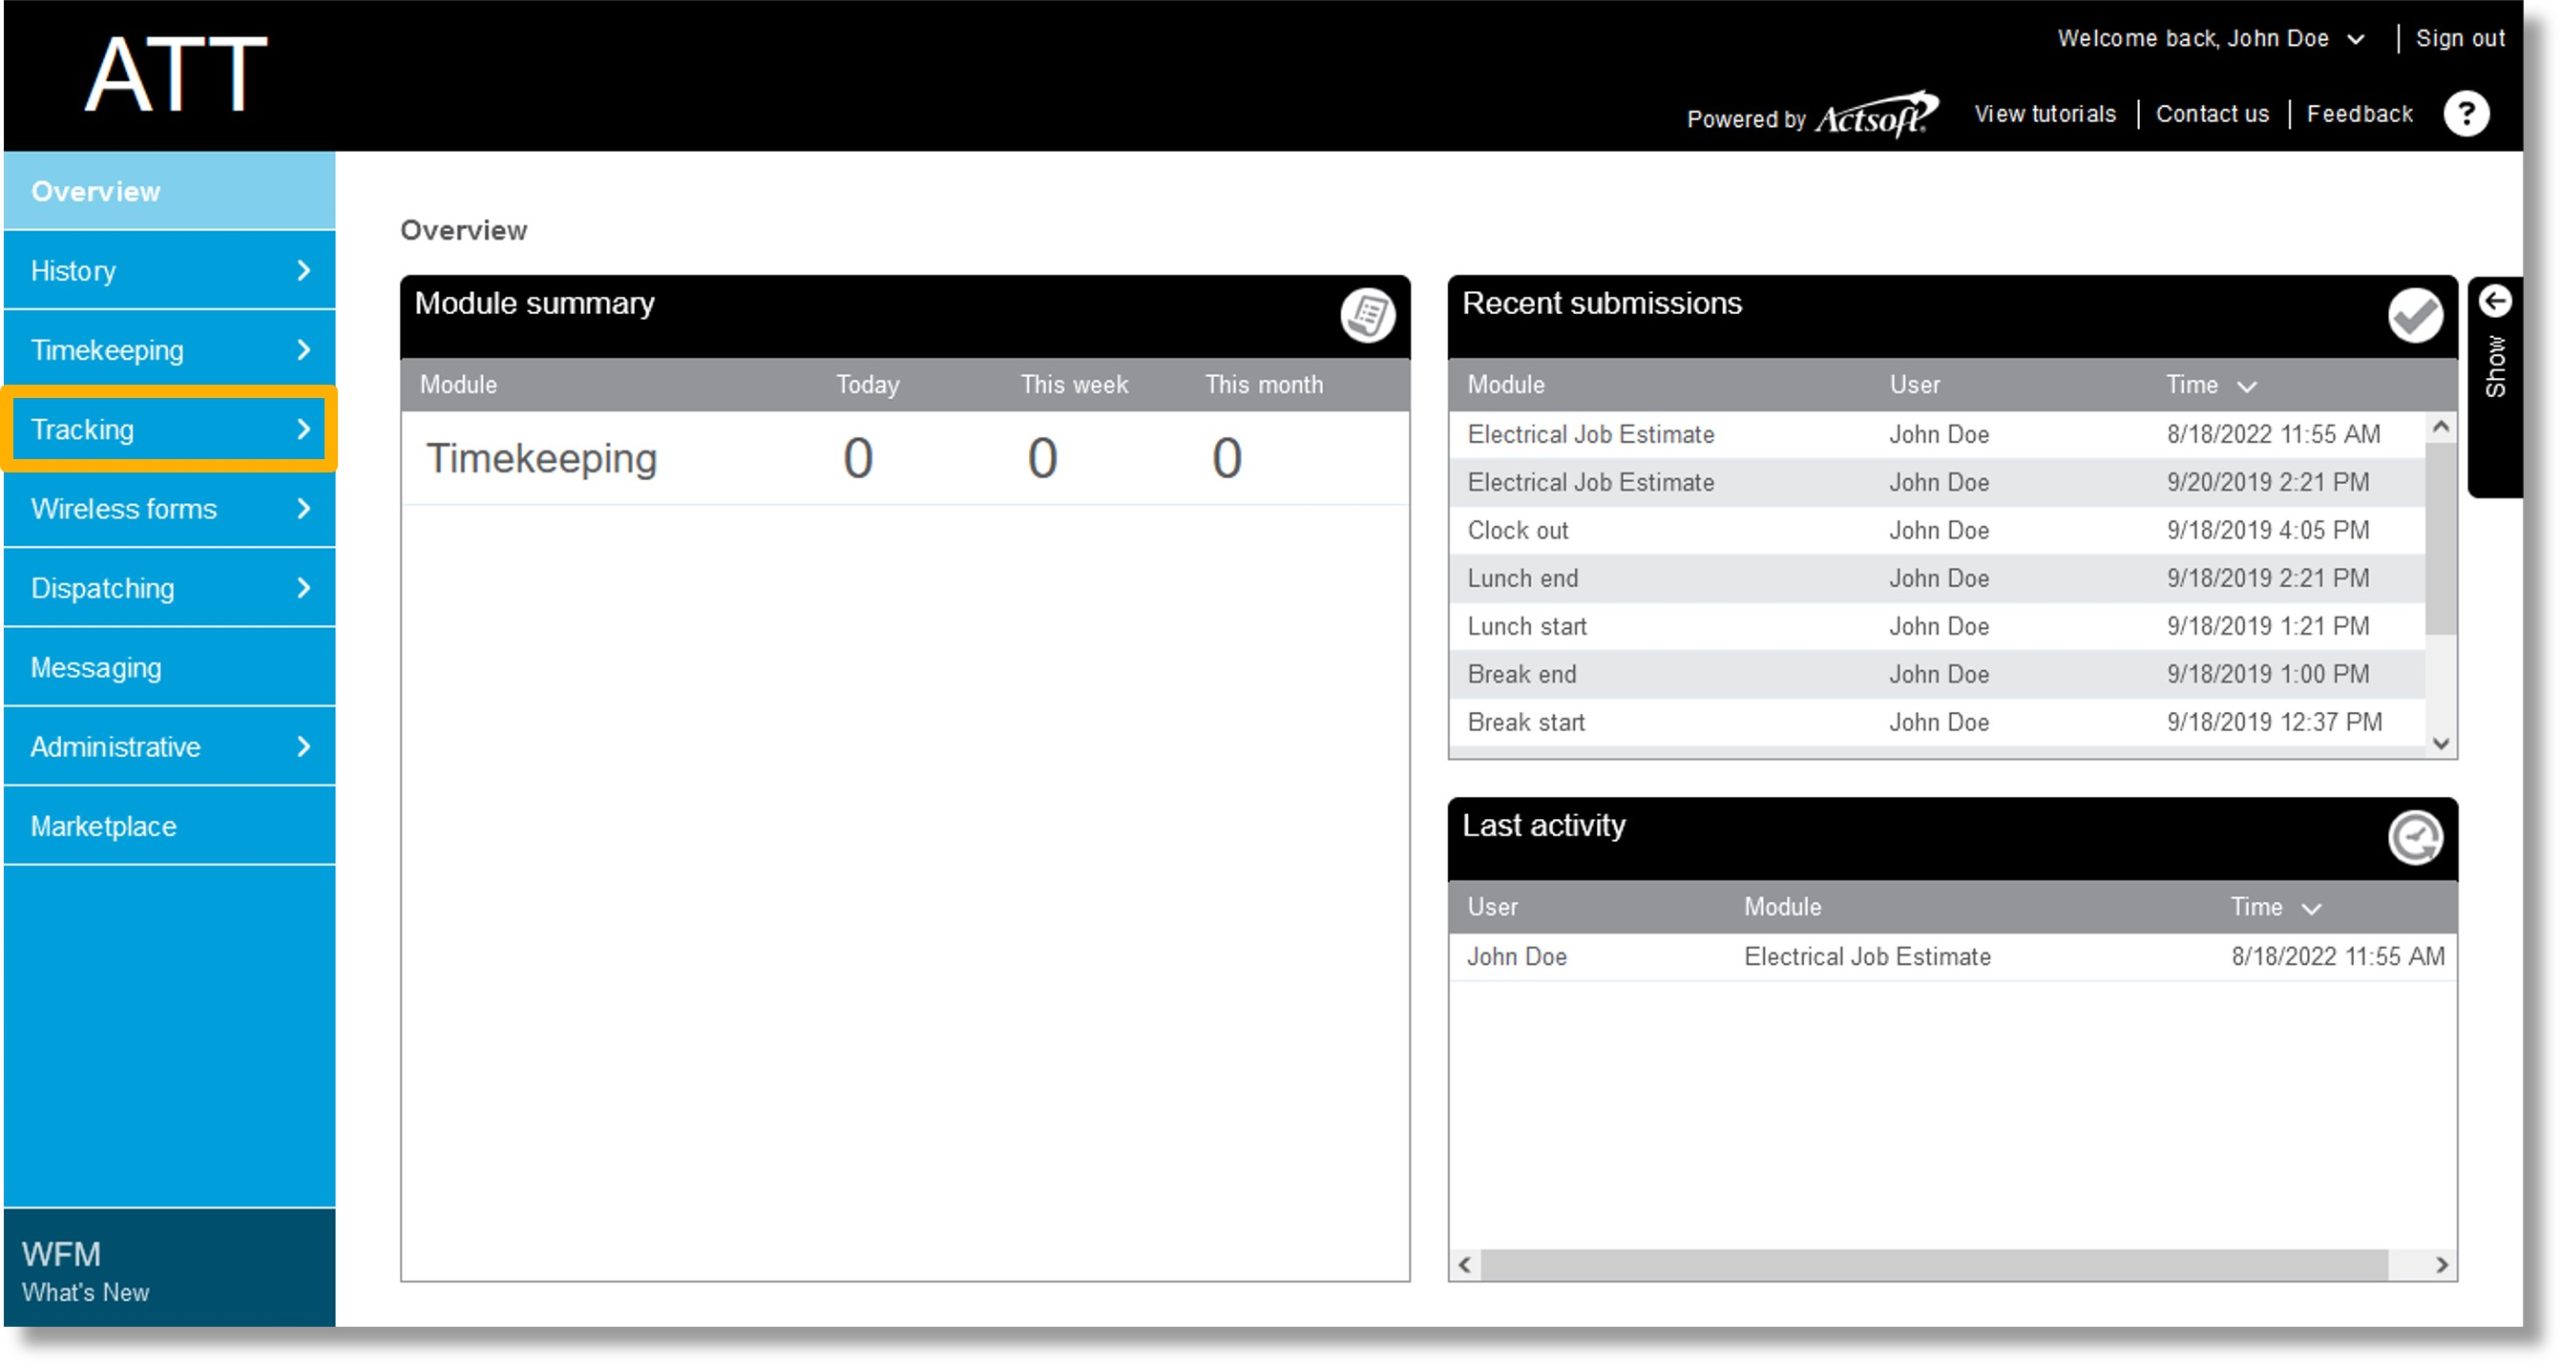
  1. Click on Tracking in the menu on the left.

    Image of step 1.

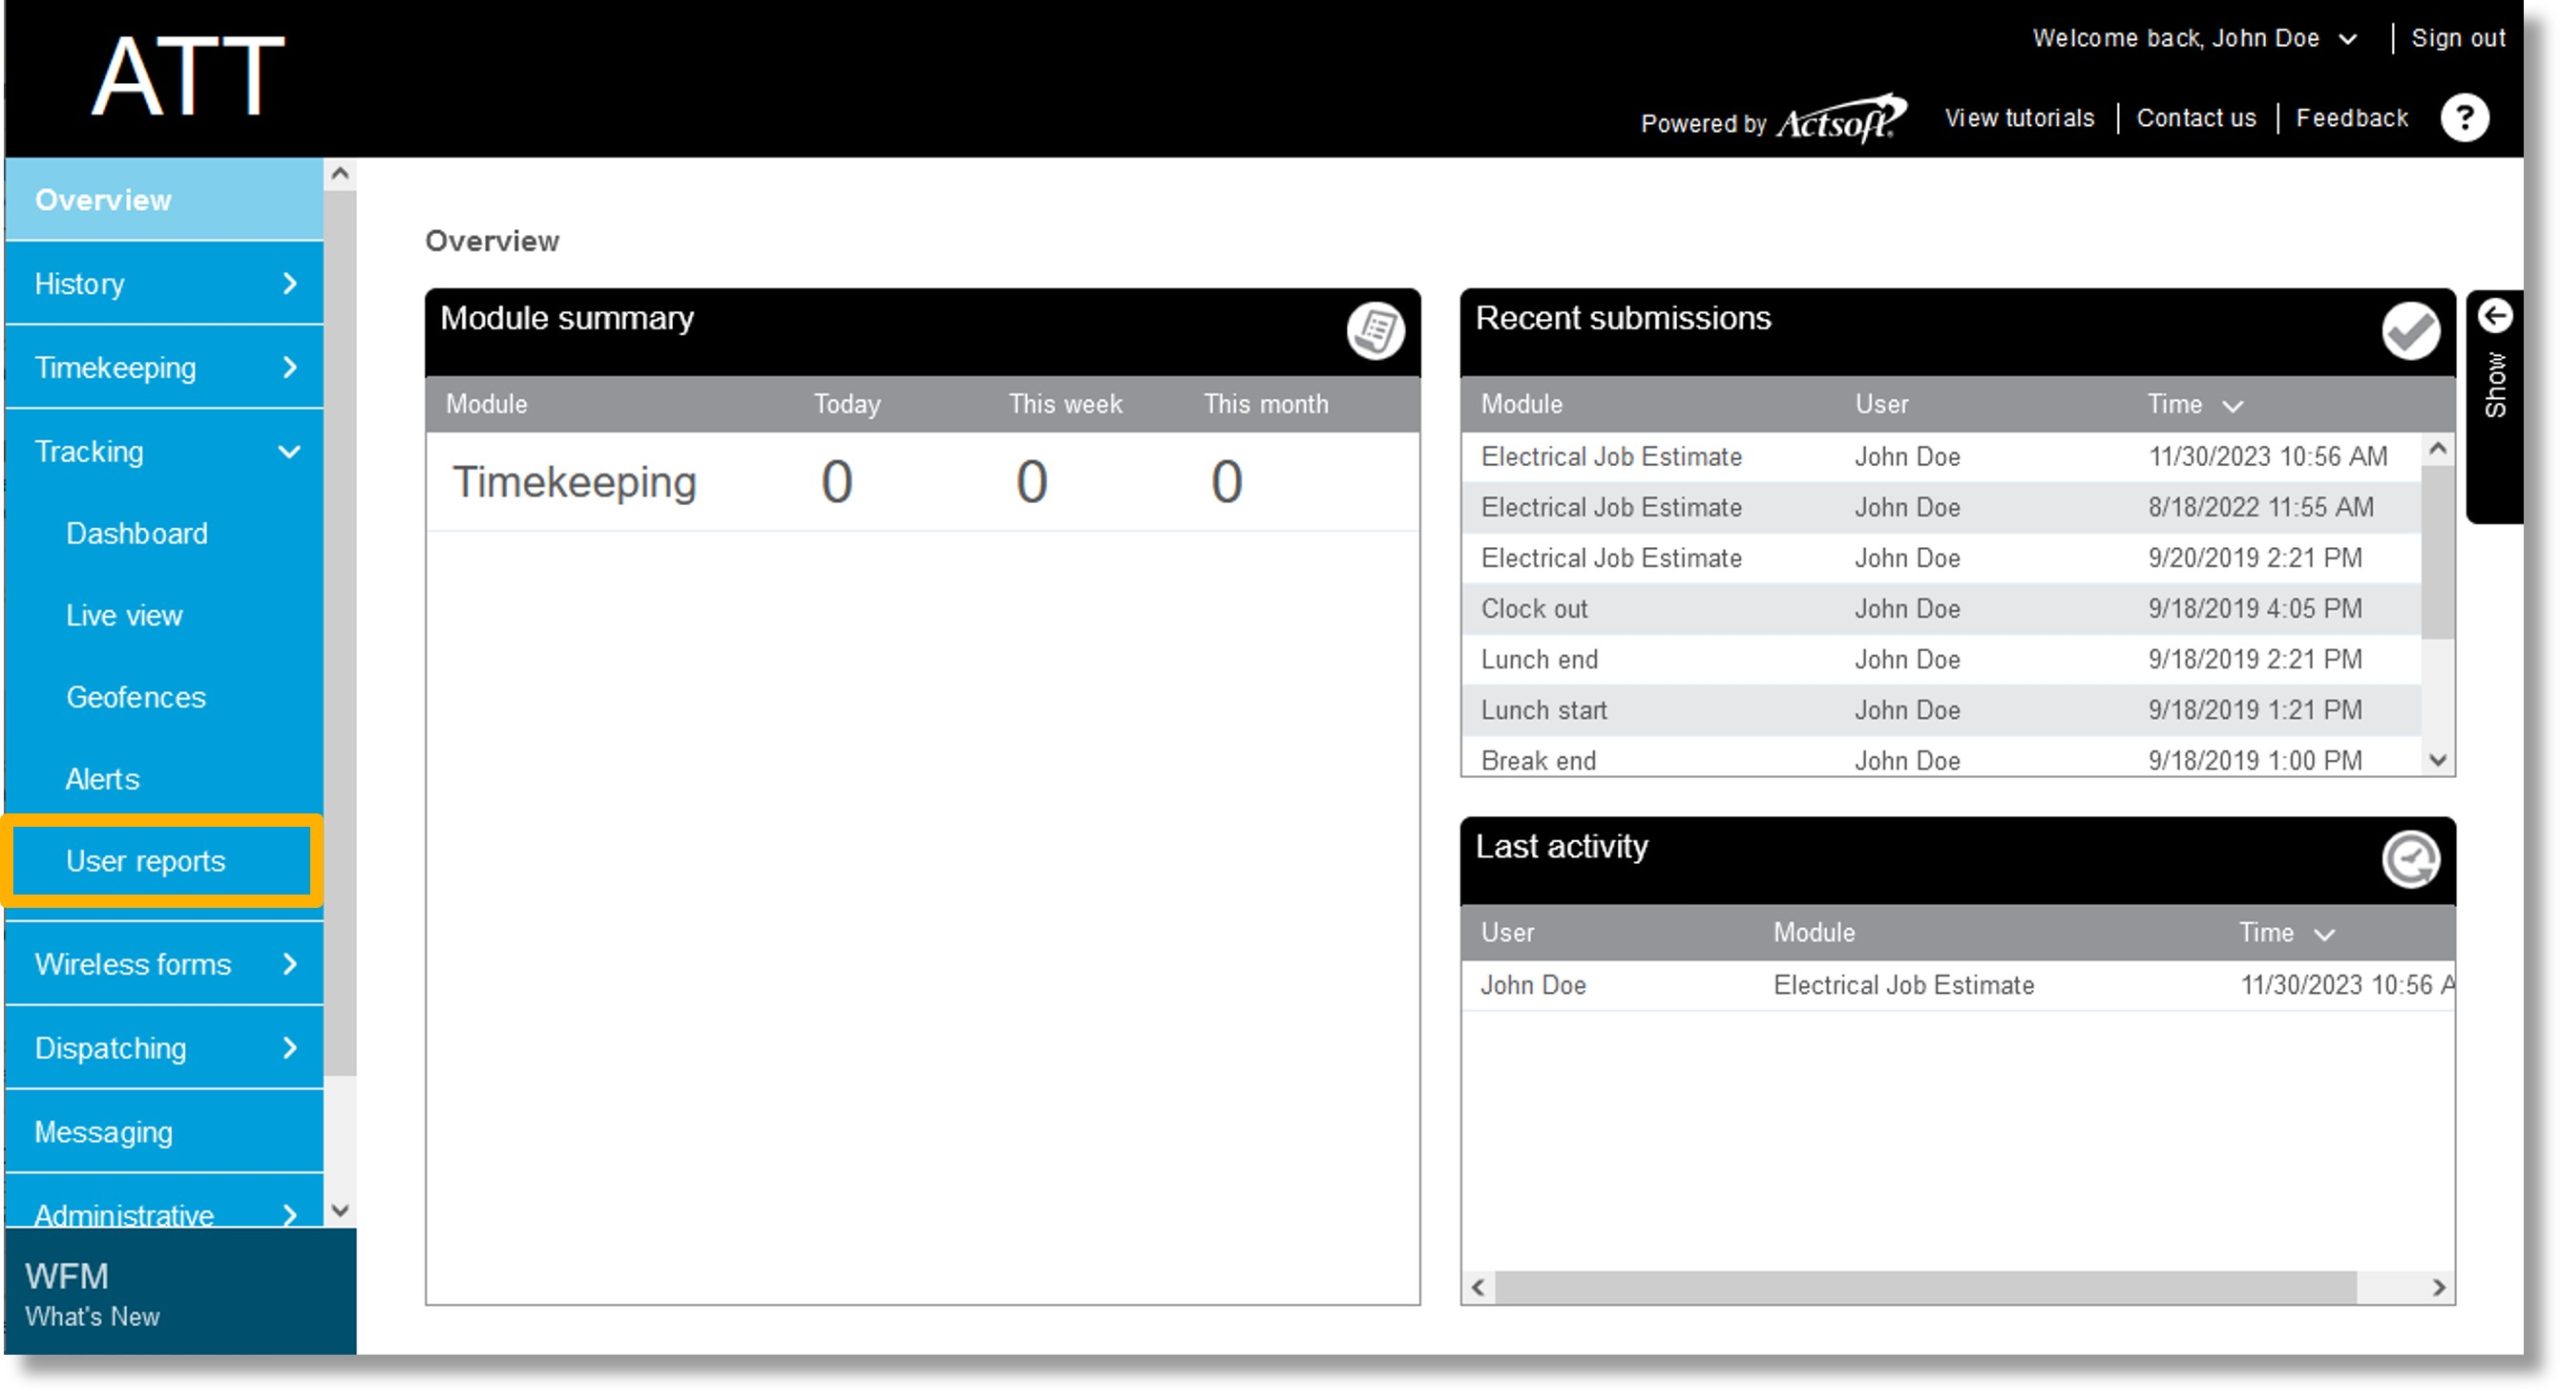
  2. Click User reports.

    Image of step 2.

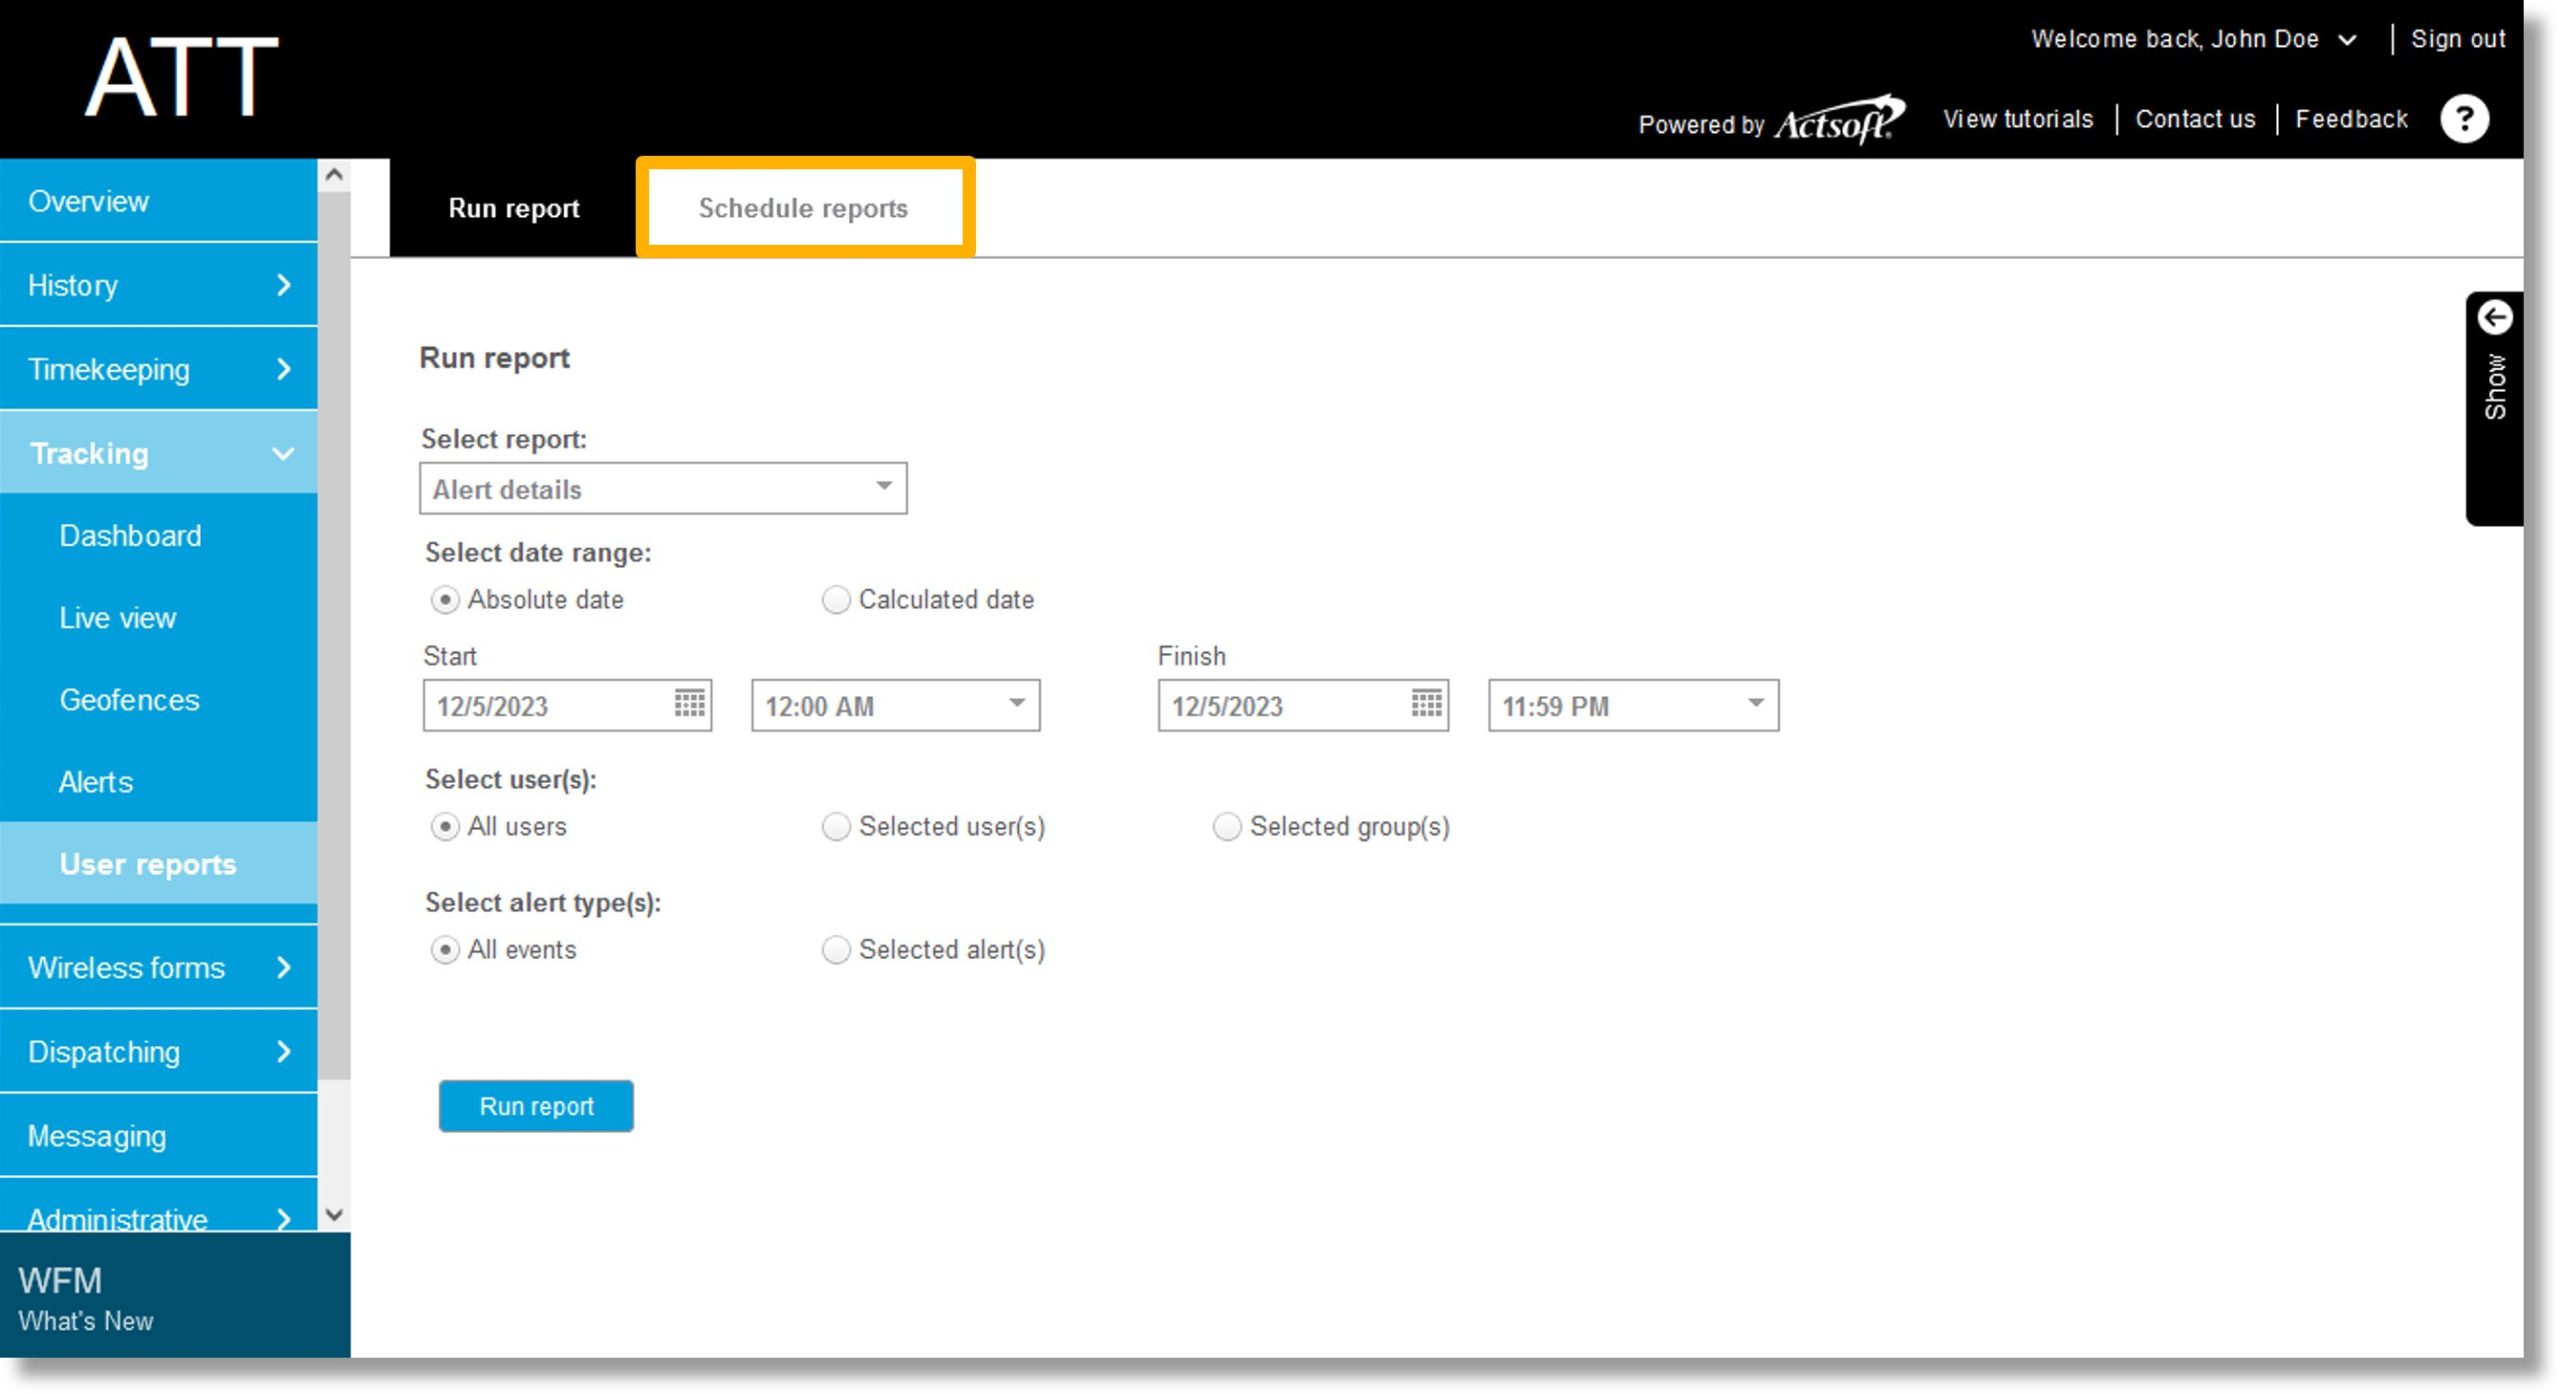
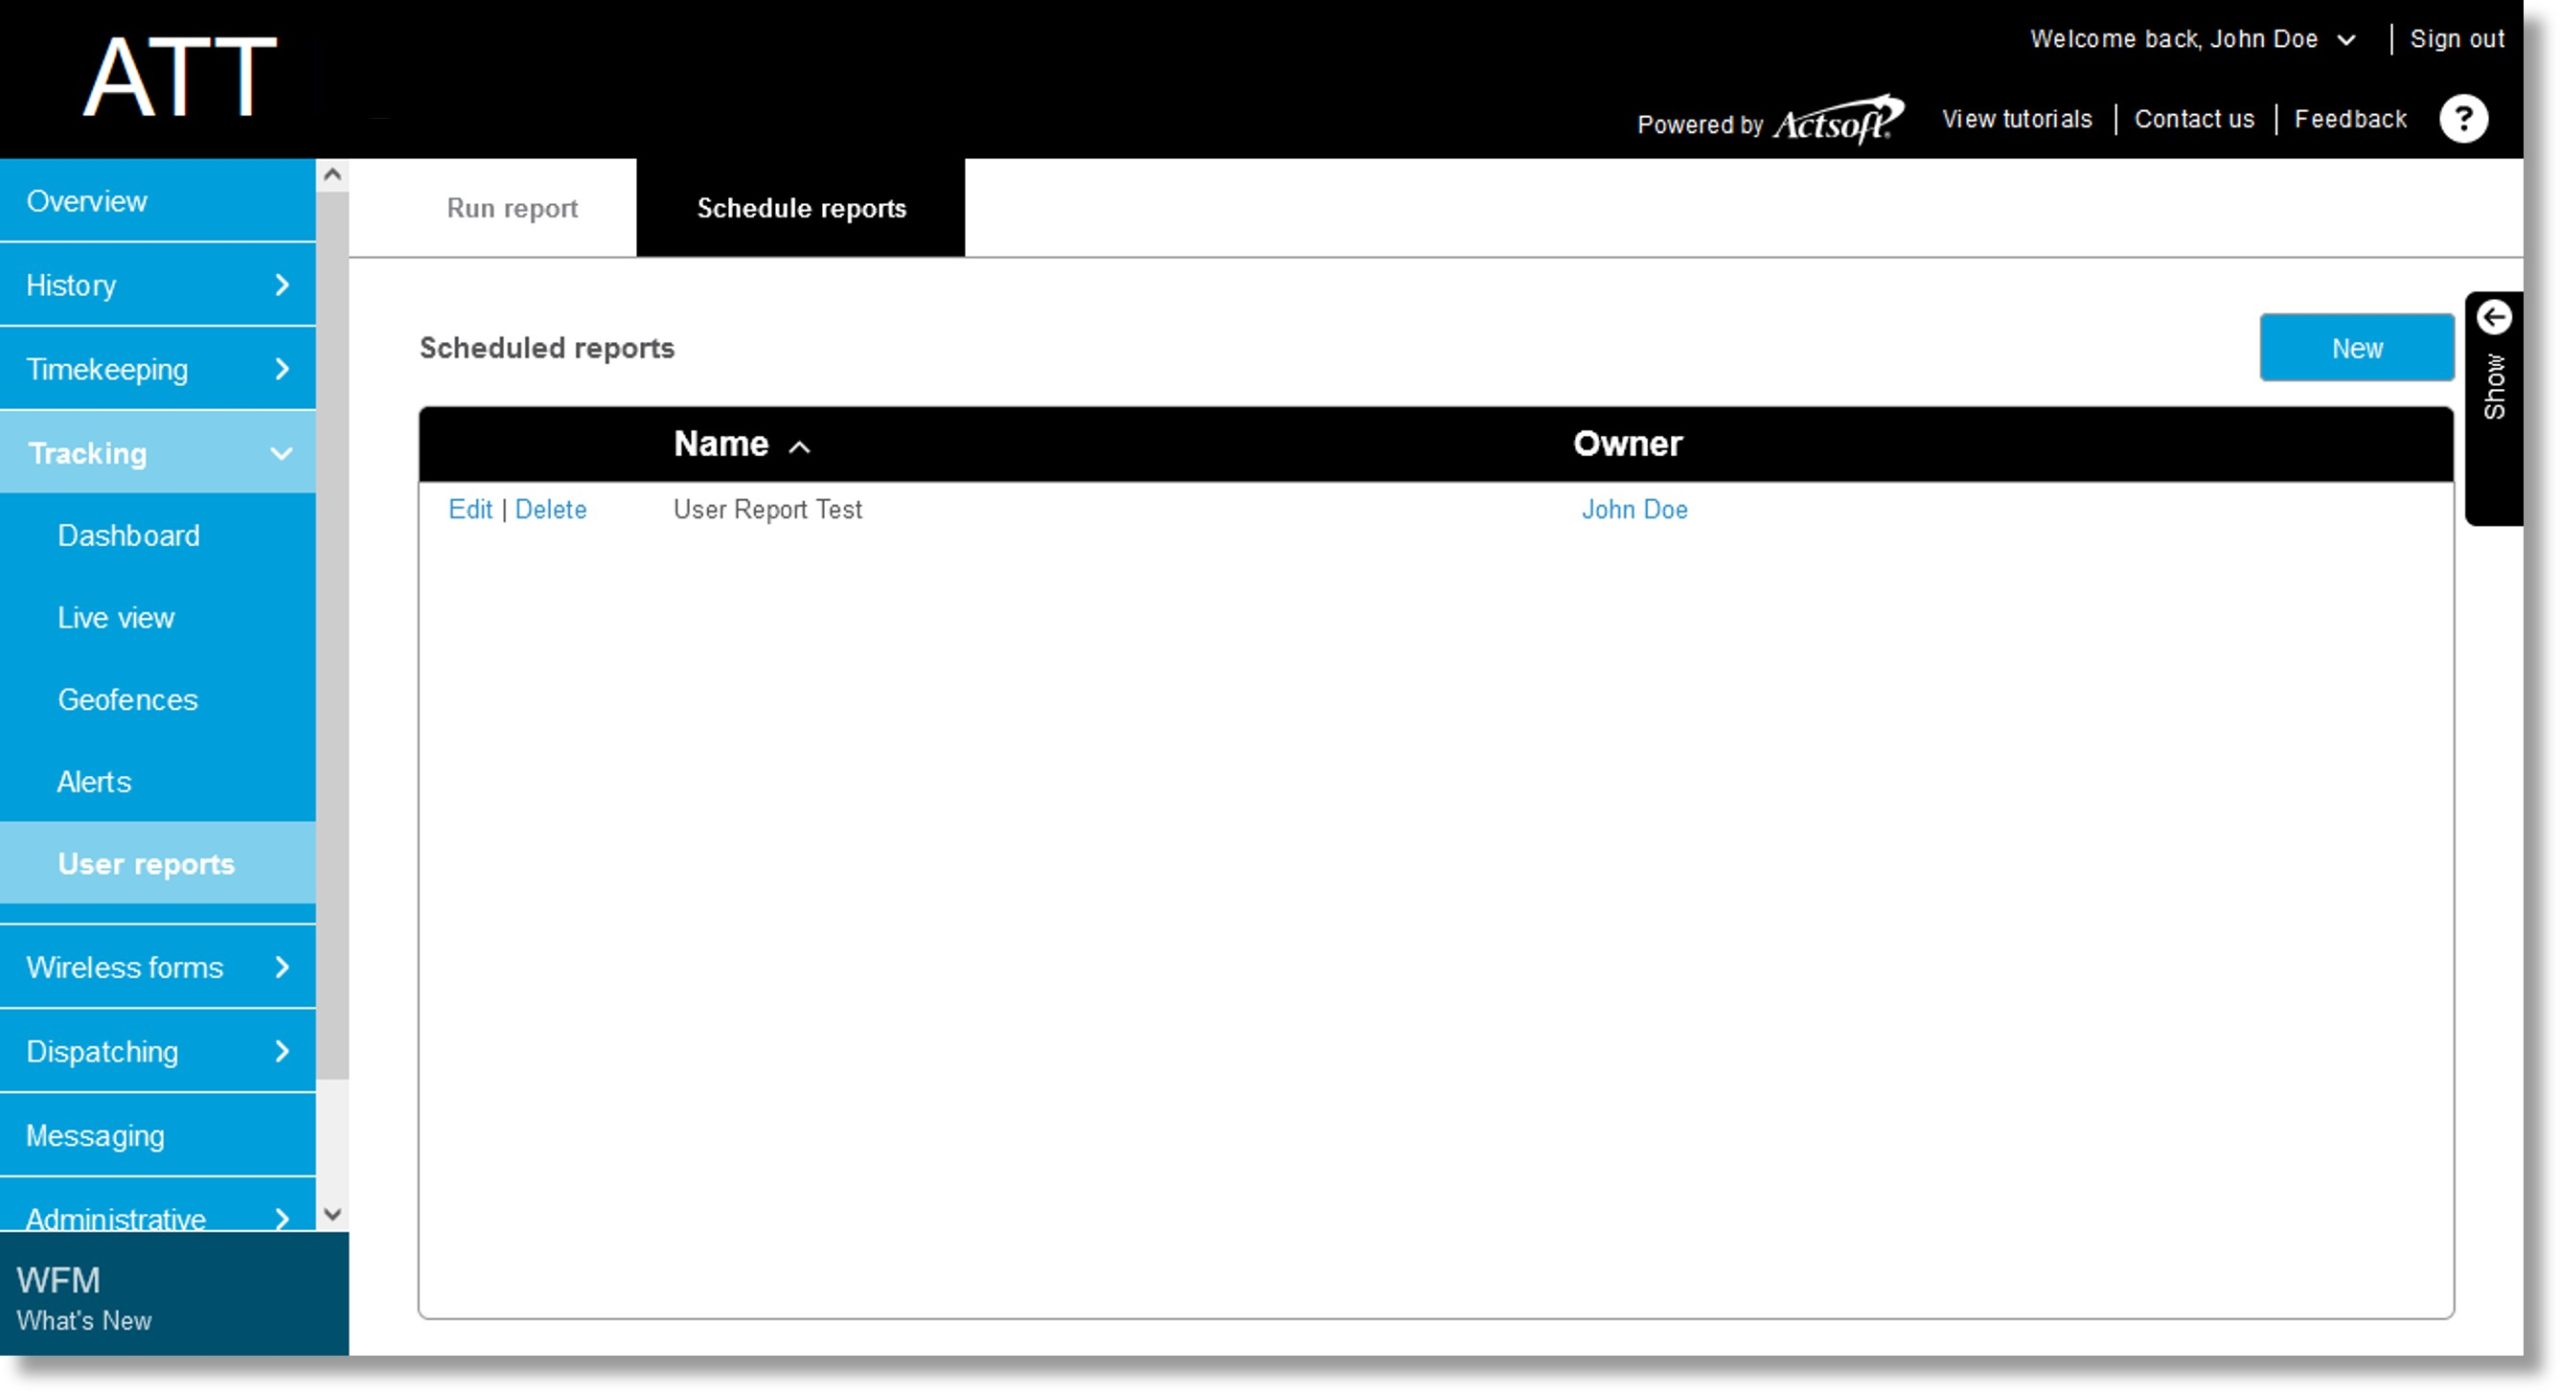
  3. Click on the Schedule reports tab.

    Image of step 3.

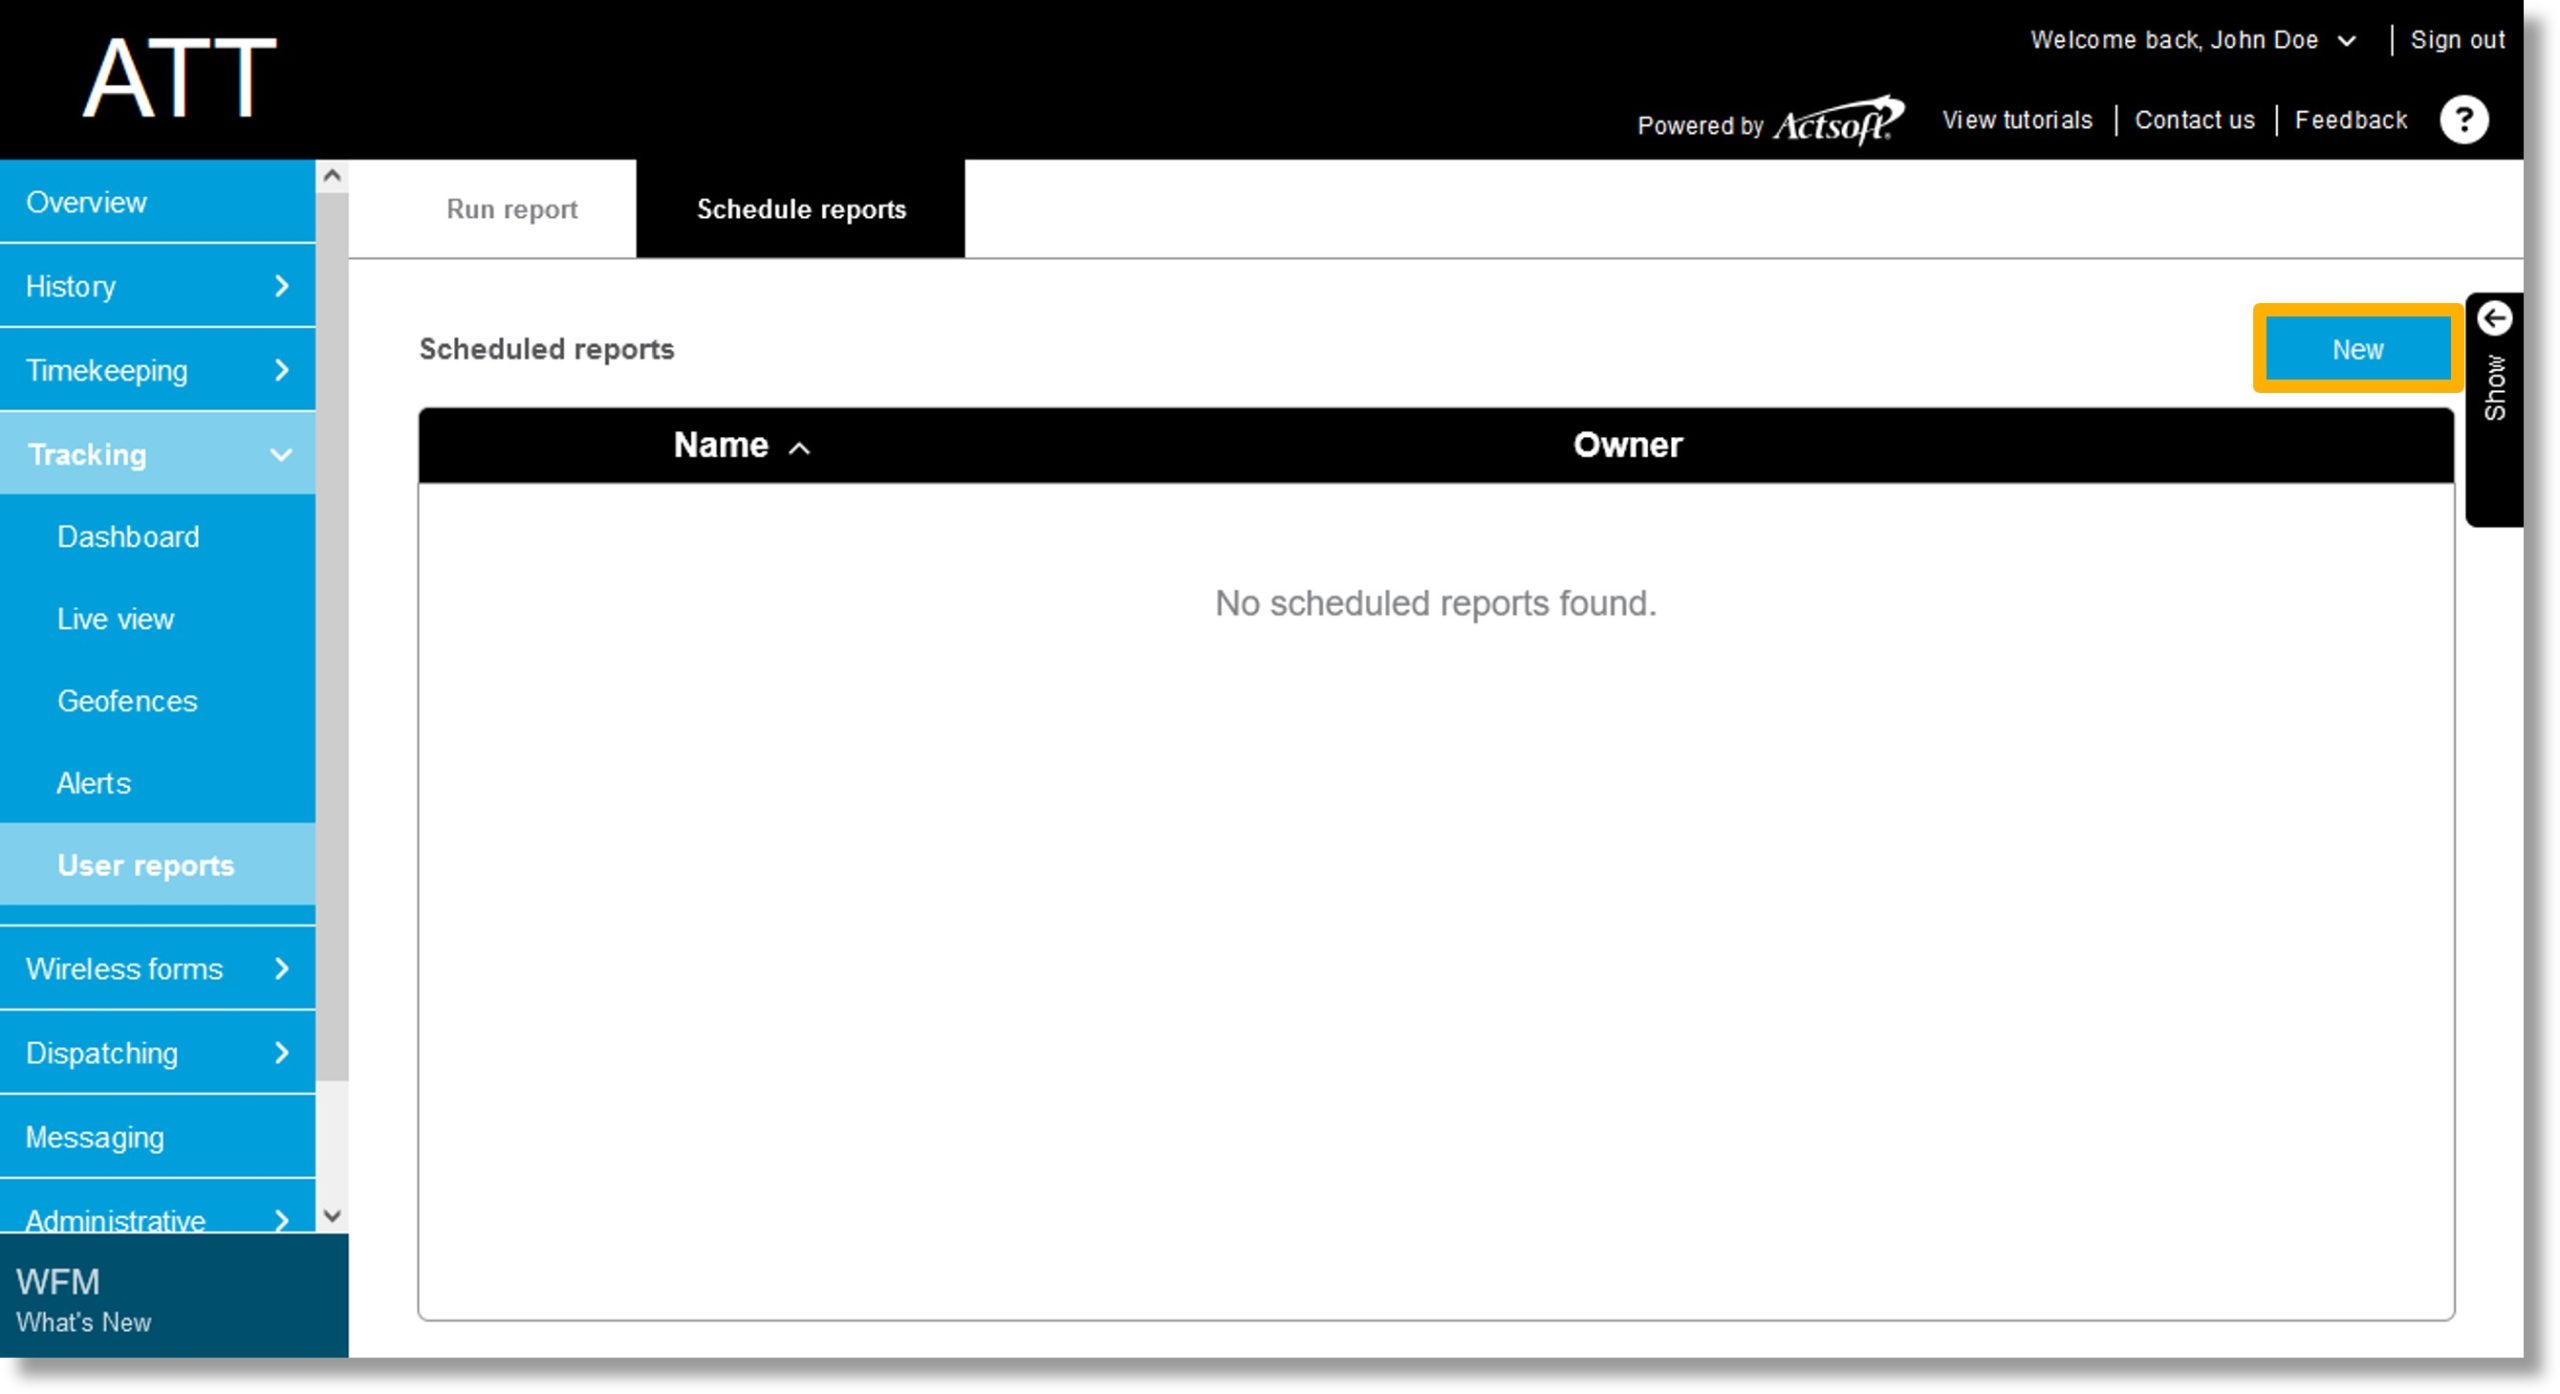
  4. A list of scheduled reports displays.

  5. Click on the New button at the top right of the reports list.

    Image of steps 4 and 5.

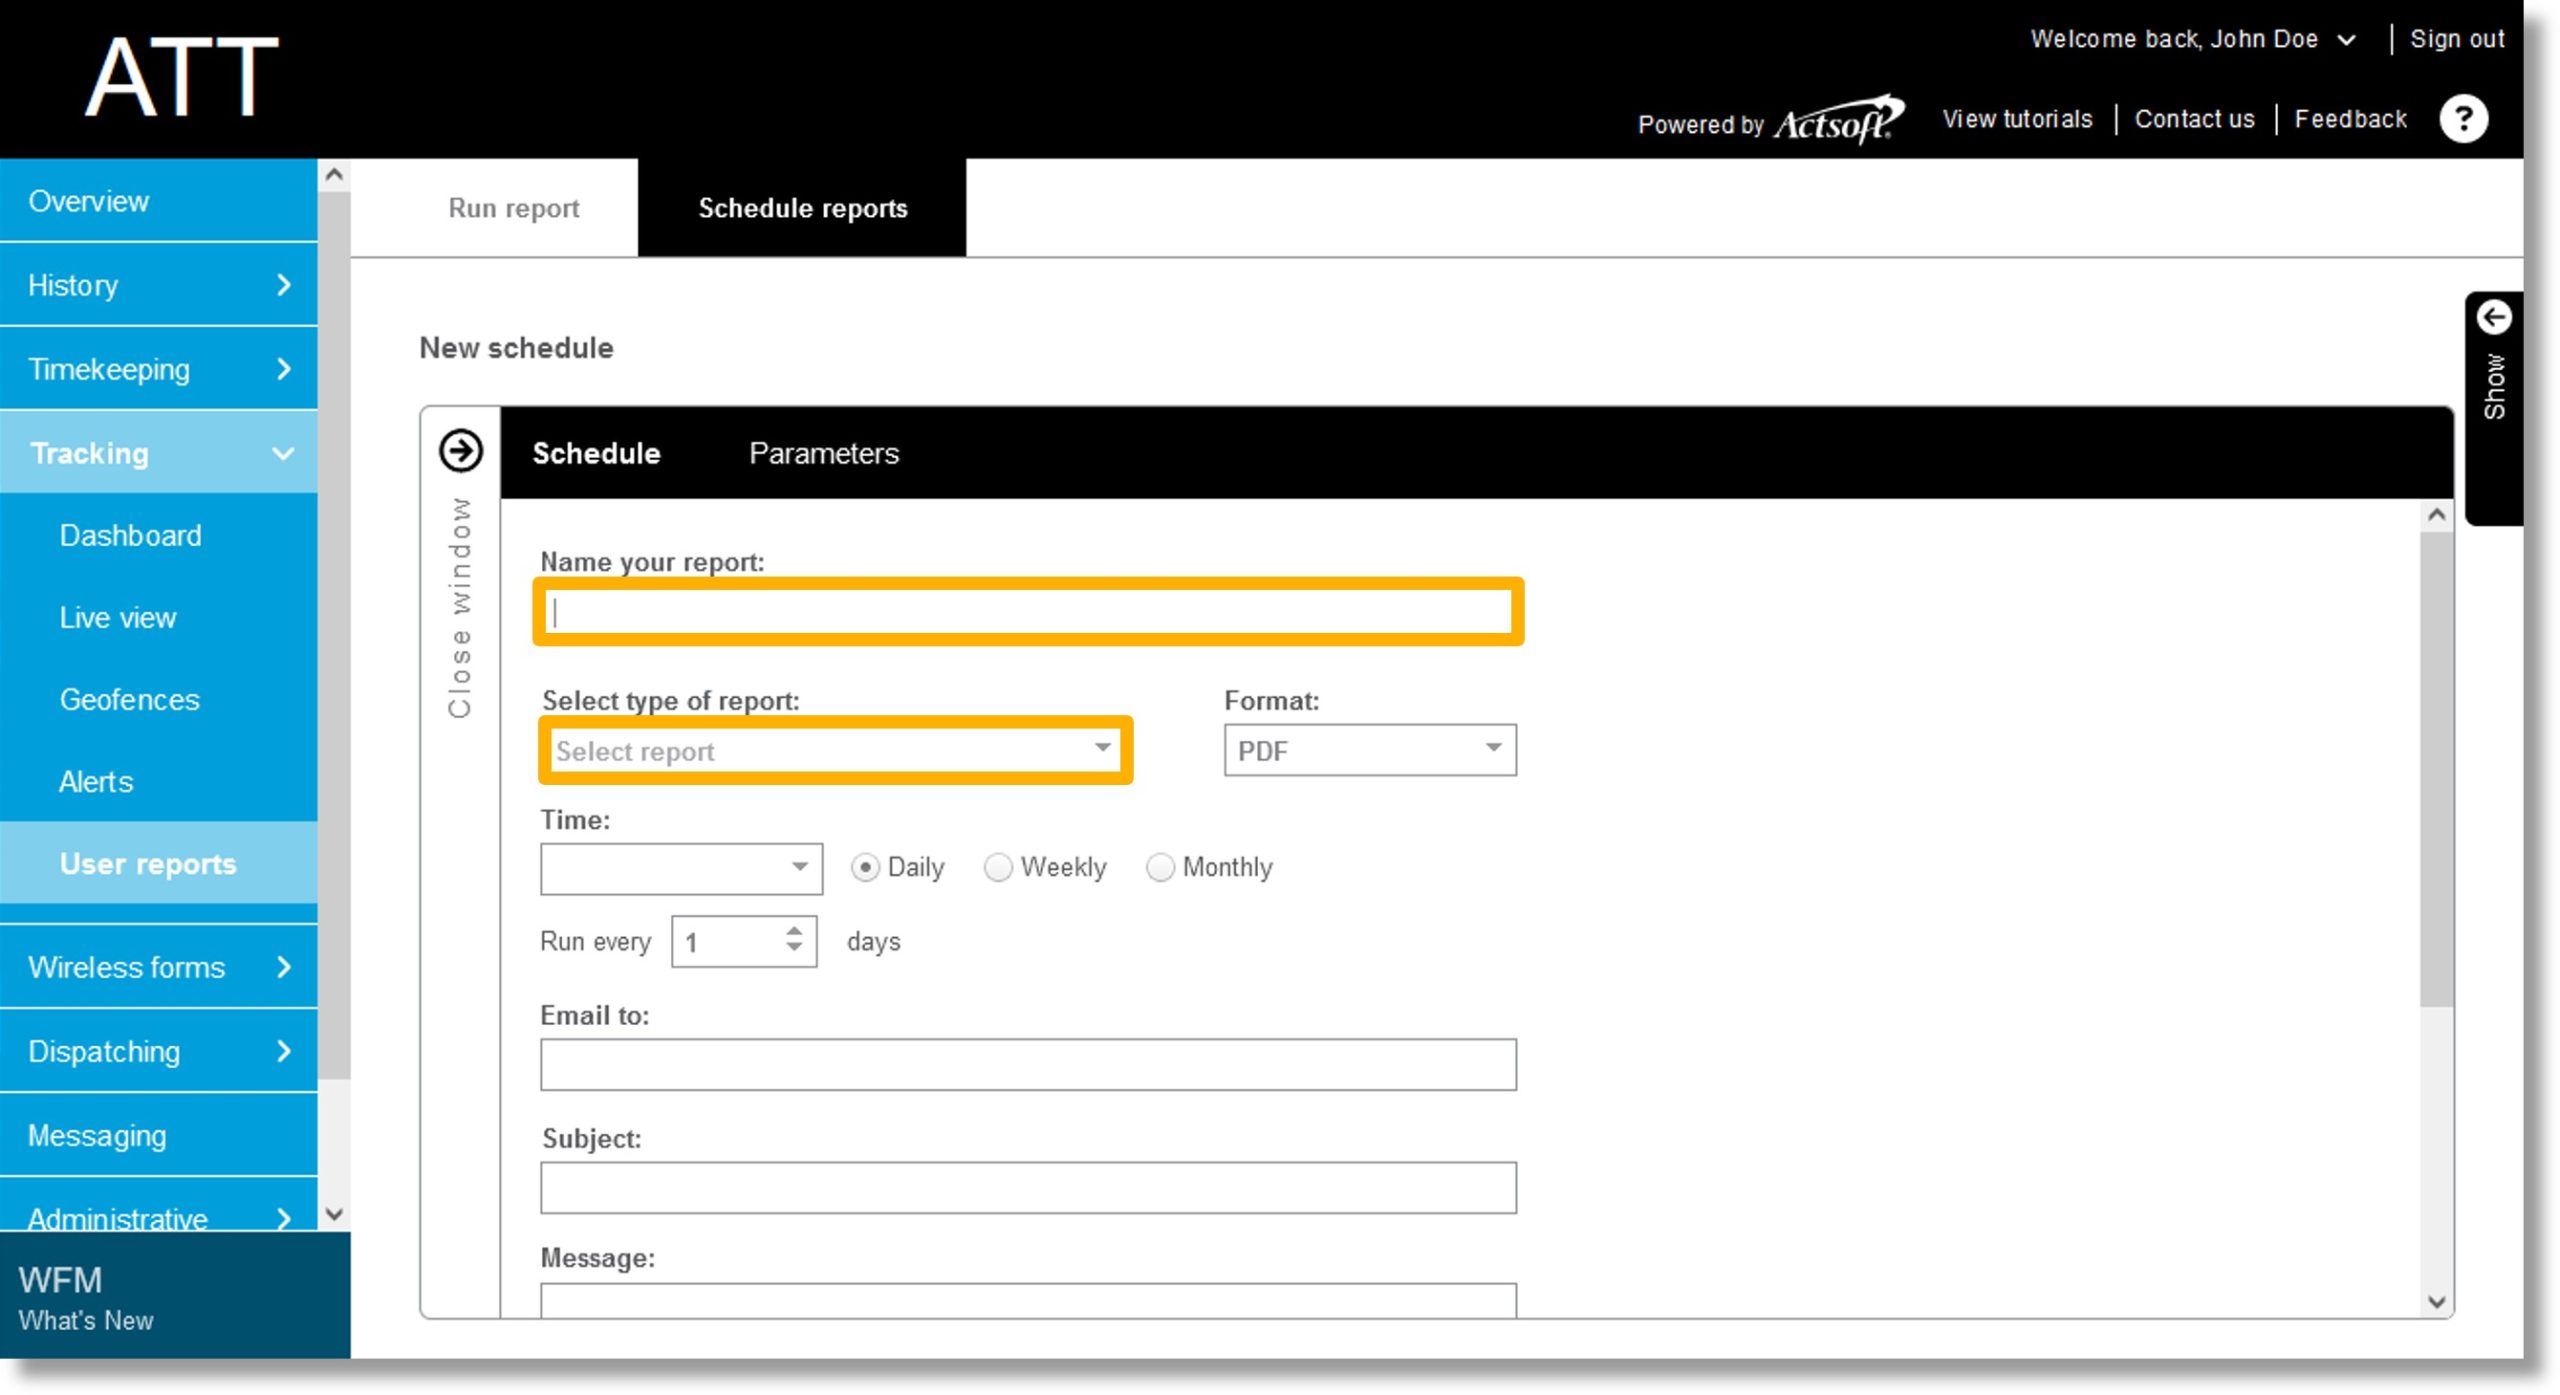
  6. Click on the field under Name your report and enter a name for your report.

  7. Click on the dropdown under Select type of report.

    Image of steps 6 and 7.

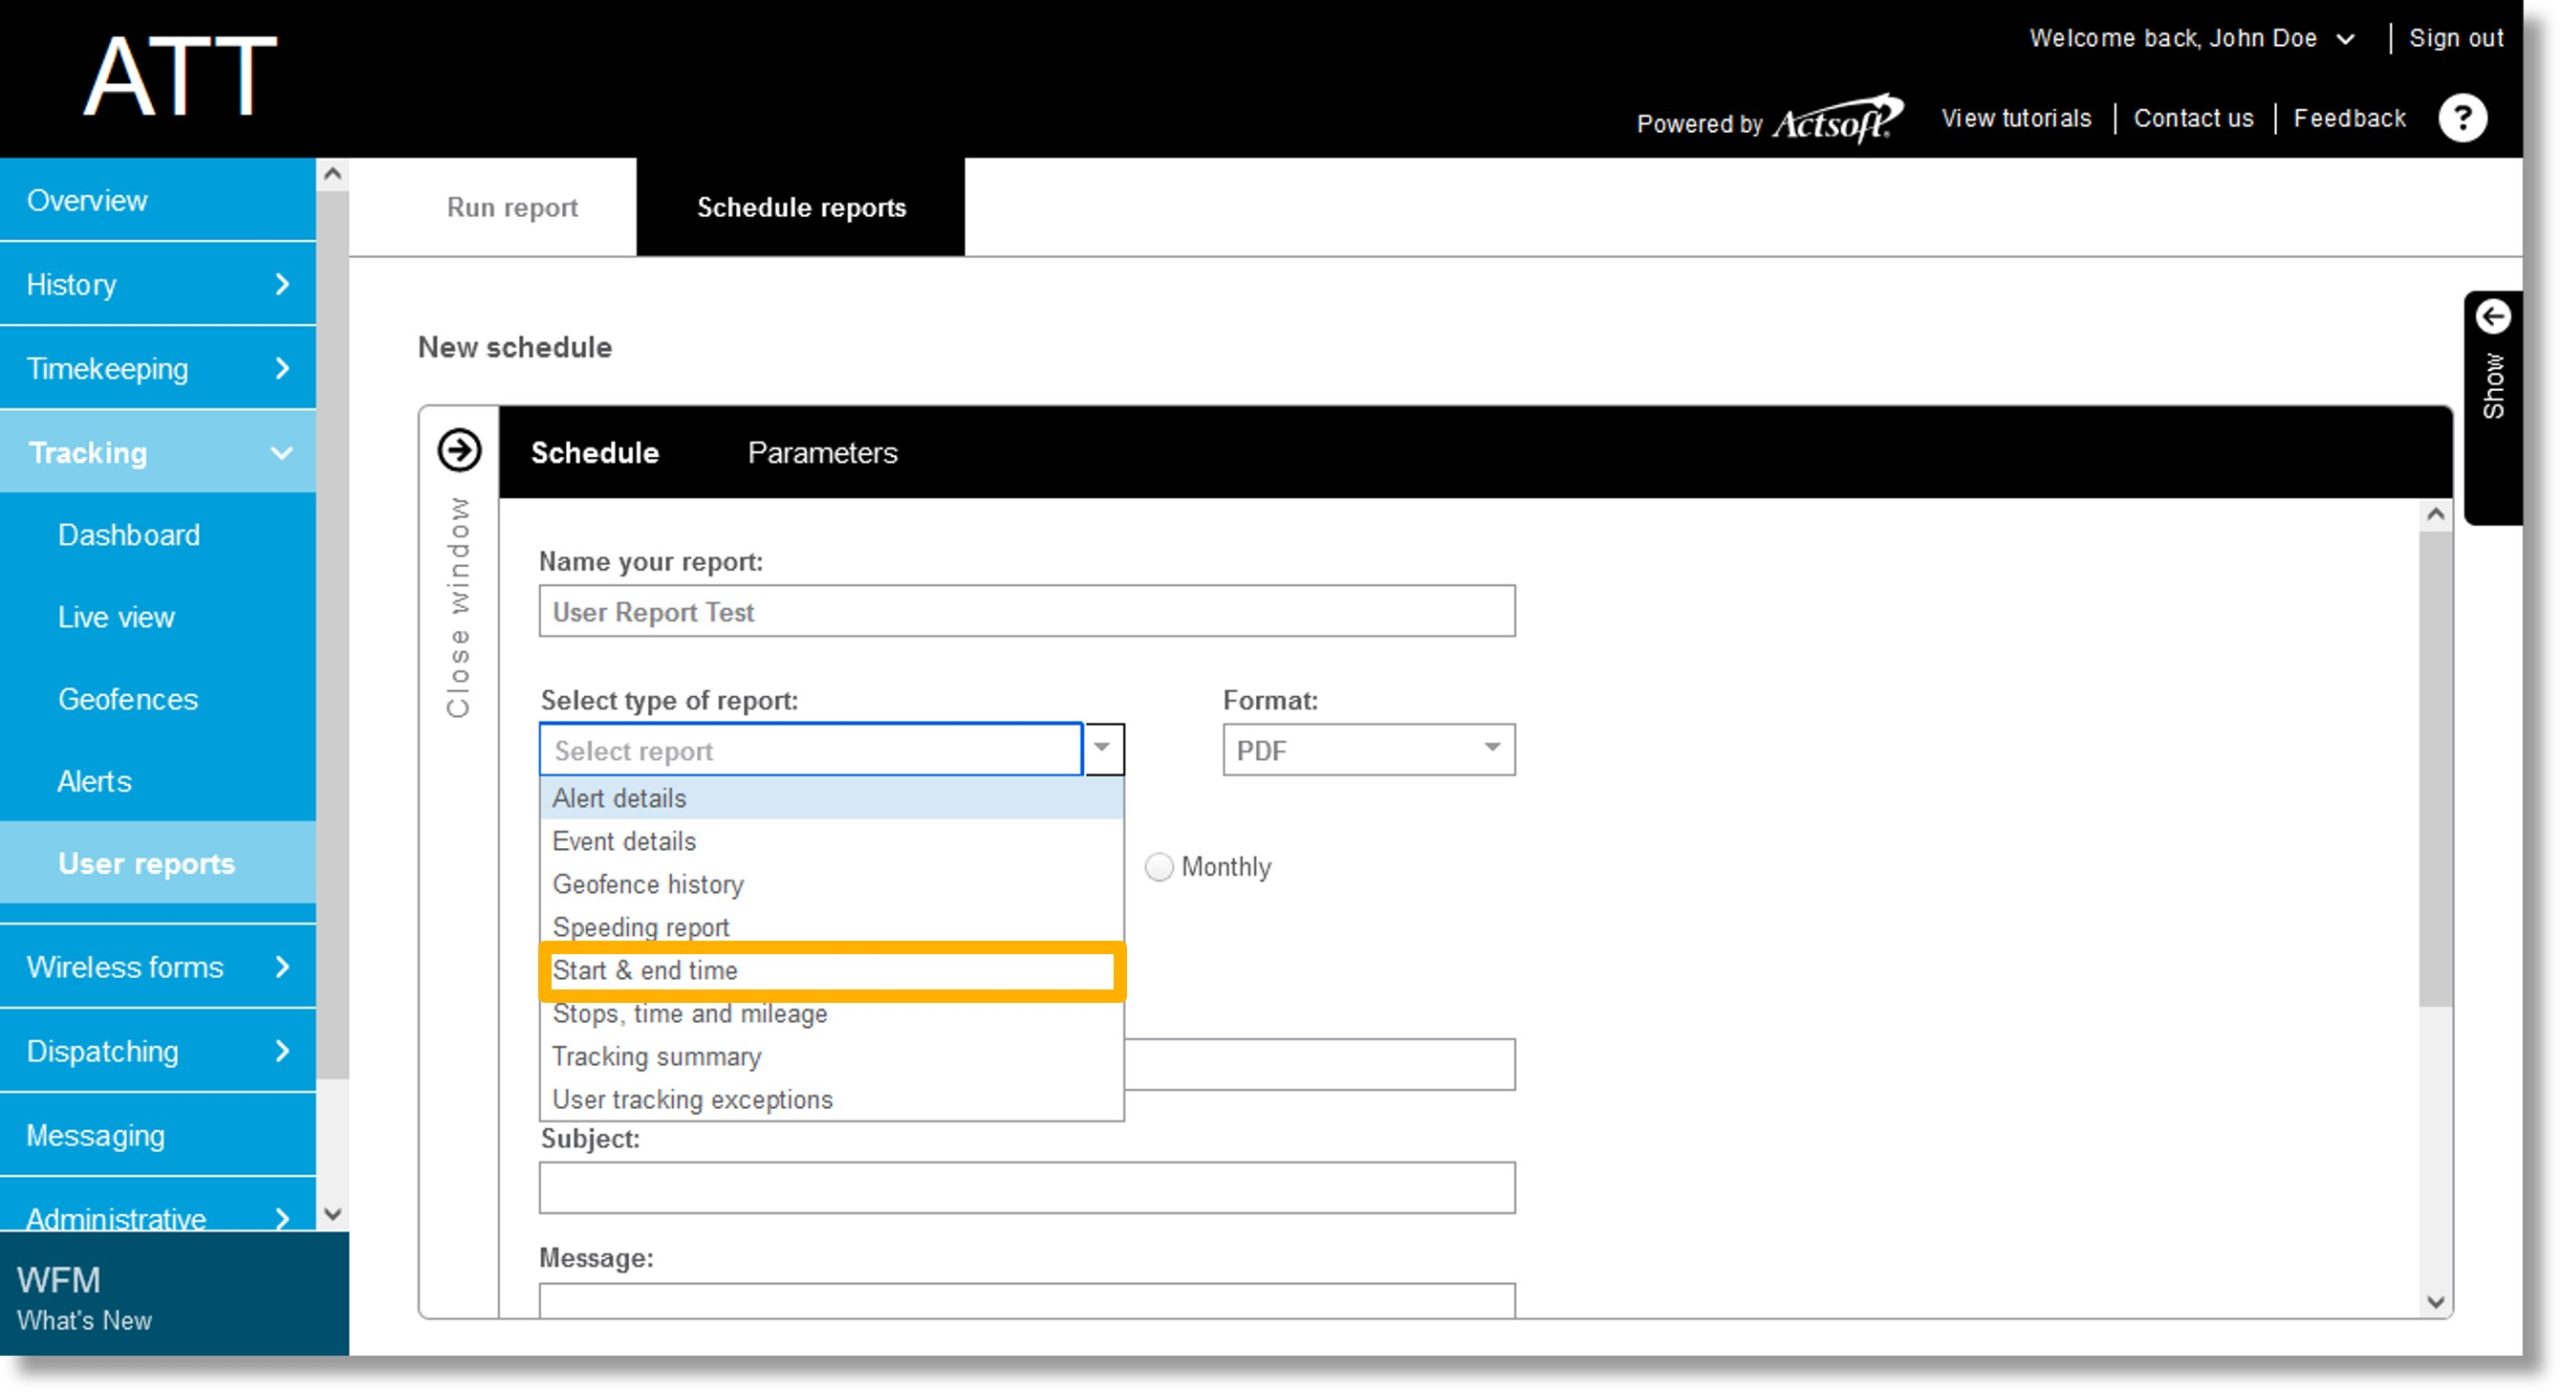
  8. Click on the desired report type.

    Image of step 8.

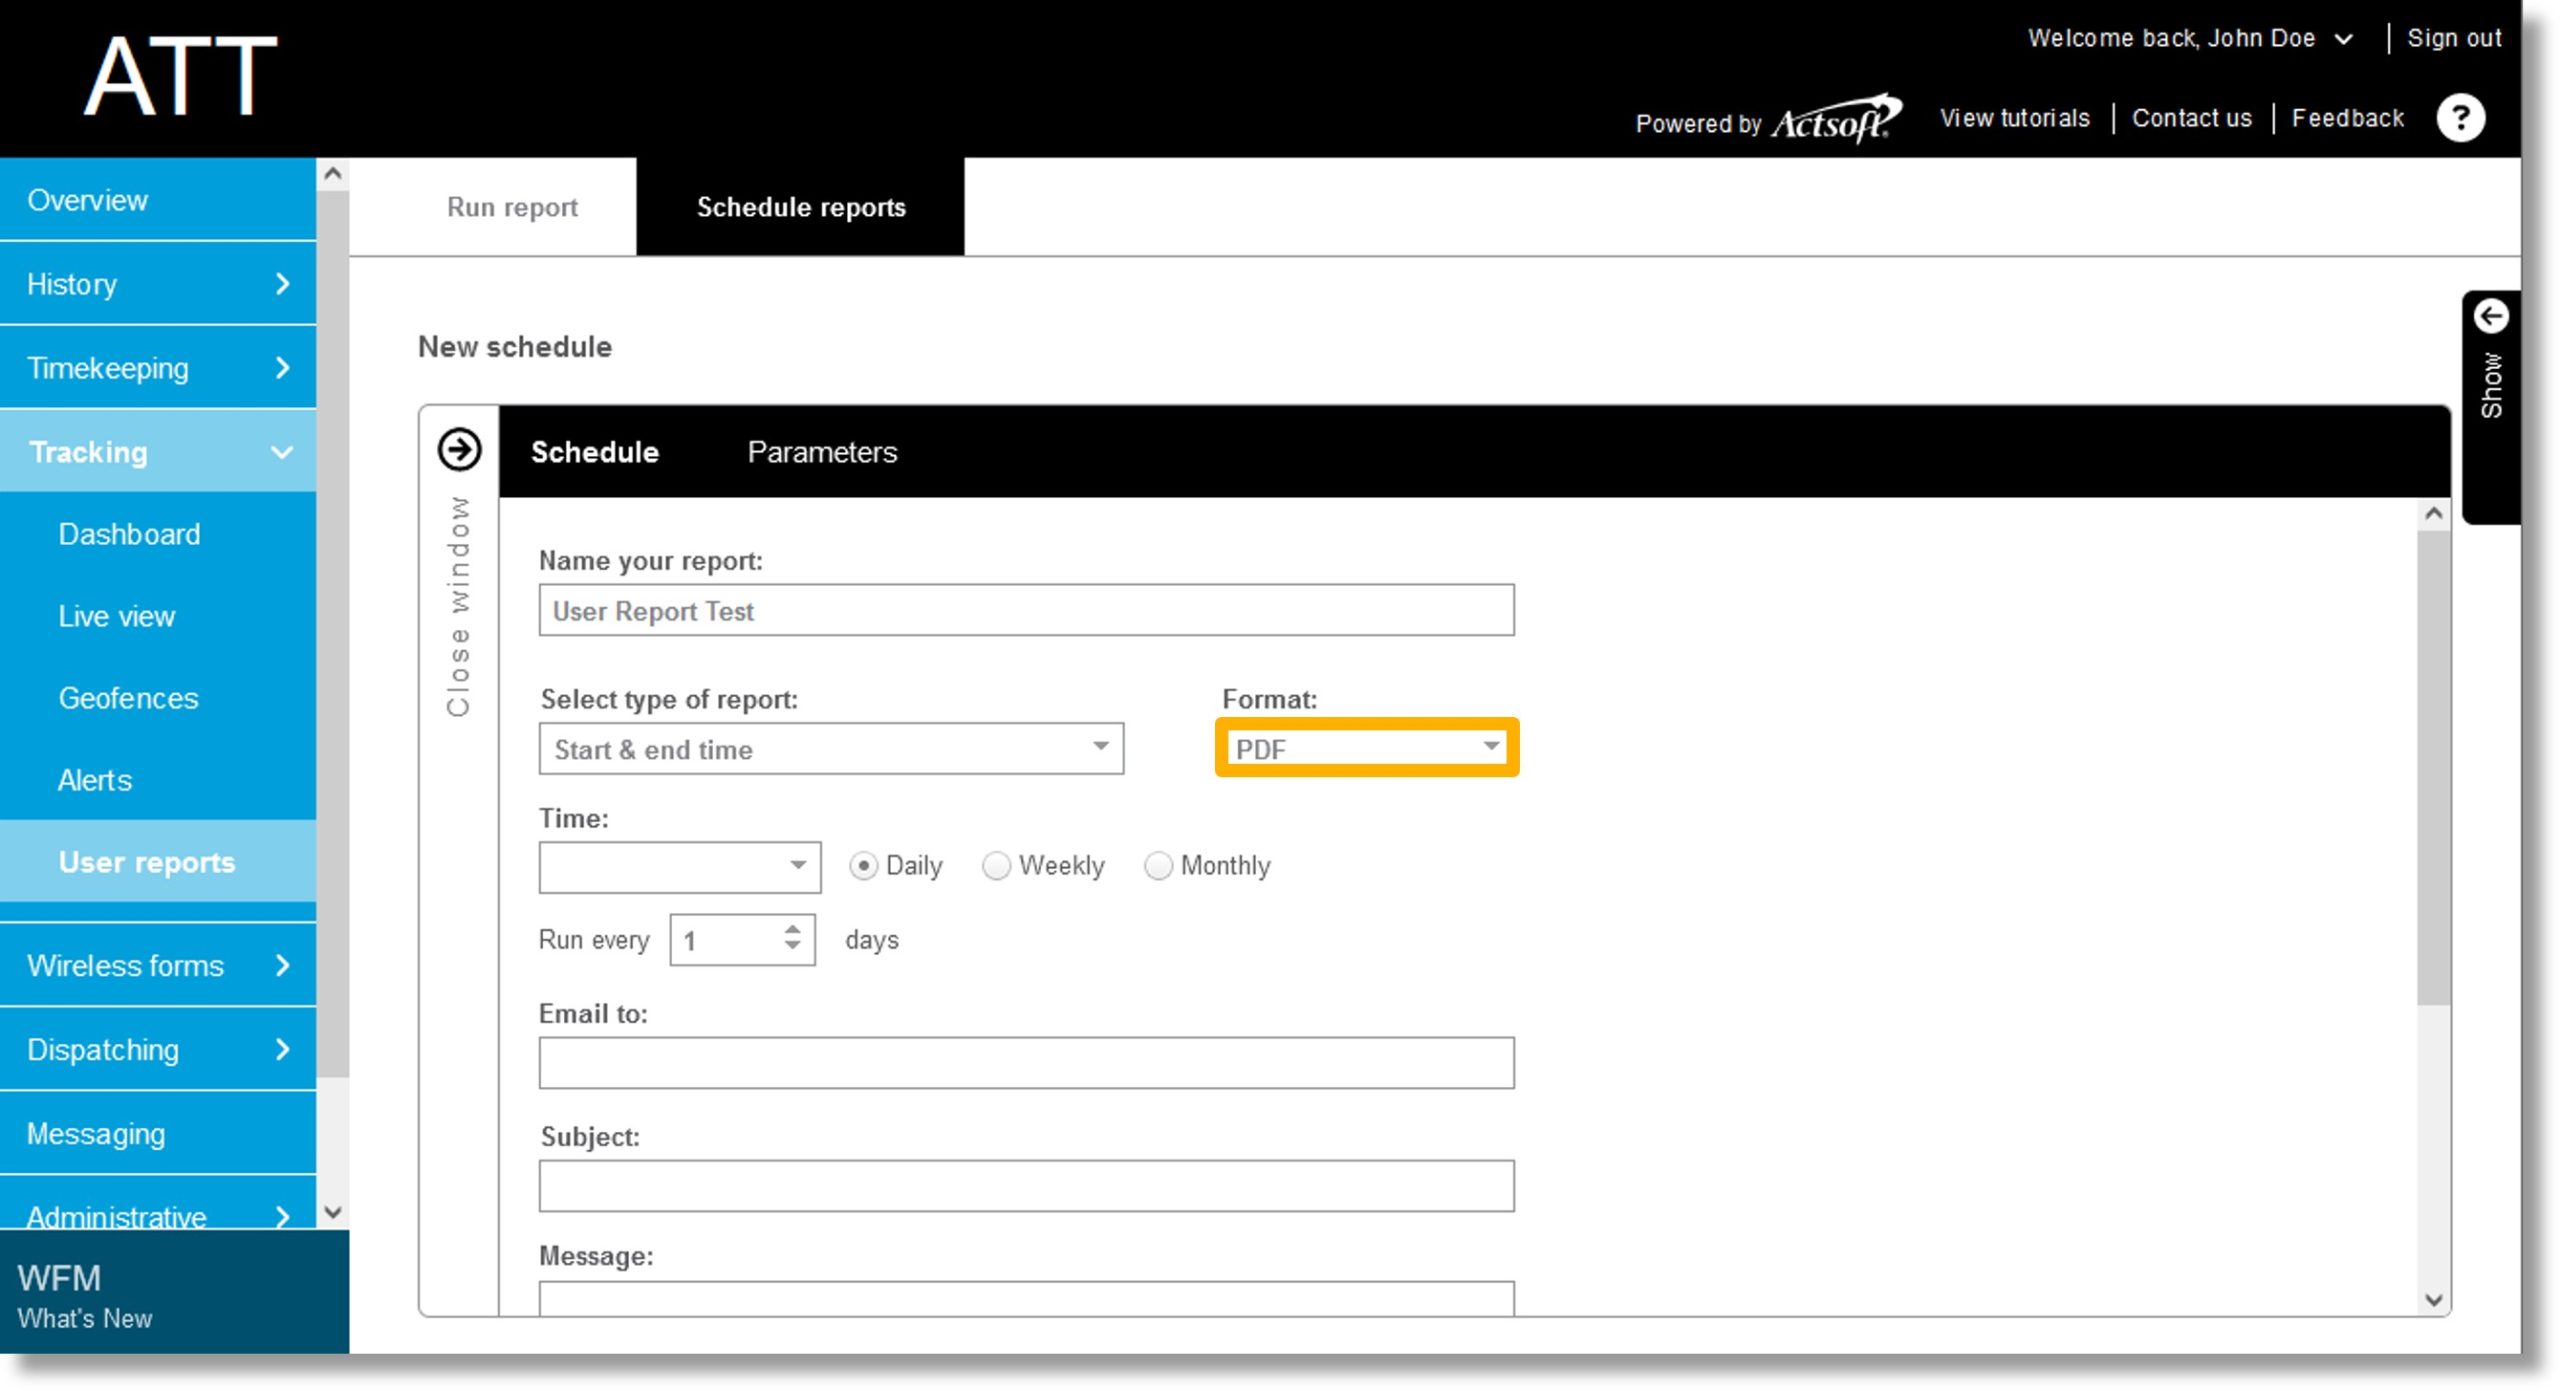
  9. Click the dropdown under Format.

    Image of step 9.

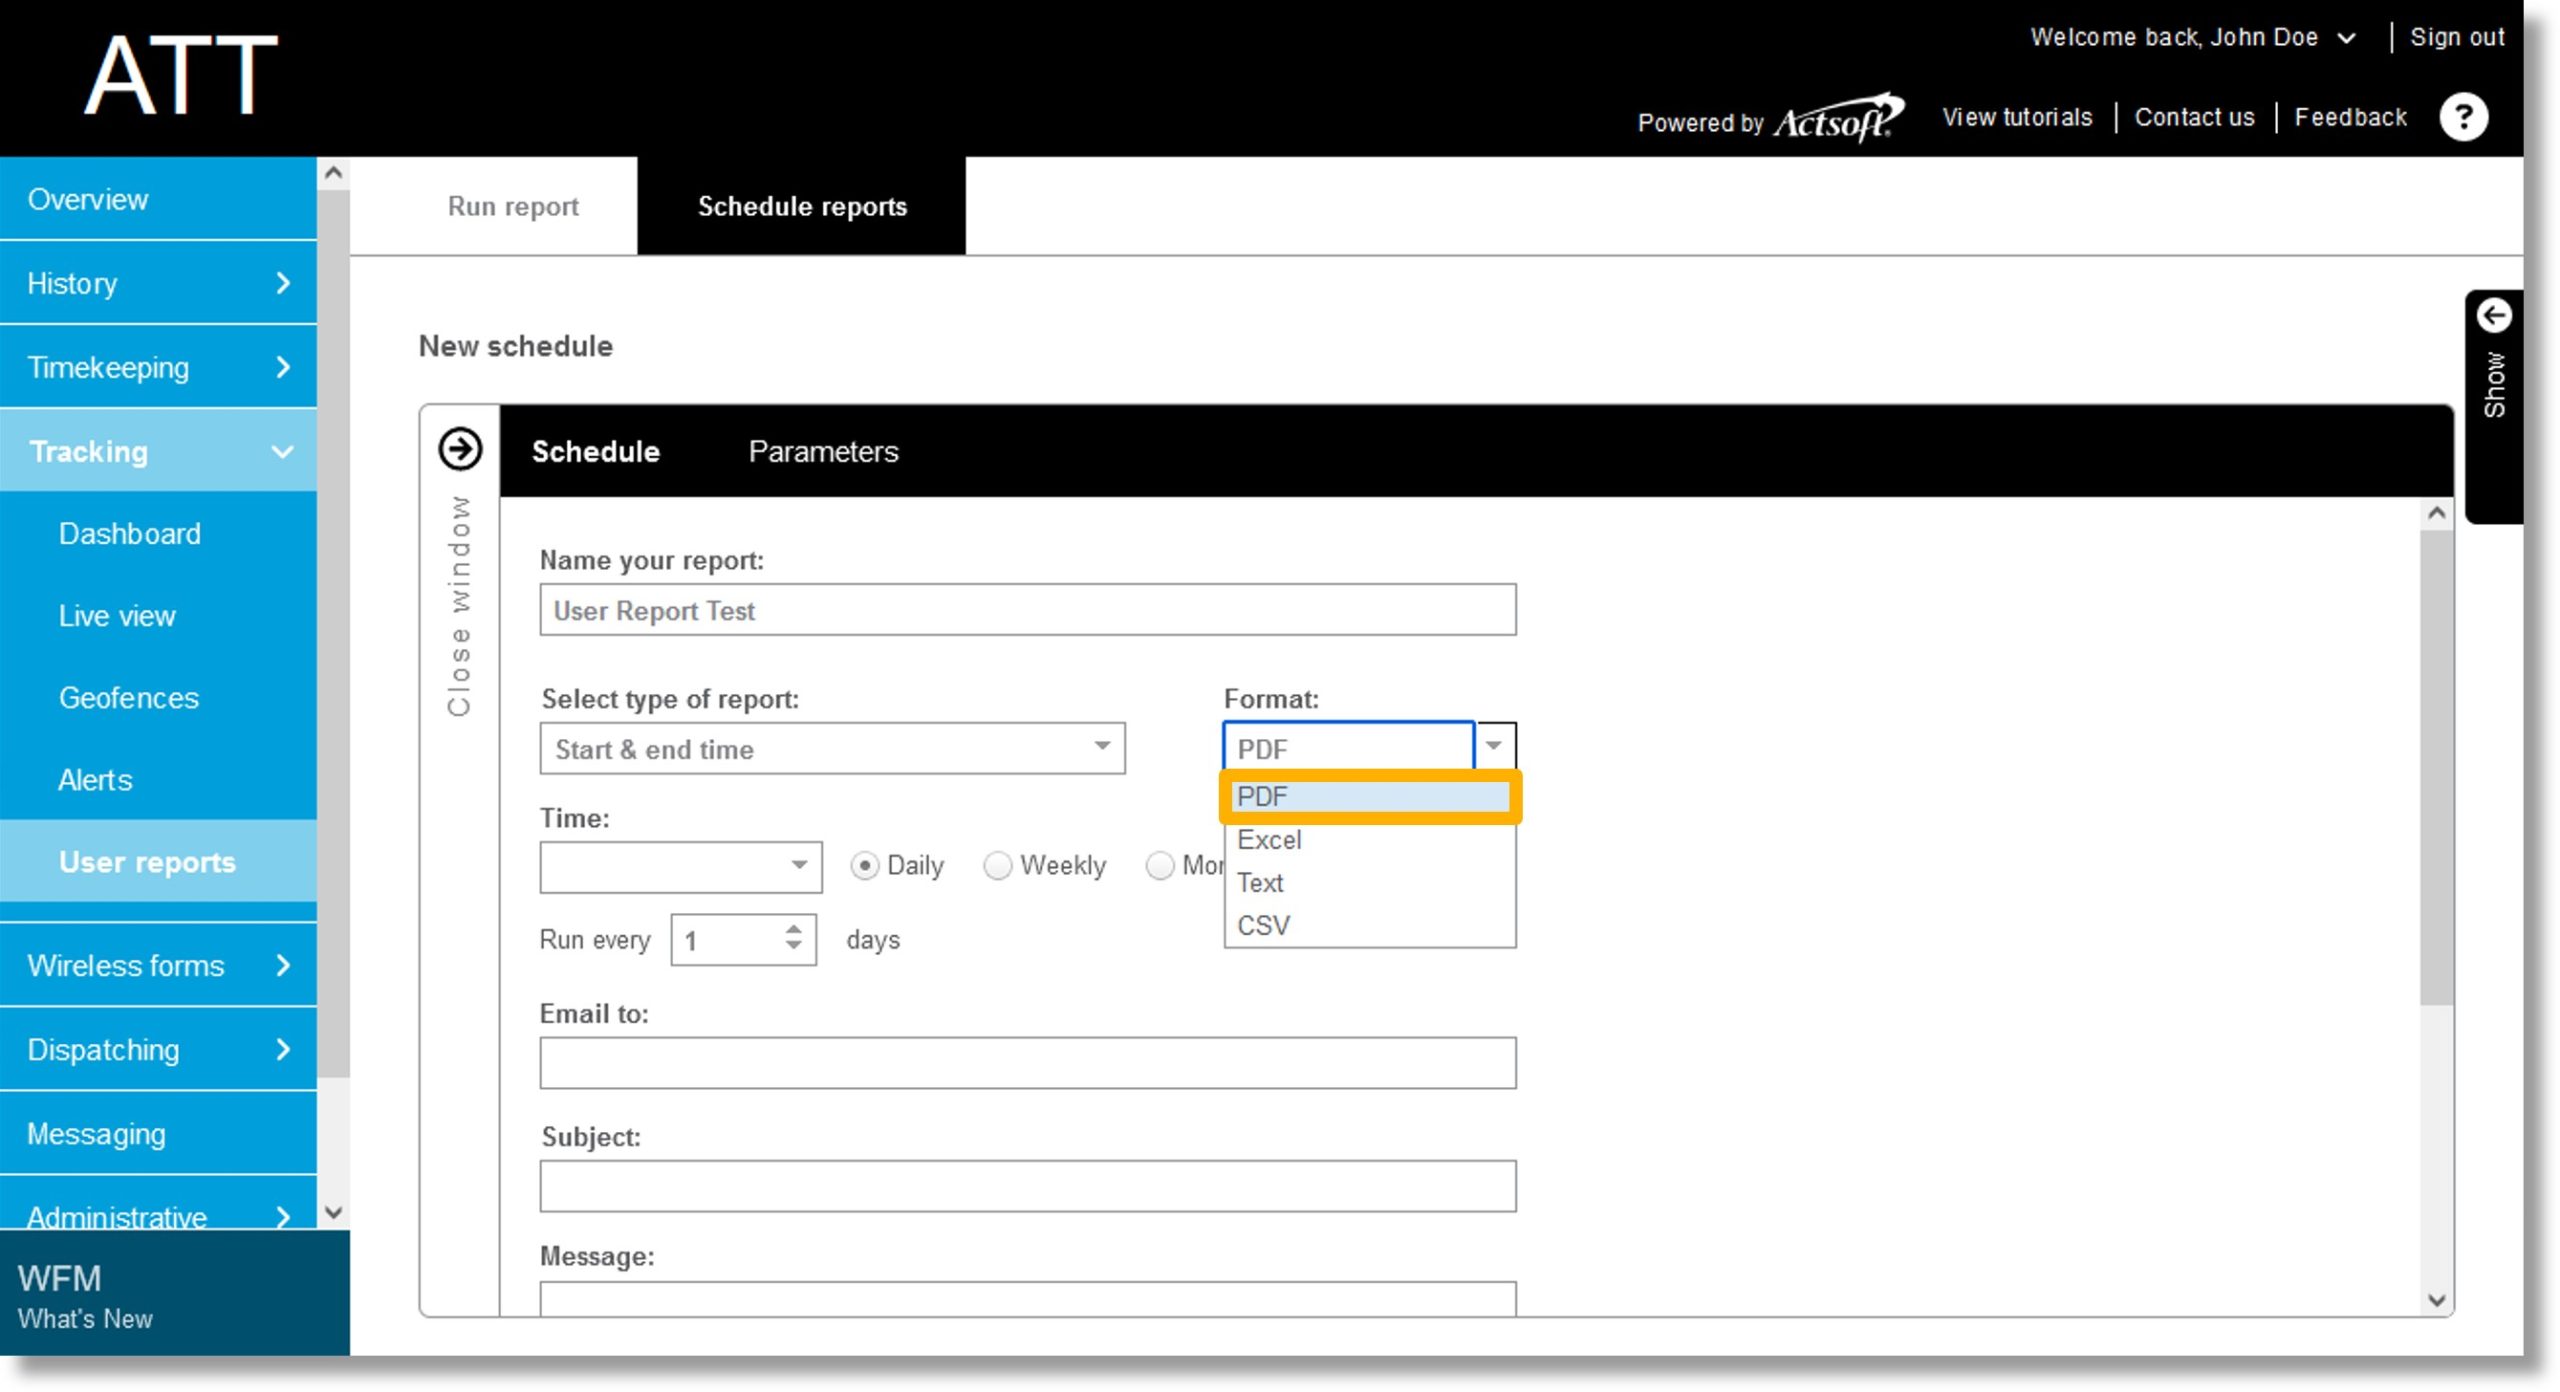
  10. Select your desired report type.

    Image of step 10.

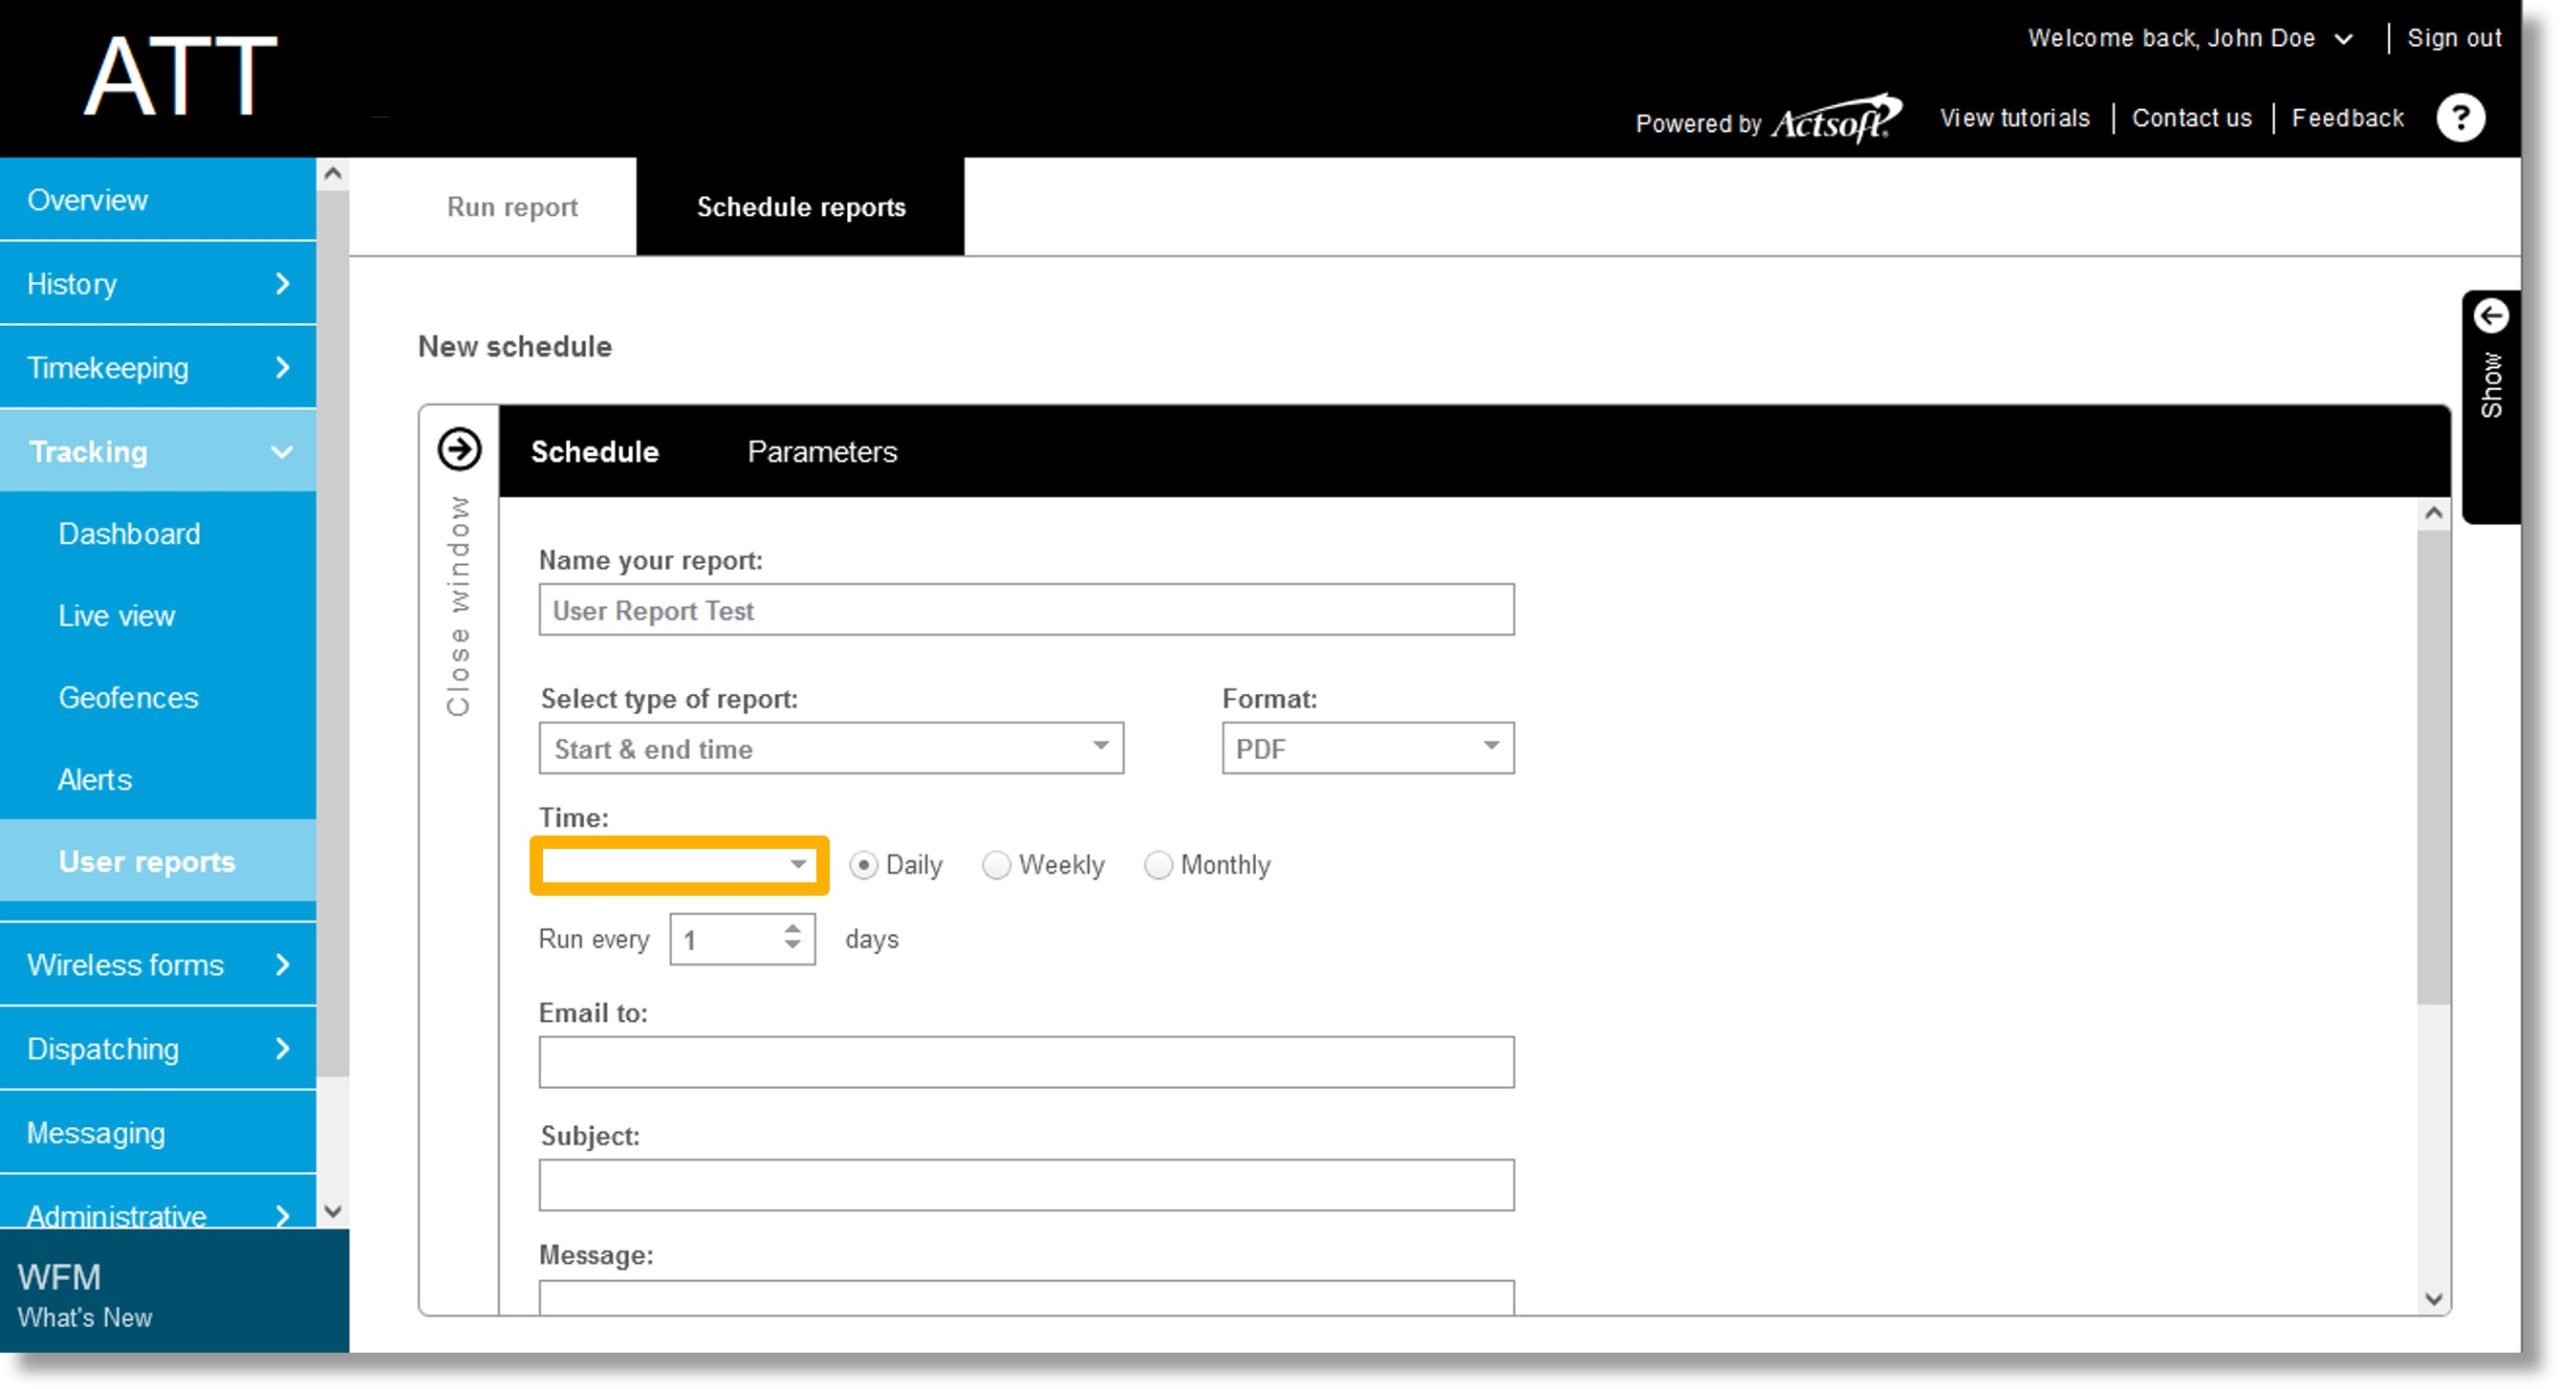
  11. Click on the dropdown under Time.

    Image of step 11.

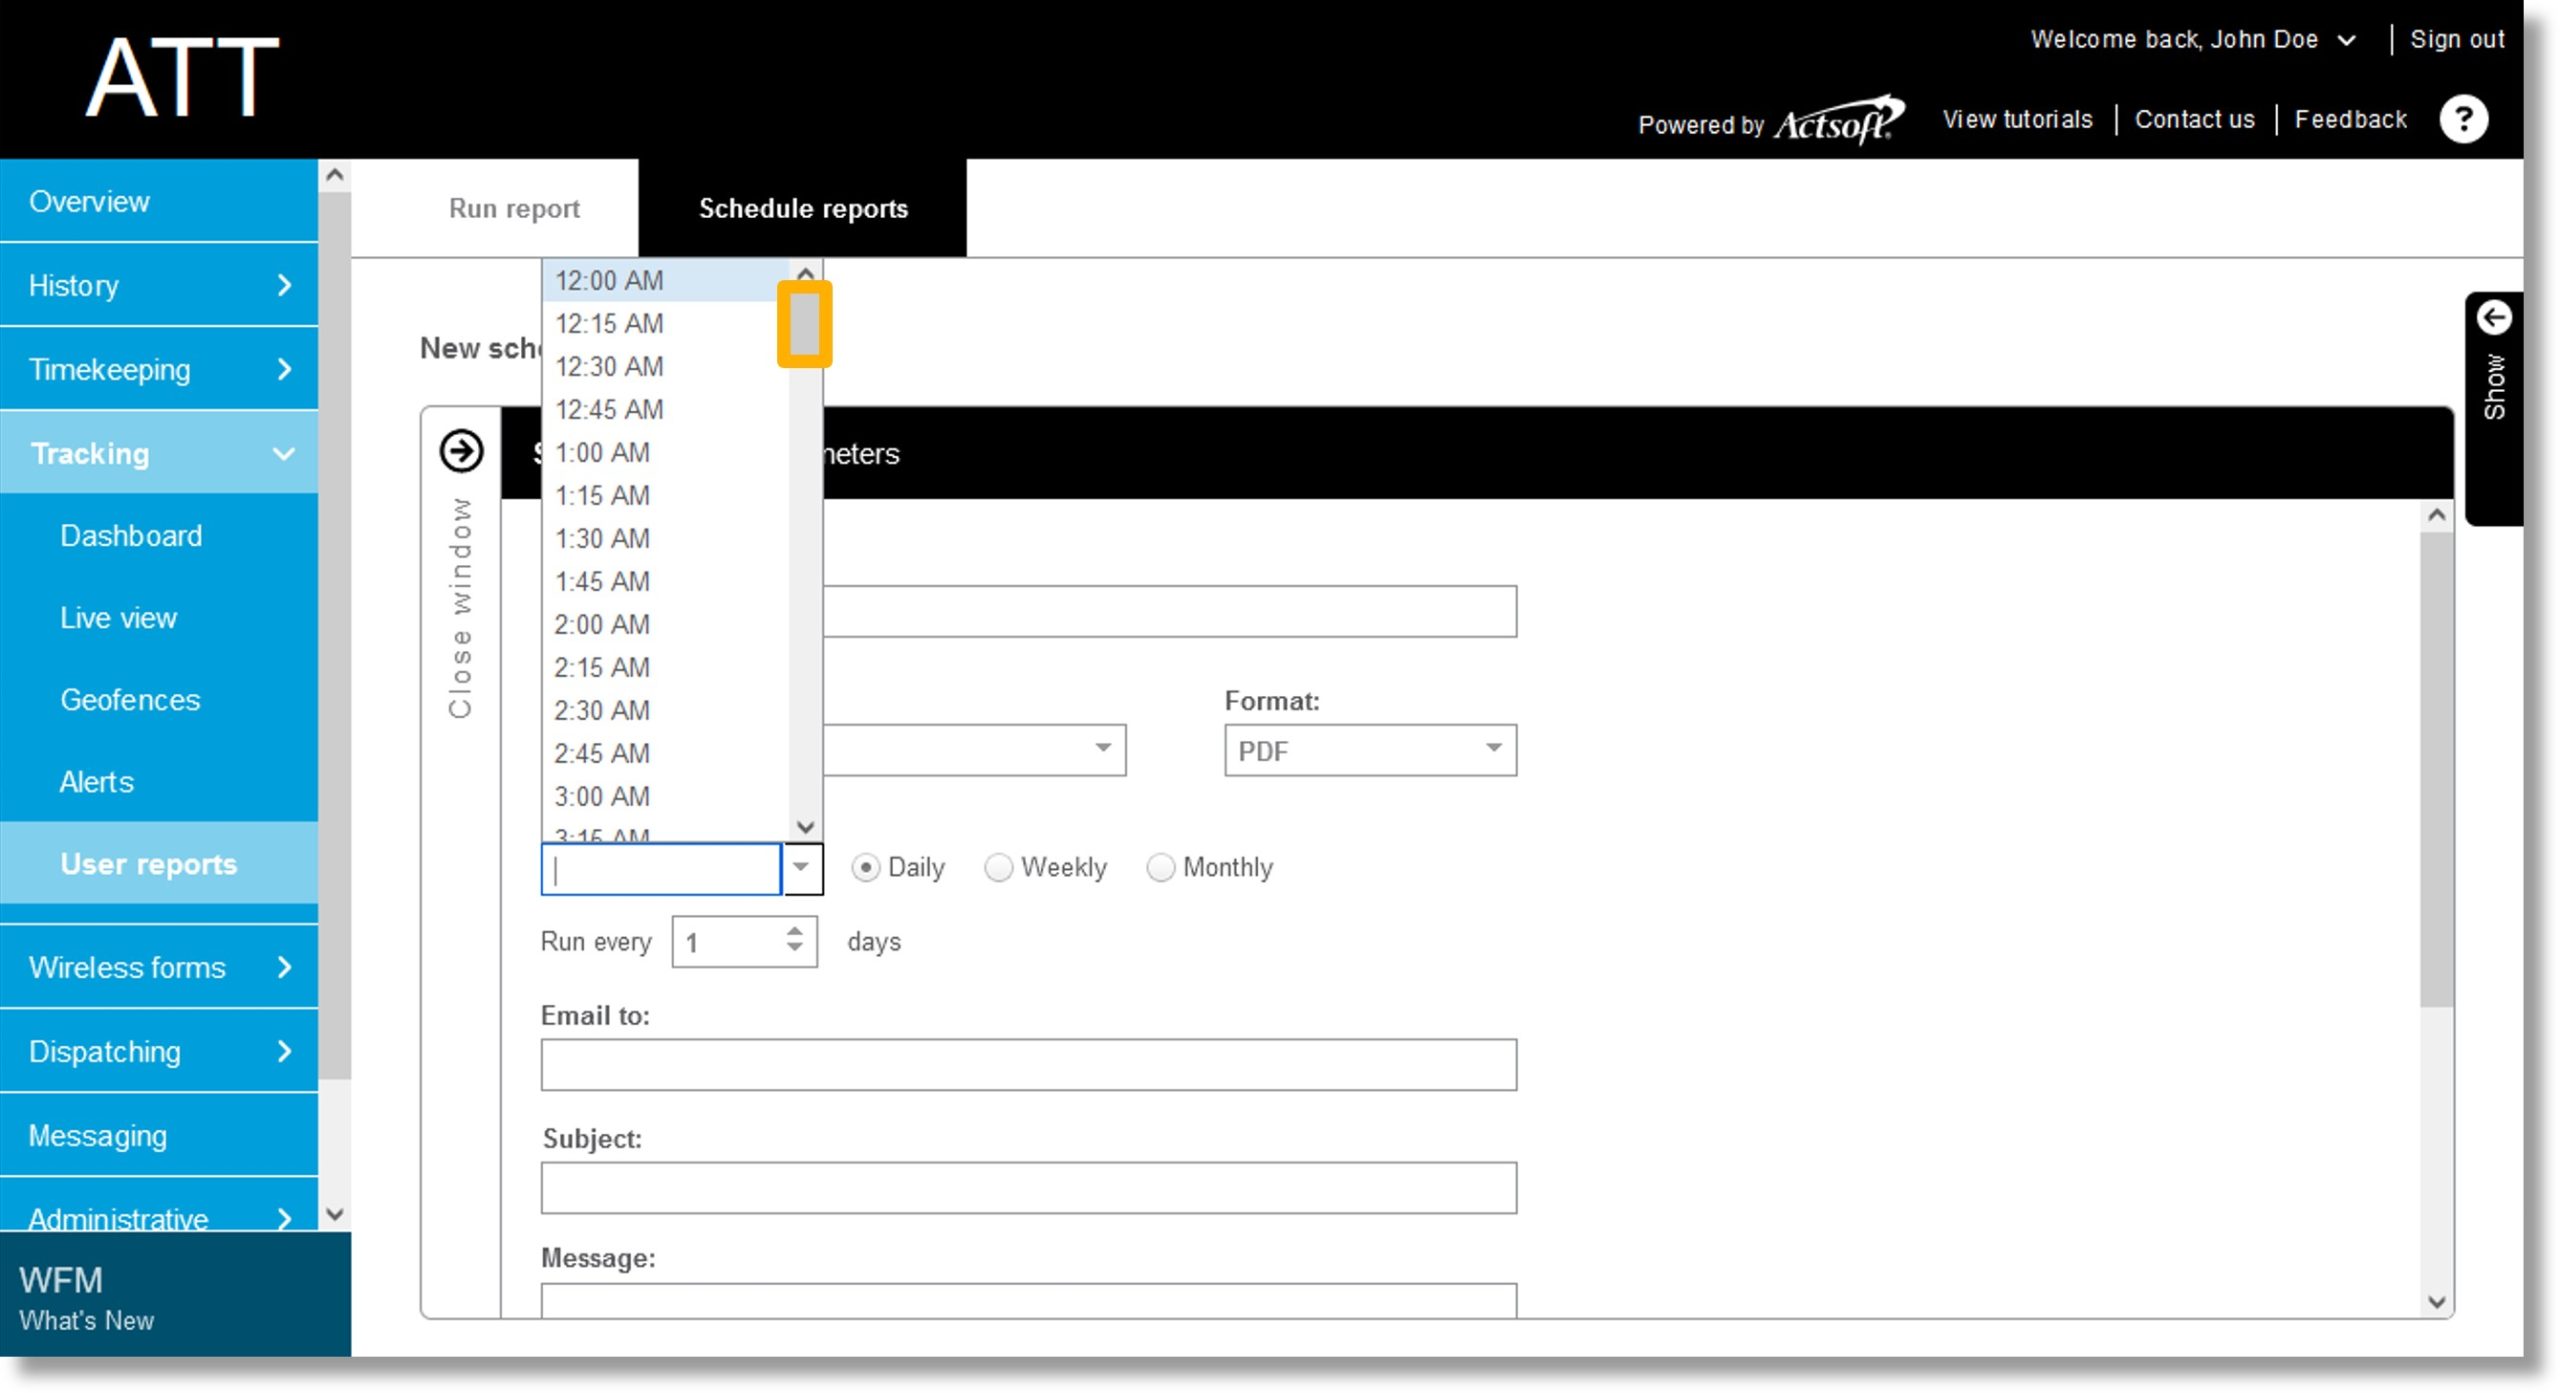
  12. Click on the desired time of day to run the report.

    Image of step 12.

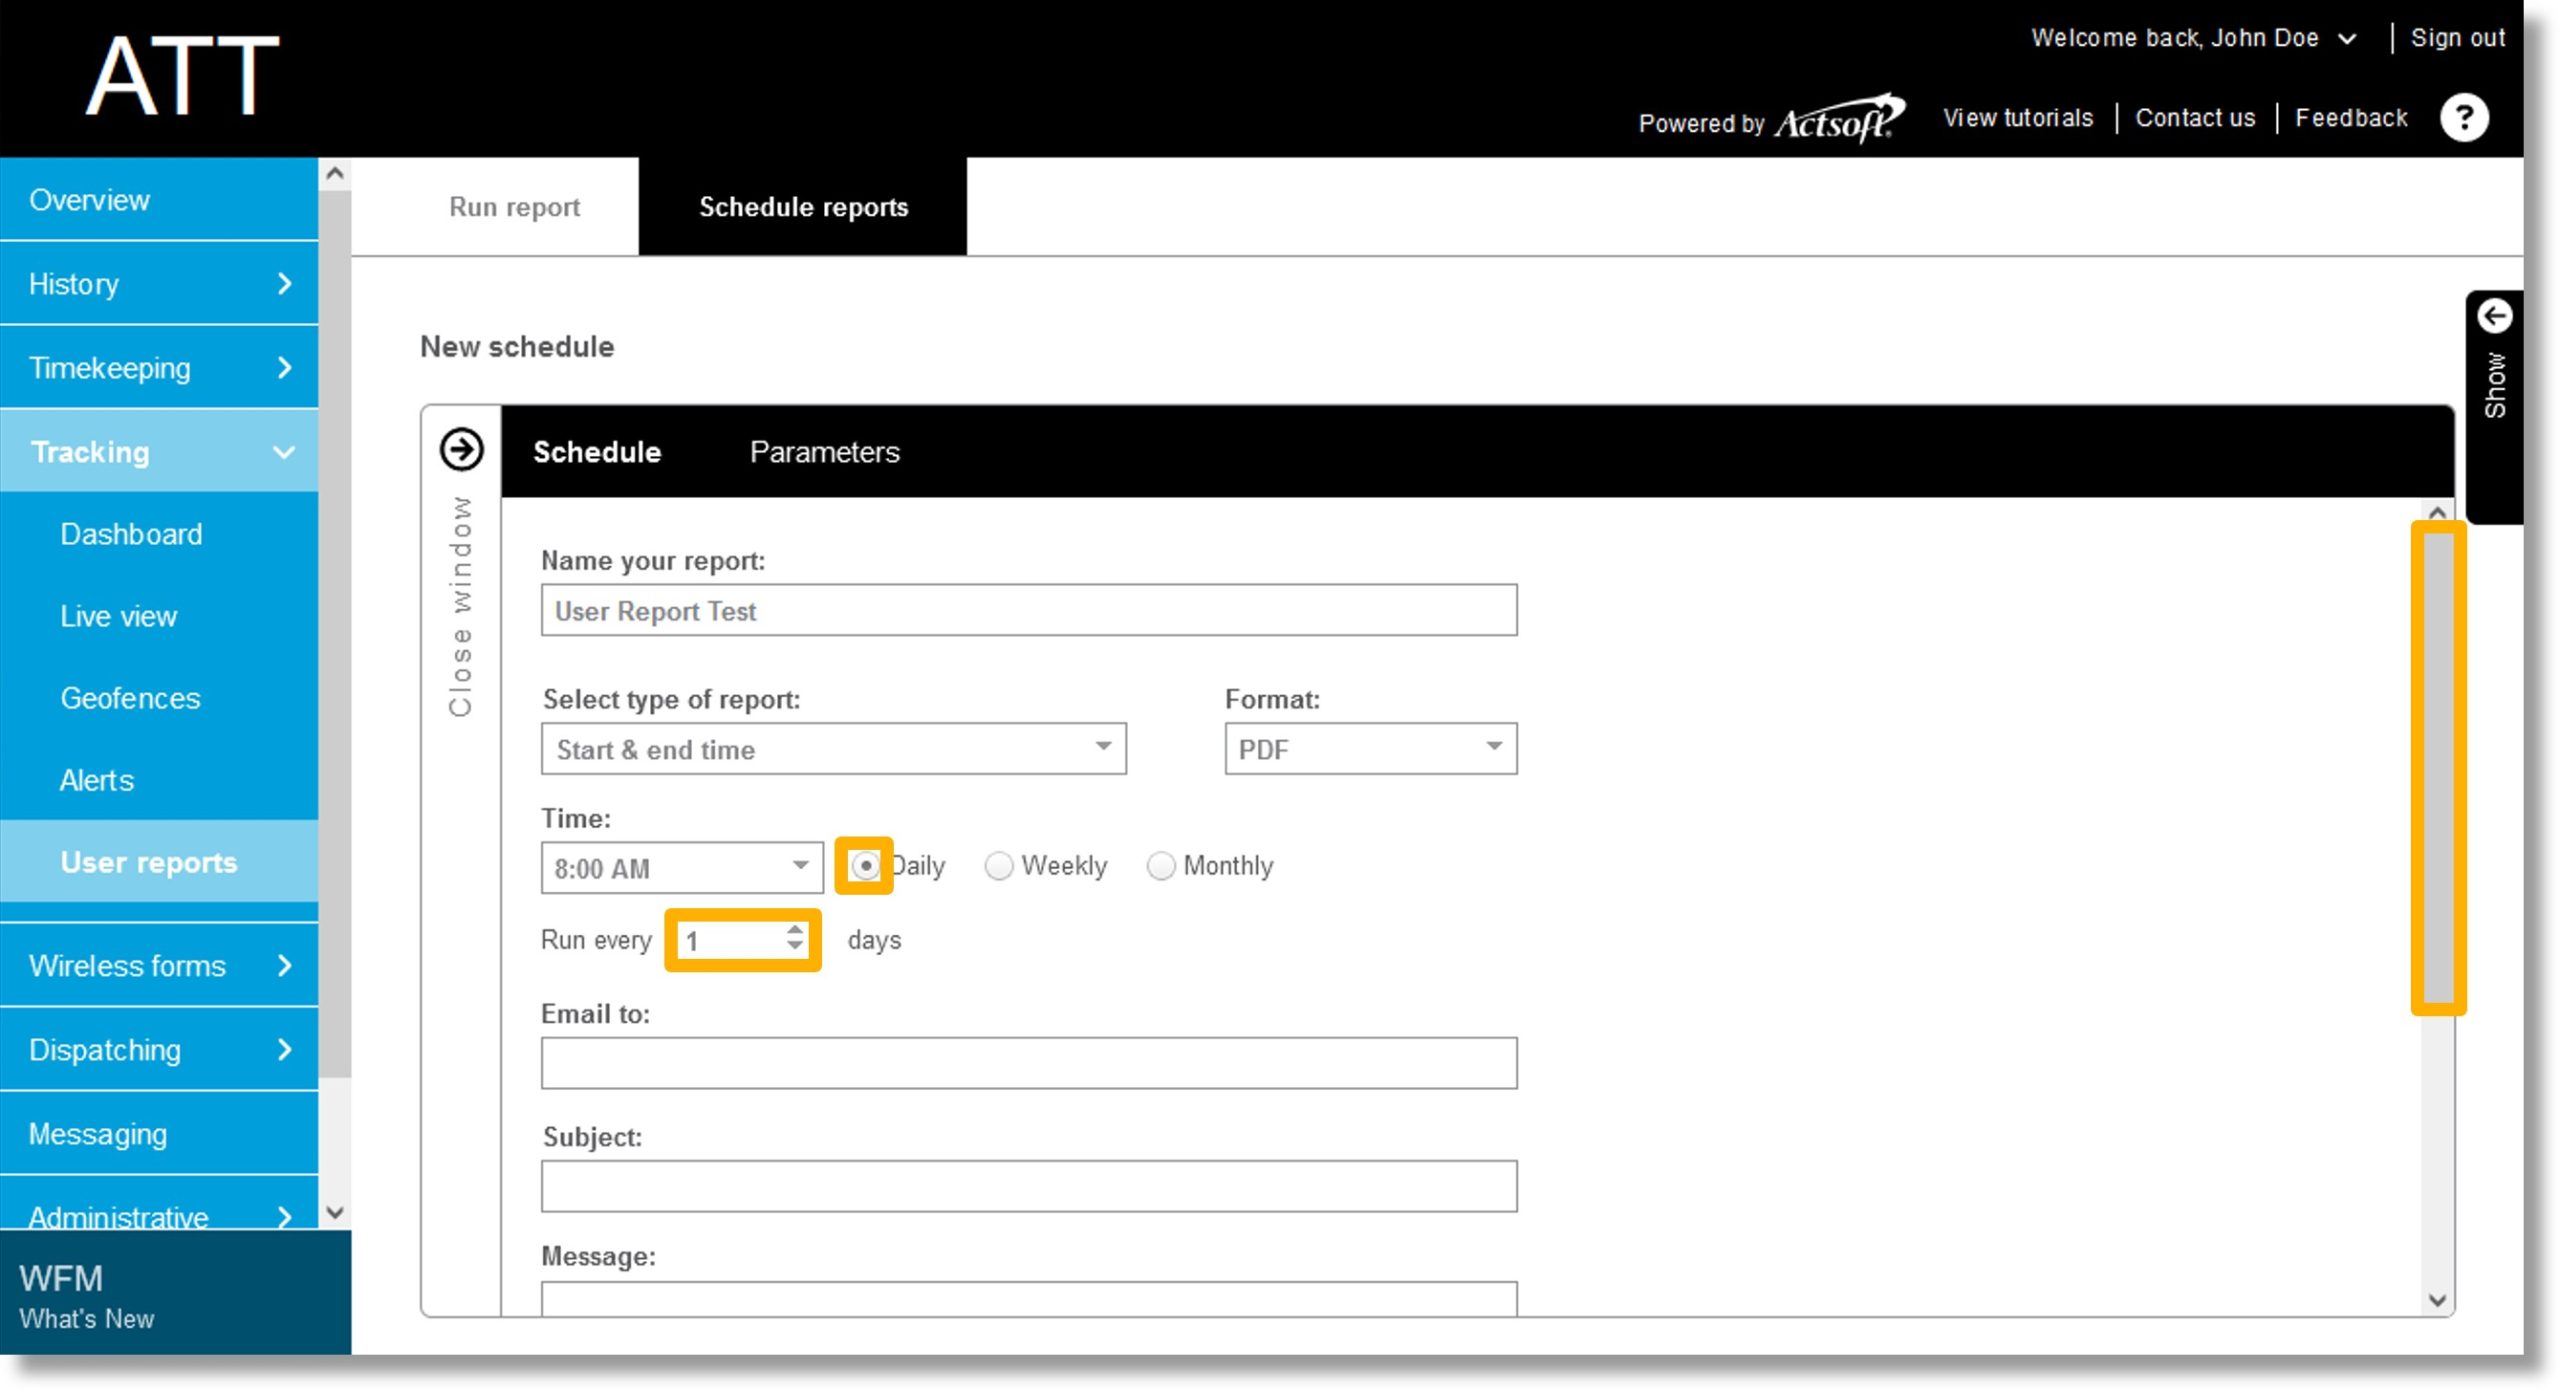
  13. Click on the radio button to the left of either Daily, Weekly, or Monthly to set the desired timeframe for the report.

  14. Click on the up or down arrow to the right of Run every to increase or decrease the days between each recurrence.

  15. Scroll down the page.

    Image of steps 13 through 15.

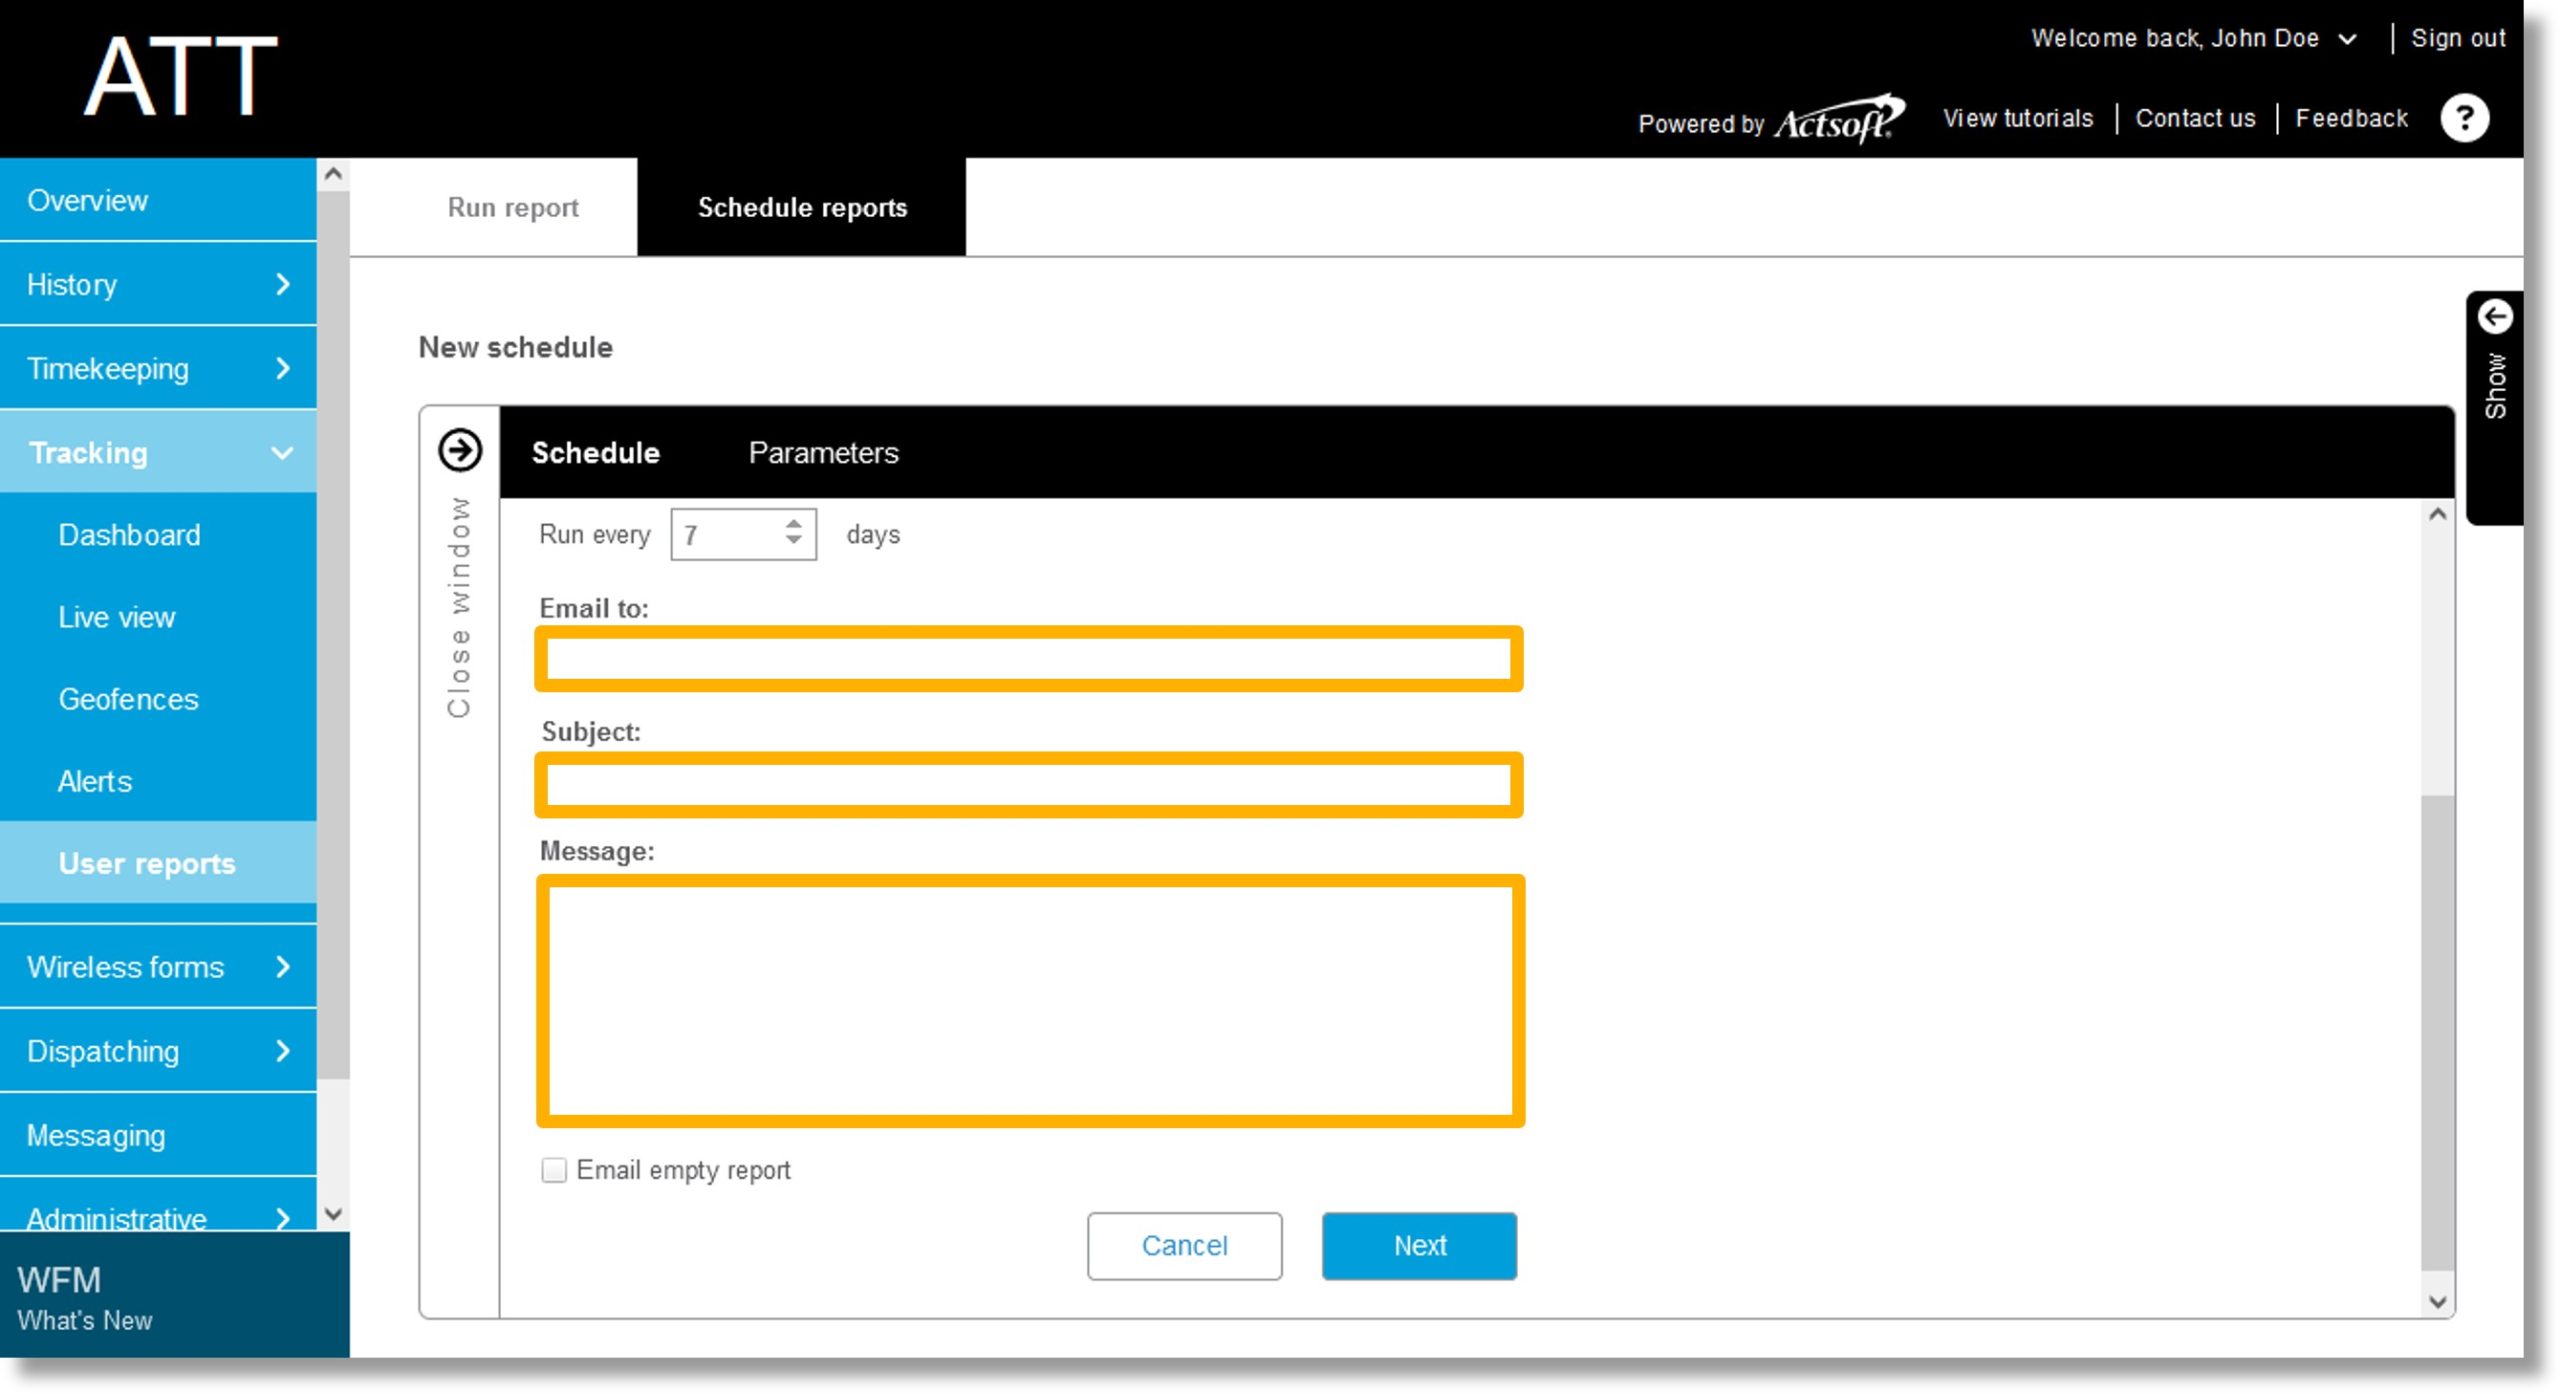
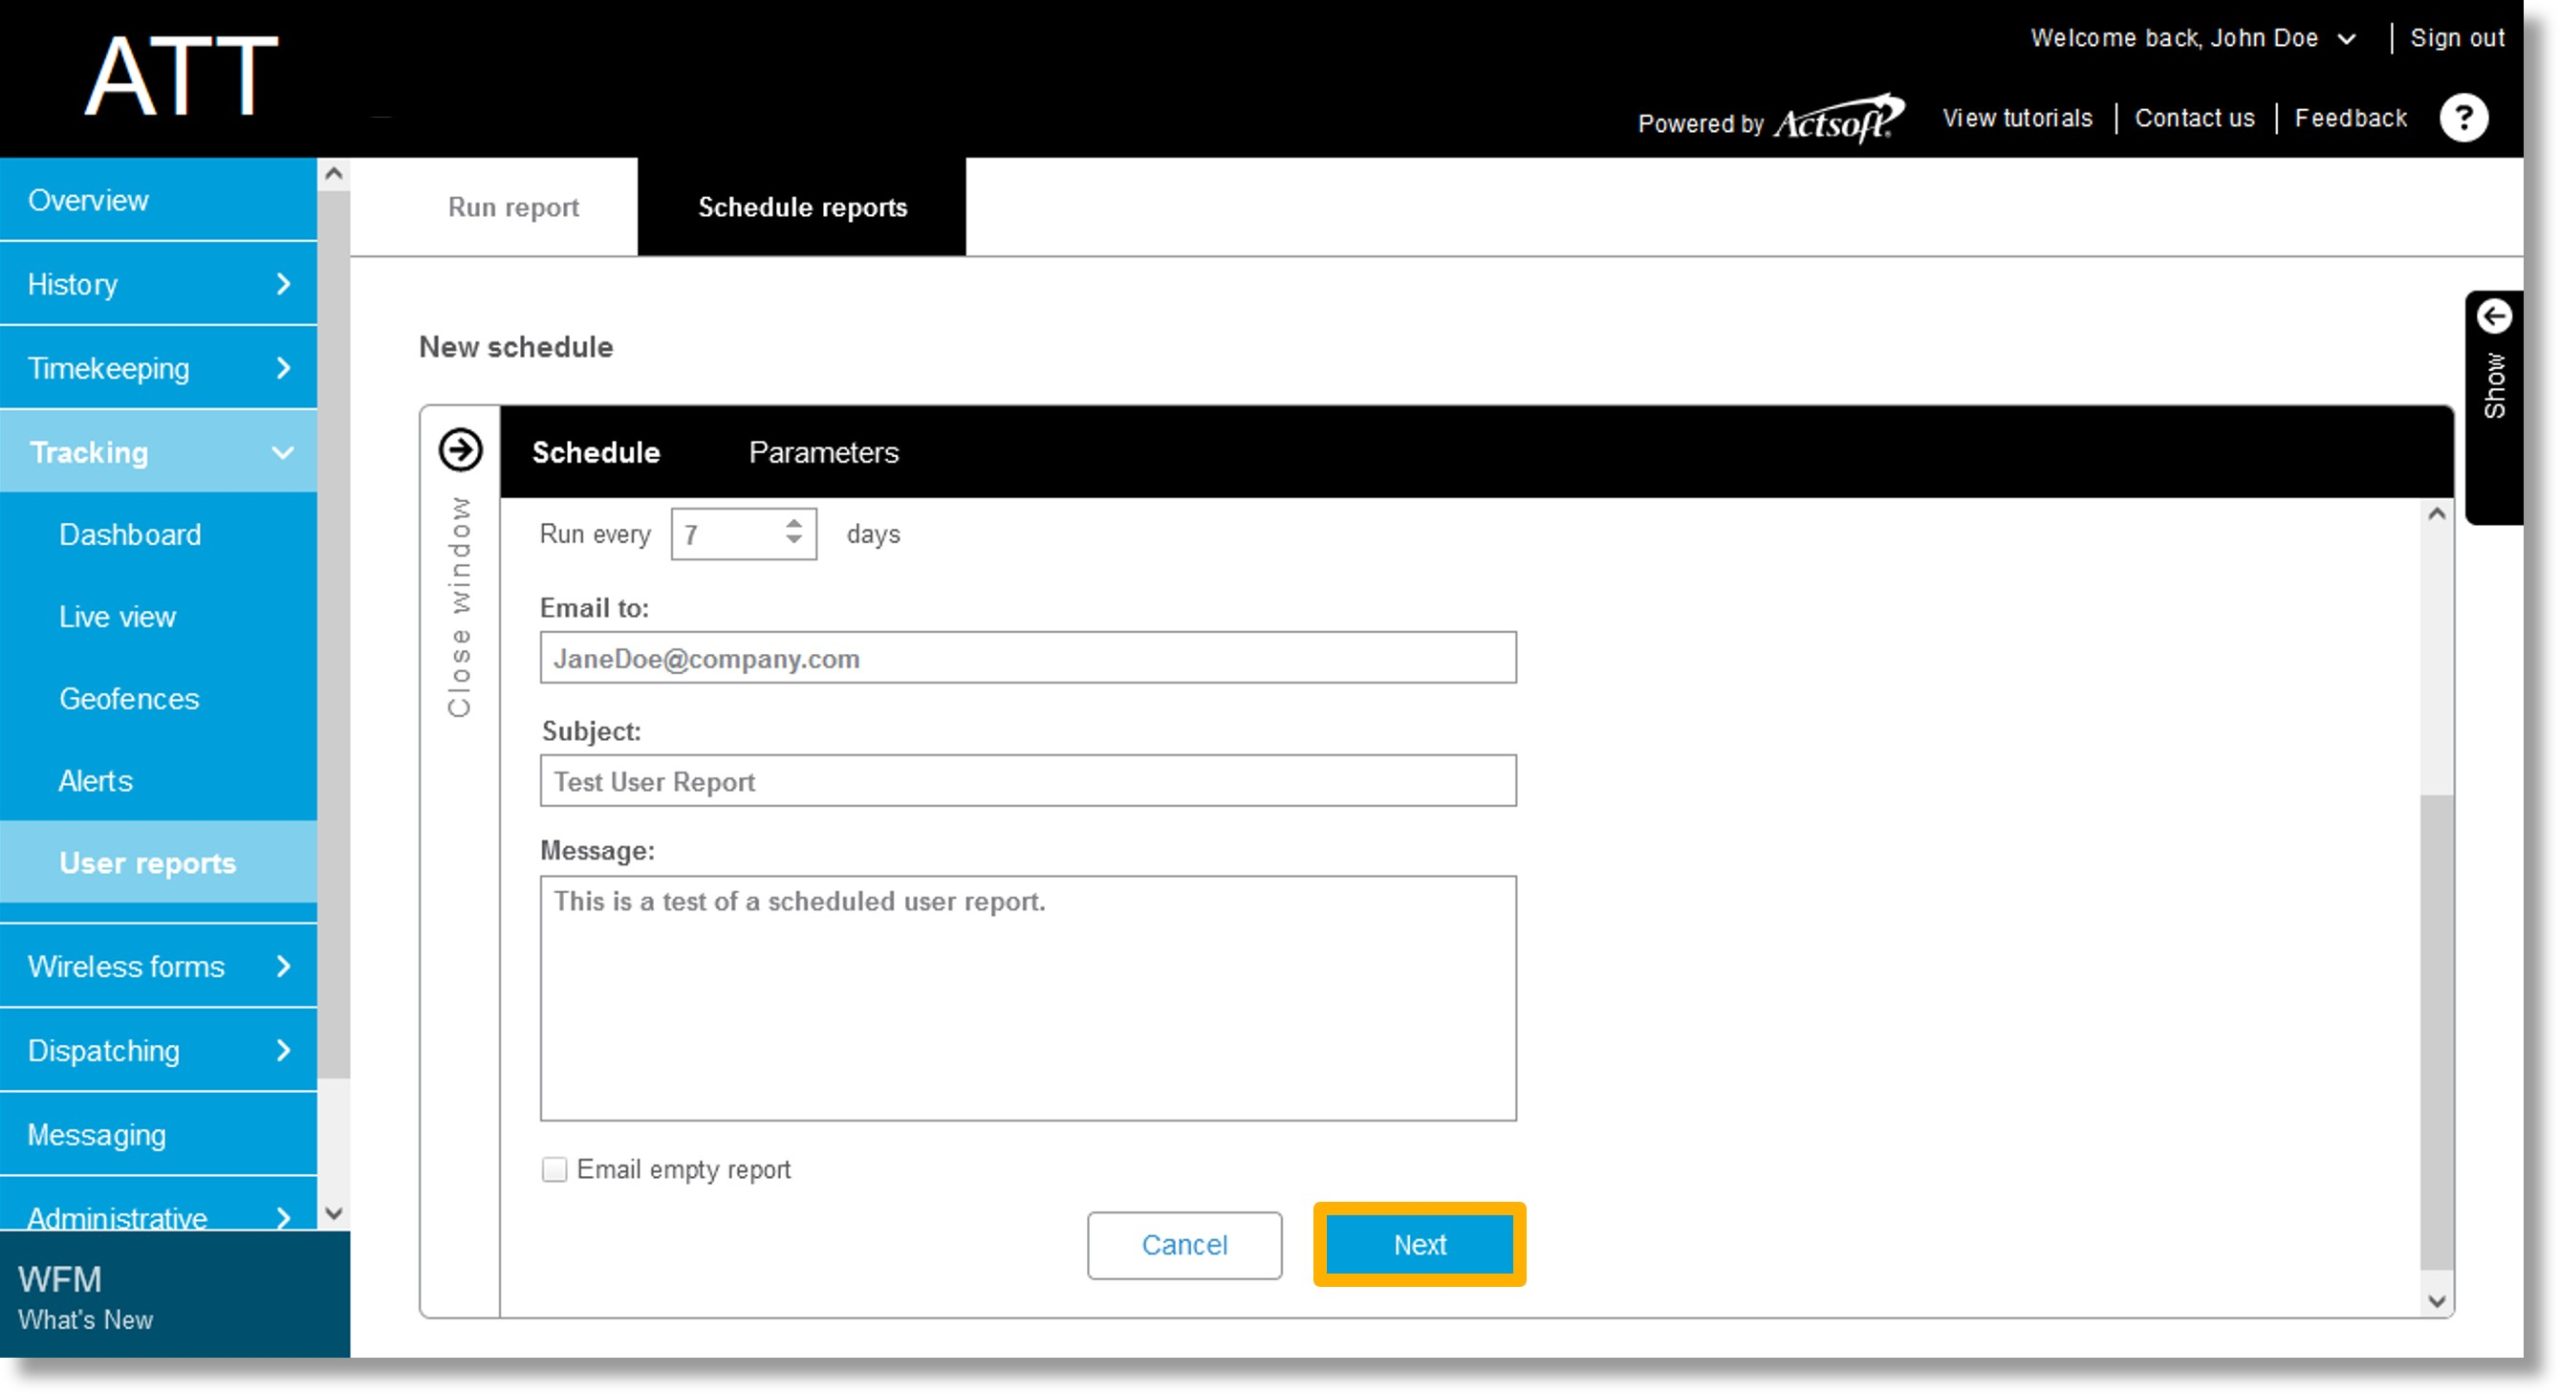
  16. Click on the field under Email to and enter the email address for the desired recipients.

  17. Click on the field under Subject and enter the desired subject line for the report.

  18. Click on the field under Message and enter the desired message.

    Image of steps 16 through 18.

  19. Click Next.

    Image of step 19.

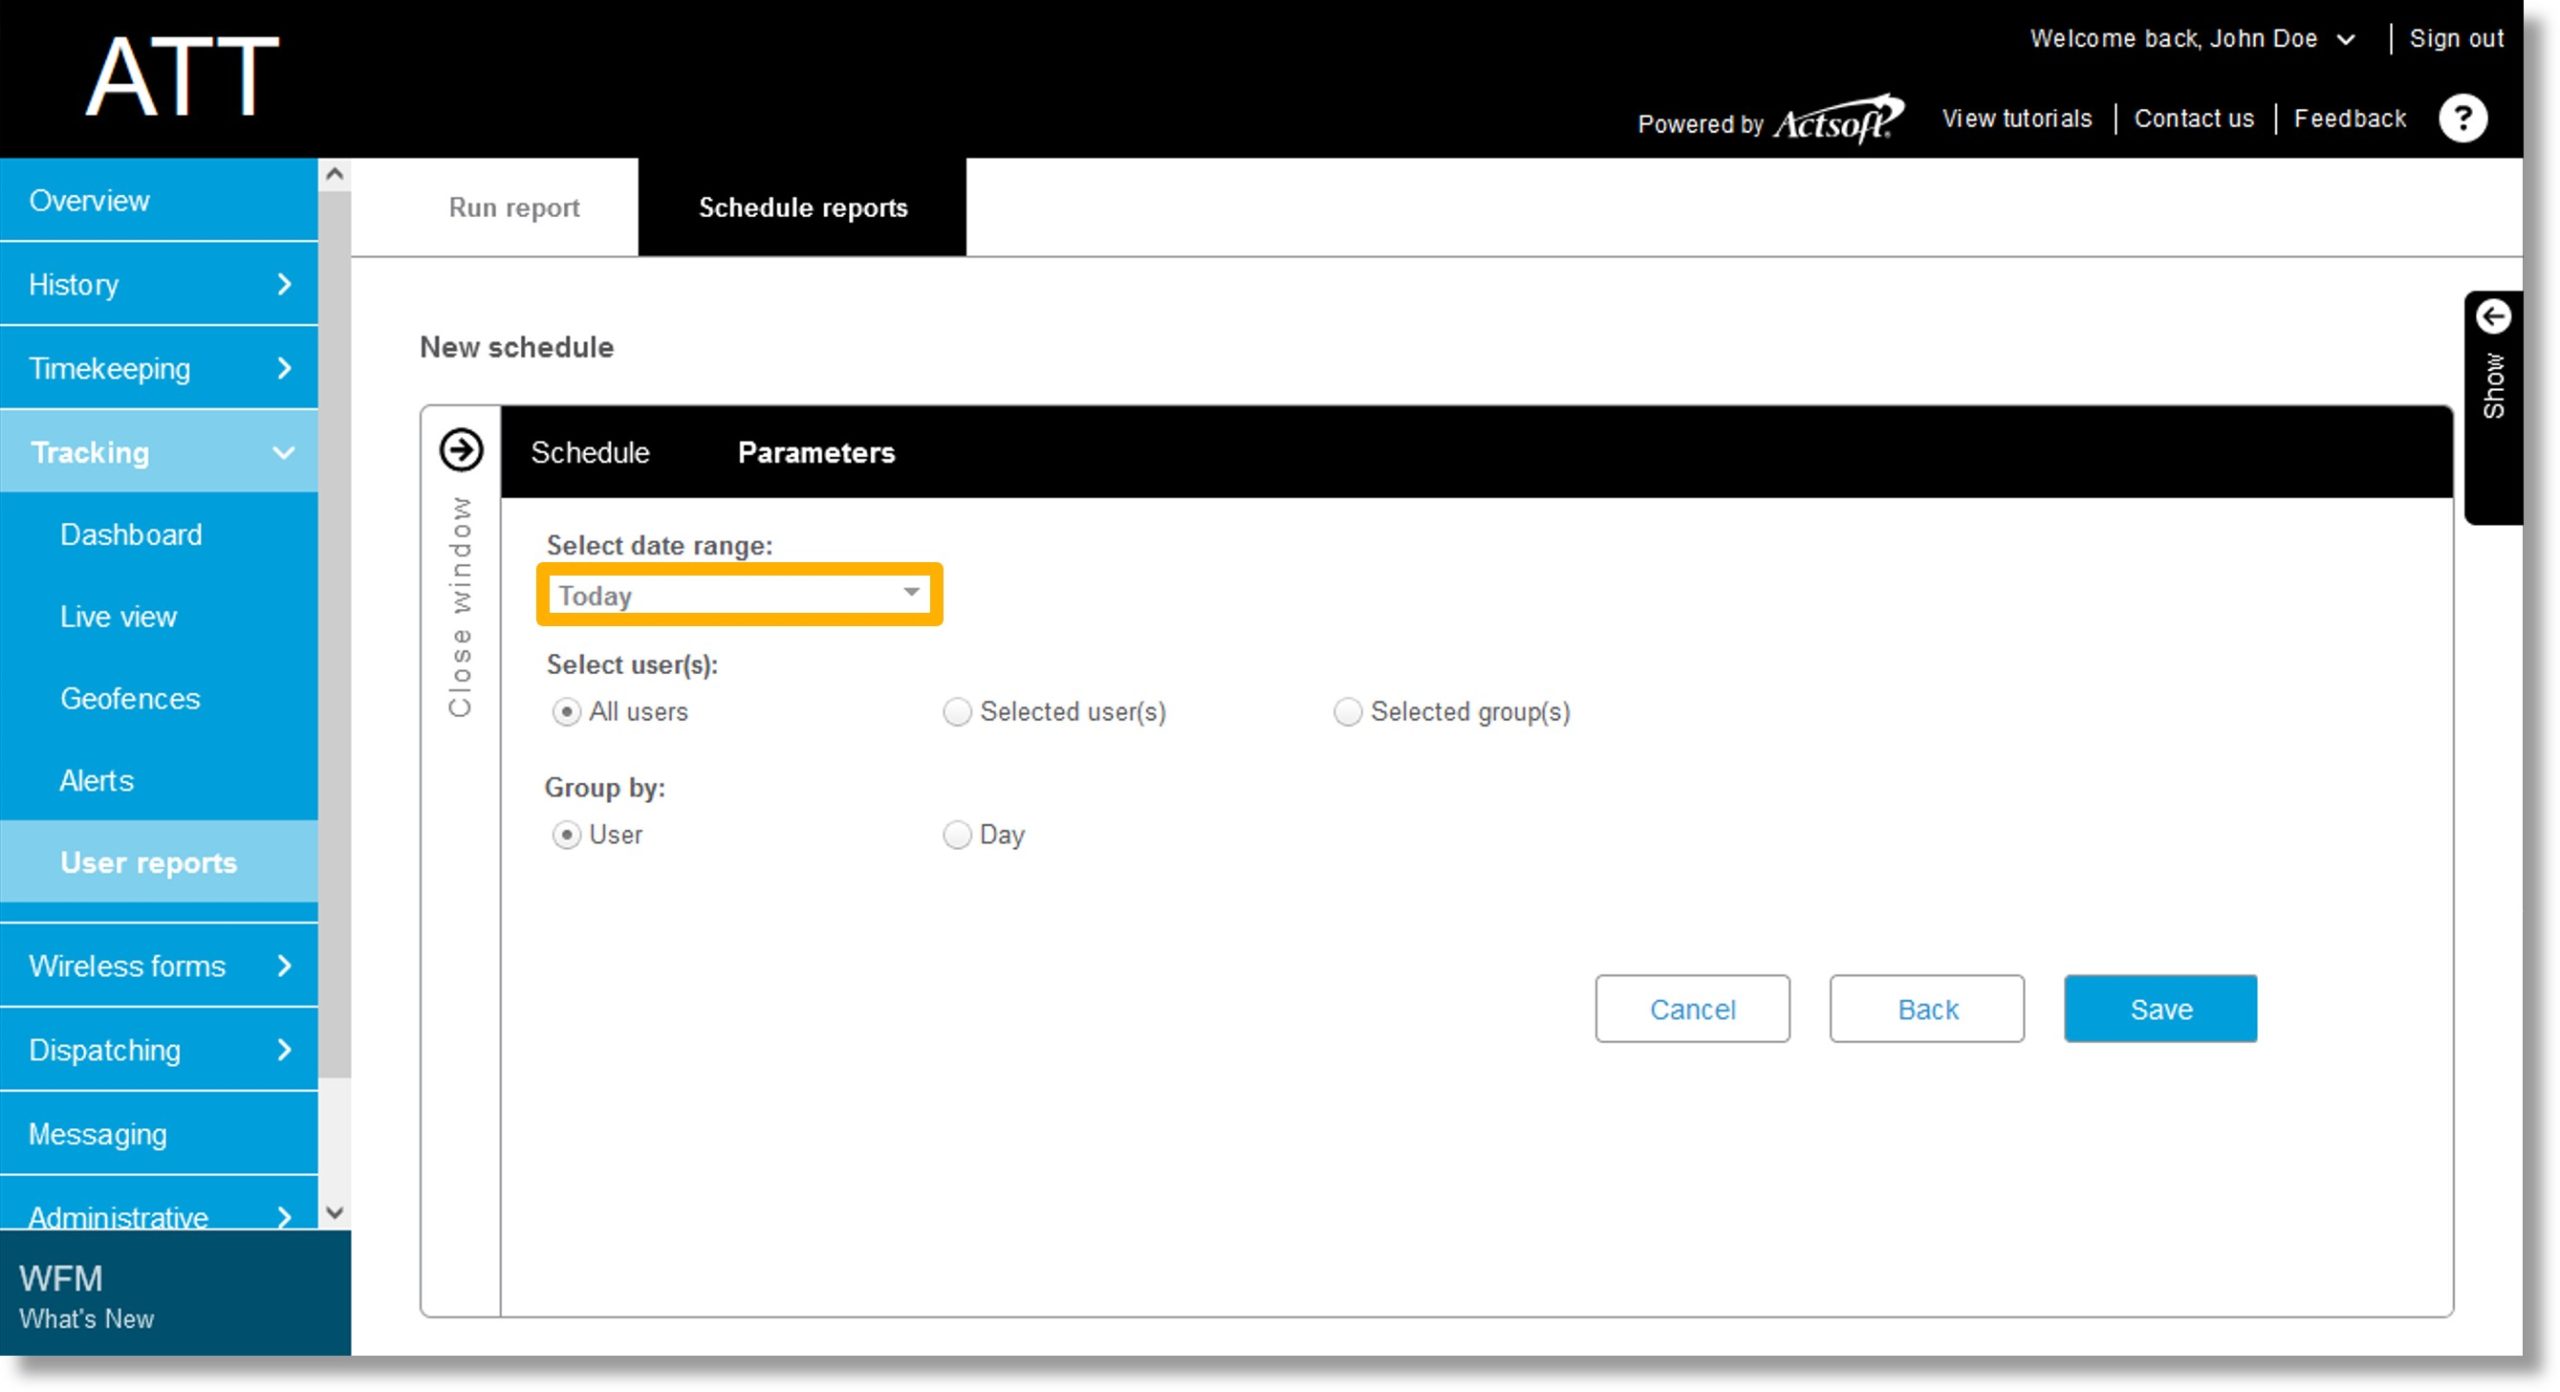
  20. Click on the dropdown under Select date range.

    Image of step 20.

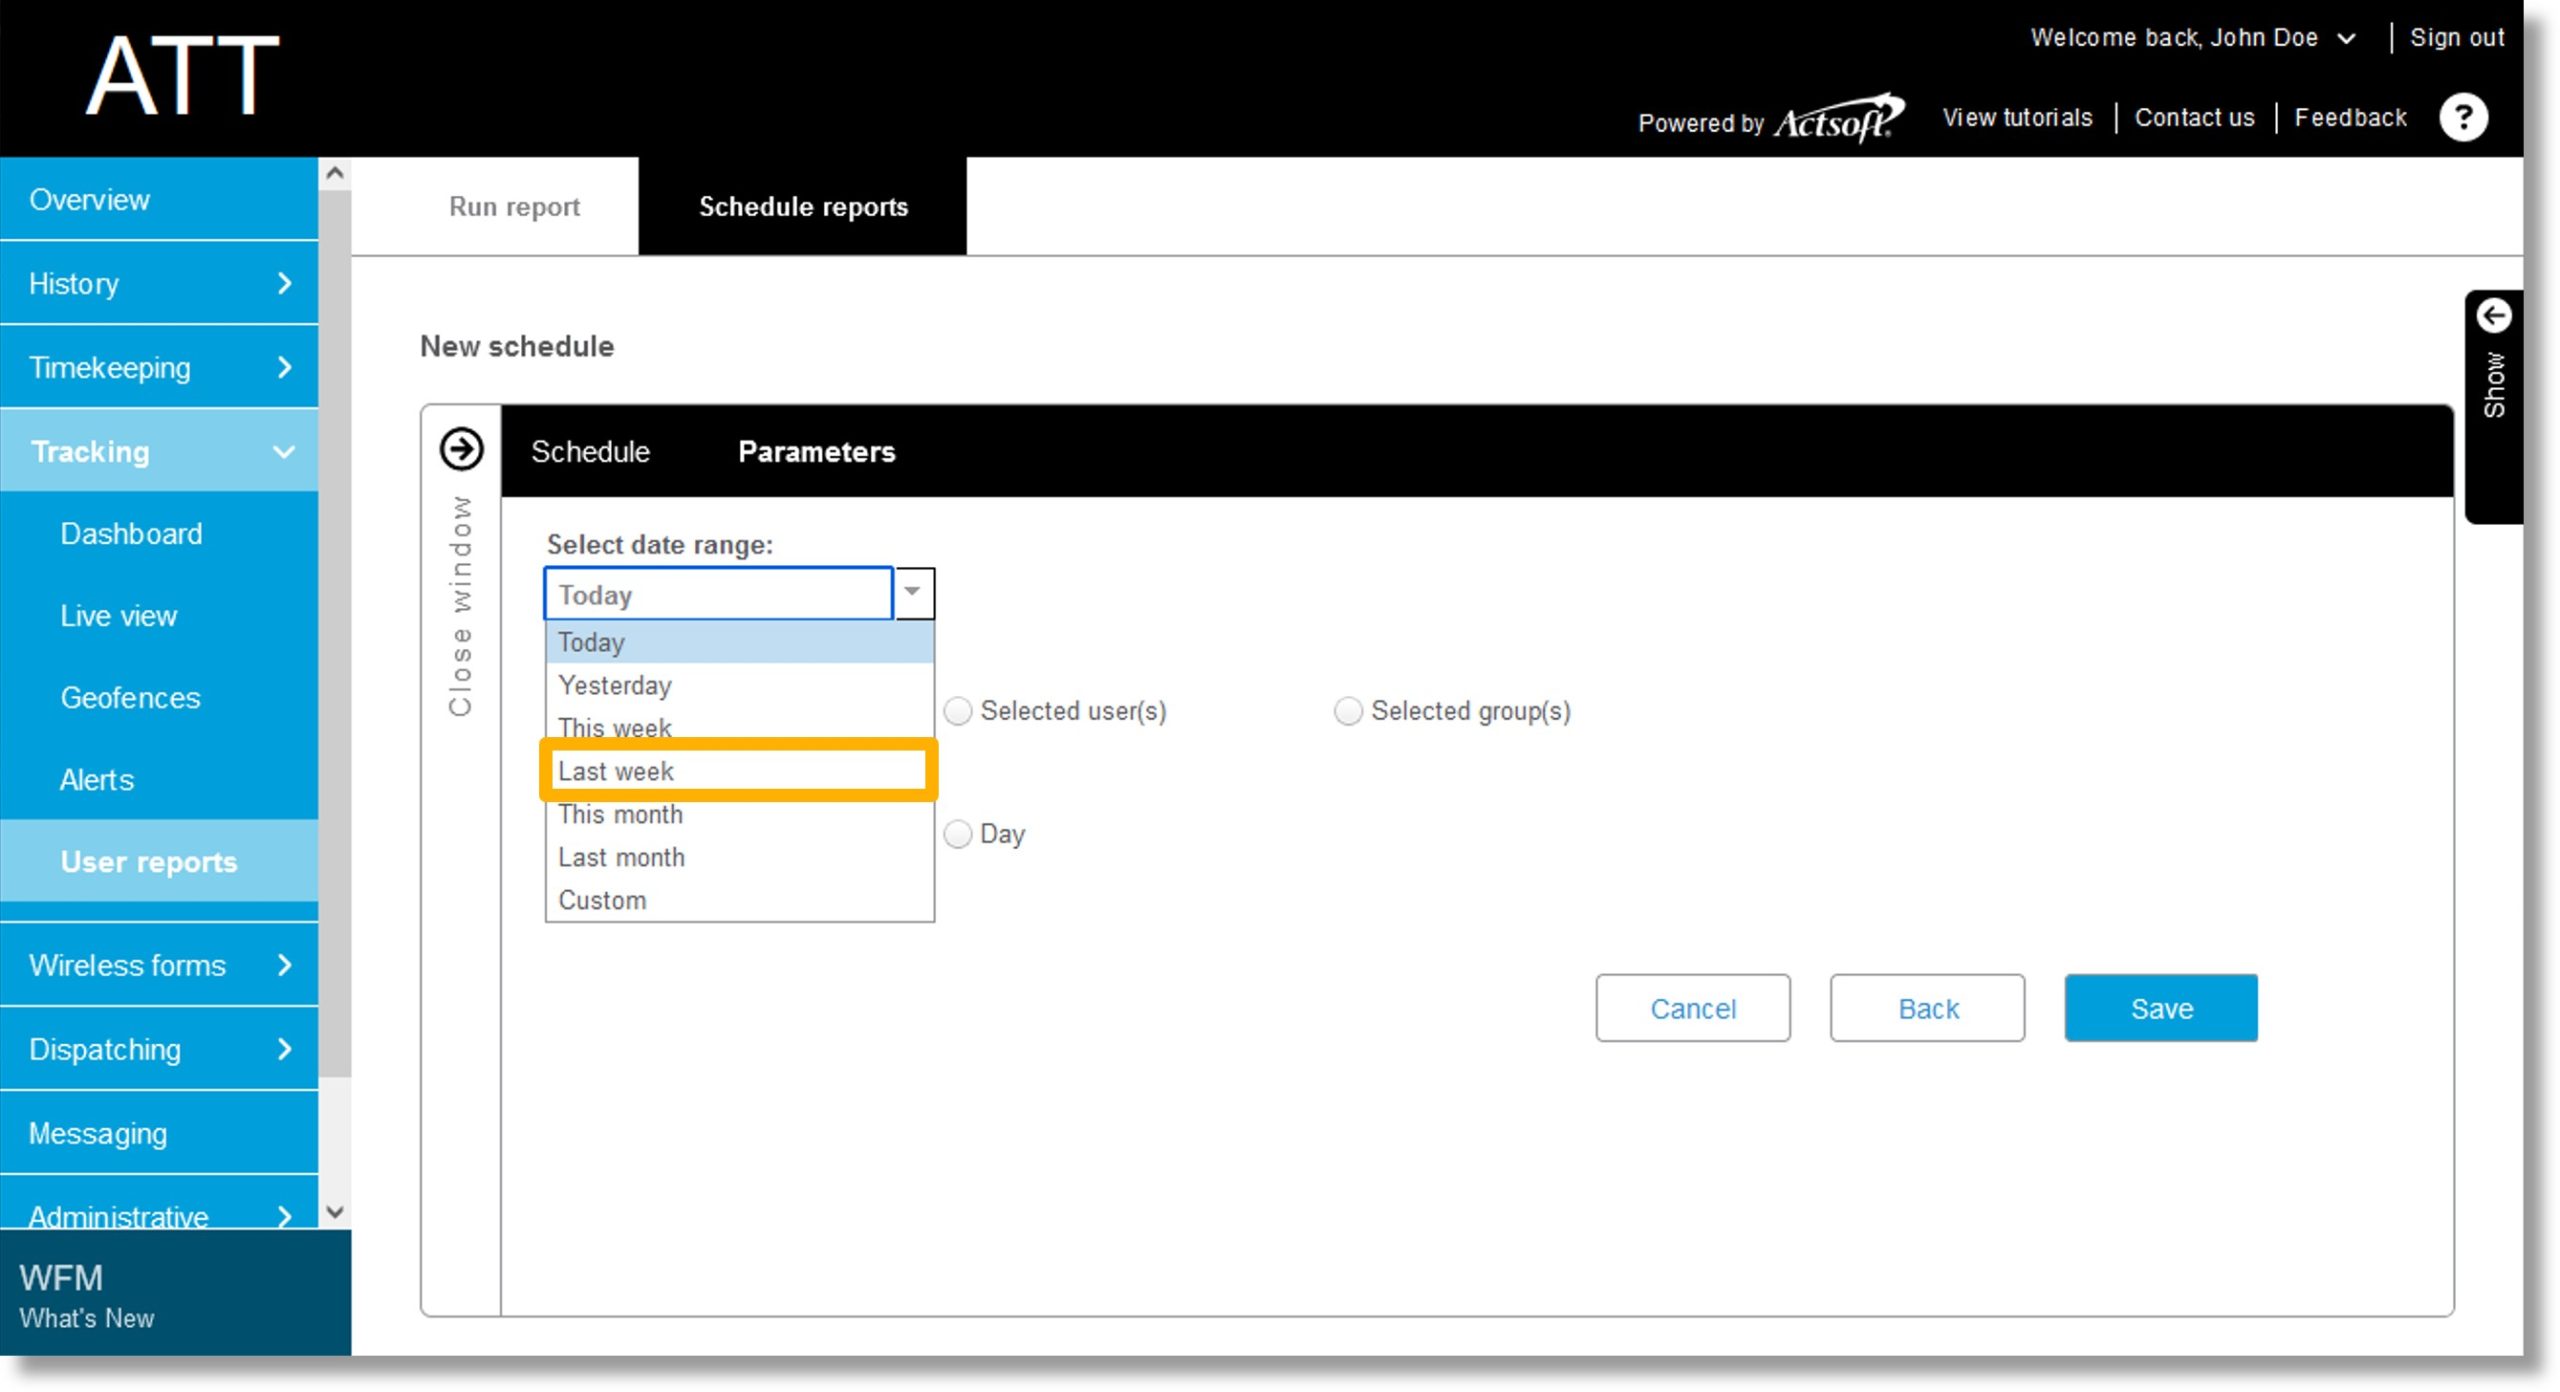
  21. Select the desired date range.

    Image of step 21.

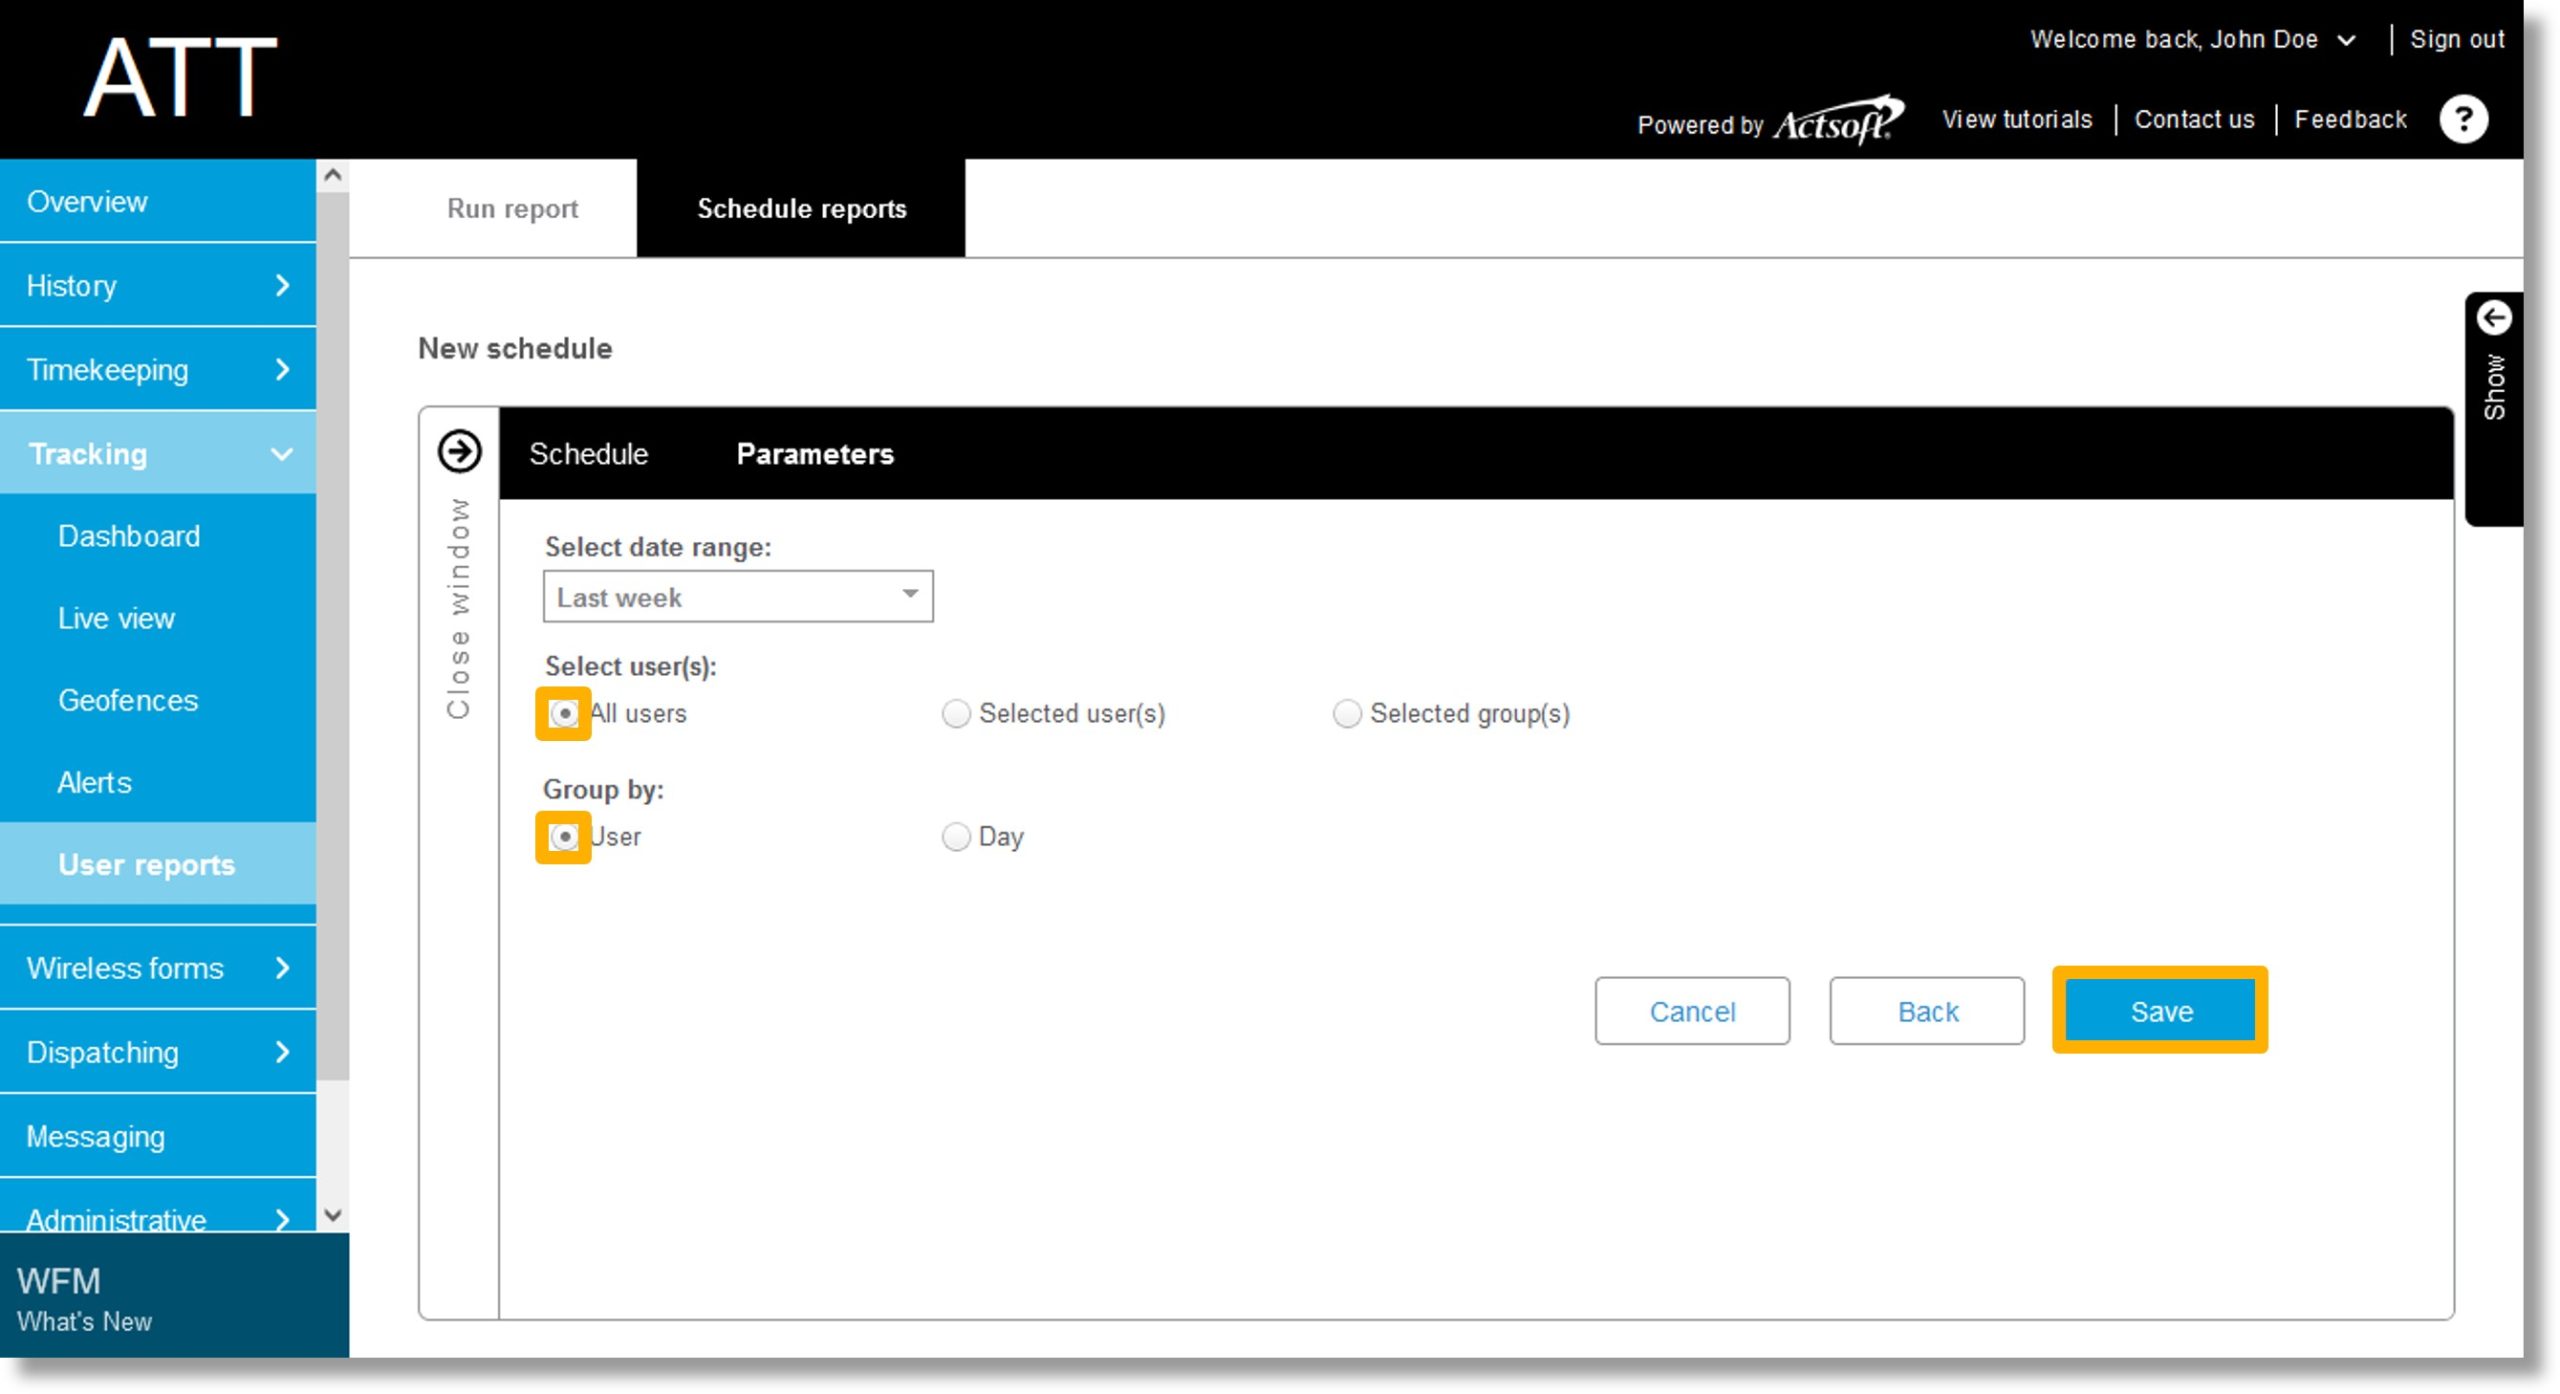
  22. Click on the radio button to the left of All users, Selected user(s), or Group by to select the users or groups to include in your report.

  23. Click on the radio button to the left User or Day to select how the report should group the data.

  24. Click Save.

    Image of steps 22 through 24.

  25. The report saves.

    Image of step 25.