TOP

AT&T Enhanced Push-to-Talk

Use our self-help resources to learn how to place and receive calls, manage contacts and groups, send and receive alerts, and understand notifications.

See a list of compatible devices here.

Back to Product Page
Use the dropdown to get support, or purchase this product

Related Content

No related content found

Create a group in the AT&T Enhanced Push-to-Talk Corporate Admin Tool (CAT)

  1. From the CAT home screen, click on Talkgroups on the menu on the left.

    Image of step 1.

  2. Click on the Create Talkgroup button.

    Image of step 2.

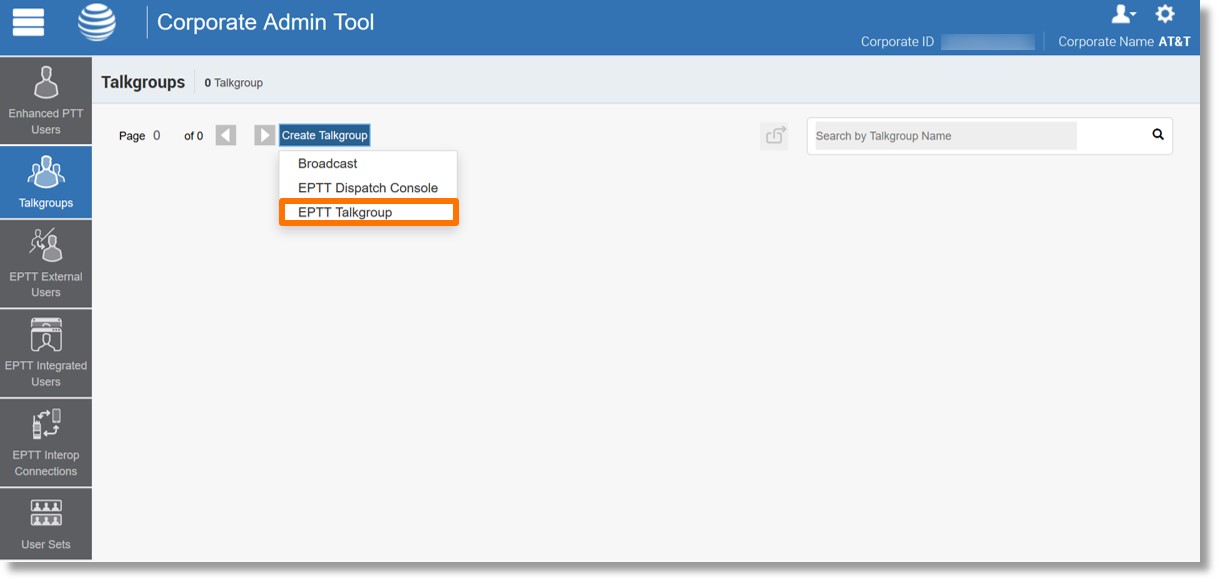
  3. Click on the desired group type.

    Image of step 3.

  4. Click in the field to the right of “Talkgroup Name” and enter a name for your group.

    Image of step 4.

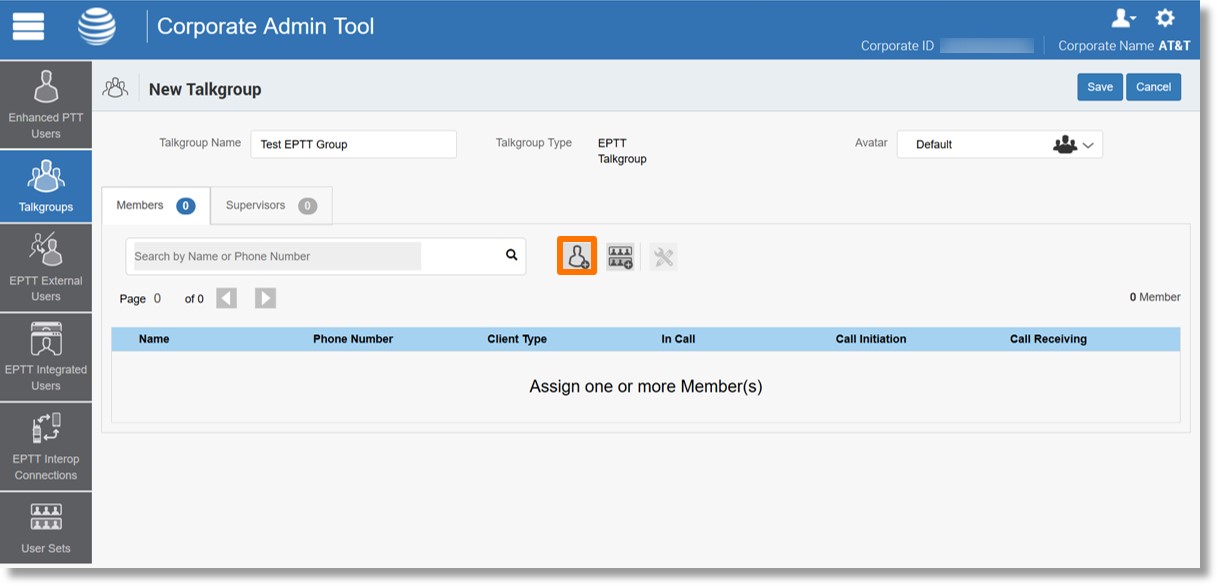
  5. Click on either the Assign Members icon Image of the assign members icon. or the Assign User Set icon Image of the assign user set icon. to the right of “Search by Name or Phone Number”.

    Image of step 5.

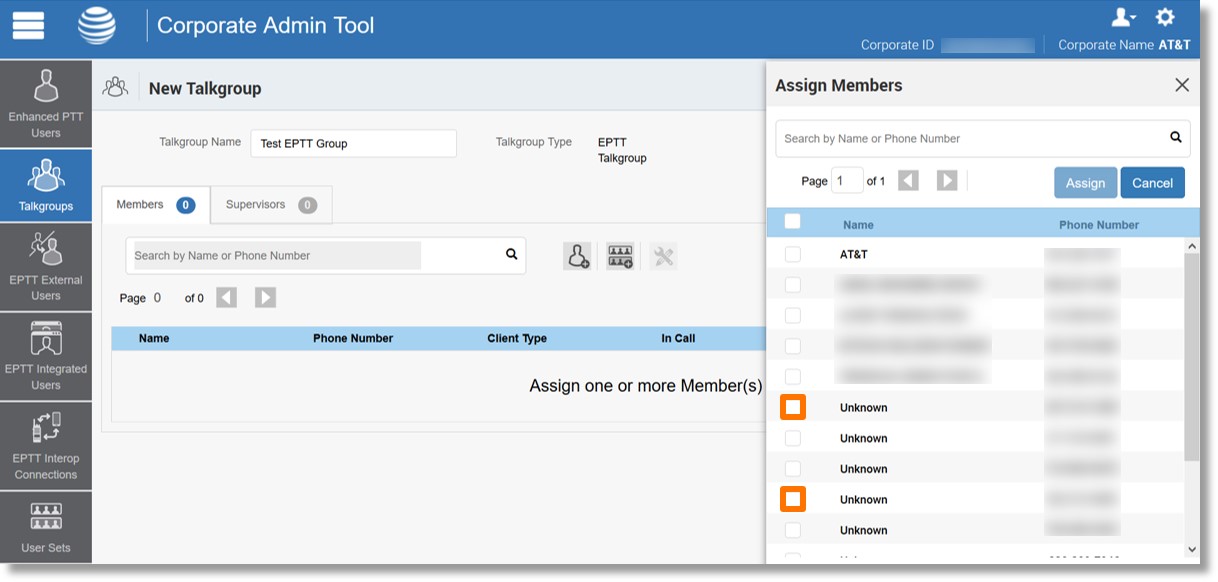
  6. The available users or user sets display.
  7. Click the checkbox to the left of the desired user or user set in the list.
    Note: If you know the name or phone number of the user you would like to add click in the field labeled “Search by Name or Phone Number”. Enter the user’s Name or Phone number, and then click the checkmark to the left of their name.

    Image of steps 6 and 7.

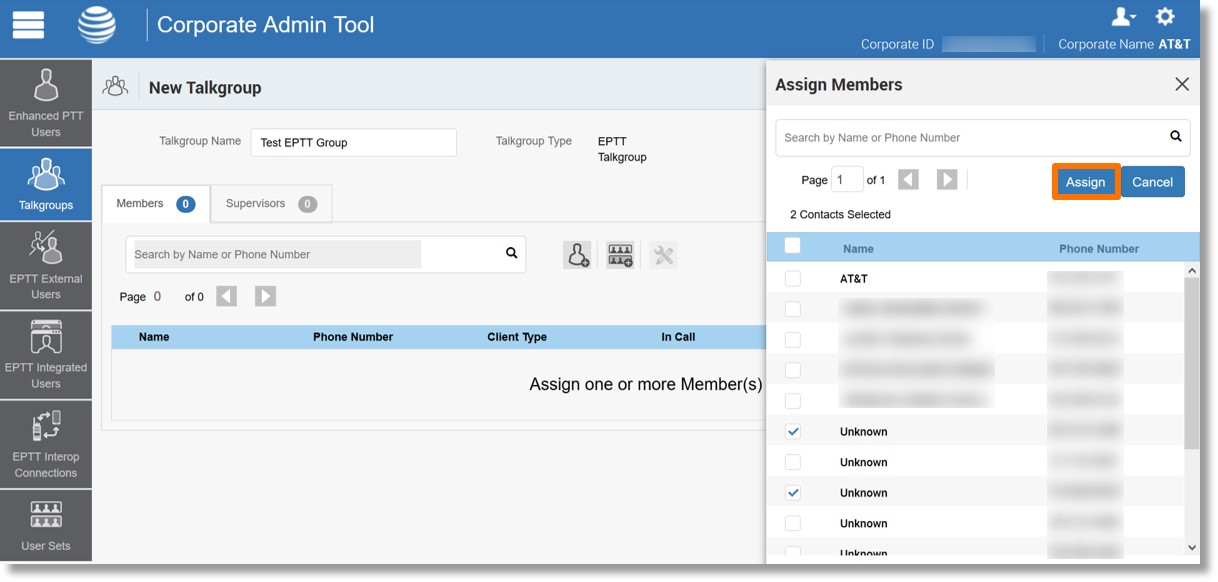
  8. Click on the Assign button.

    Image of step 8.

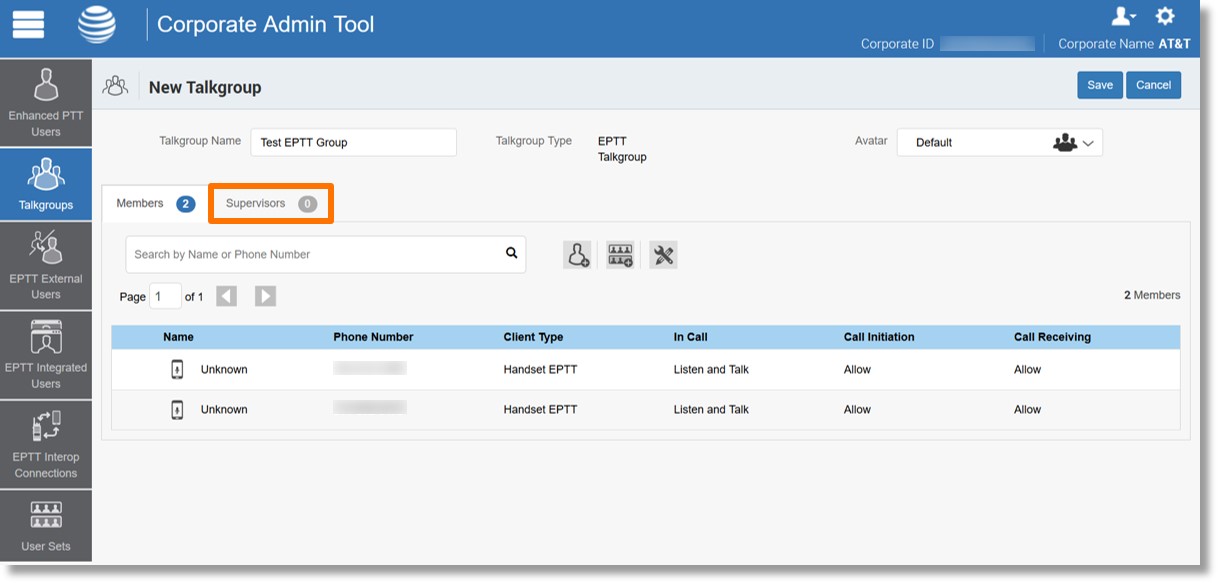
  9. Click on the Supervisor tab.

    Image of step 9.

  10. Click on the Assign Supervisors icon Image of the assign supervisors icon. to the right of “Search by Name or Phone Number”.

    Image of step 10.

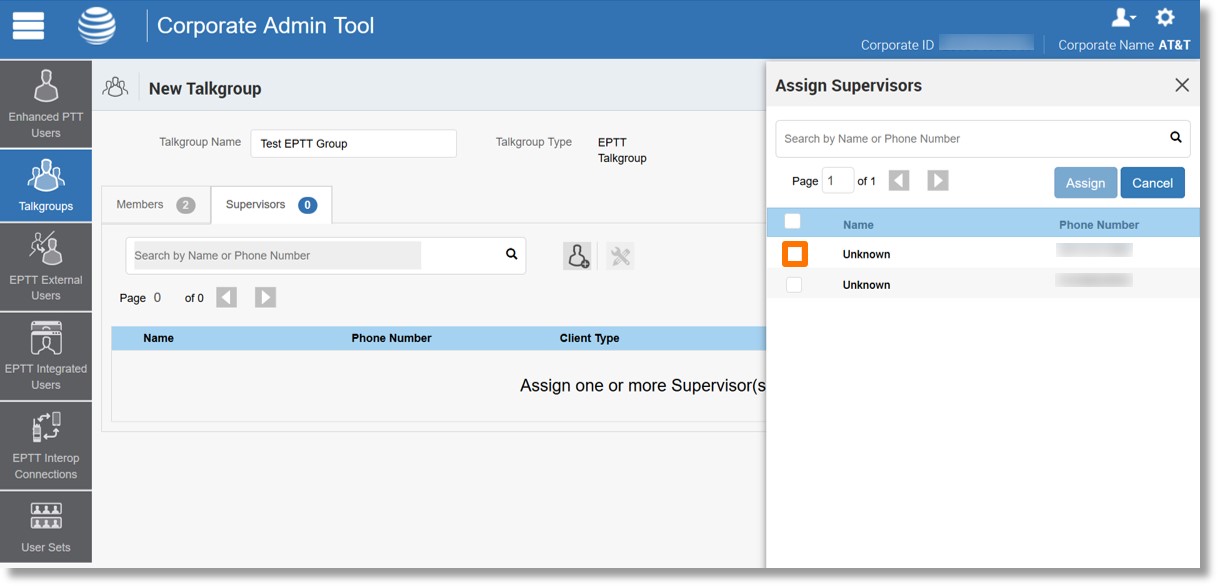
  11. Click the checkbox to the left of the desired user in the list.

    Image of step 11.

  12. Click on the Assign button.

    Image of step 12.

  13. Click the dropdown to the right of “Avatar” to set the desired avatar for your group.

    Image of step 13.

  14. Click on the Save button at the top right.

    Image of step 14.

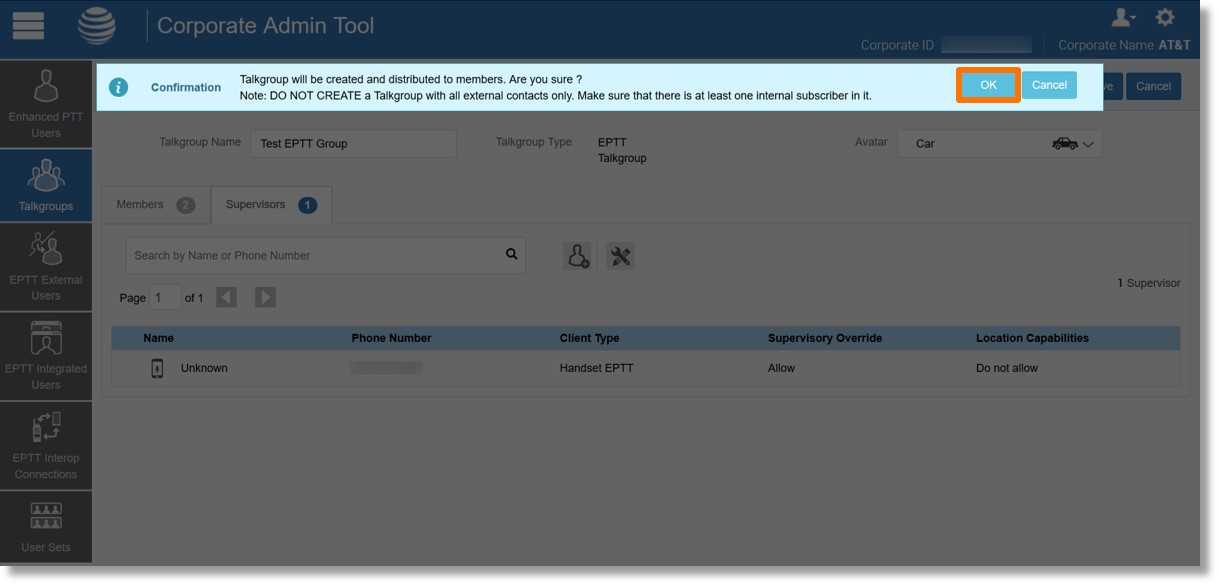
  15. A confirmation message populates.
  16. Click on the OK button to proceed.

    Image of steps 15 and 16.

  17. The group saves and displays on the user’s application.