-
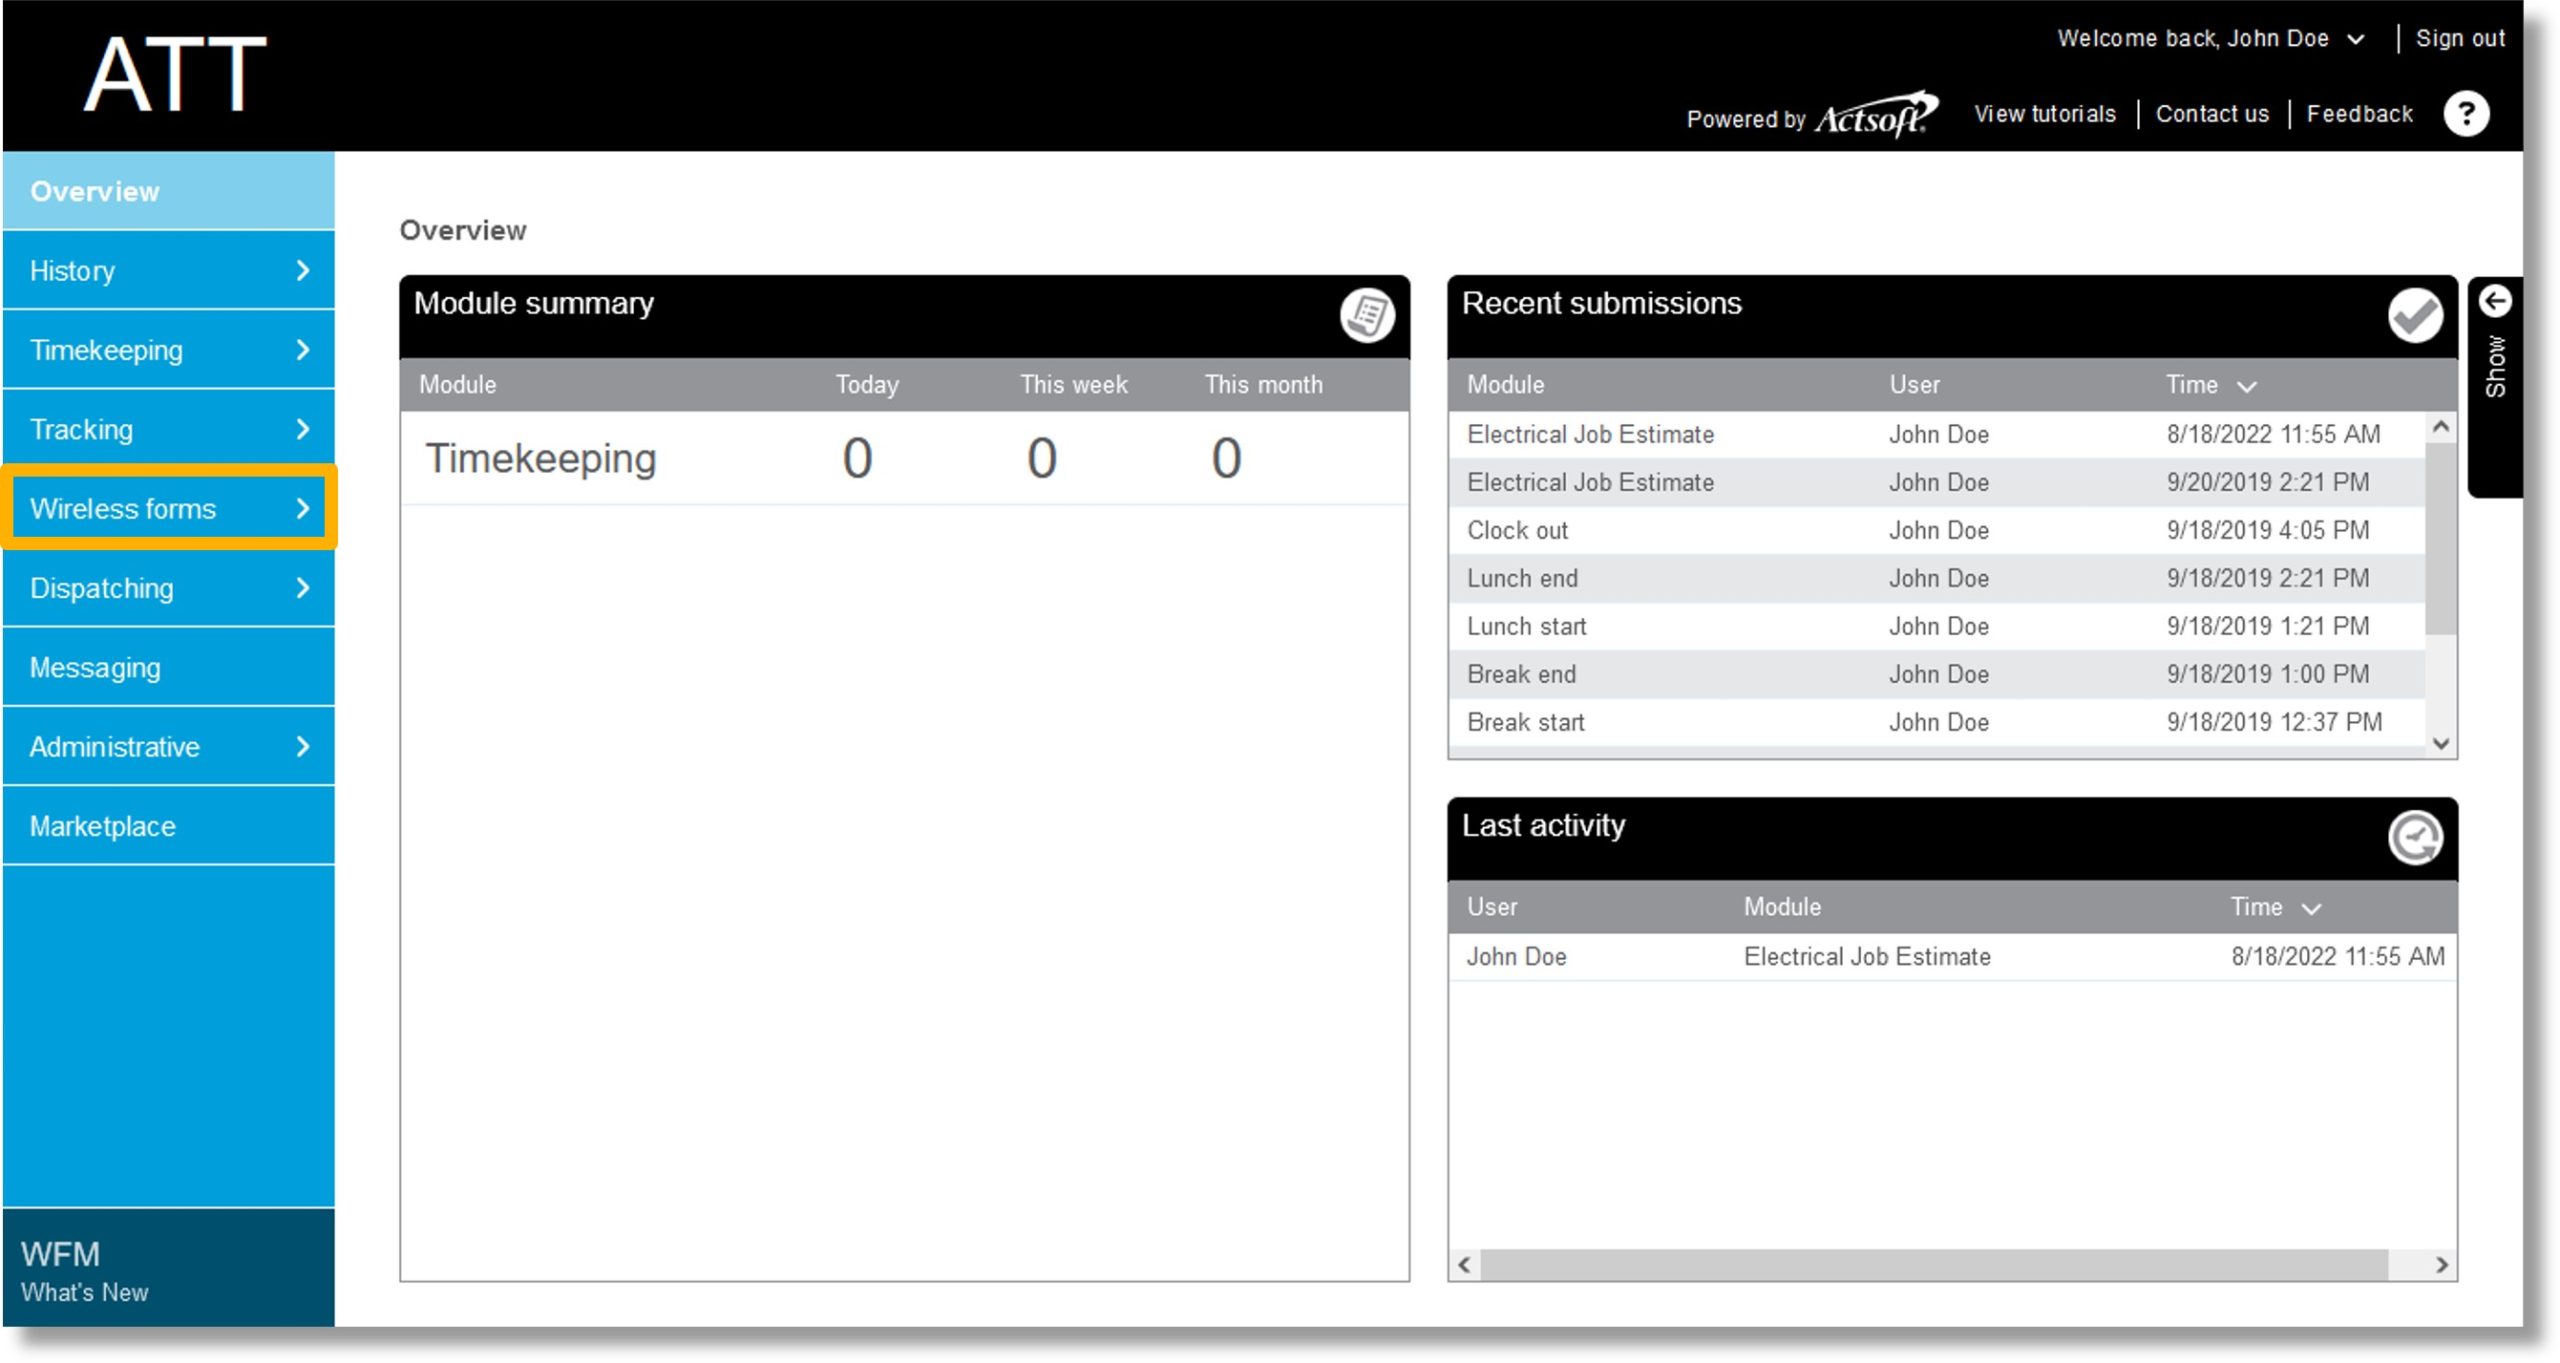
Click on Wireless forms in the menu on the left.
-
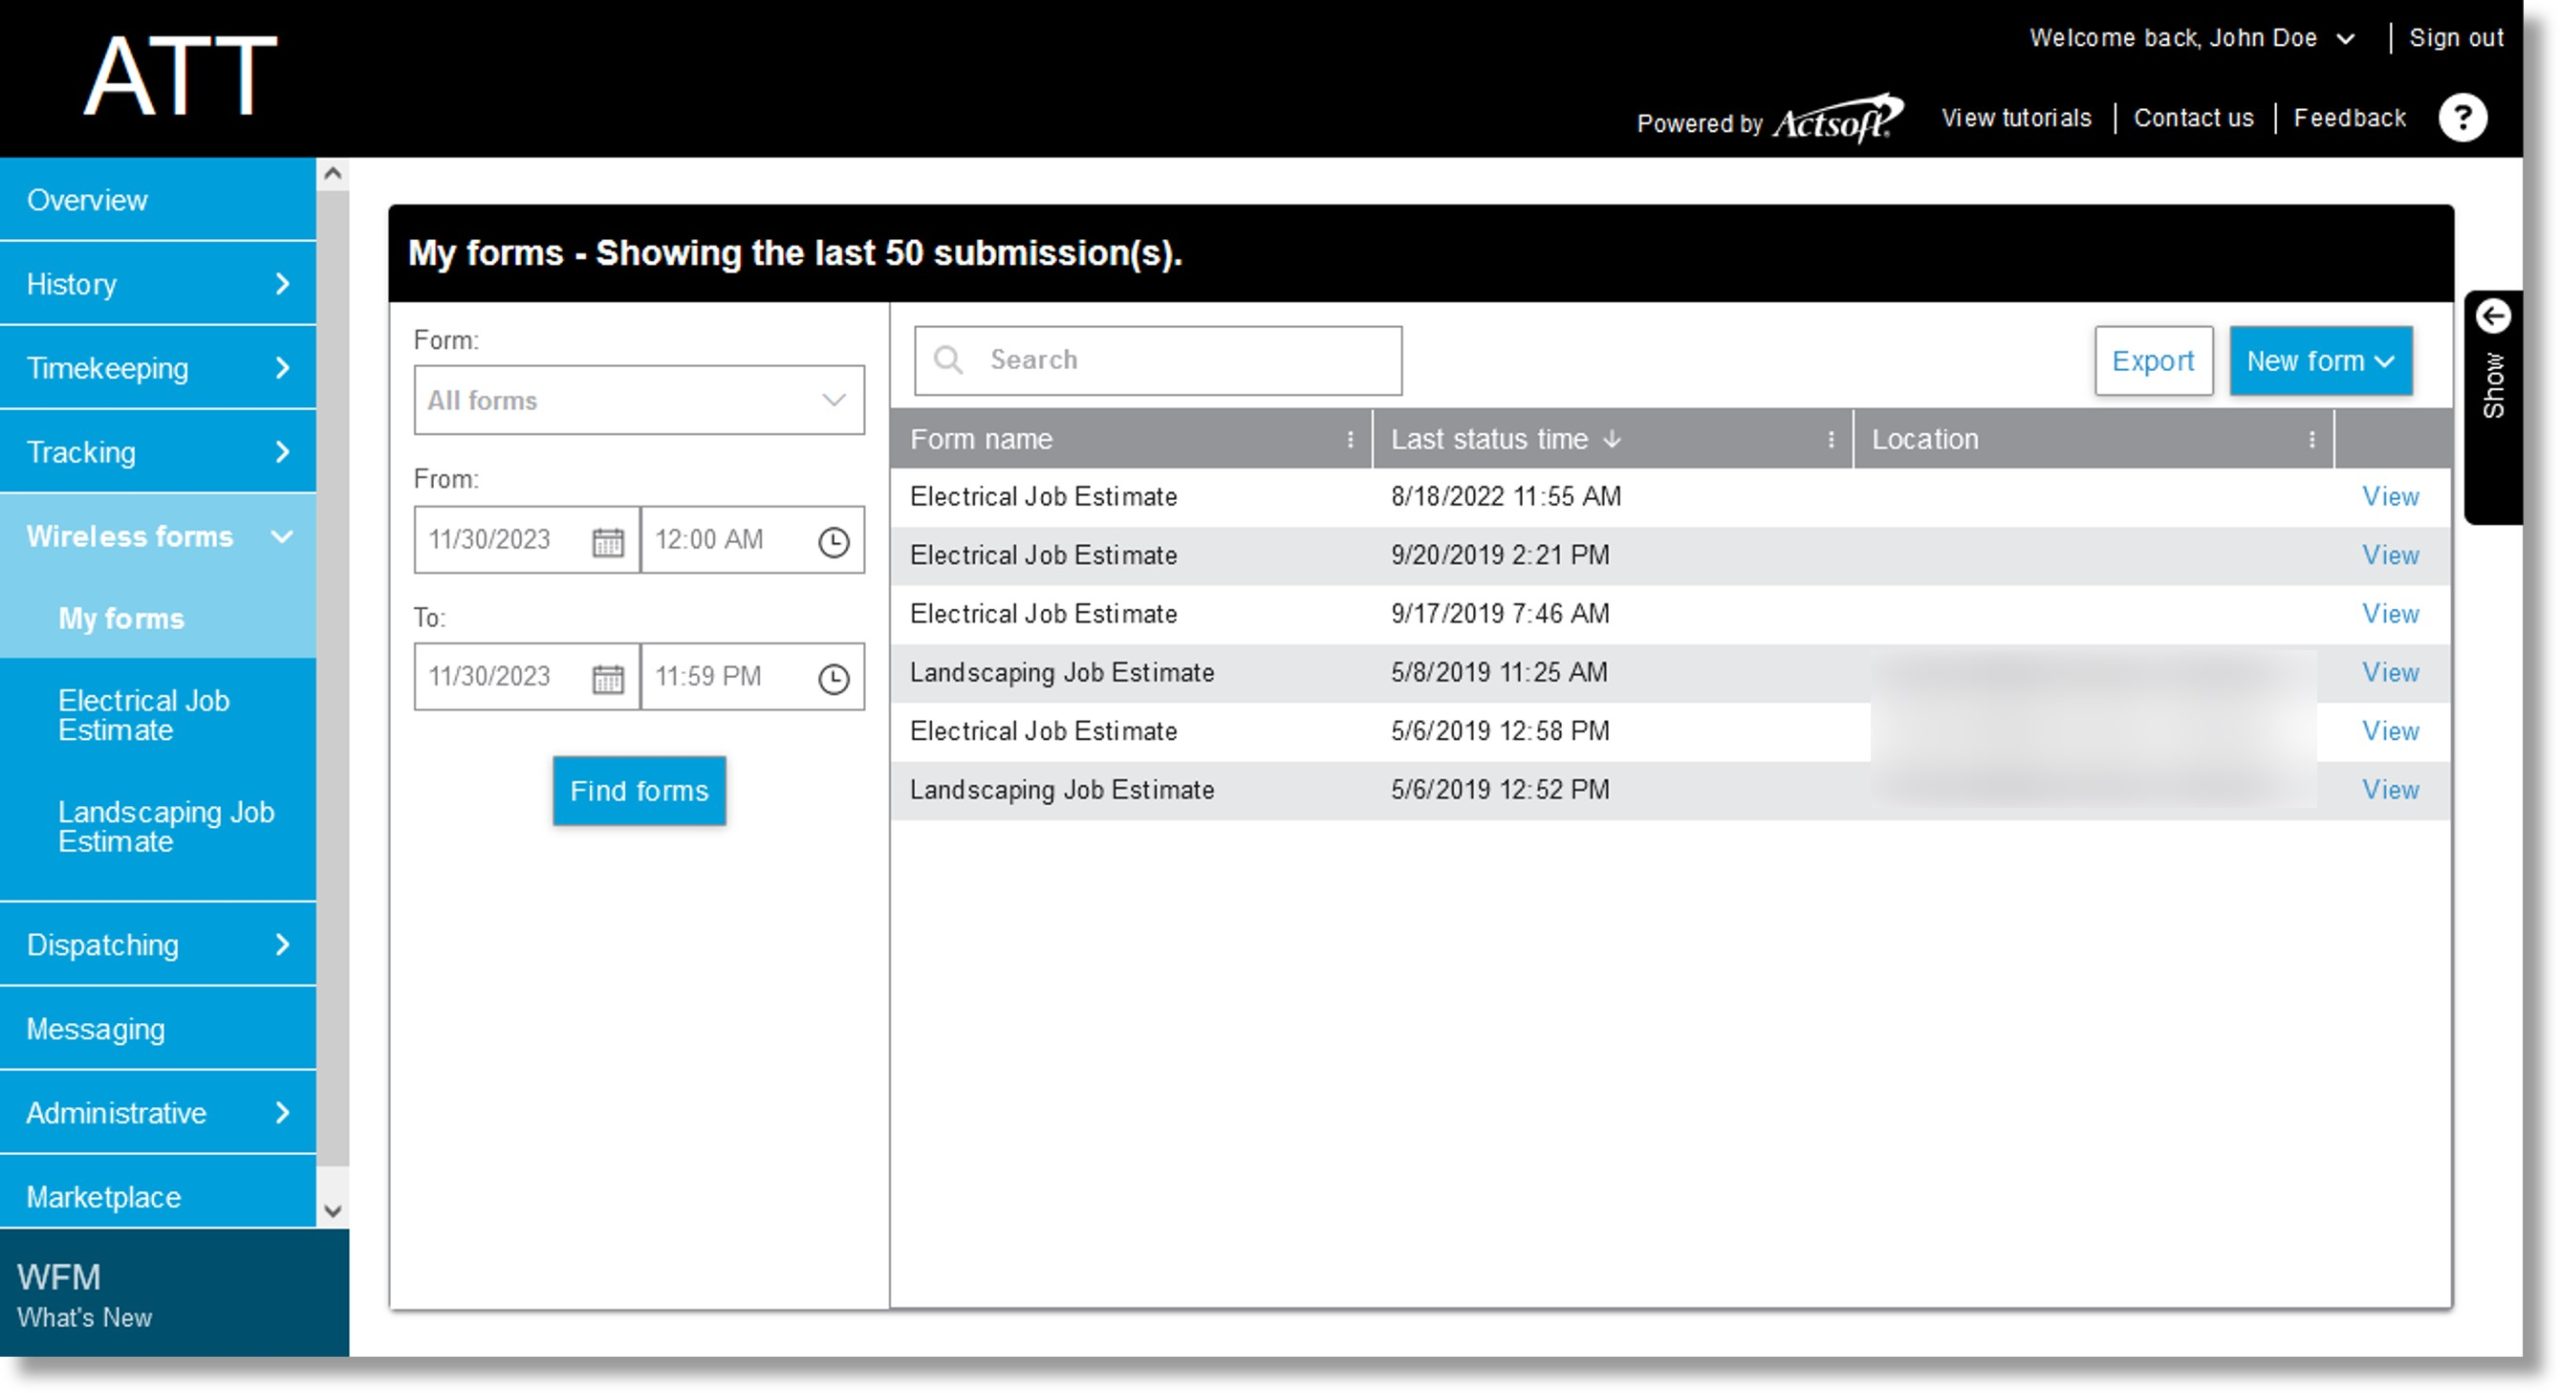
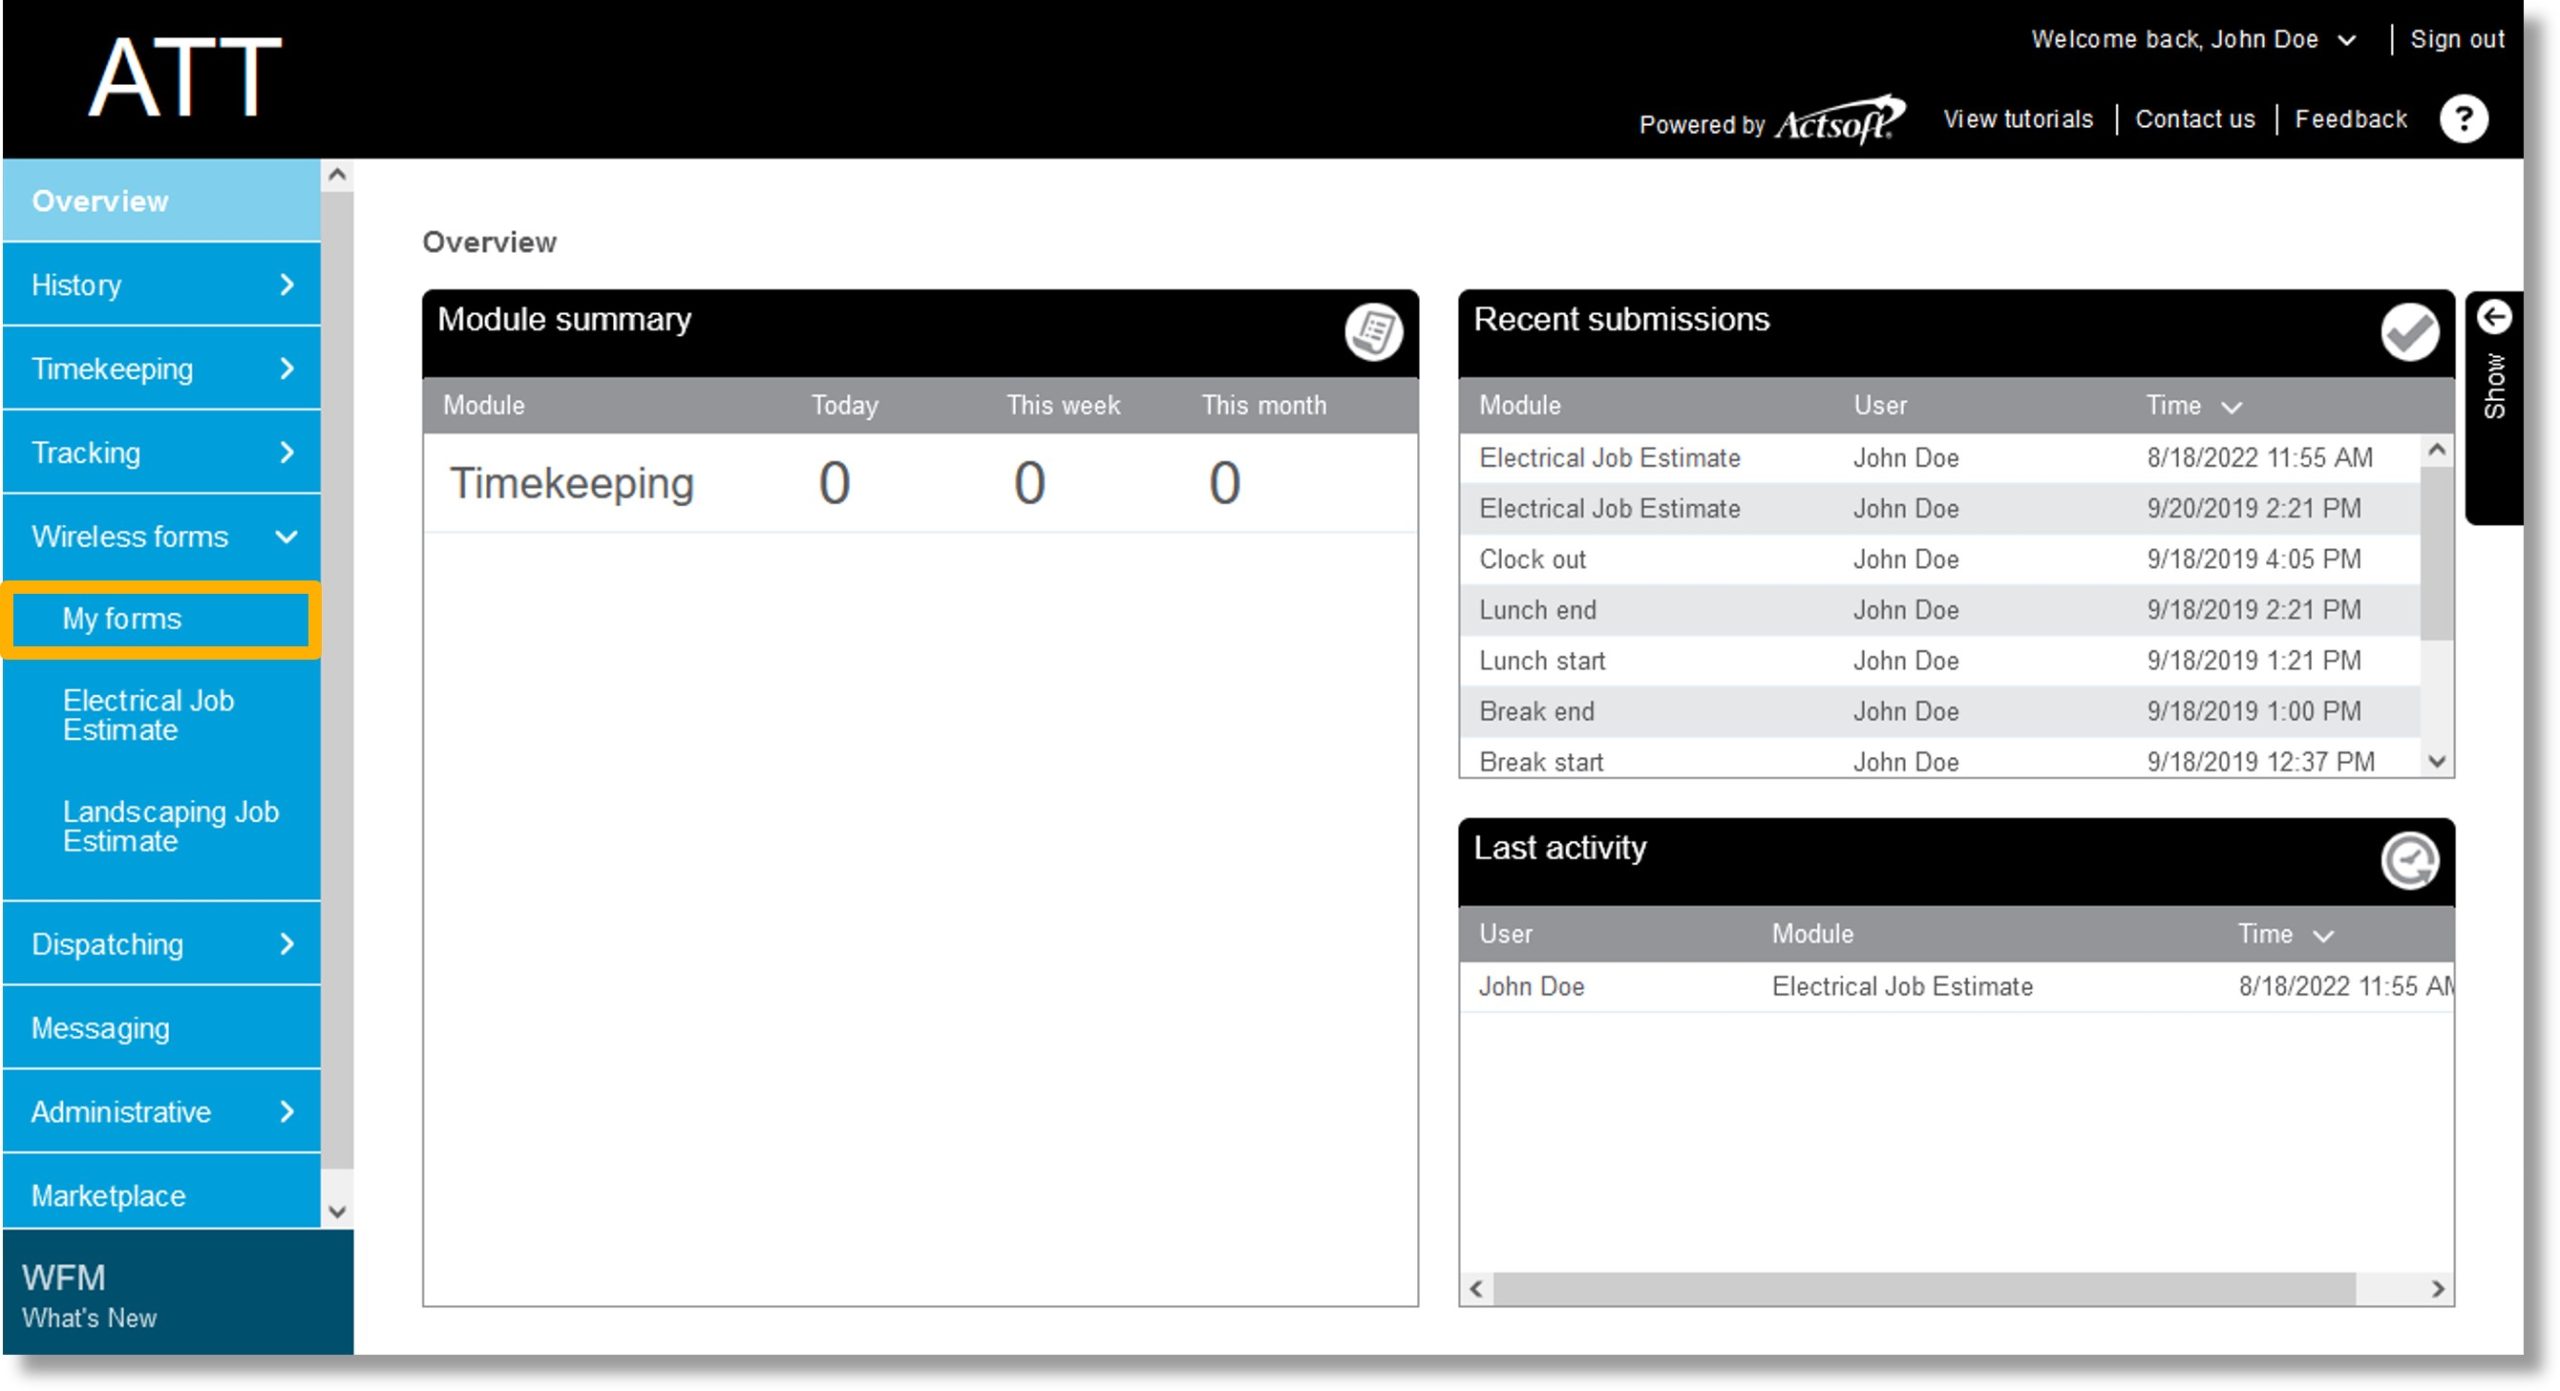
Click My forms.
-
The list of forms displays.
-
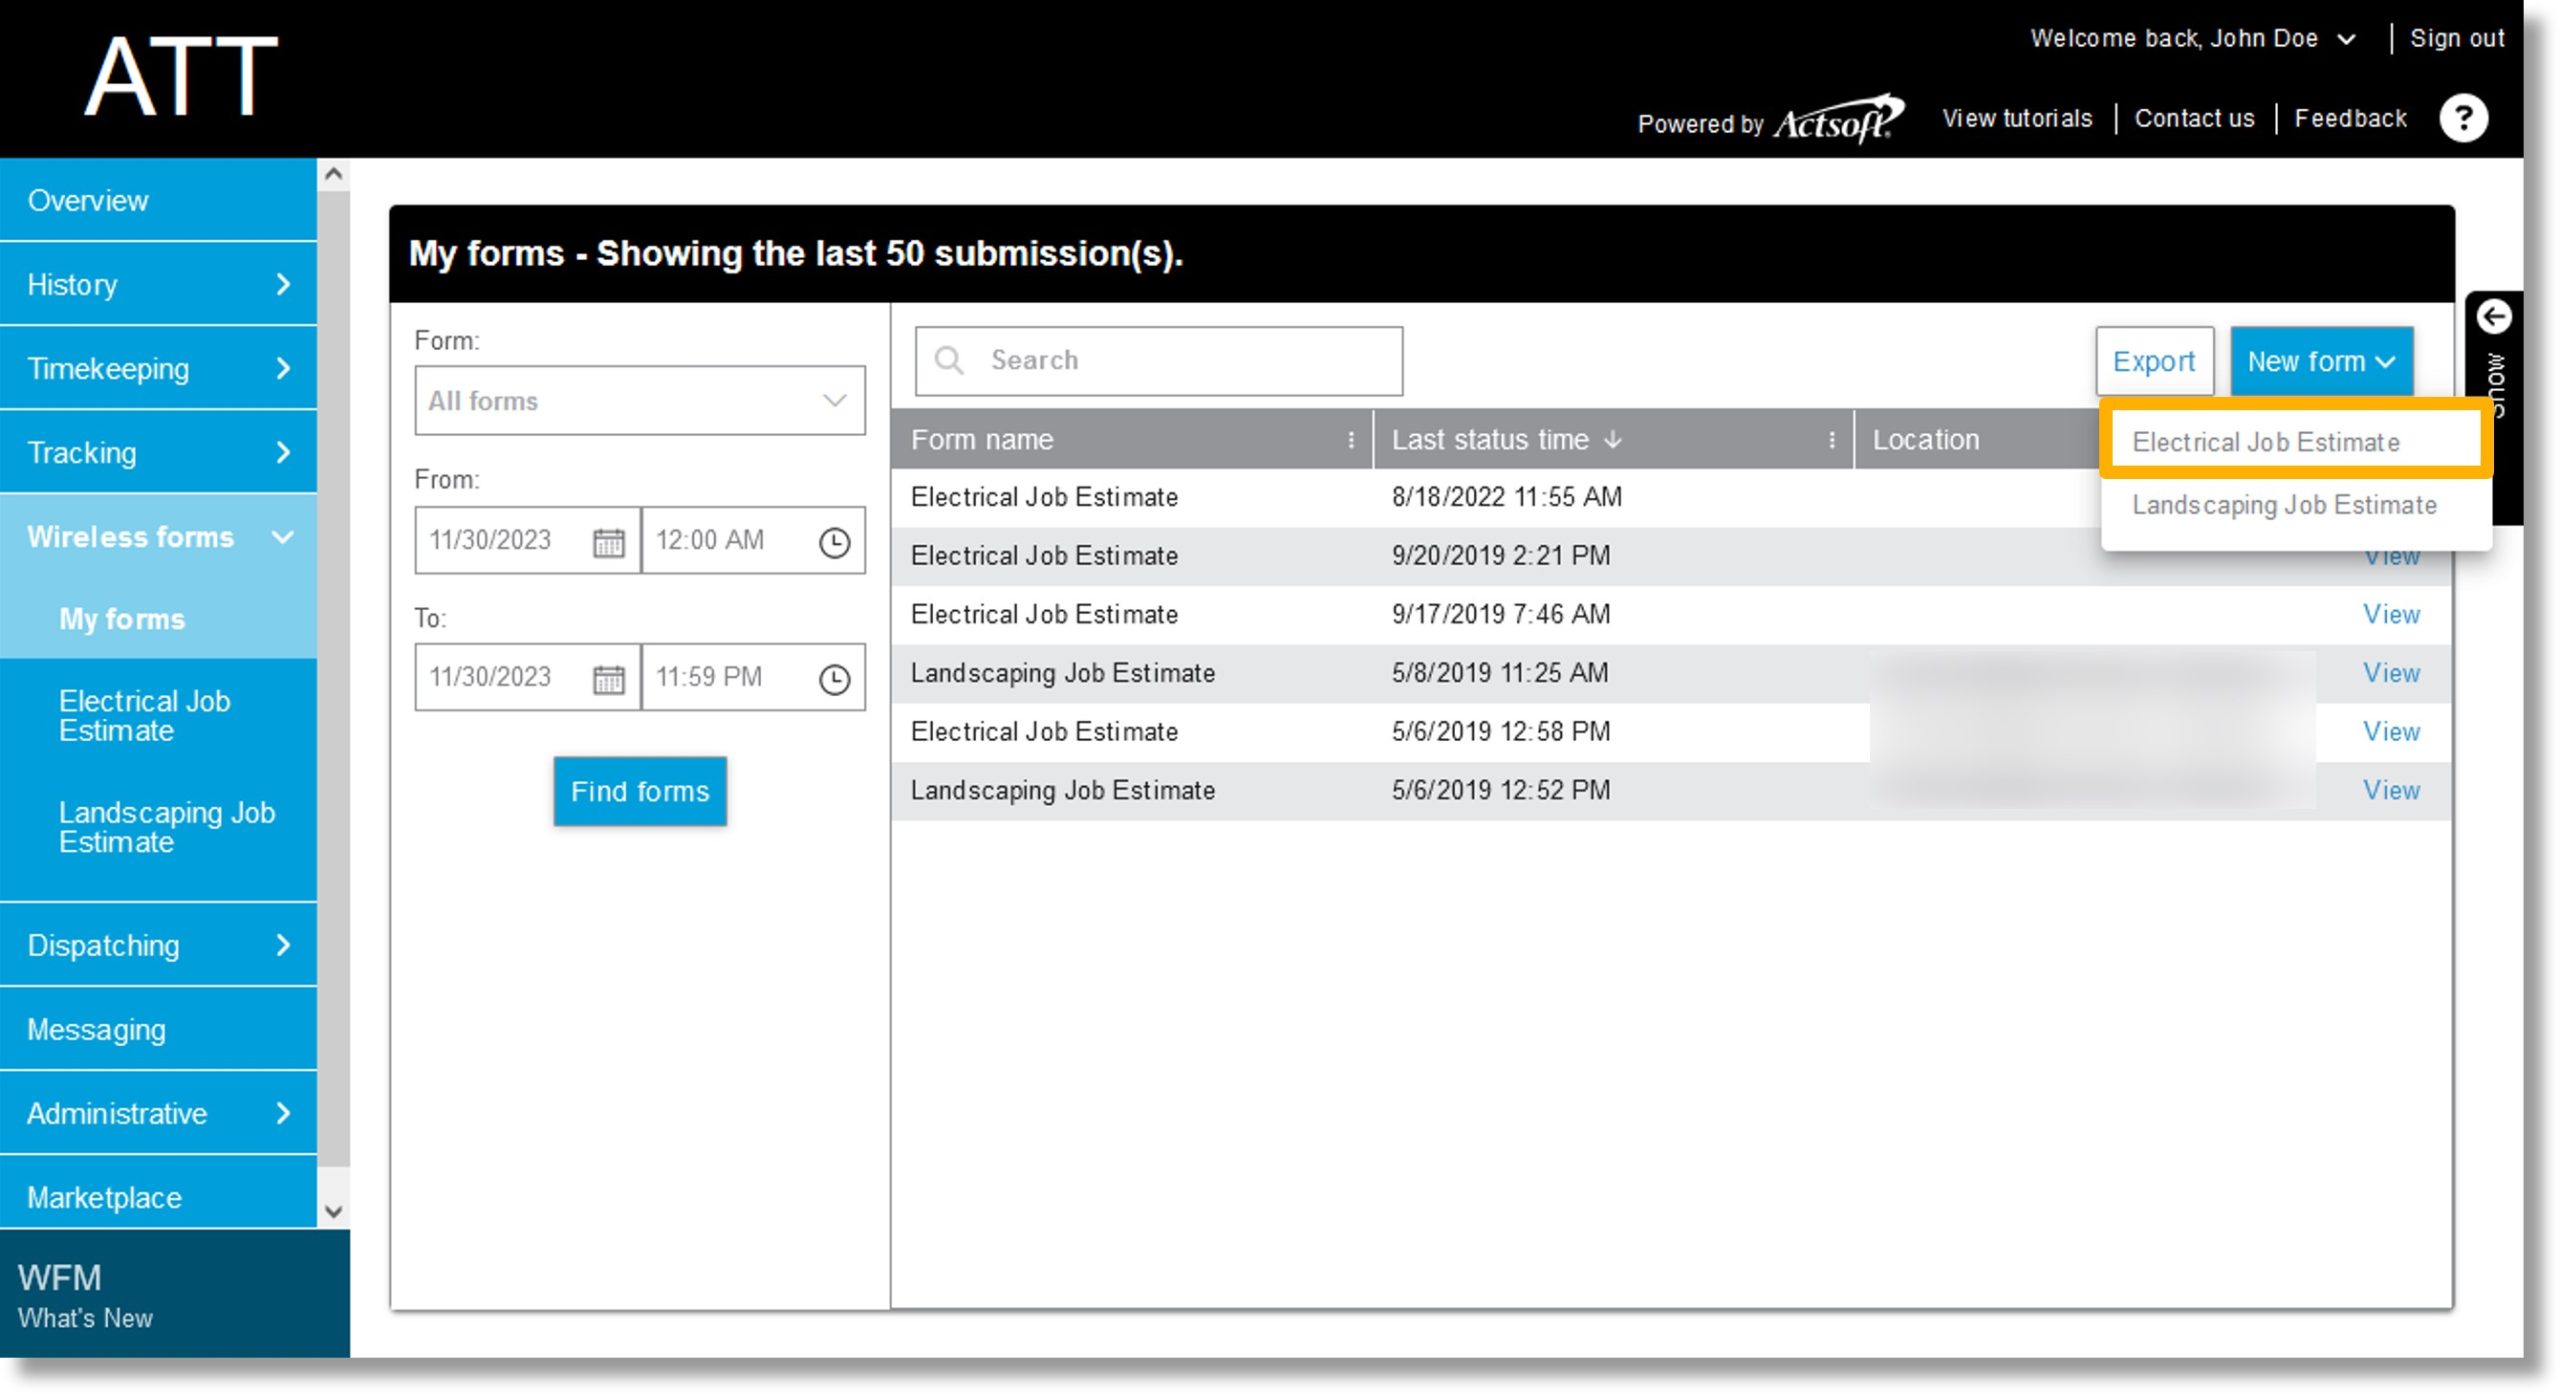
Click on New form.

-
Select the desired form type.
-
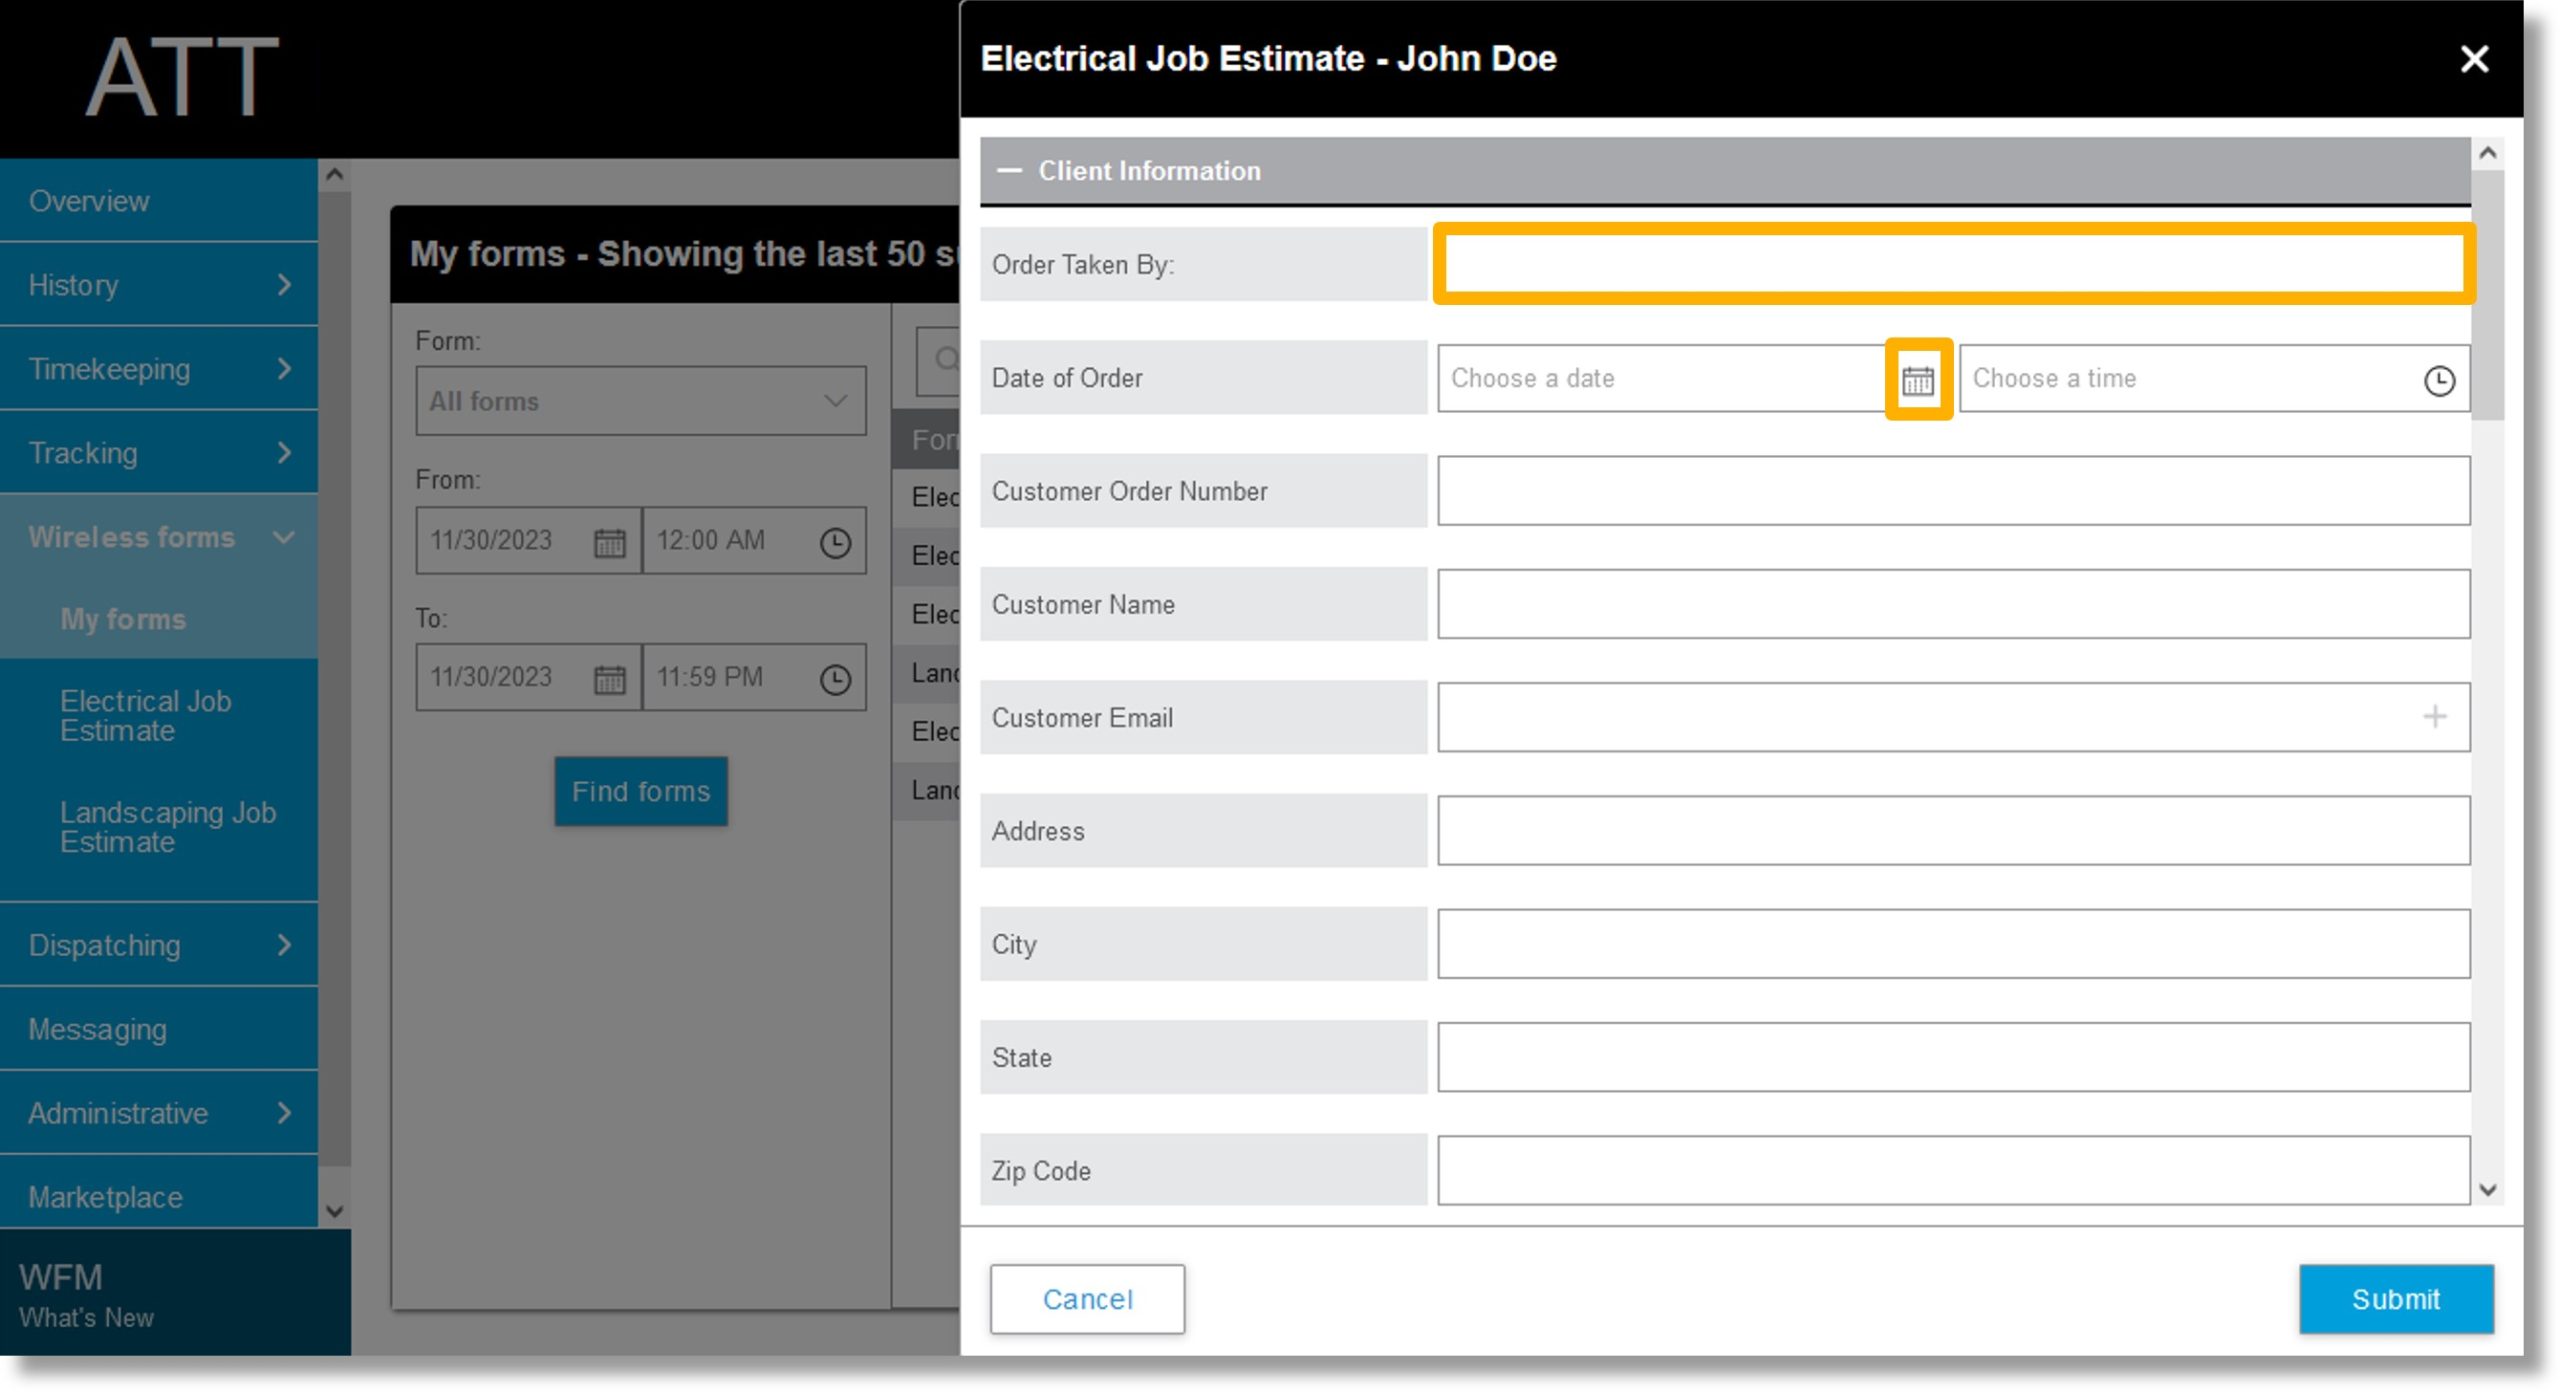
Click on the field to the right of Order Taken By and enter the worker’s name.
-
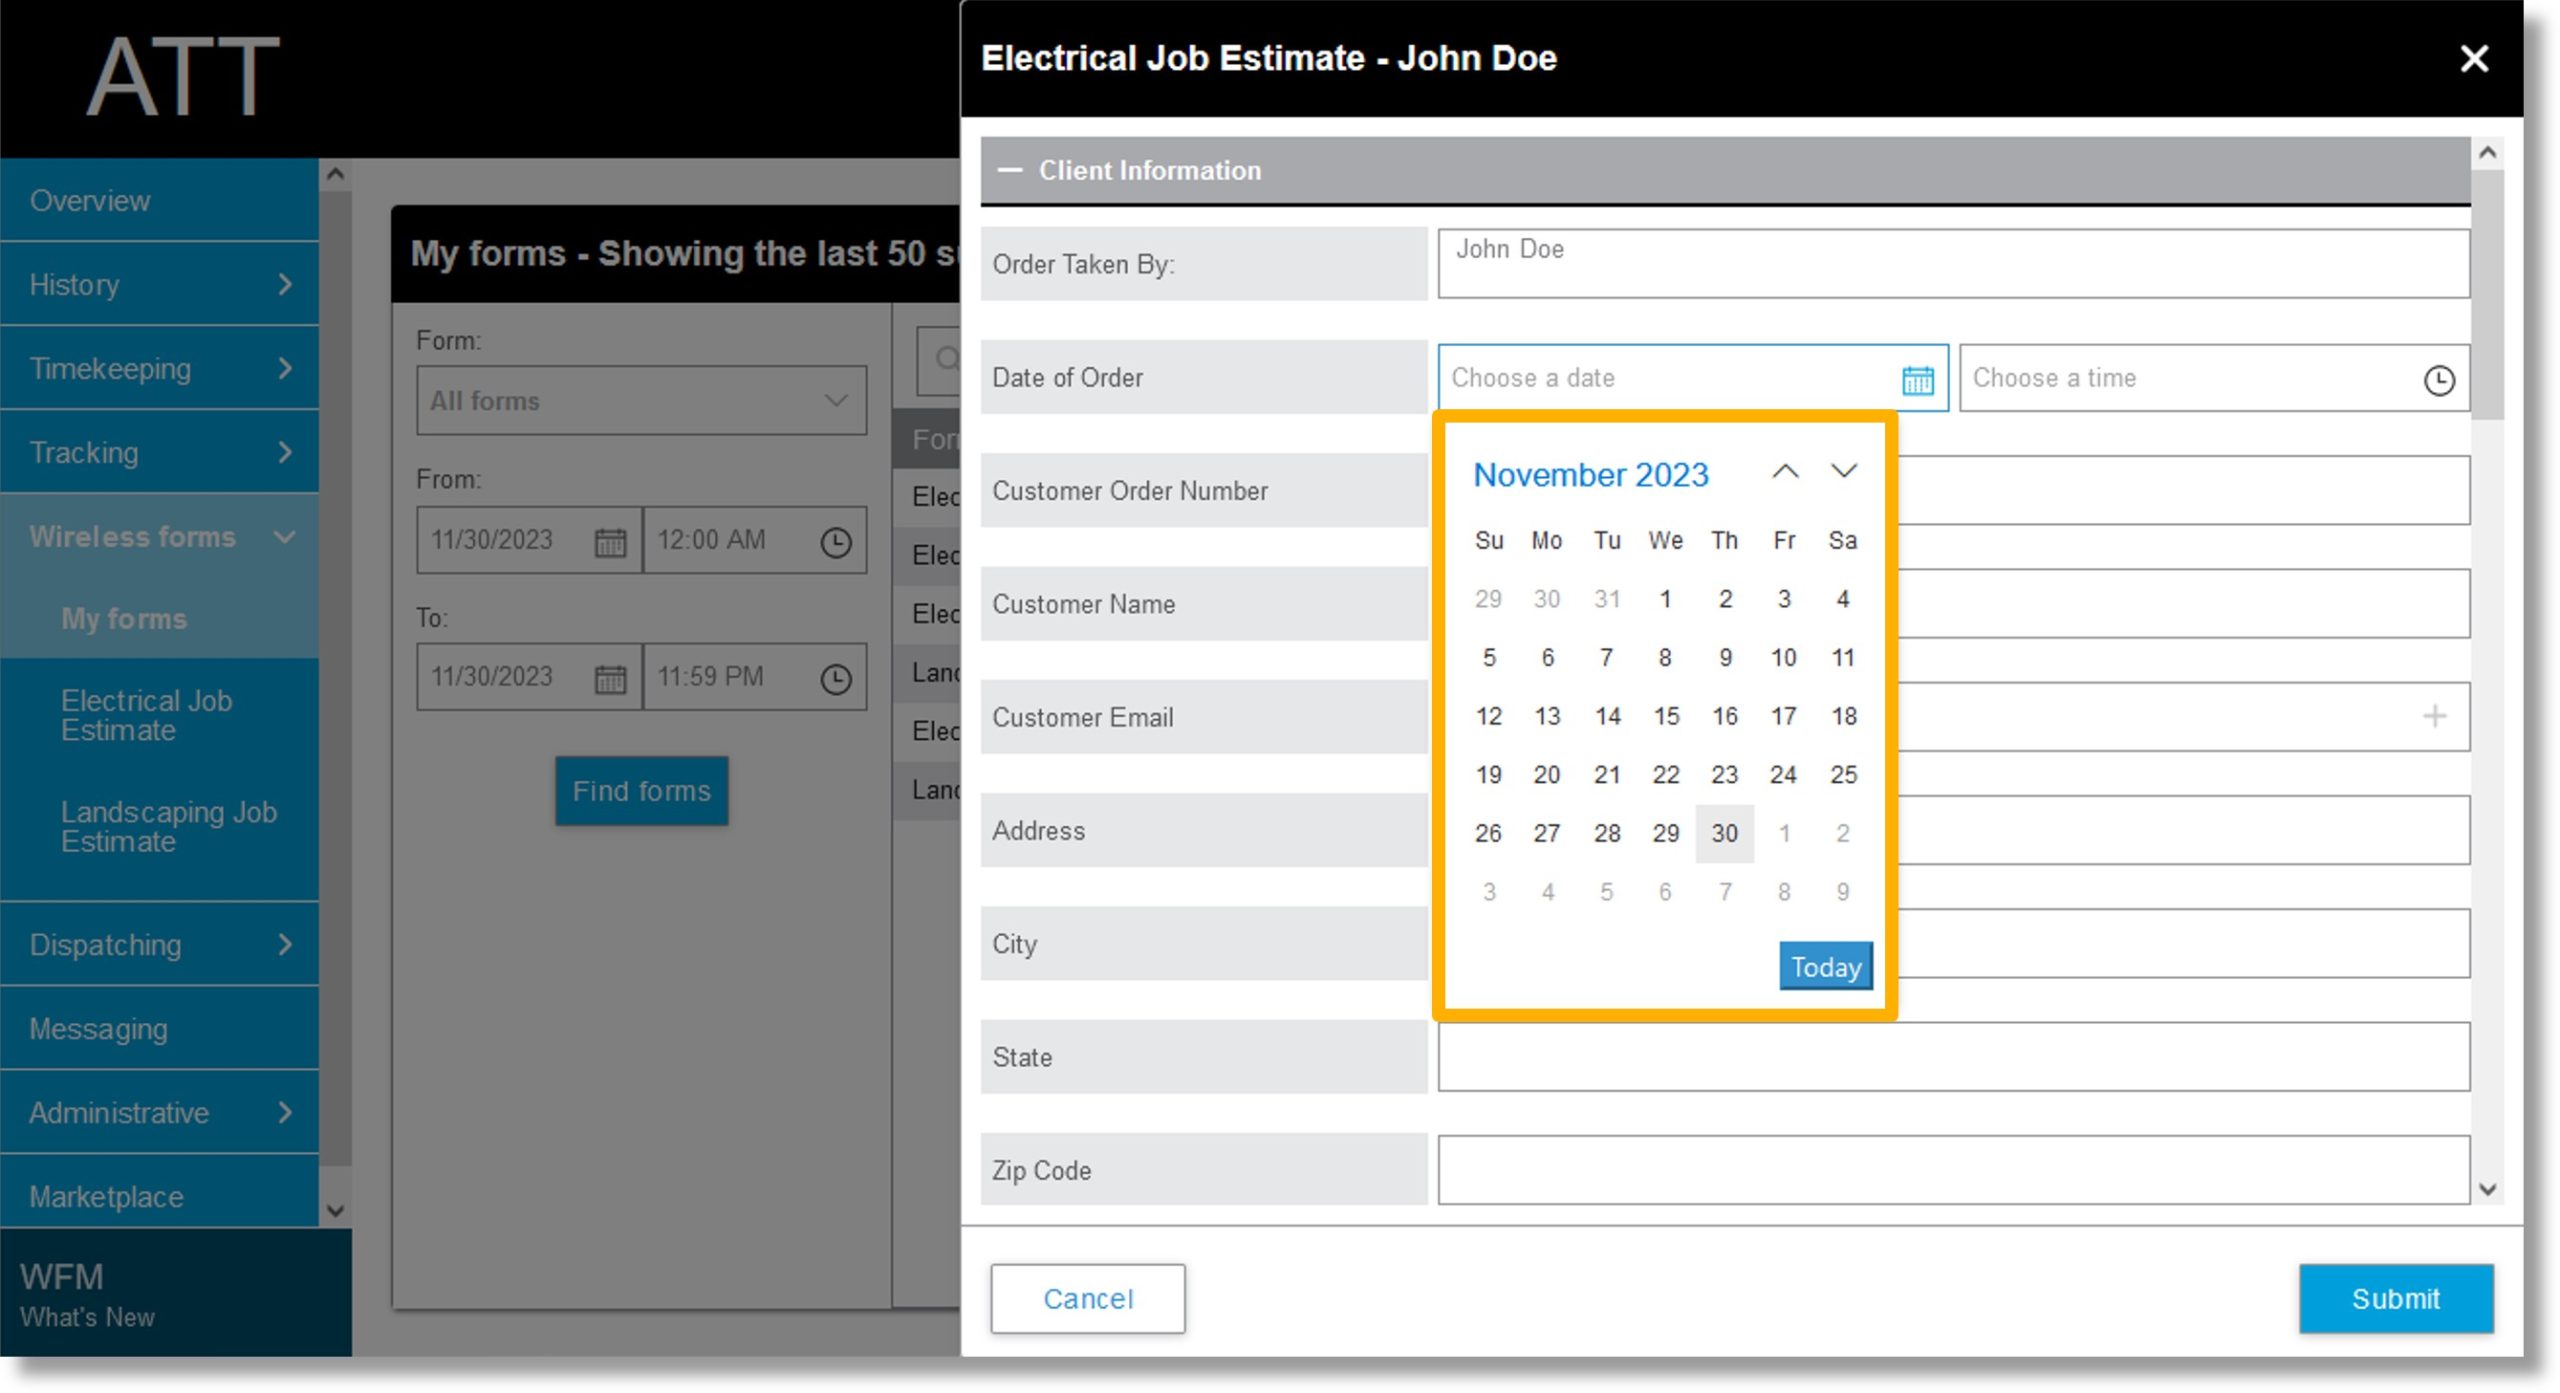
Click on the calendar icon  in the field to the right of Date of Order.
-
Use the controls the populate to select the desired date.
-
Click on the clock icon  in the field to the right of Date of Order.

-
Scroll to and click on the desired time.

-
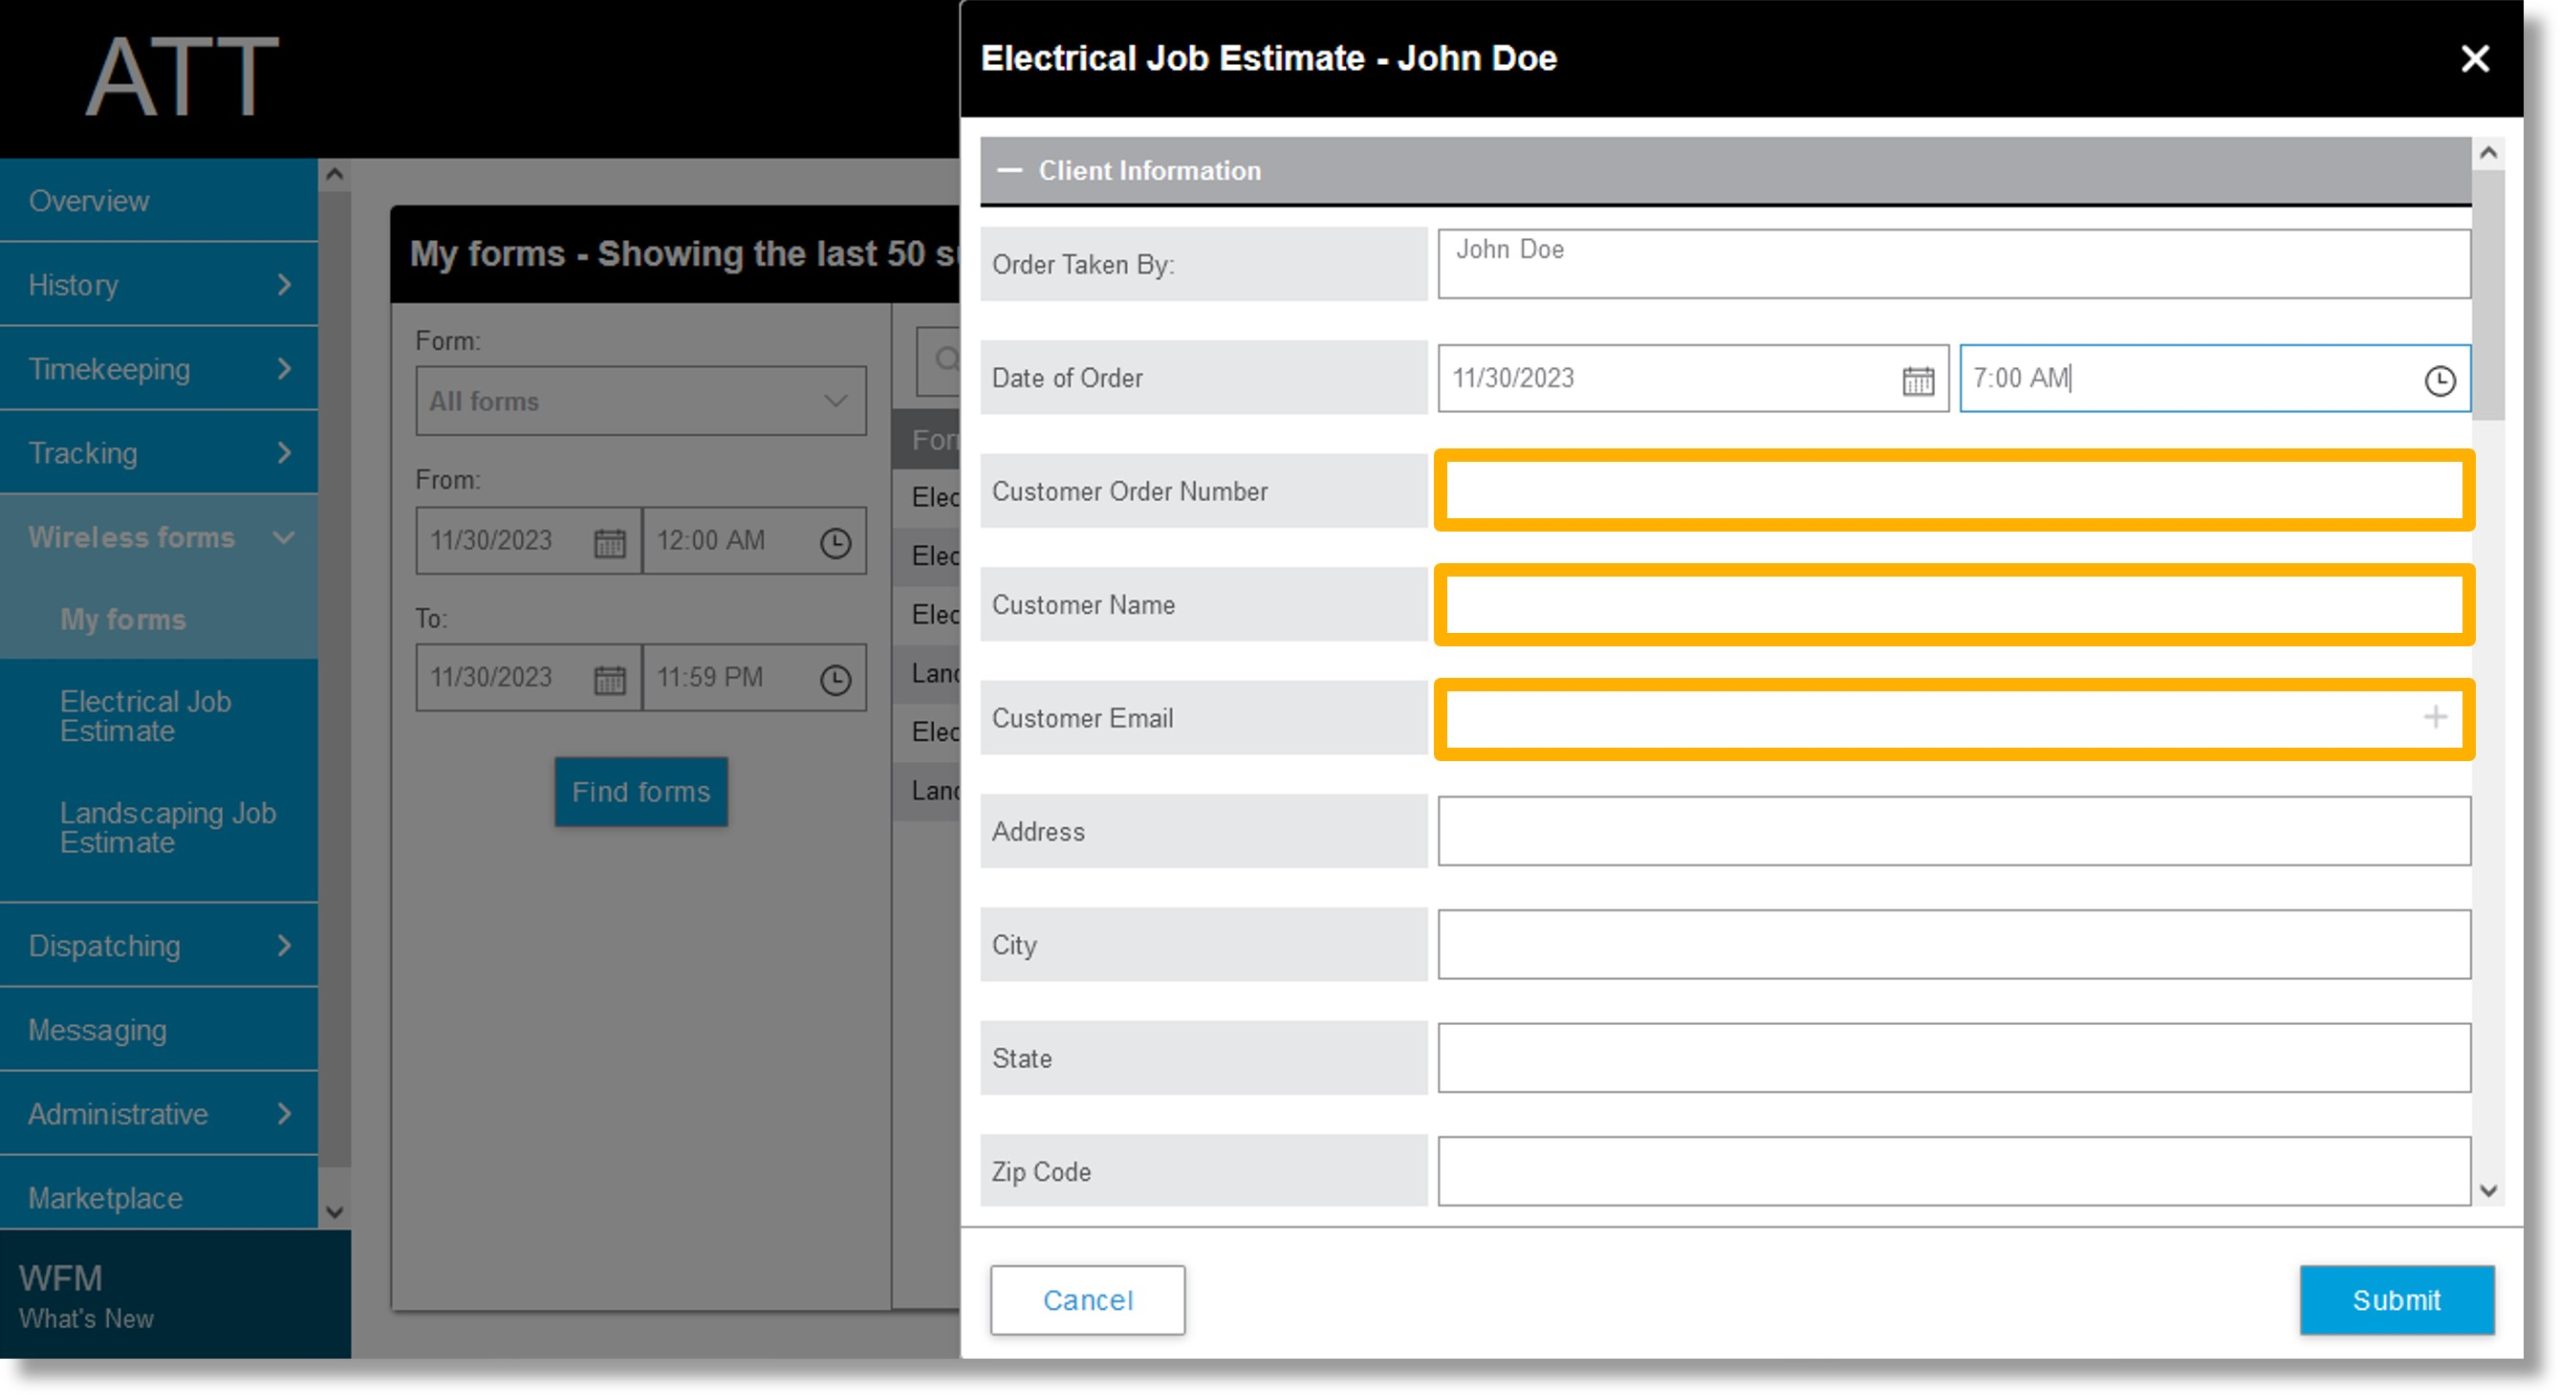
Click in the field to the right of Customer Order Number and enter the desired order number.
-
Click in the field to the right of Customer Name and enter the client’s name.
-
Click in the field to the right of Customer Email and enter the customer’s email address.
-
Click on the plus icon  to the right of the email address.
-
Repeat steps 13 and 14 to add more email addresses.
-
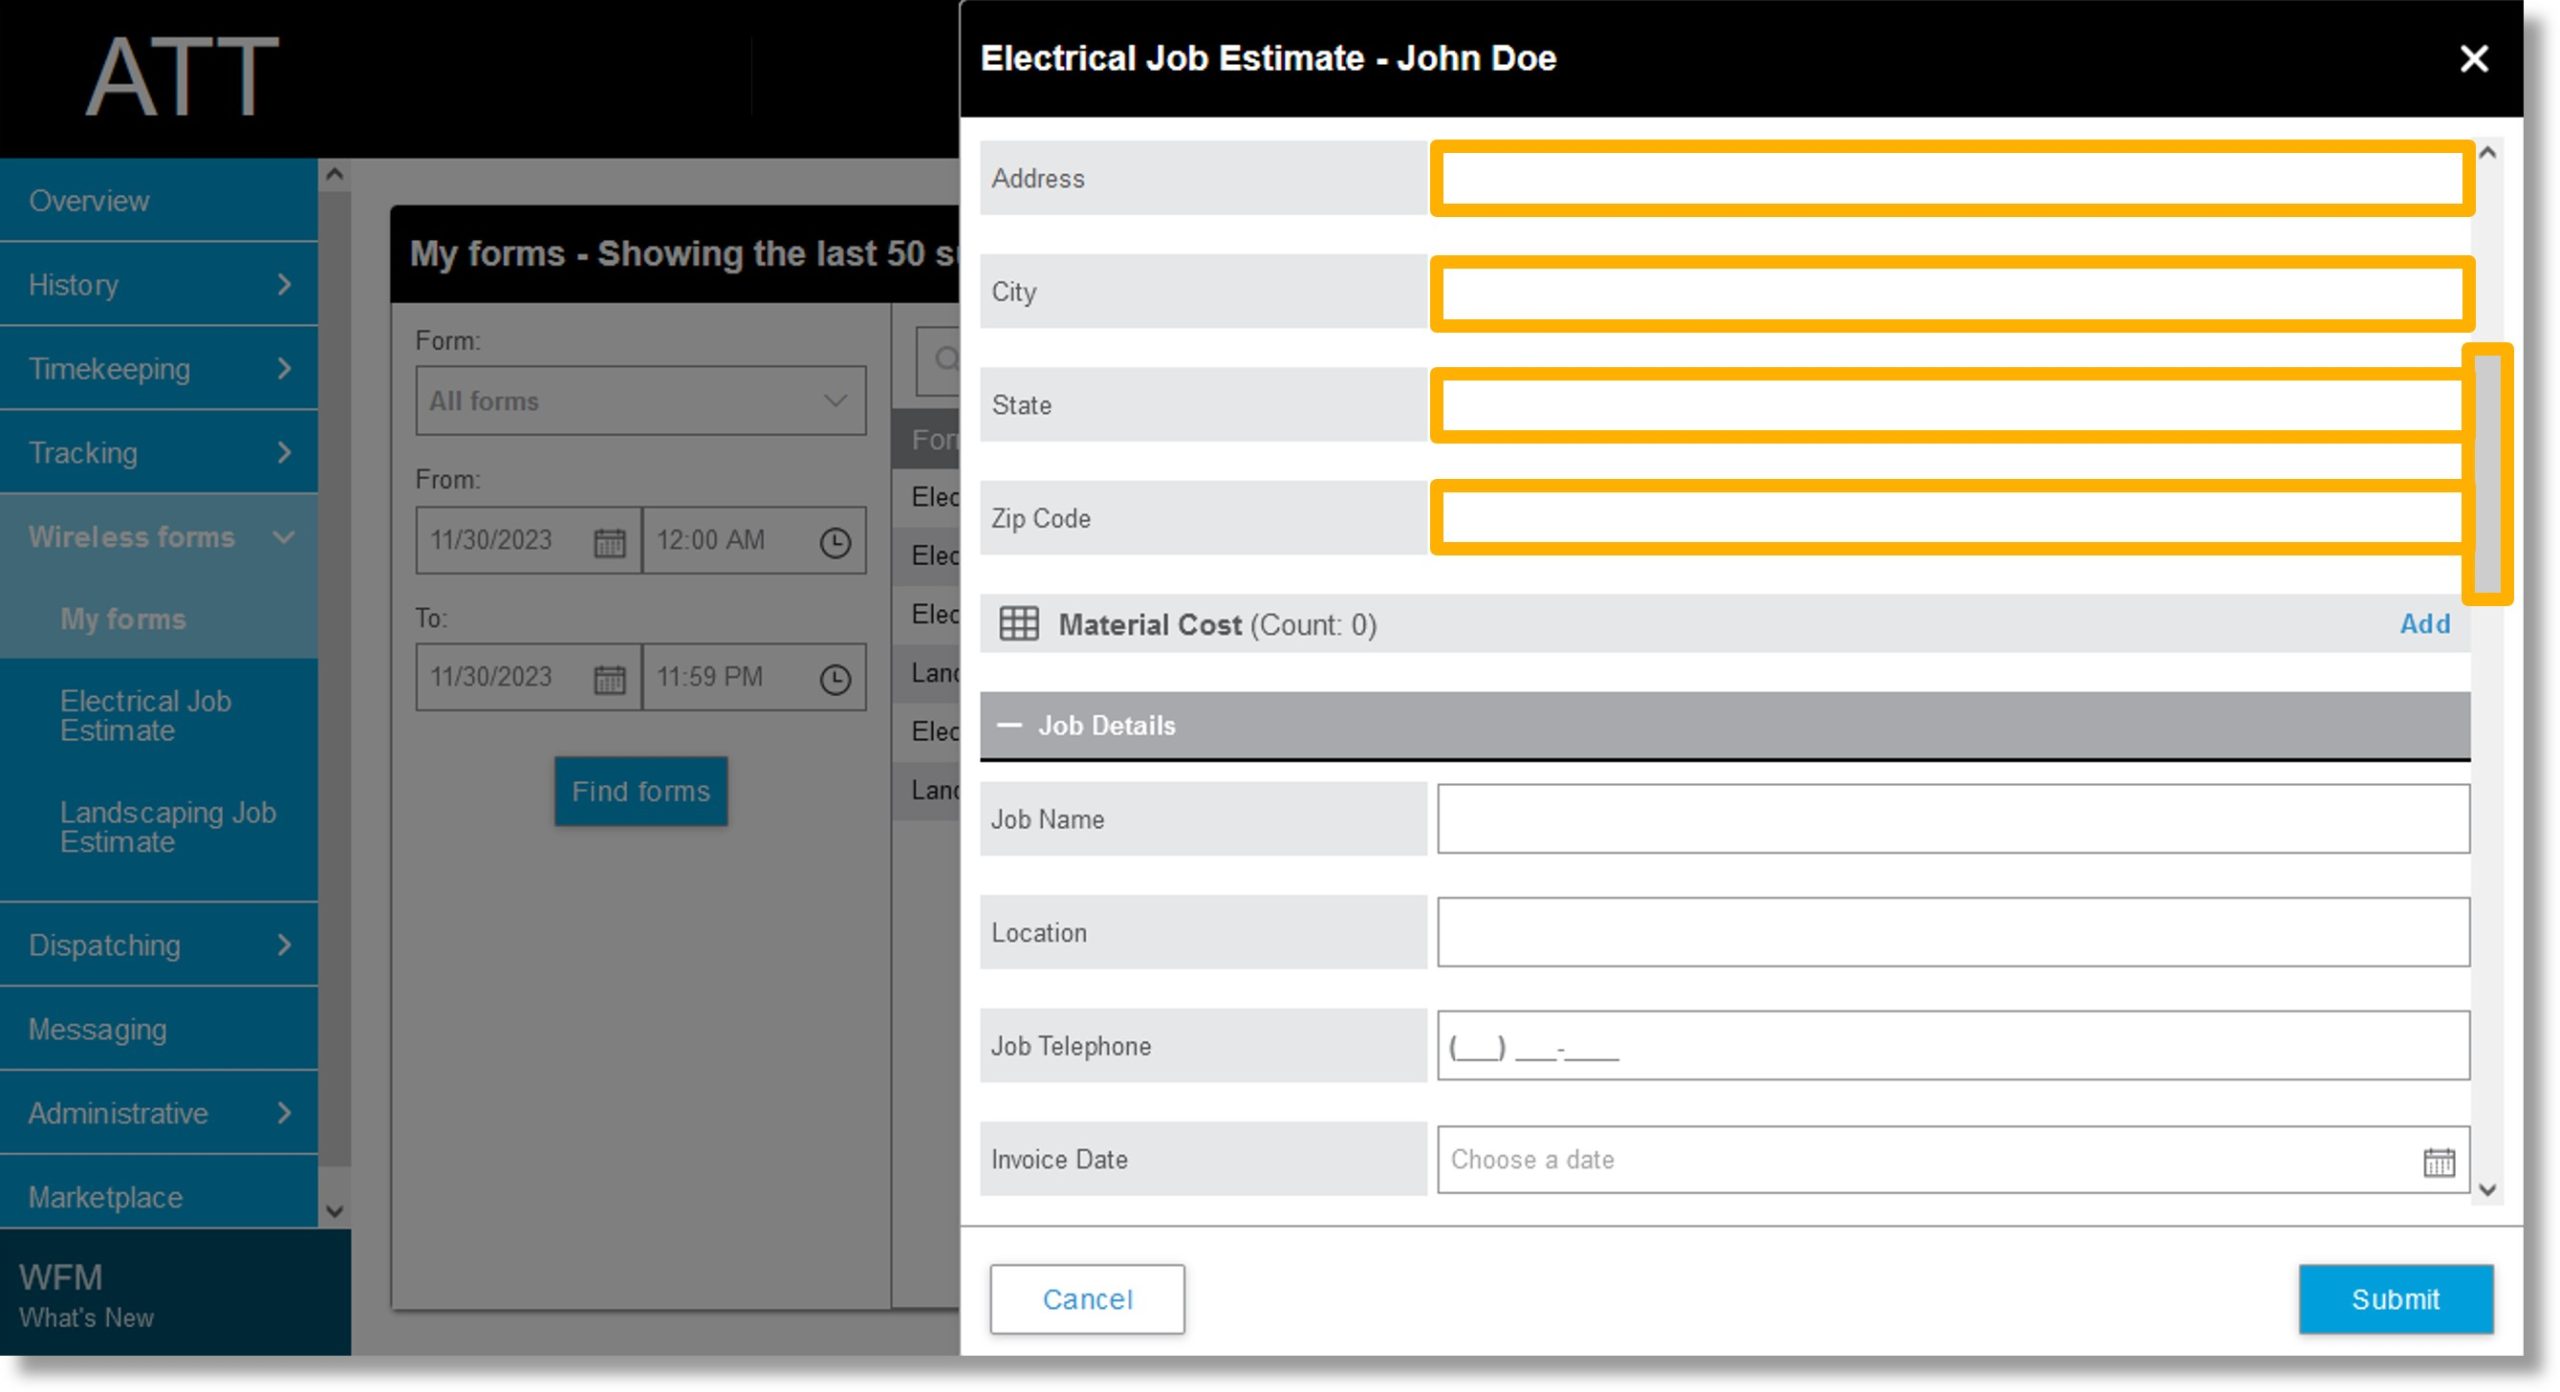
Click on the field to the right of Address and enter the customer’s address.
-
Click on the field to the right of City and enter the customer’s city.
-
Click on the field to the right of State and enter the customer’s state.
-
Click on the field to the right of Zip Code and enter the customer’s zip code.
-
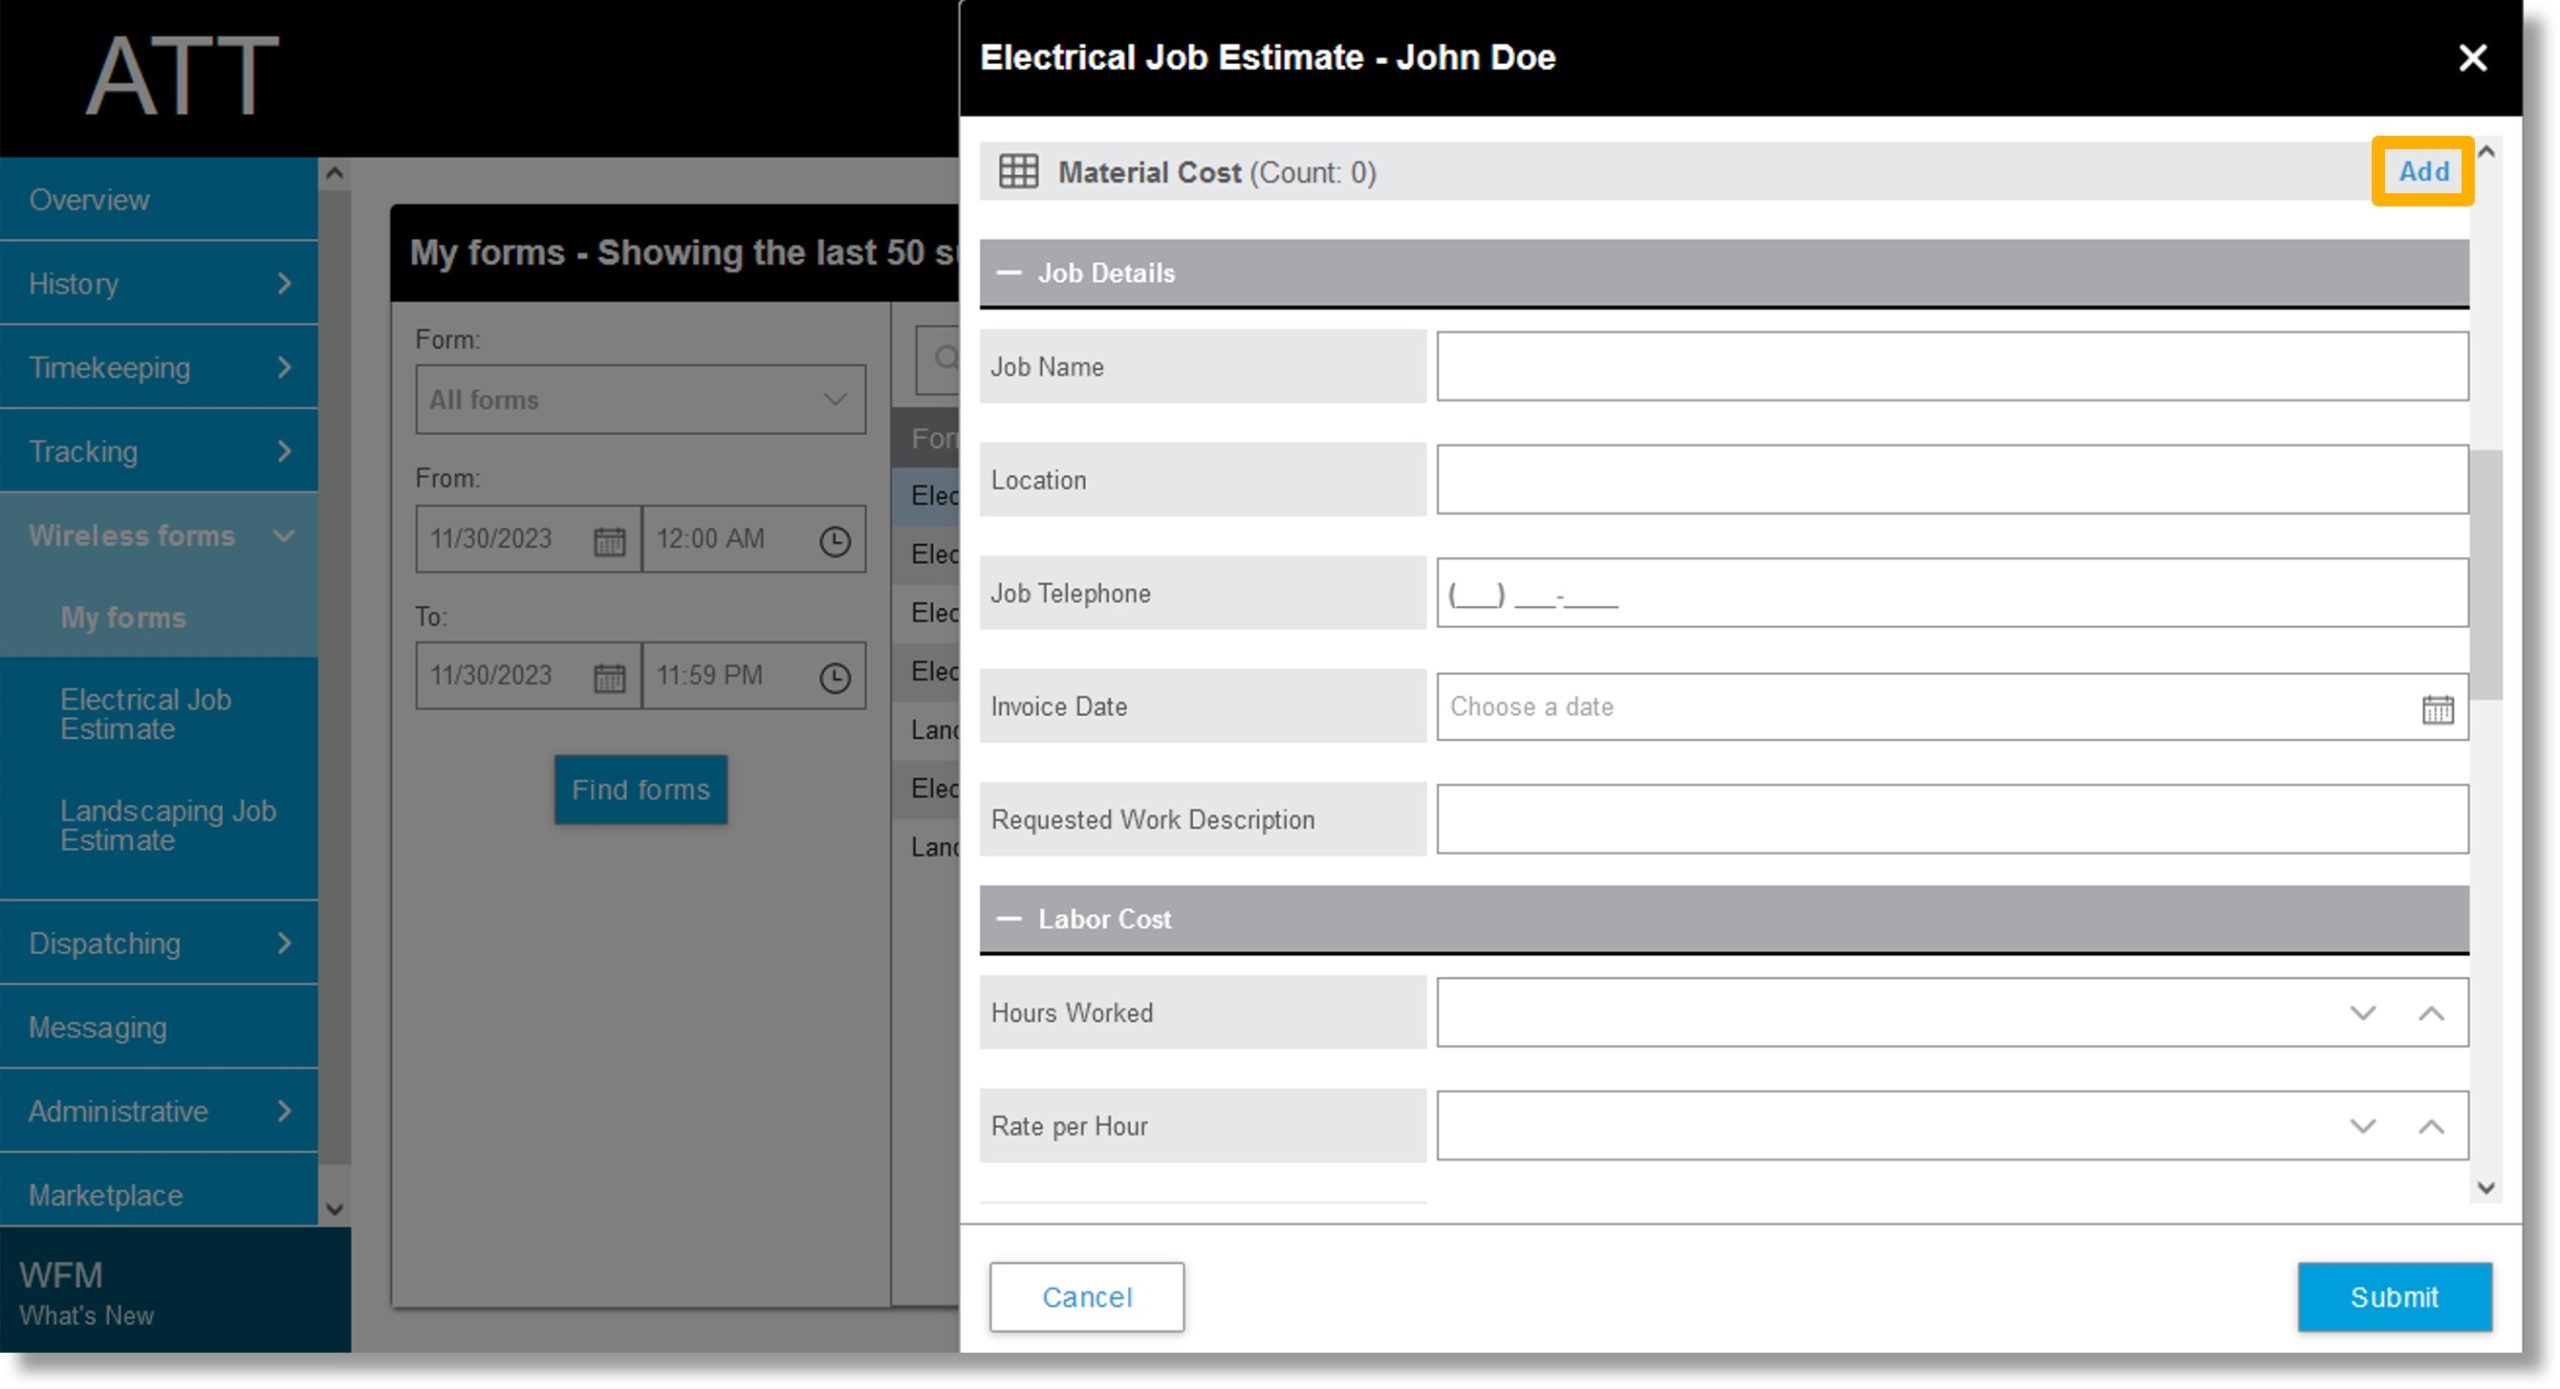
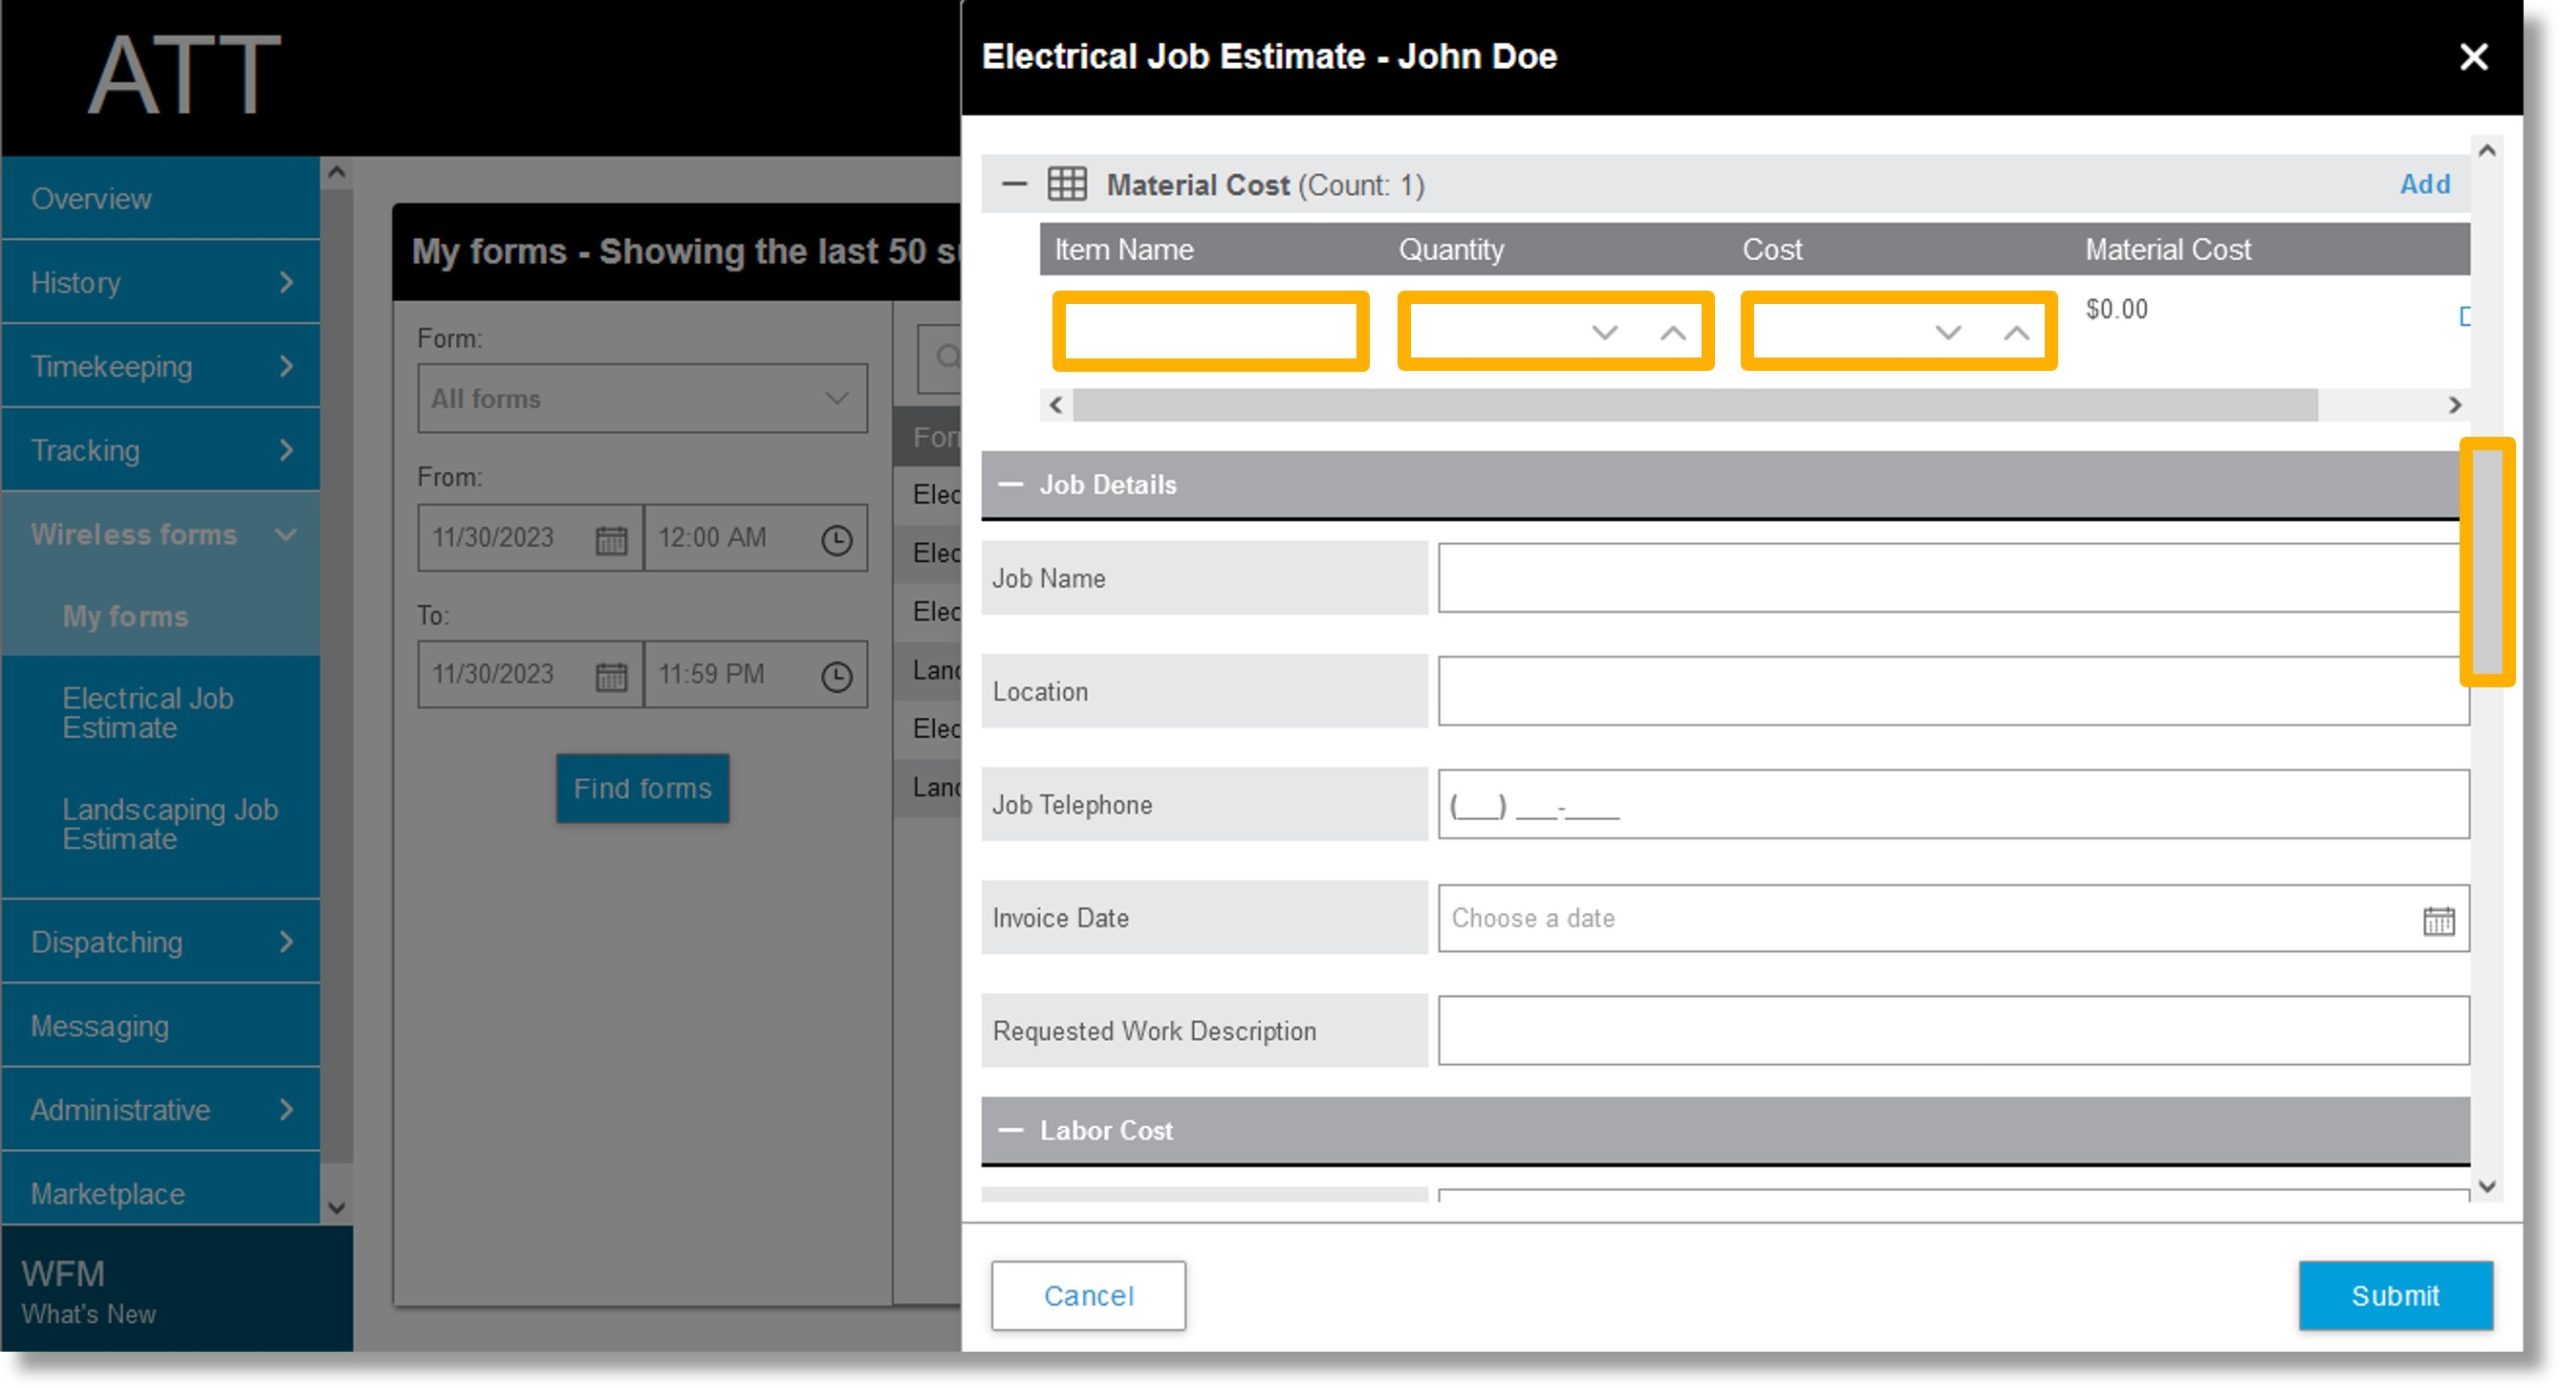
Scroll down to Material Cost.
-
Click on the Add link to the right of Material Cost.
-
Click on the field under Item Name and enter the name of the material.
-
Click on the field under Quantity and enter the quantity of the material required.
-
Click on the field under Cost and enter the cost of the material.
-
Repeat steps 21 through 24 to add more materials.
-
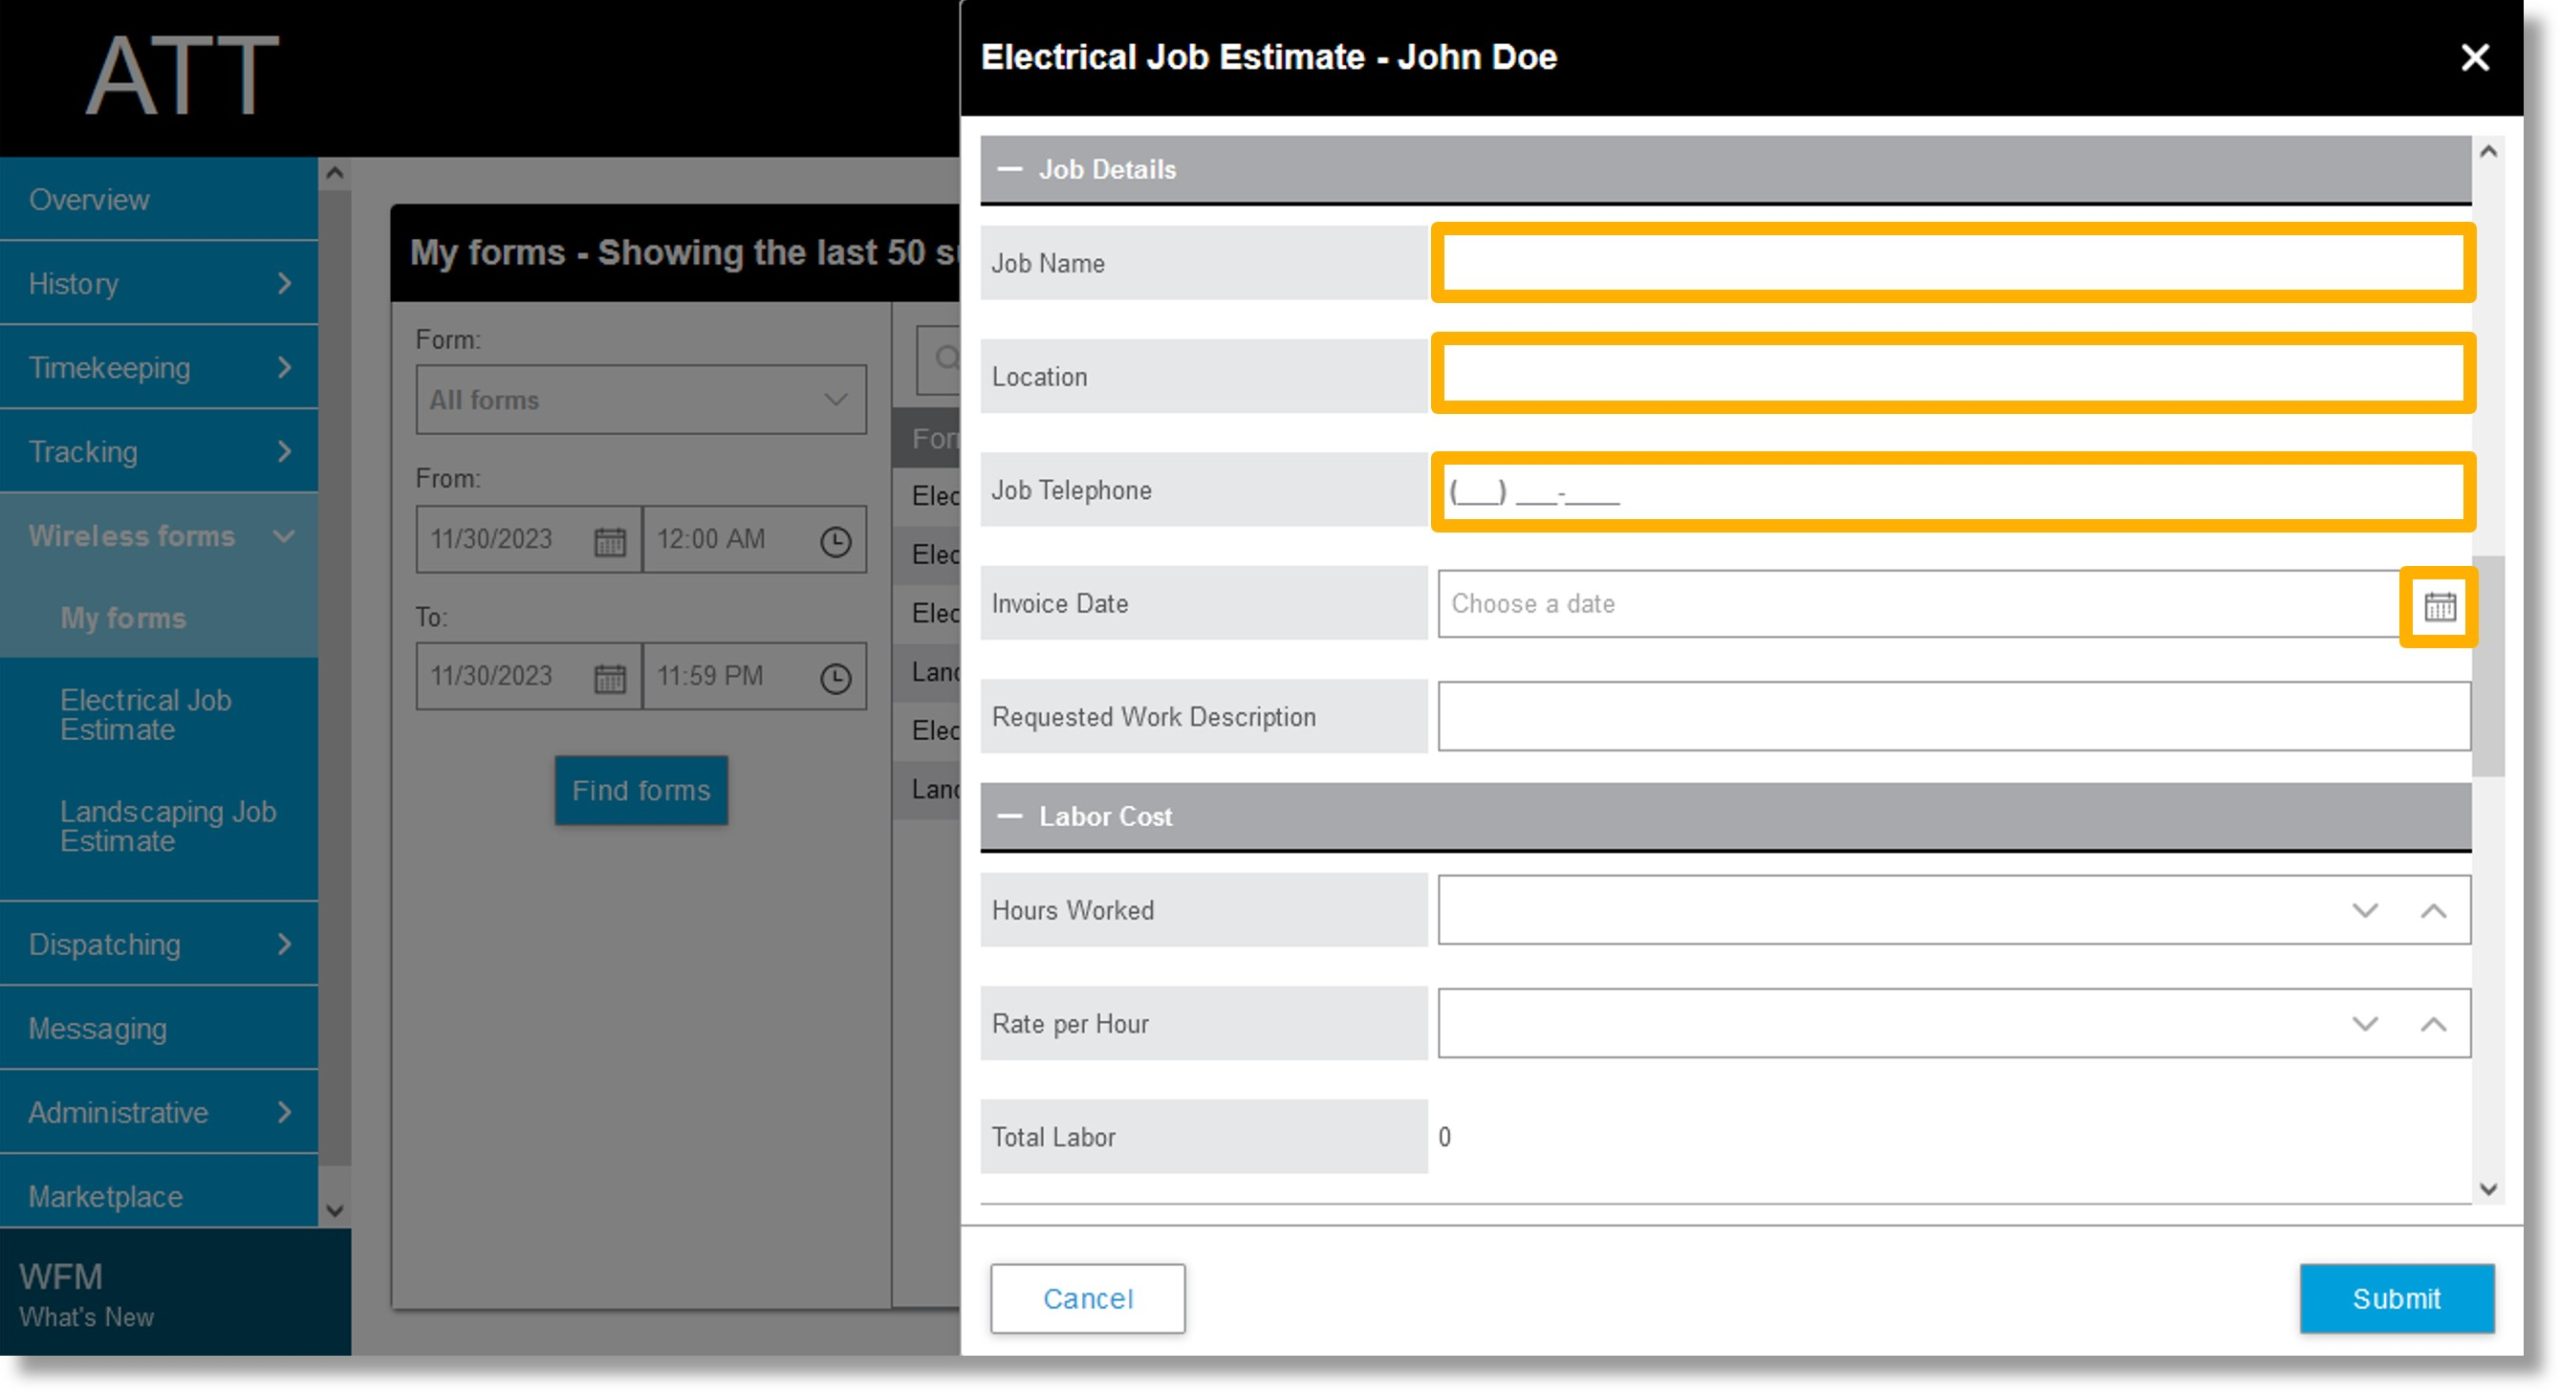
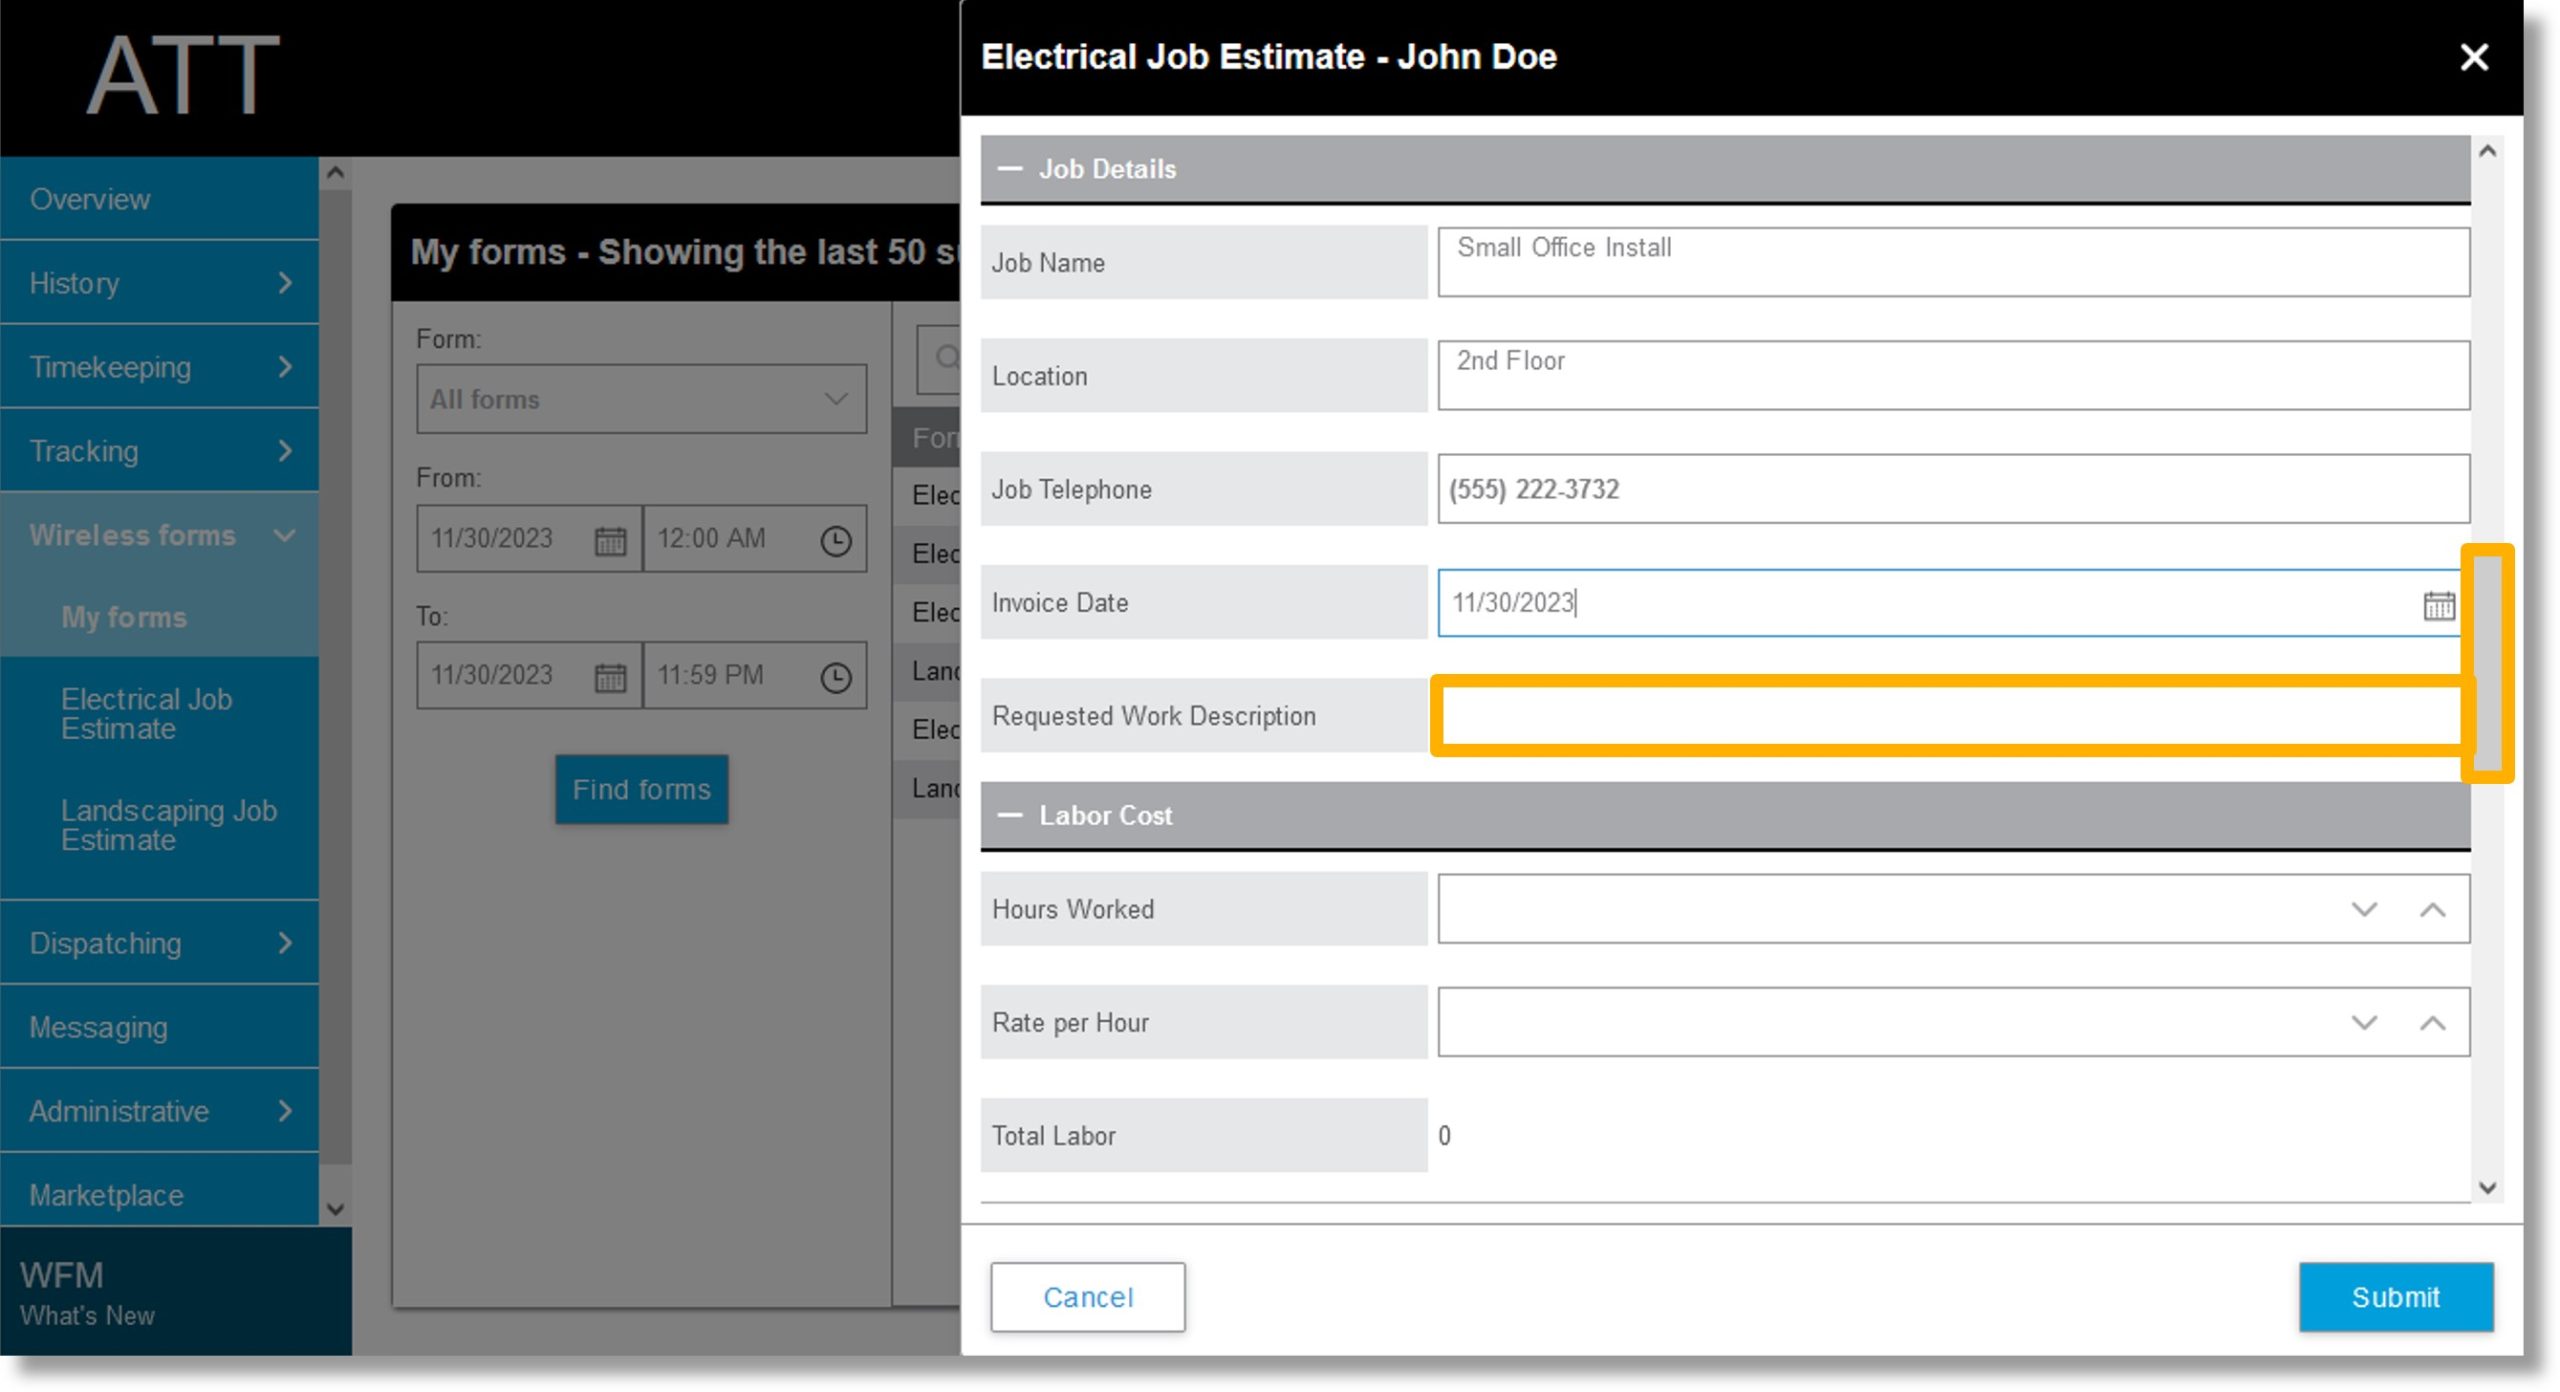
Scroll down to the Job Details section.
-
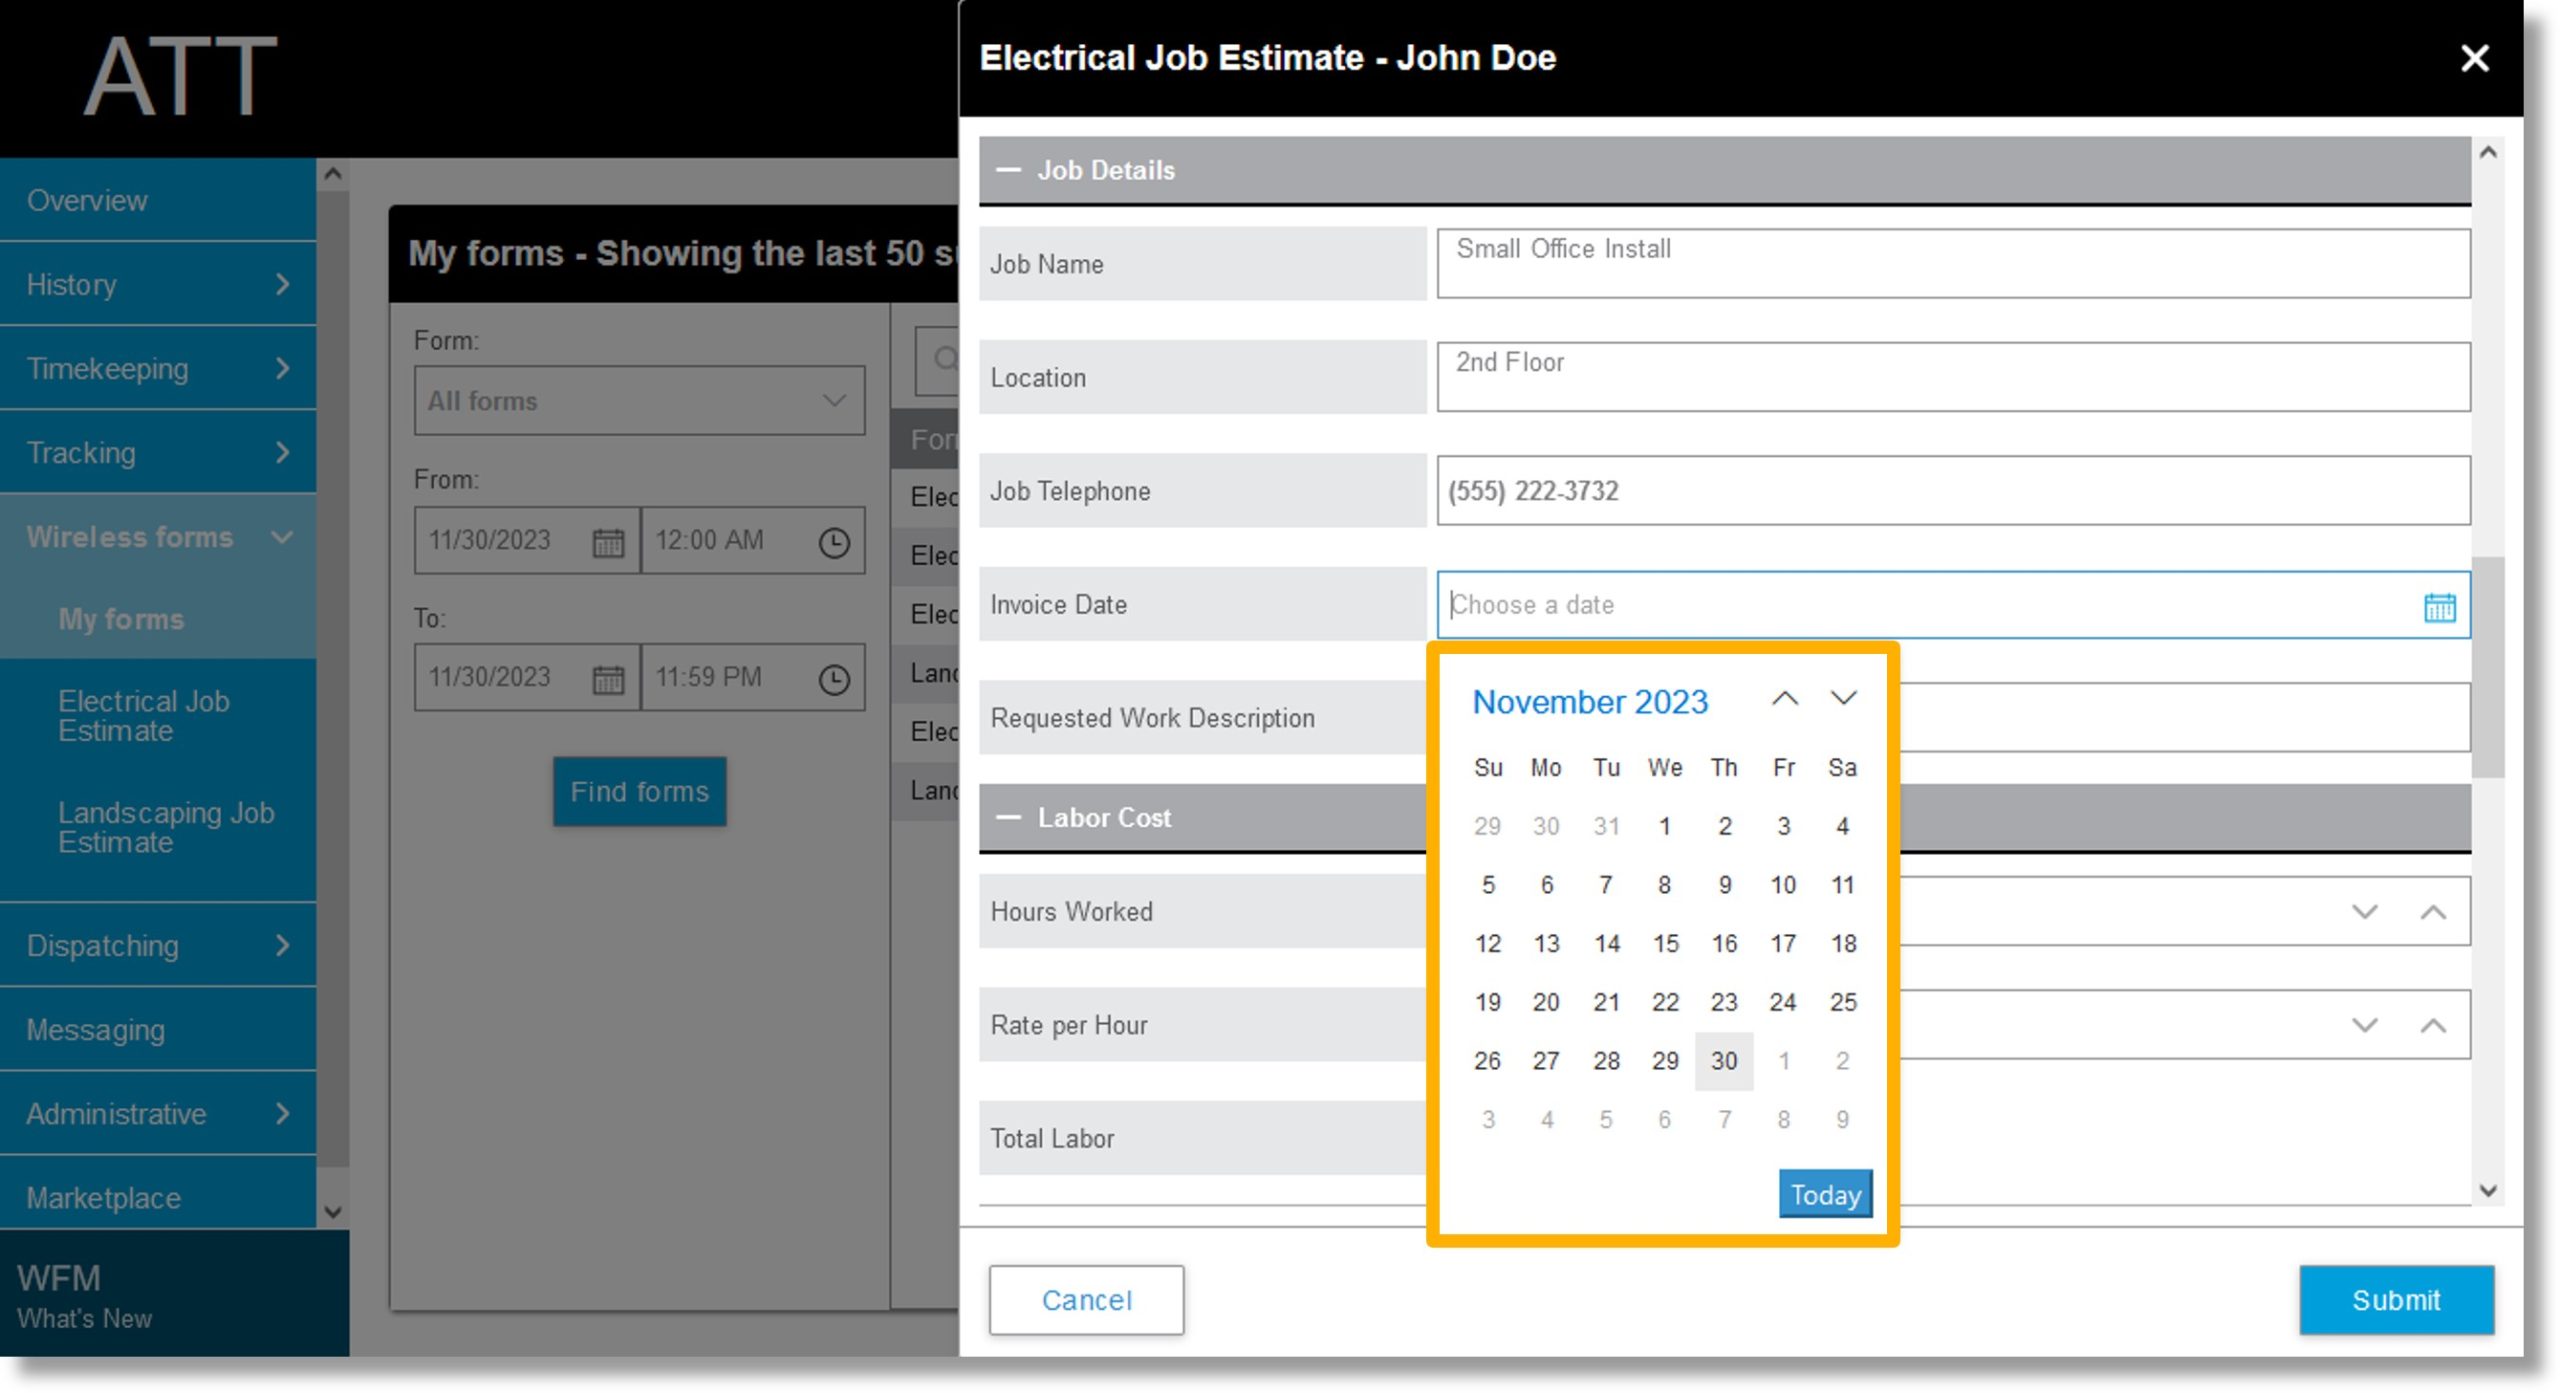
Click on the field to the right of Job Name and enter a name for the job.
-
Click on the field to the right of Location and enter the location for the job.
-
Click on the field to the right of Job Telephone and enter a phone number for the job.
-
Click on the calendar icon  to the right of Invoice Date.
-
Use the controls that populate to select the desired date.
-
Click on the field to the right of Requested Work Description and enter a description for the job.
-
Scroll down to the Labor Cost section.
-
Click on the field to the right of Hours Worked and enter the hours.
-
Click on the field to the right of Rate per Hour and enter the desired rate.
-
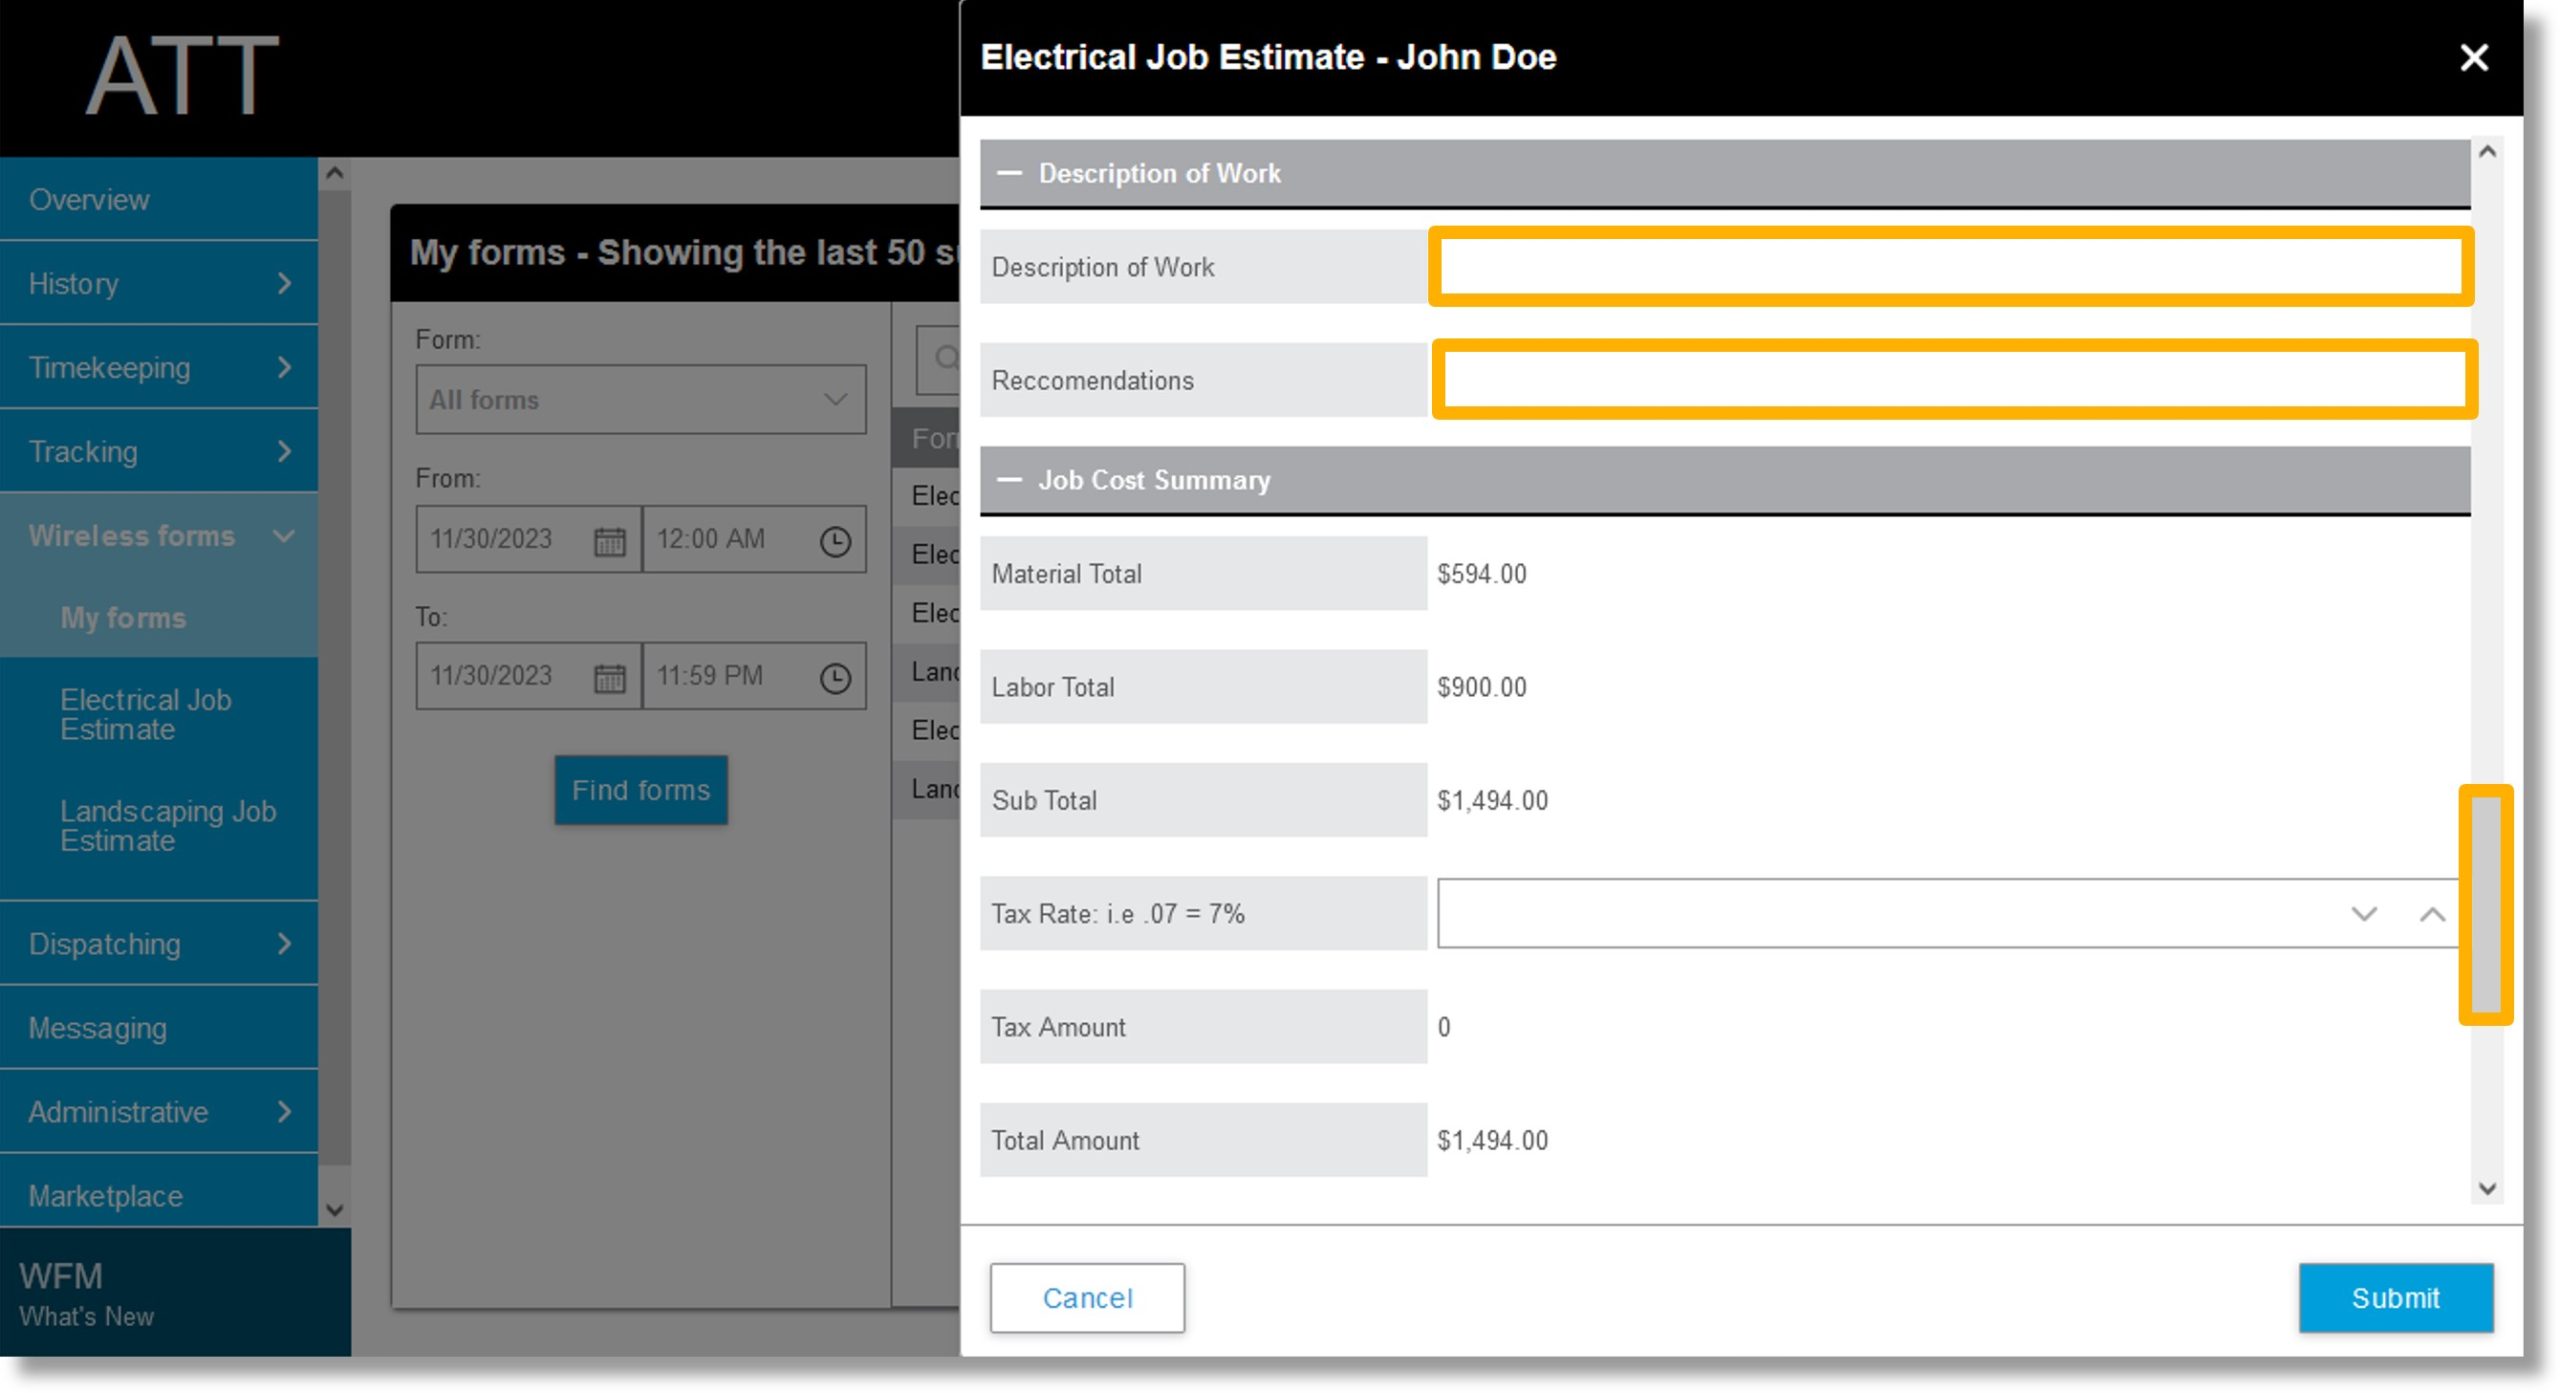
Scroll down to the Description of Work section.

-
Click on the field to the right of Description of Work and enter a completed work description.
-
Click on the field to the right of Recommendations and enter any applicable recommendations.
-
Scroll down to the Job Cost Summary section.
-
The Material Total, Labor Total, and Sub Total fields populate based on the amounts entered above.
-
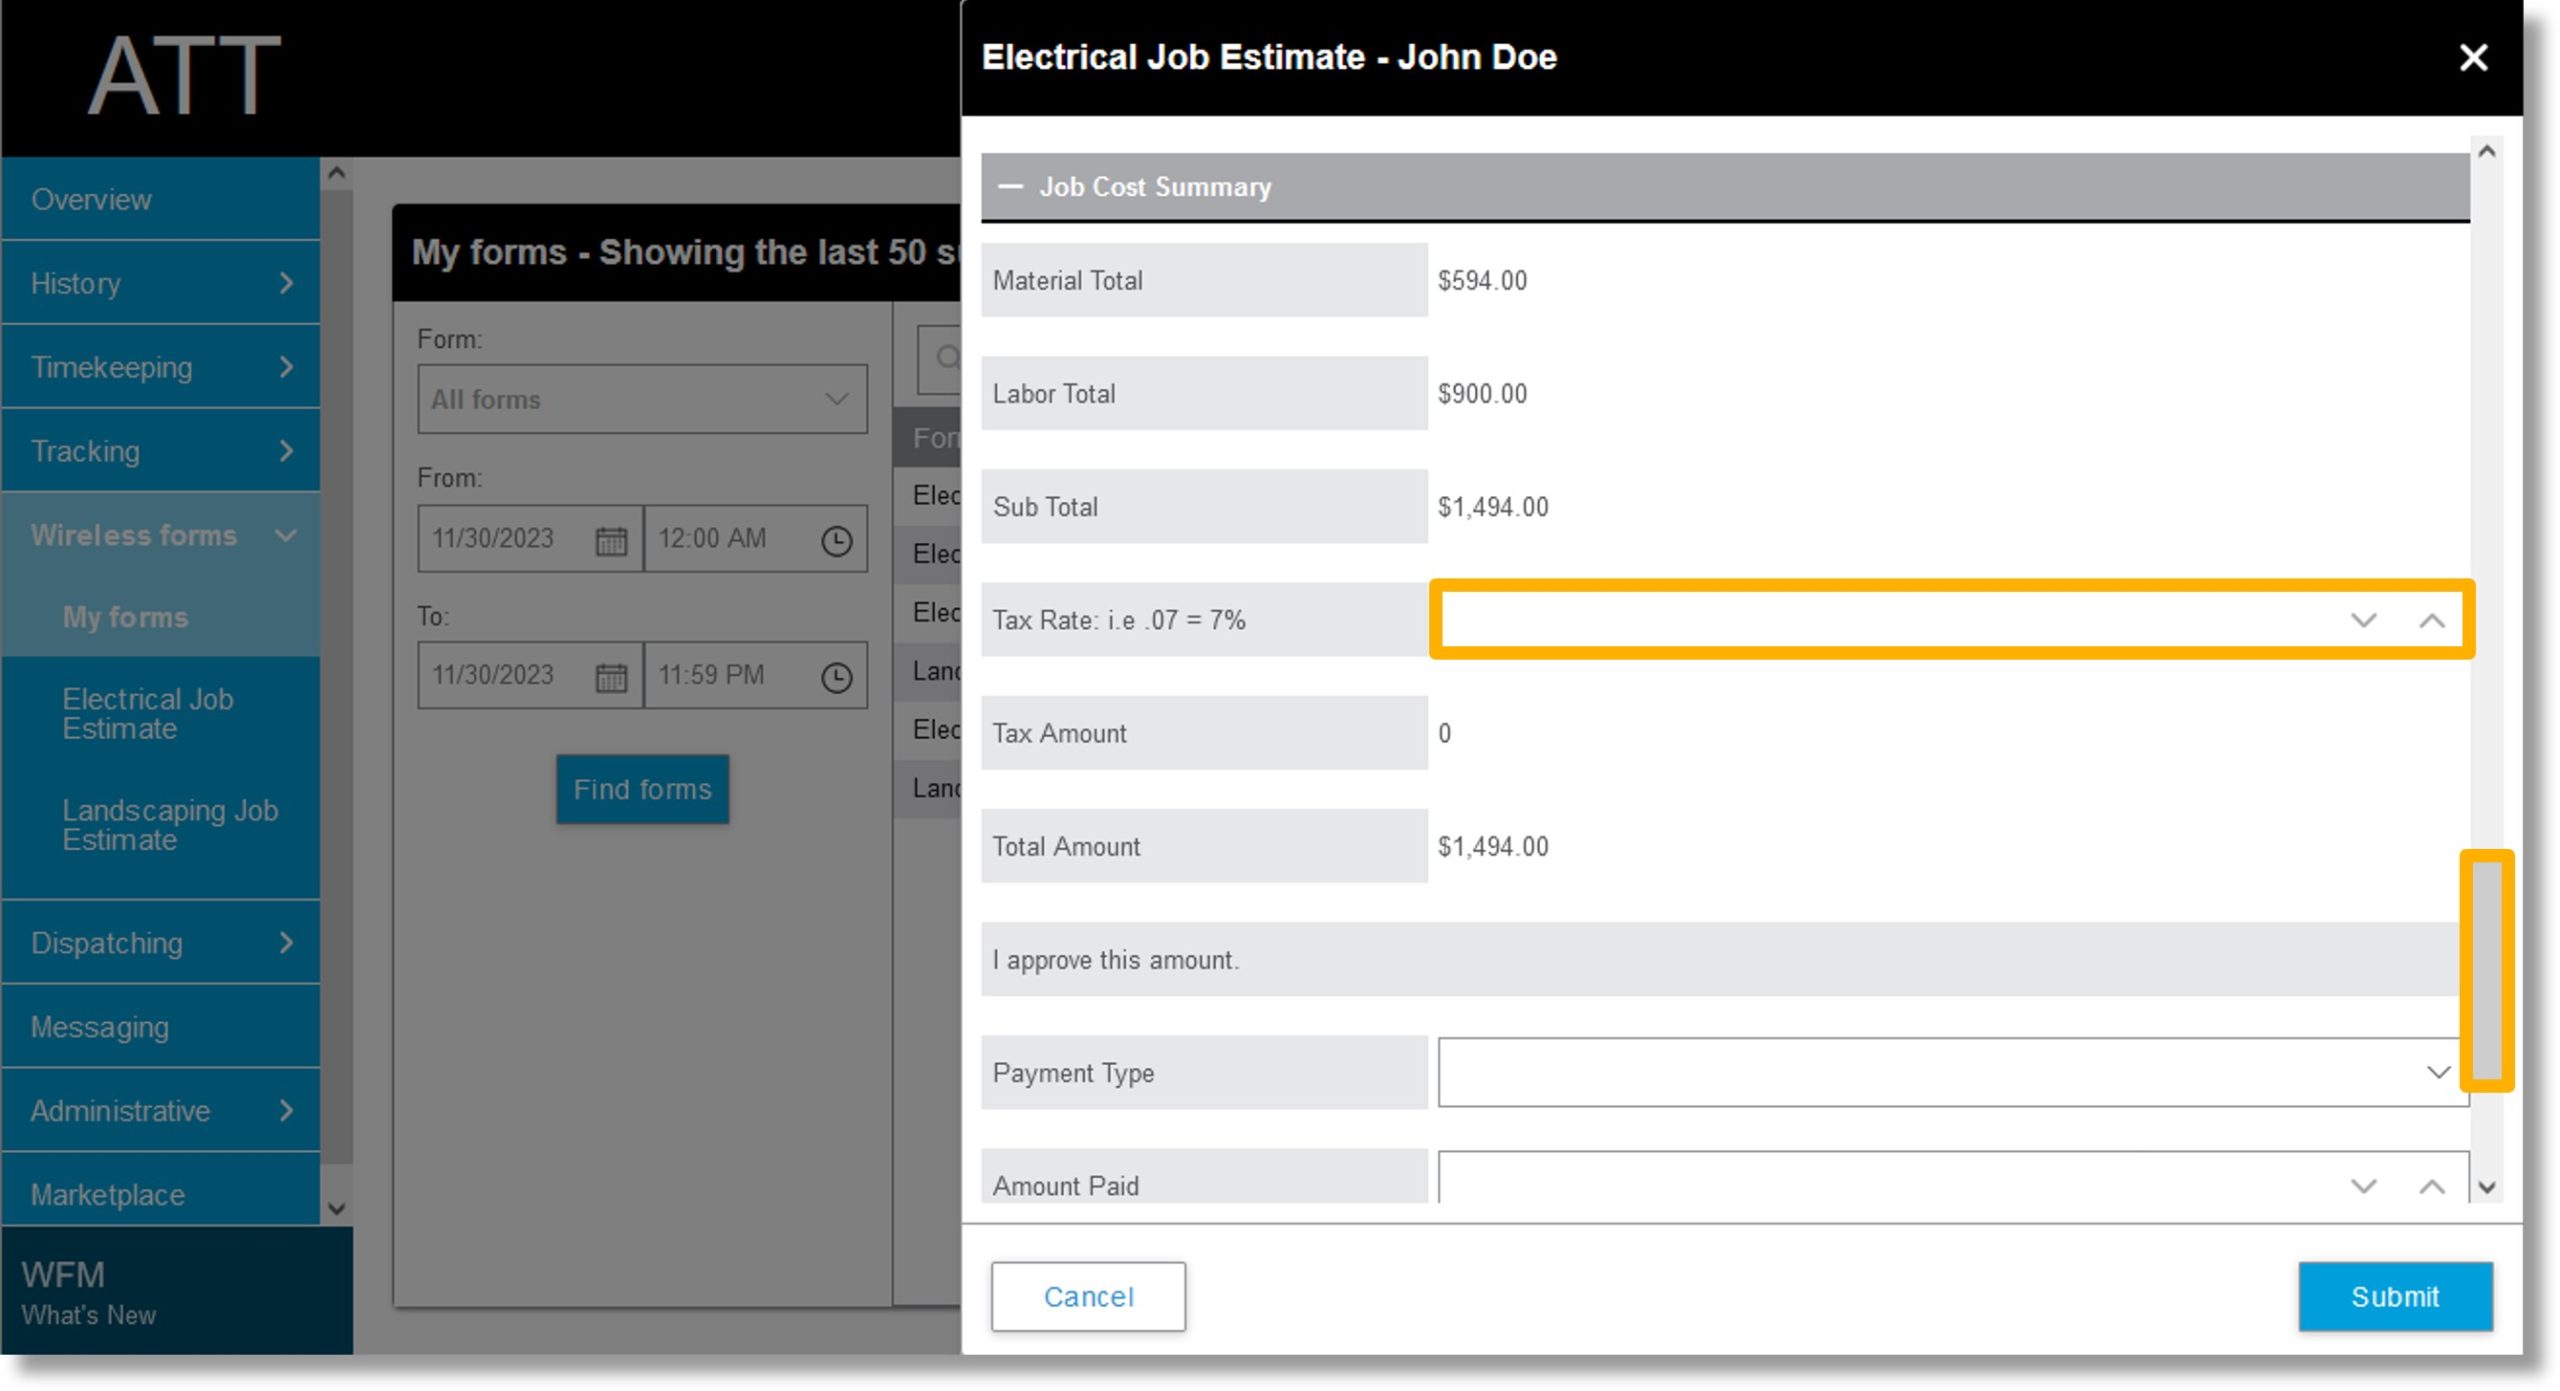
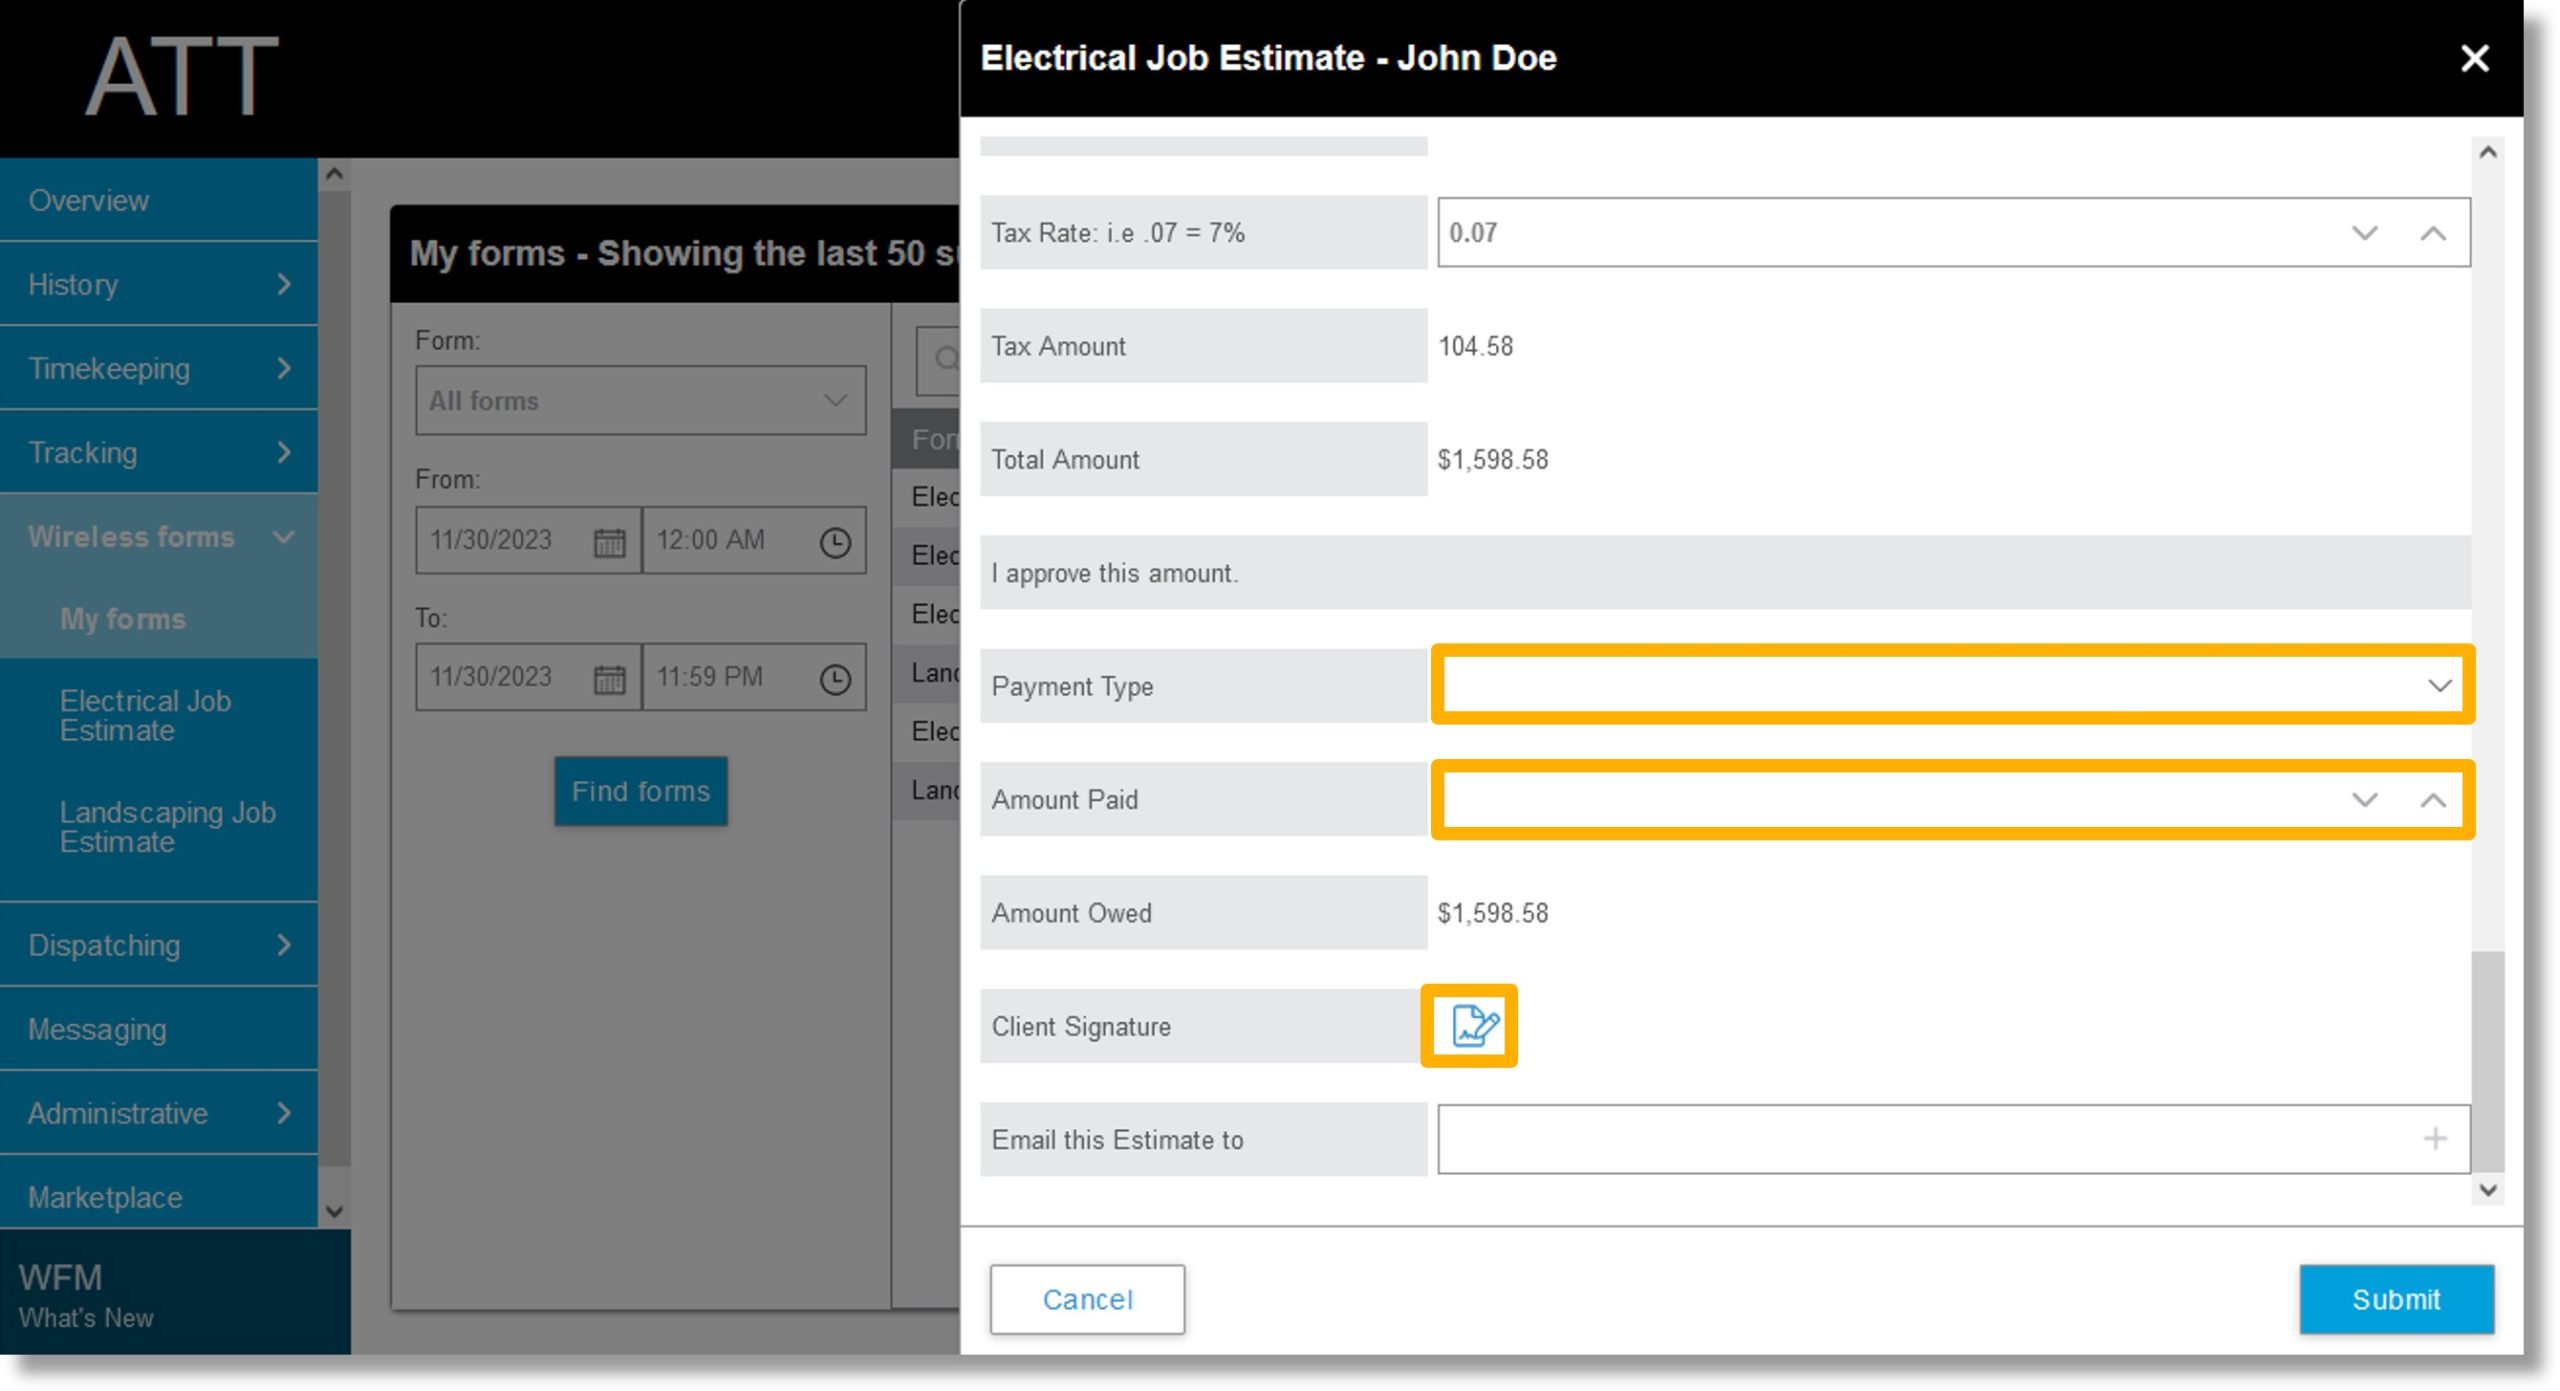
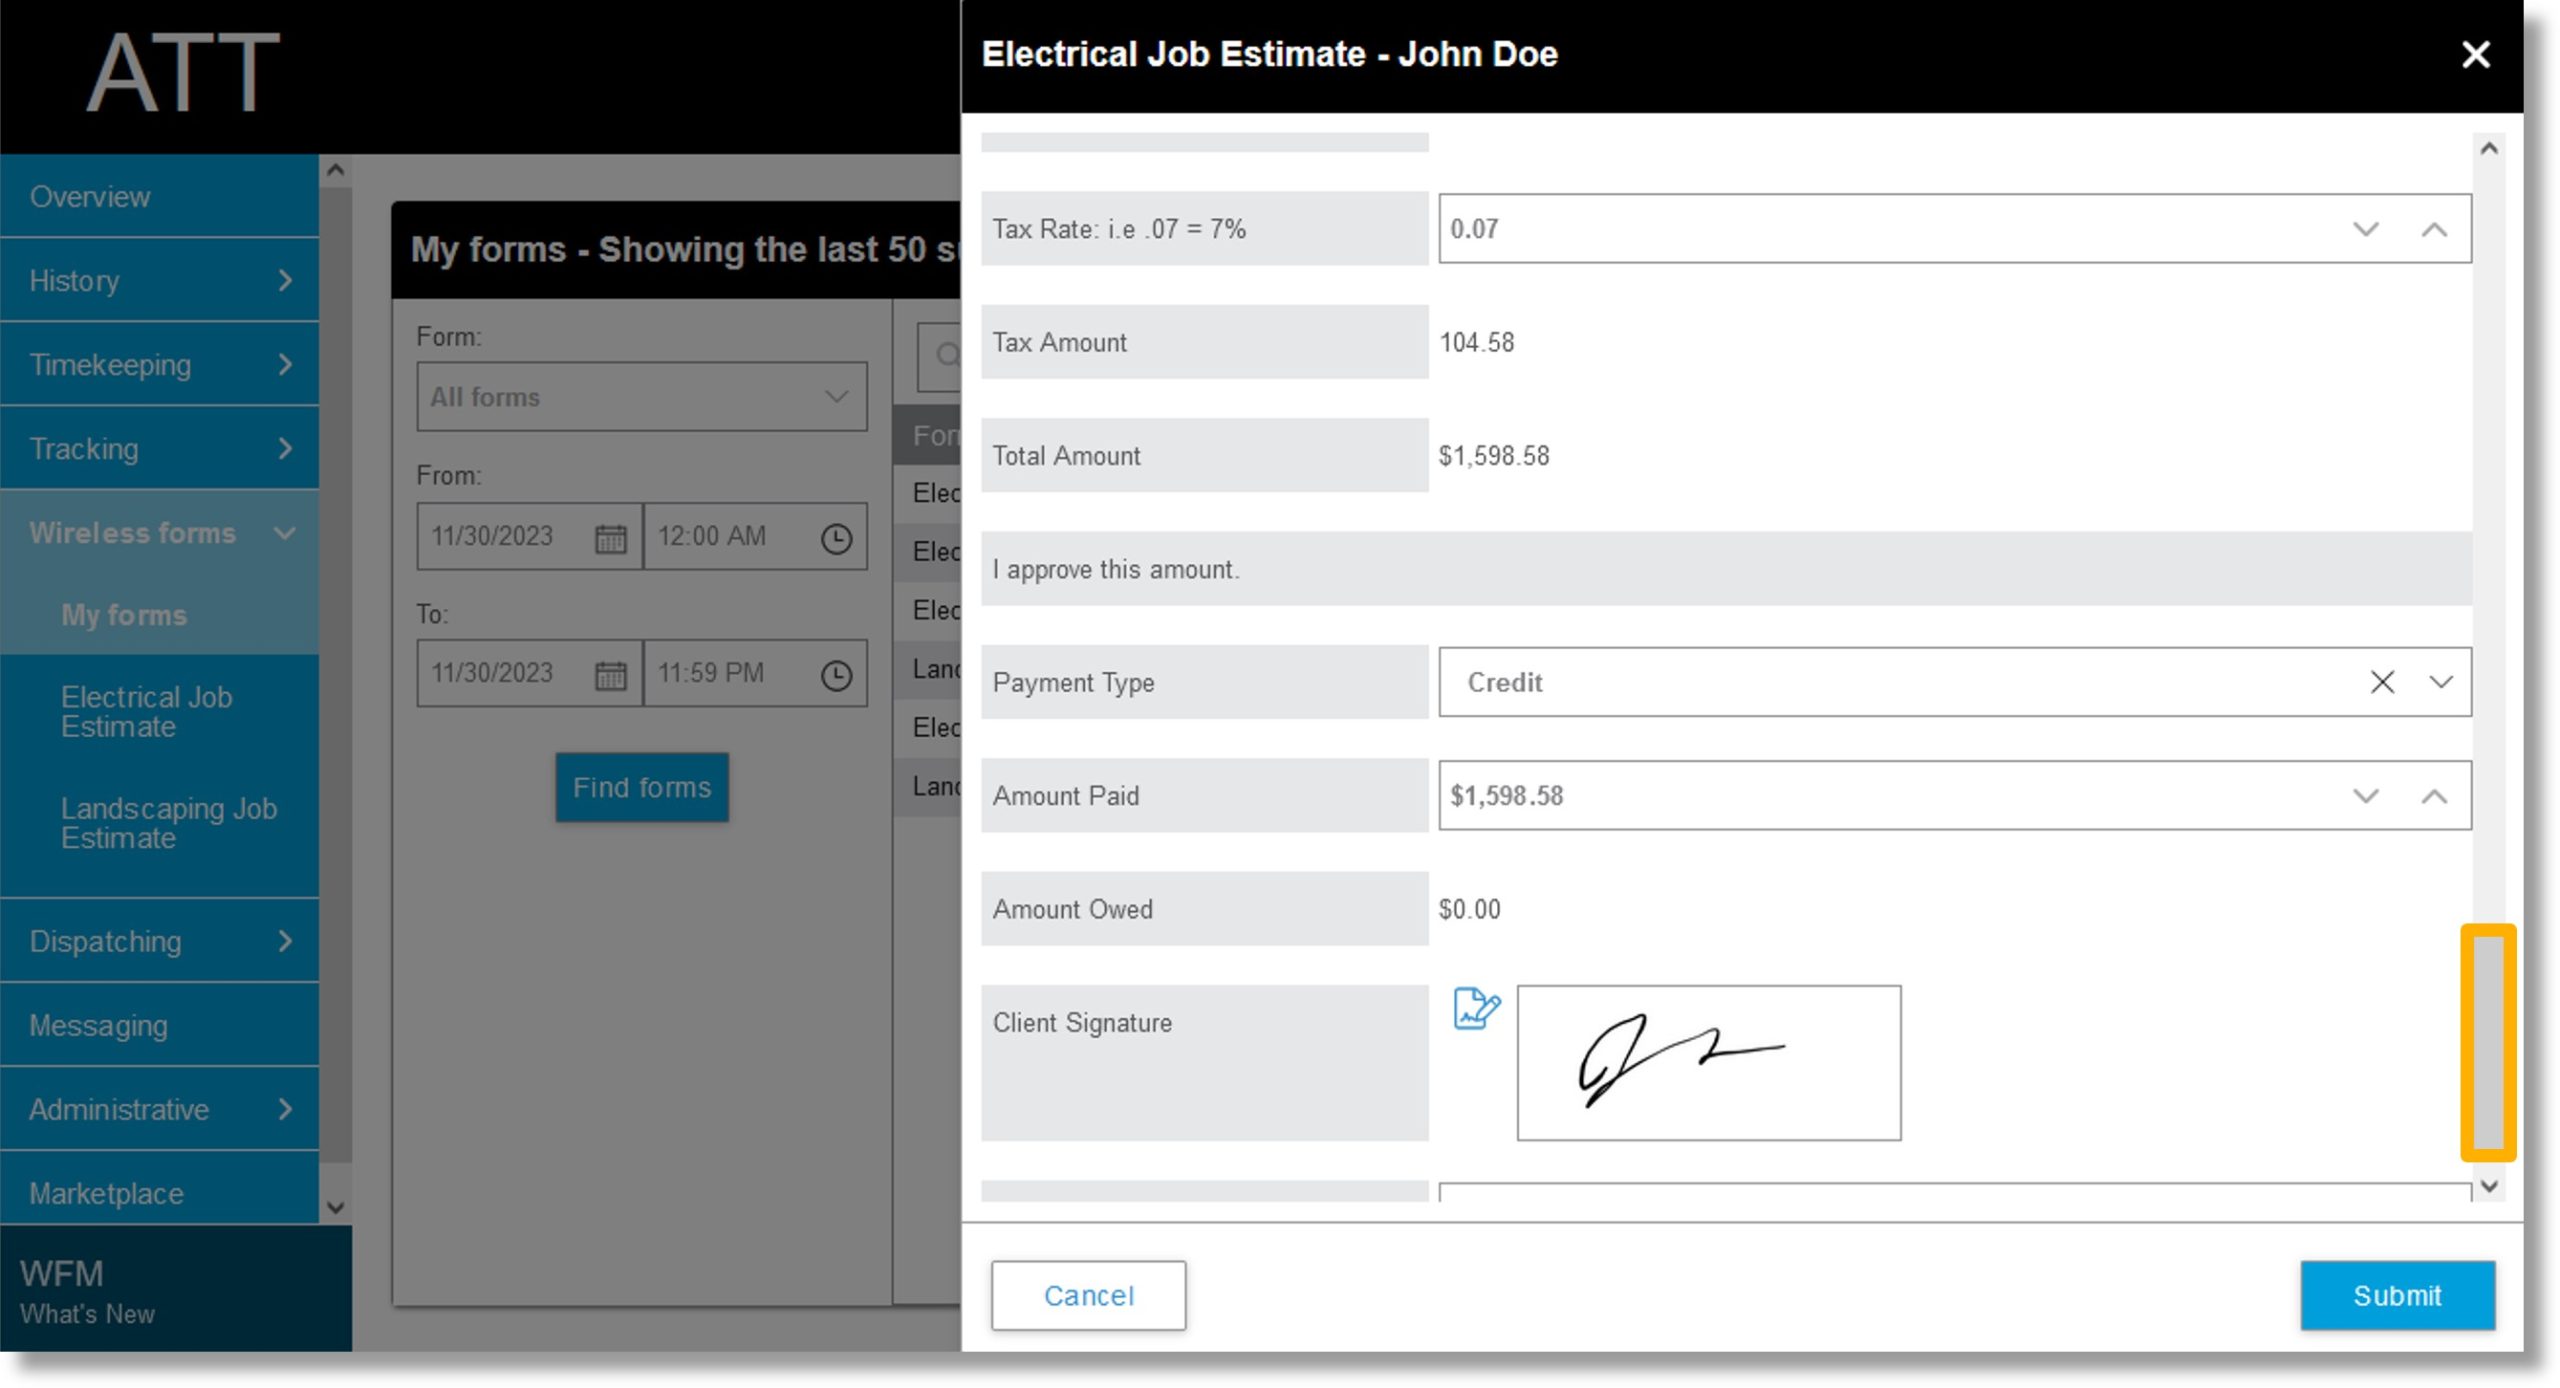
Click on the field to the right of Tax Rate and enter the desired tax rate.
-
Scroll down.
-
The total updates based on the tax rate entered.
-
Click on the drop down to the right of Payment Type and select the desired type.
-
Click on the field to the right of Amount Paid and enter the amount paid by the customer.
-
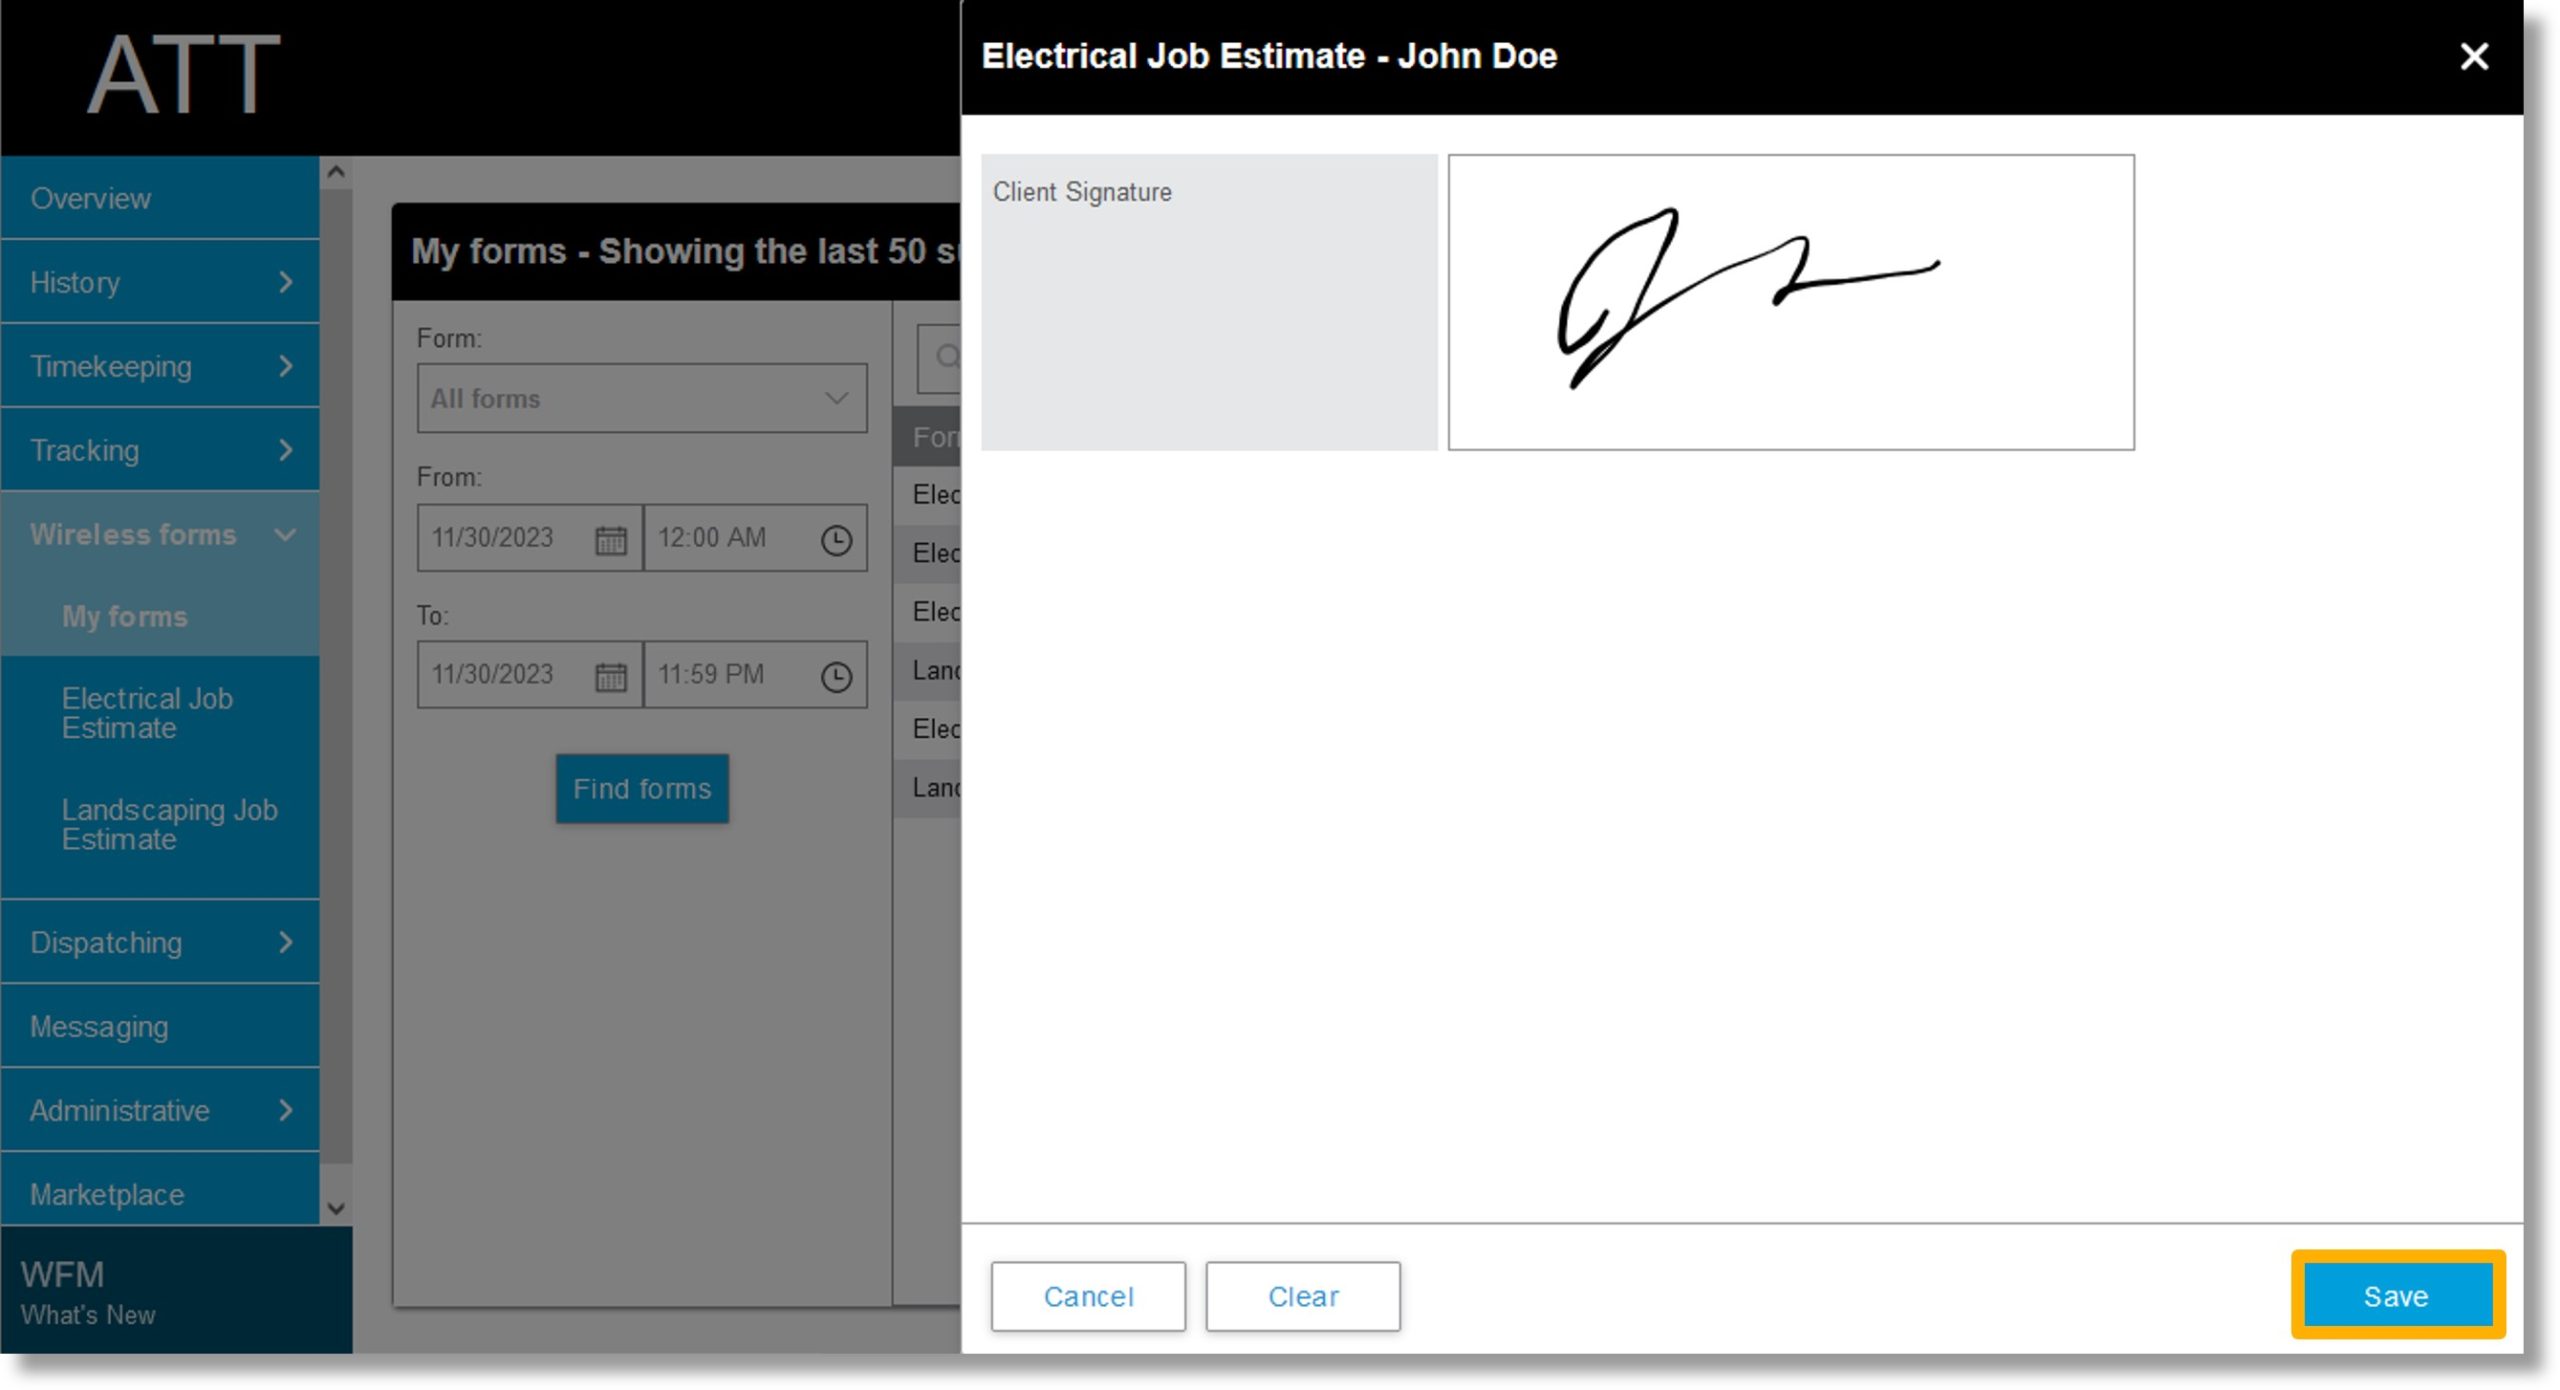
Click on the signature icon  to the right of Client Signature.
-
Click in the field to the right of Client Signature.
-
Have the customer provide their signature.
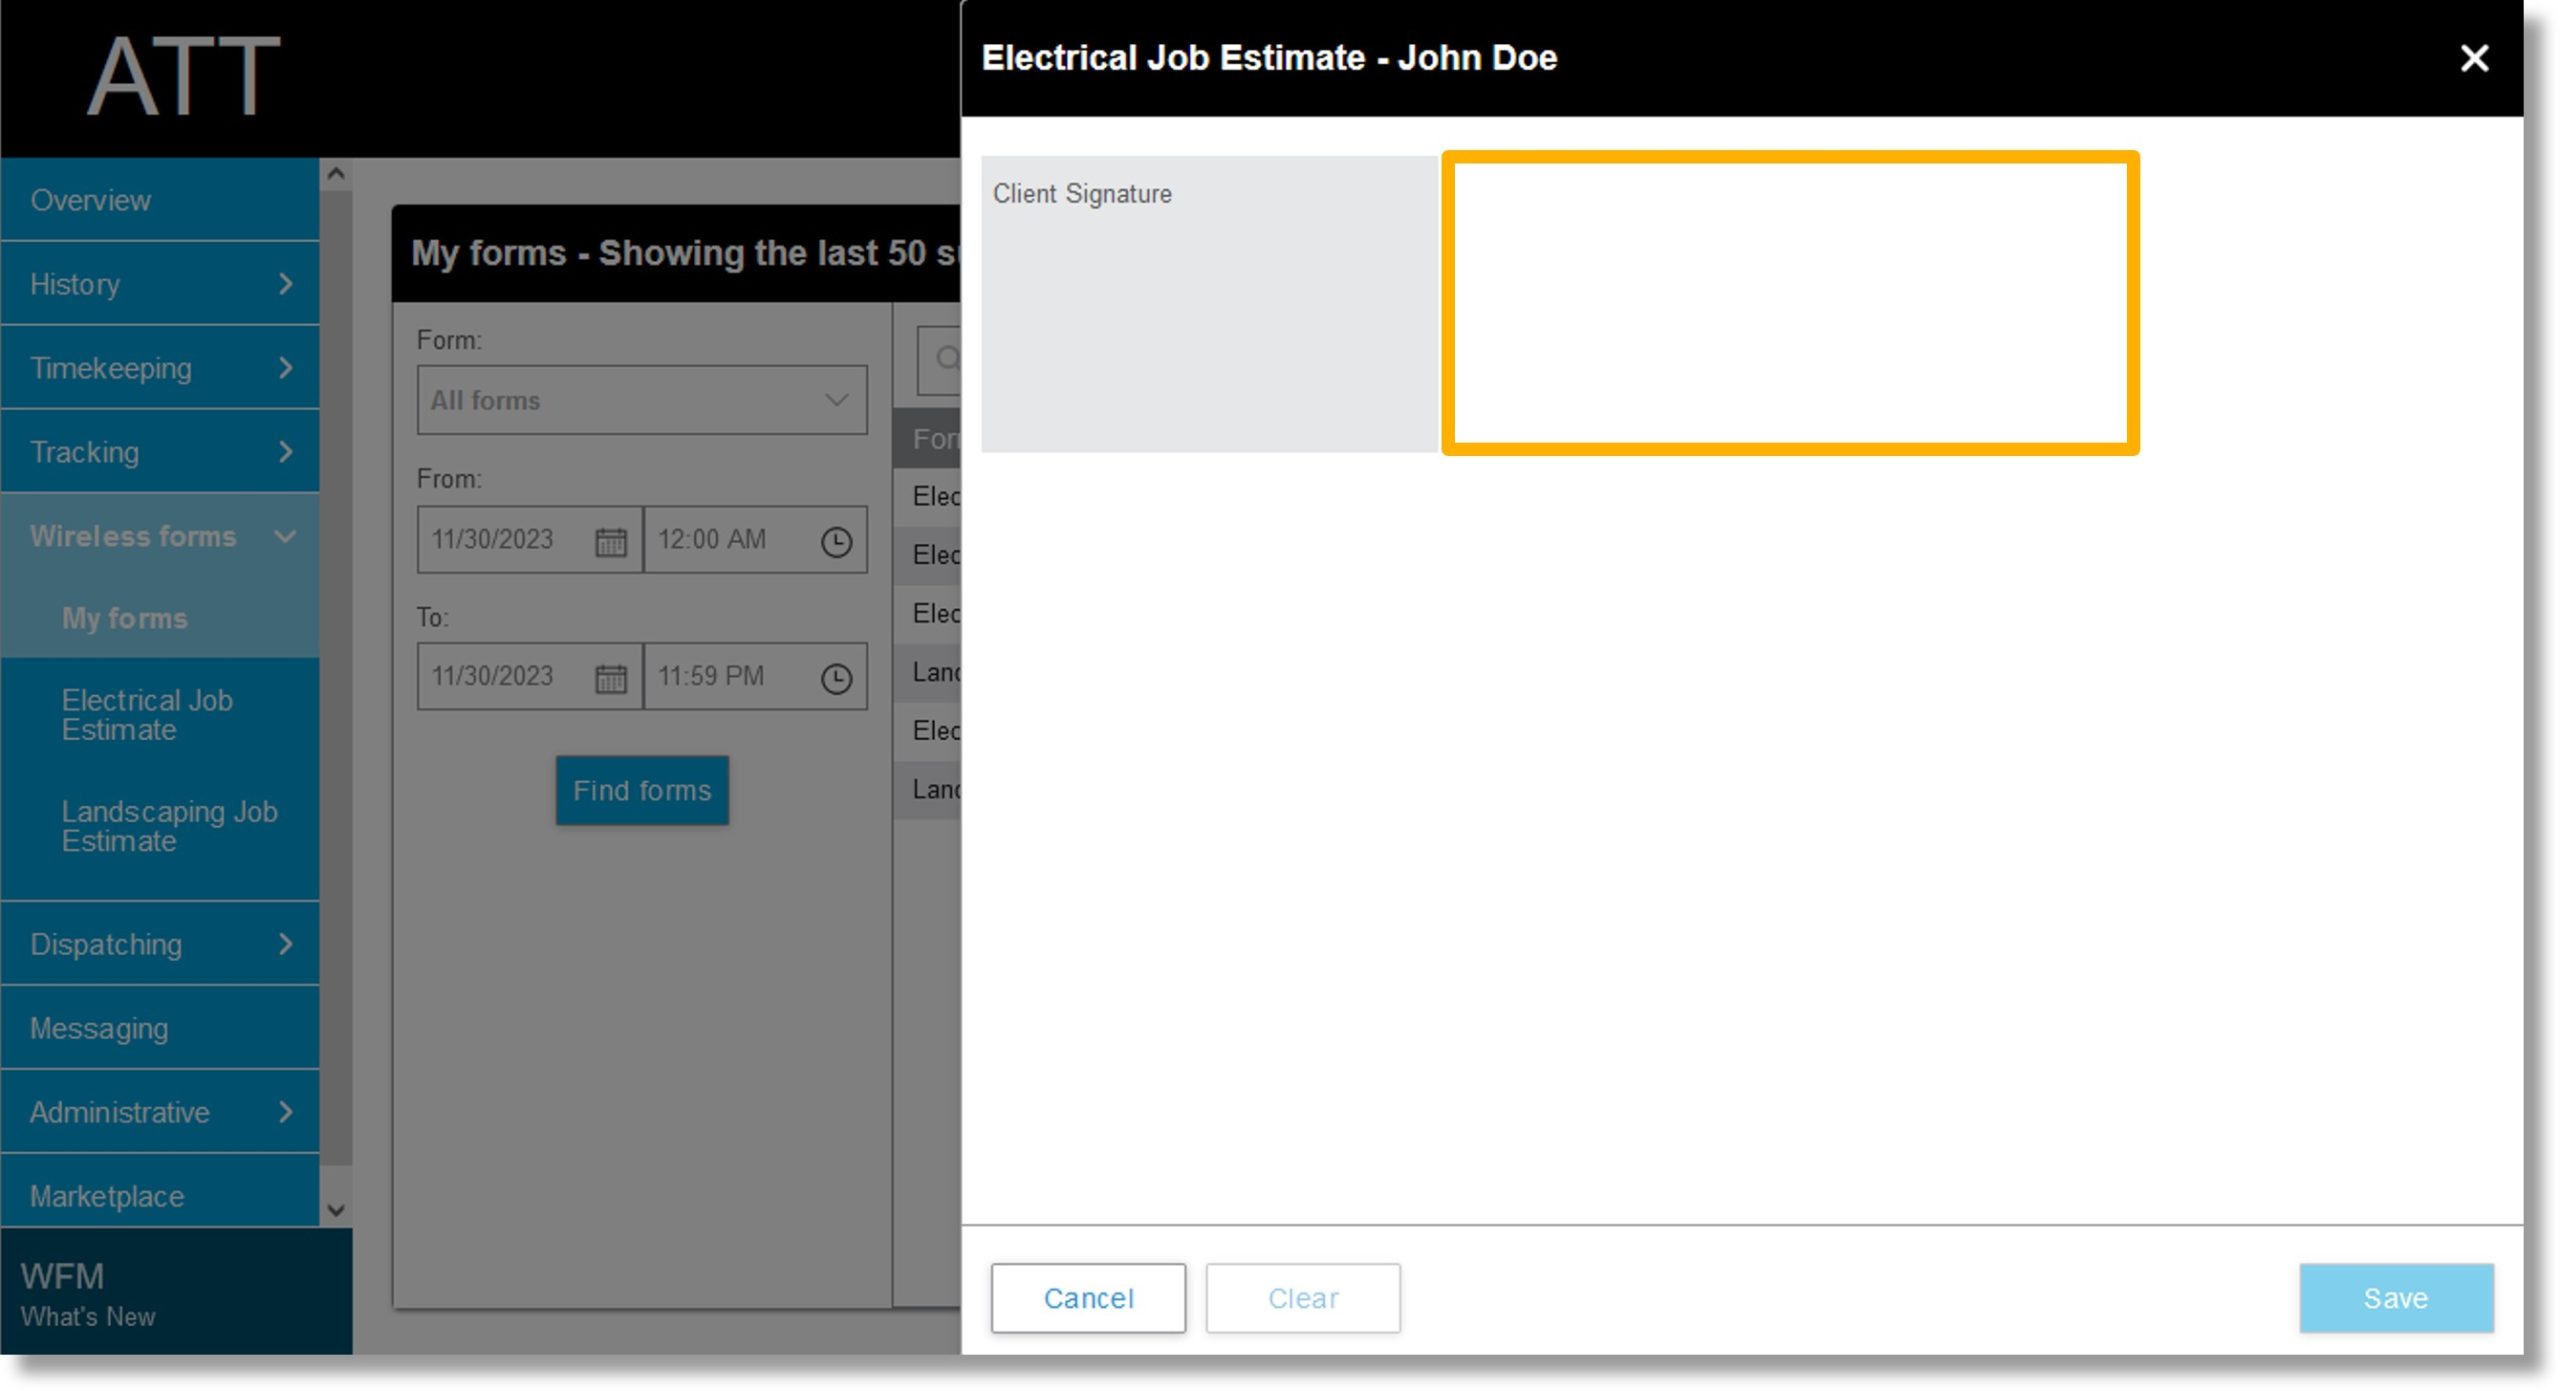
Note: You can click Clear to clear the current signature and have the customers re-sign.
-
Click Save.
-
Scroll down.
-
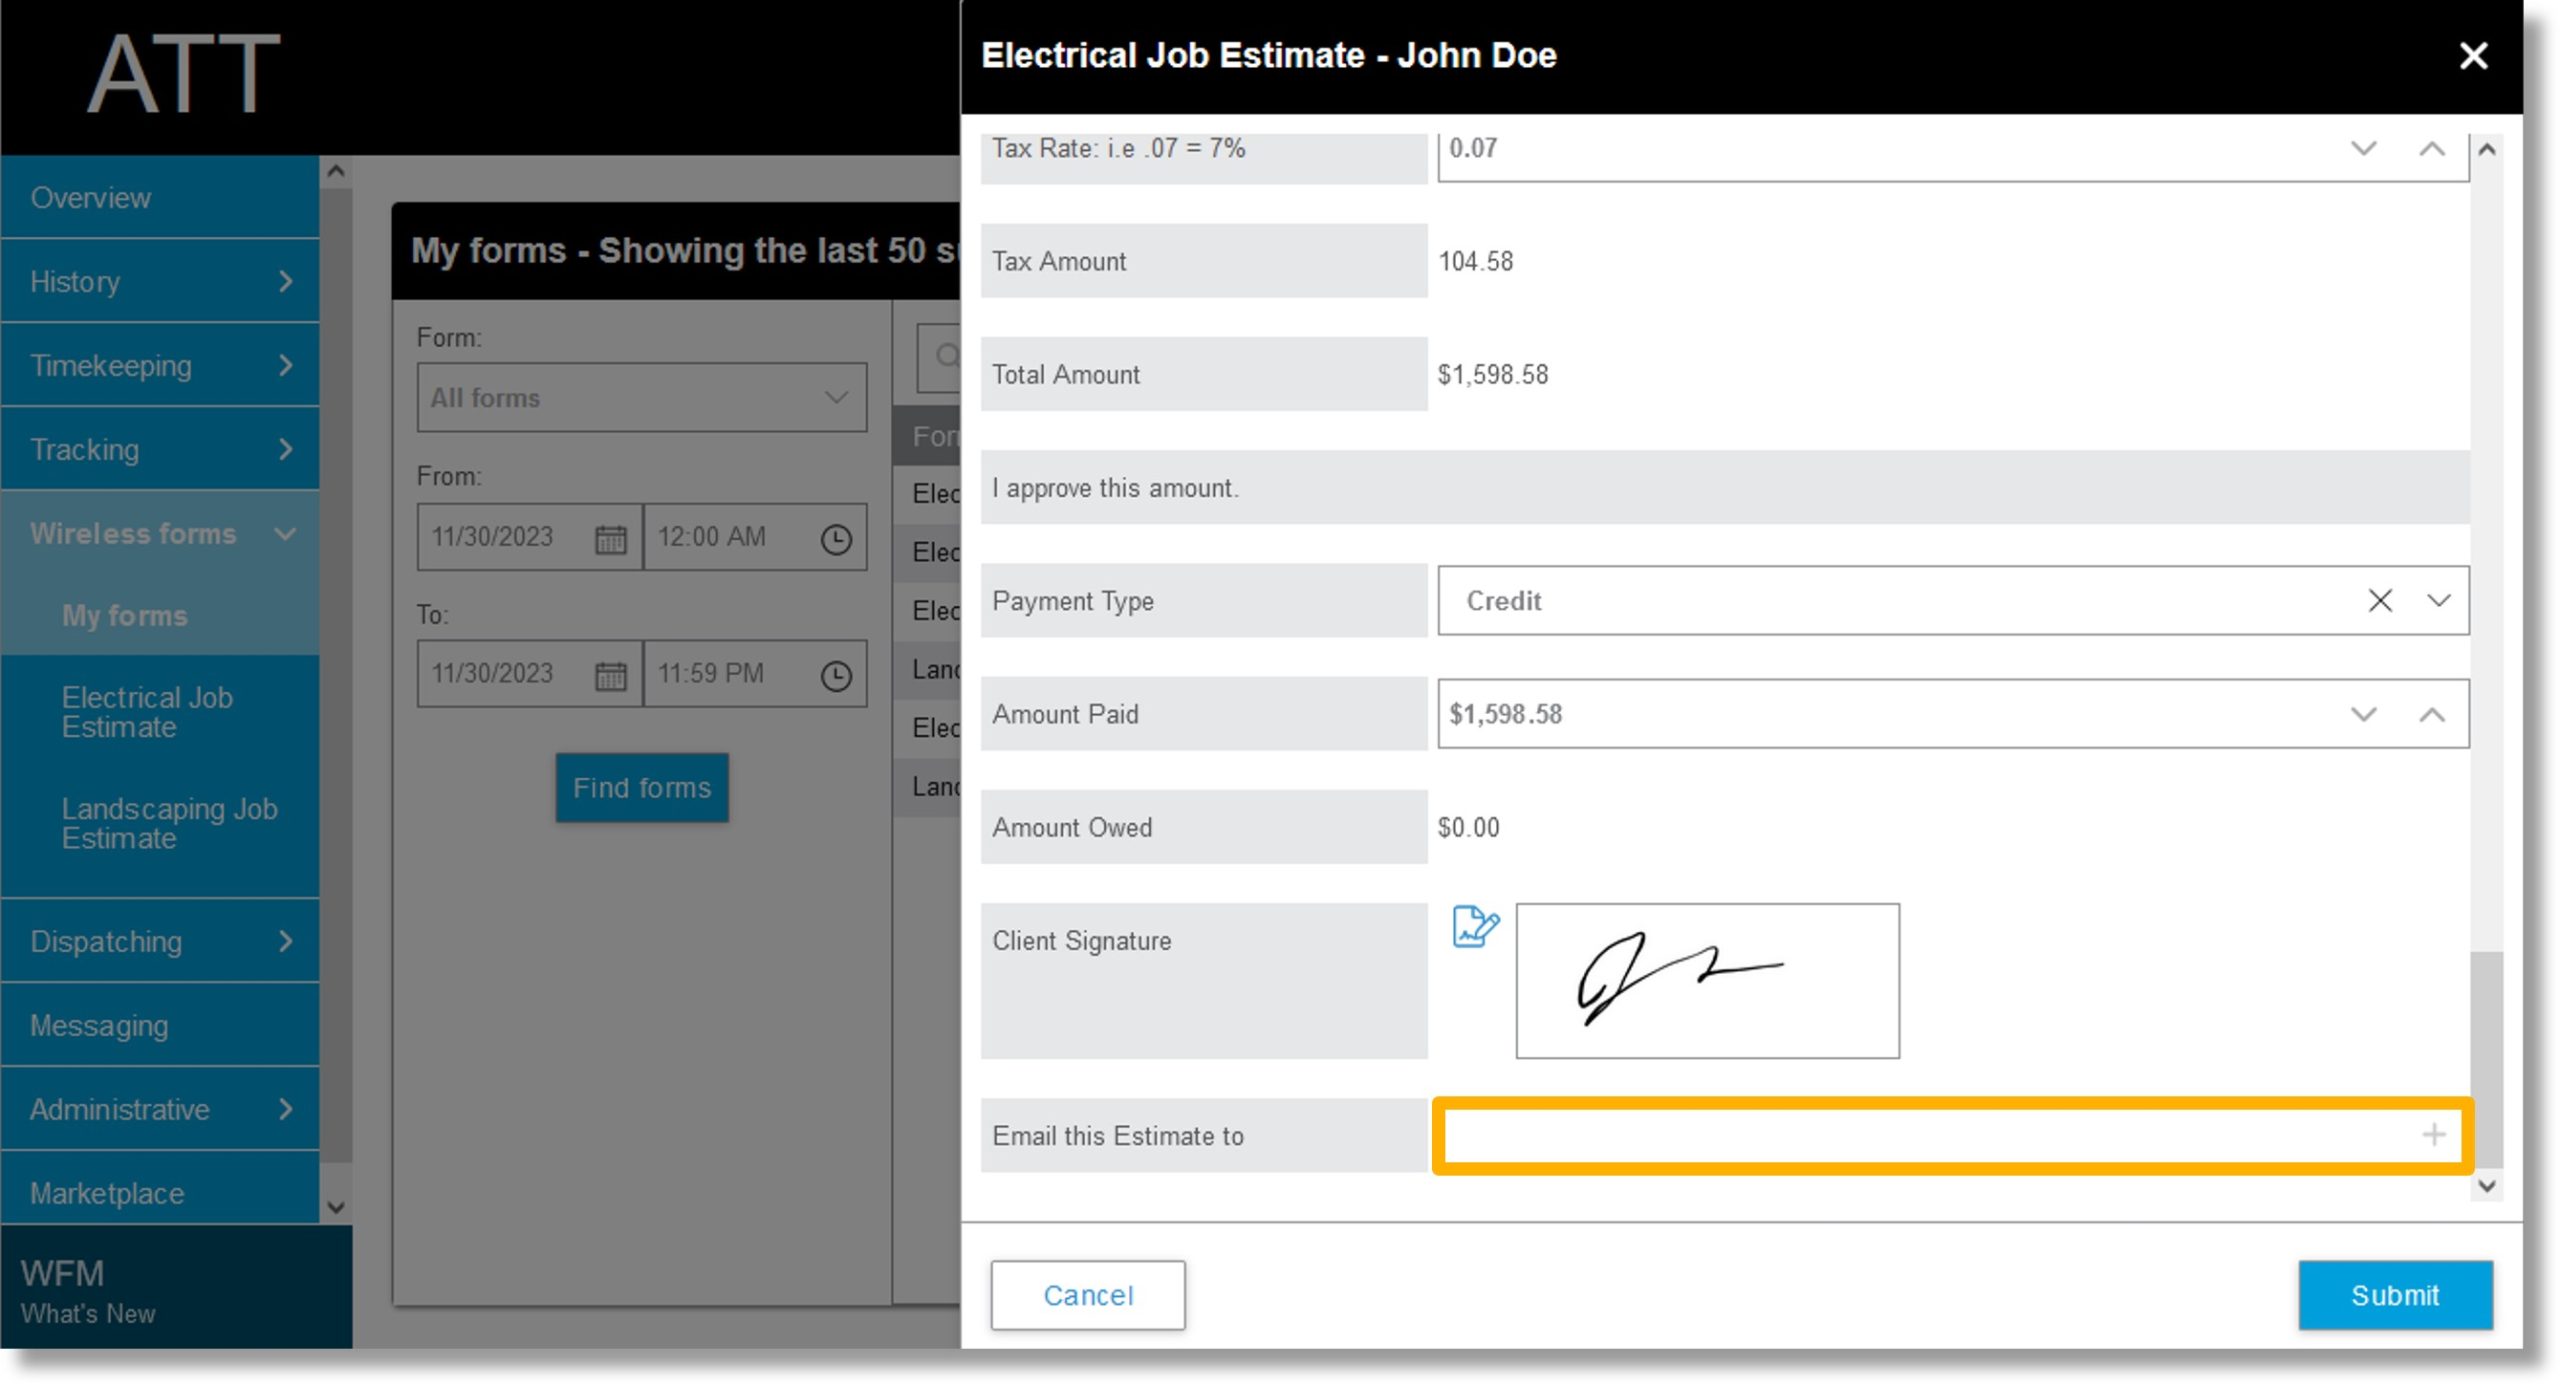
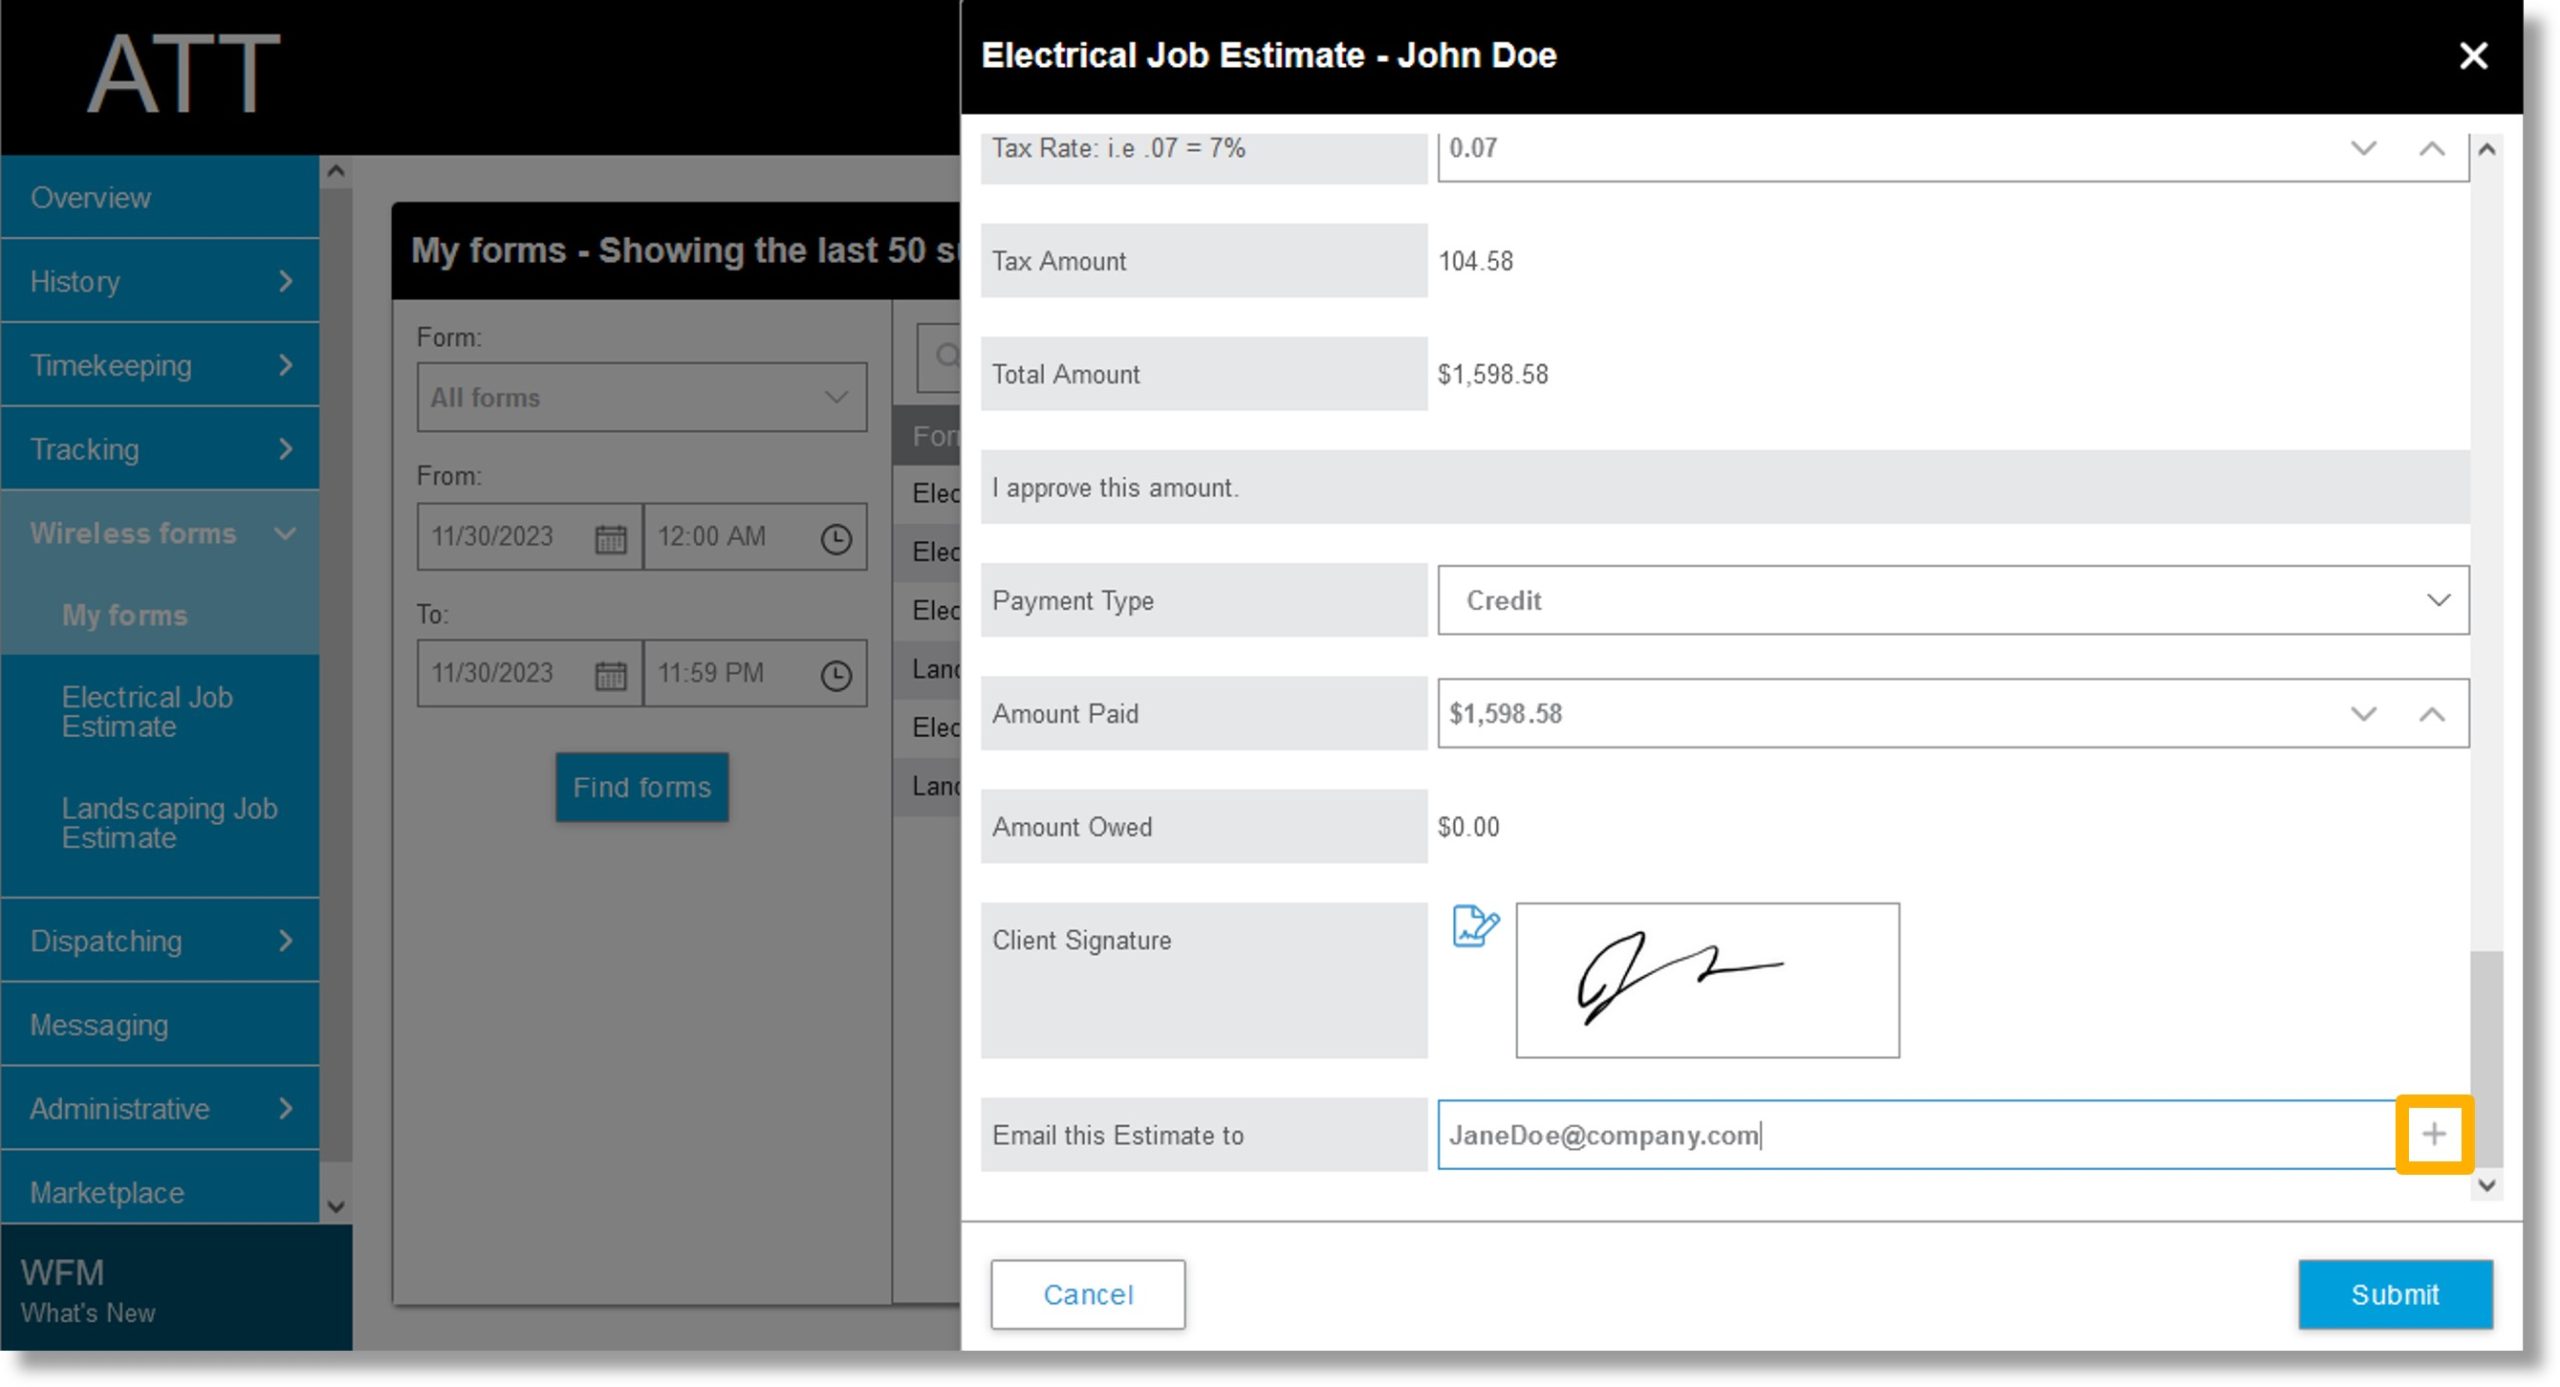
Click on the field to the right of Email this Estimate to and enter the desired email address.
-
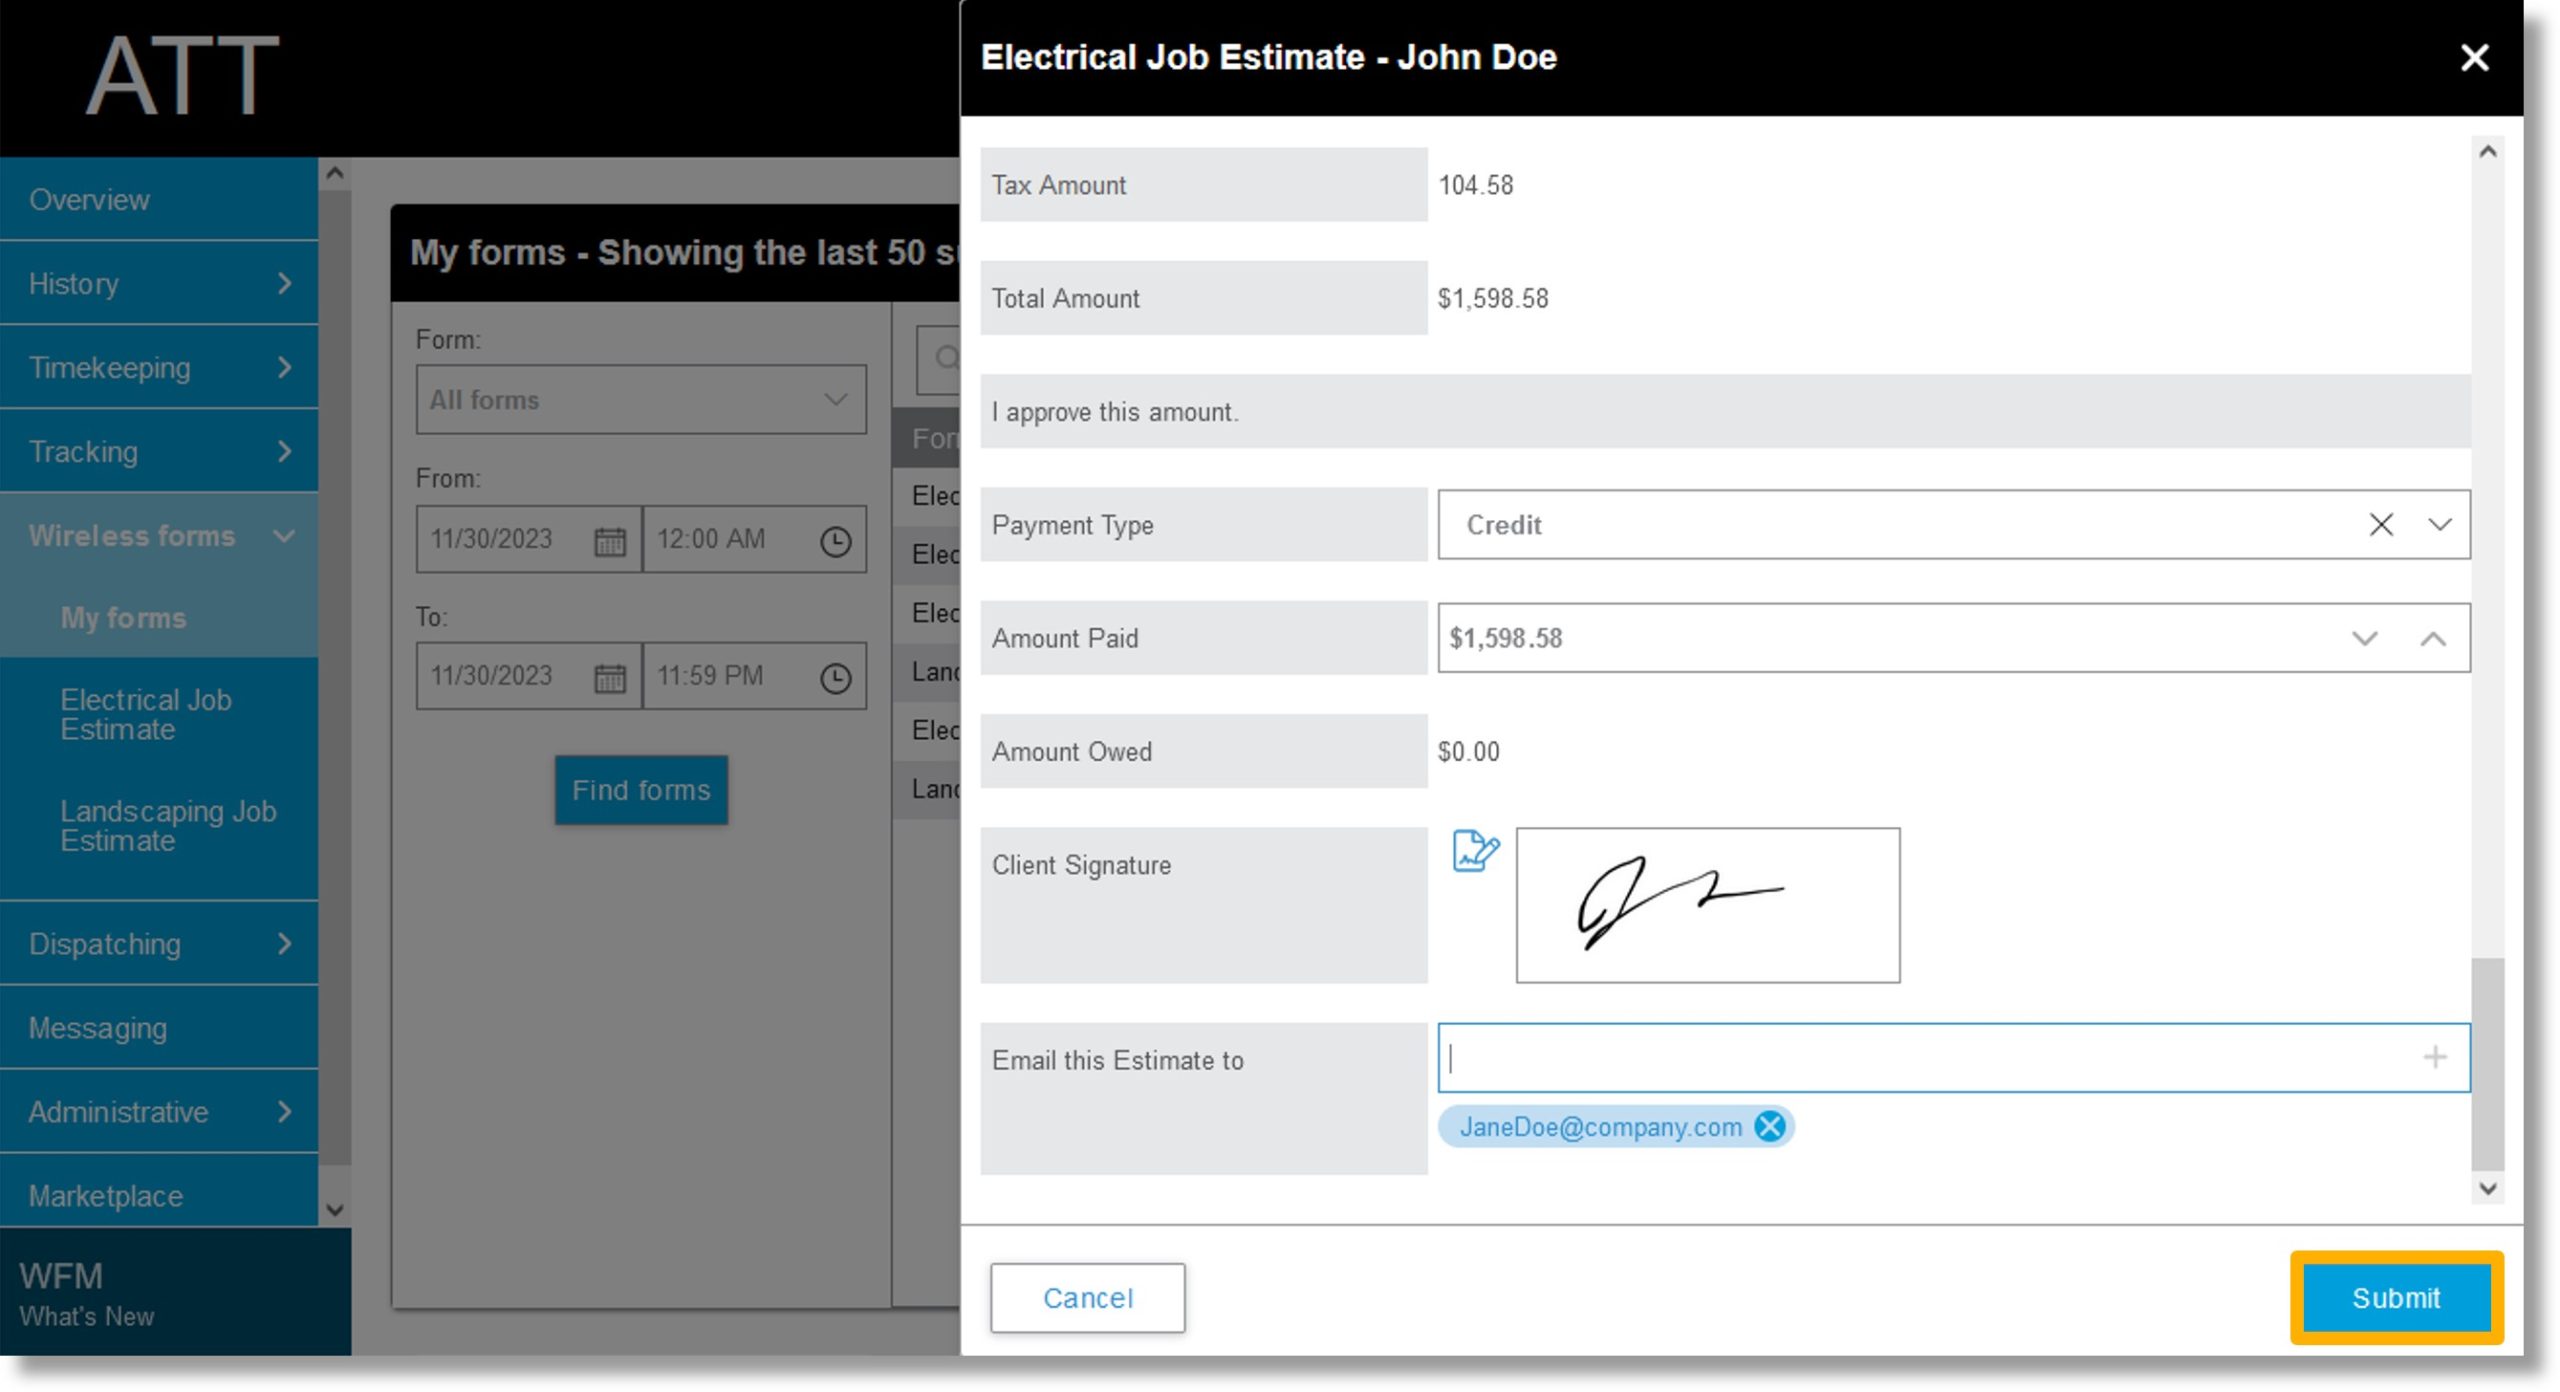
Click on the plus symbol to the right of Email this Estimate to.
-
Repeat steps 51 and 52 to add more emails.
-
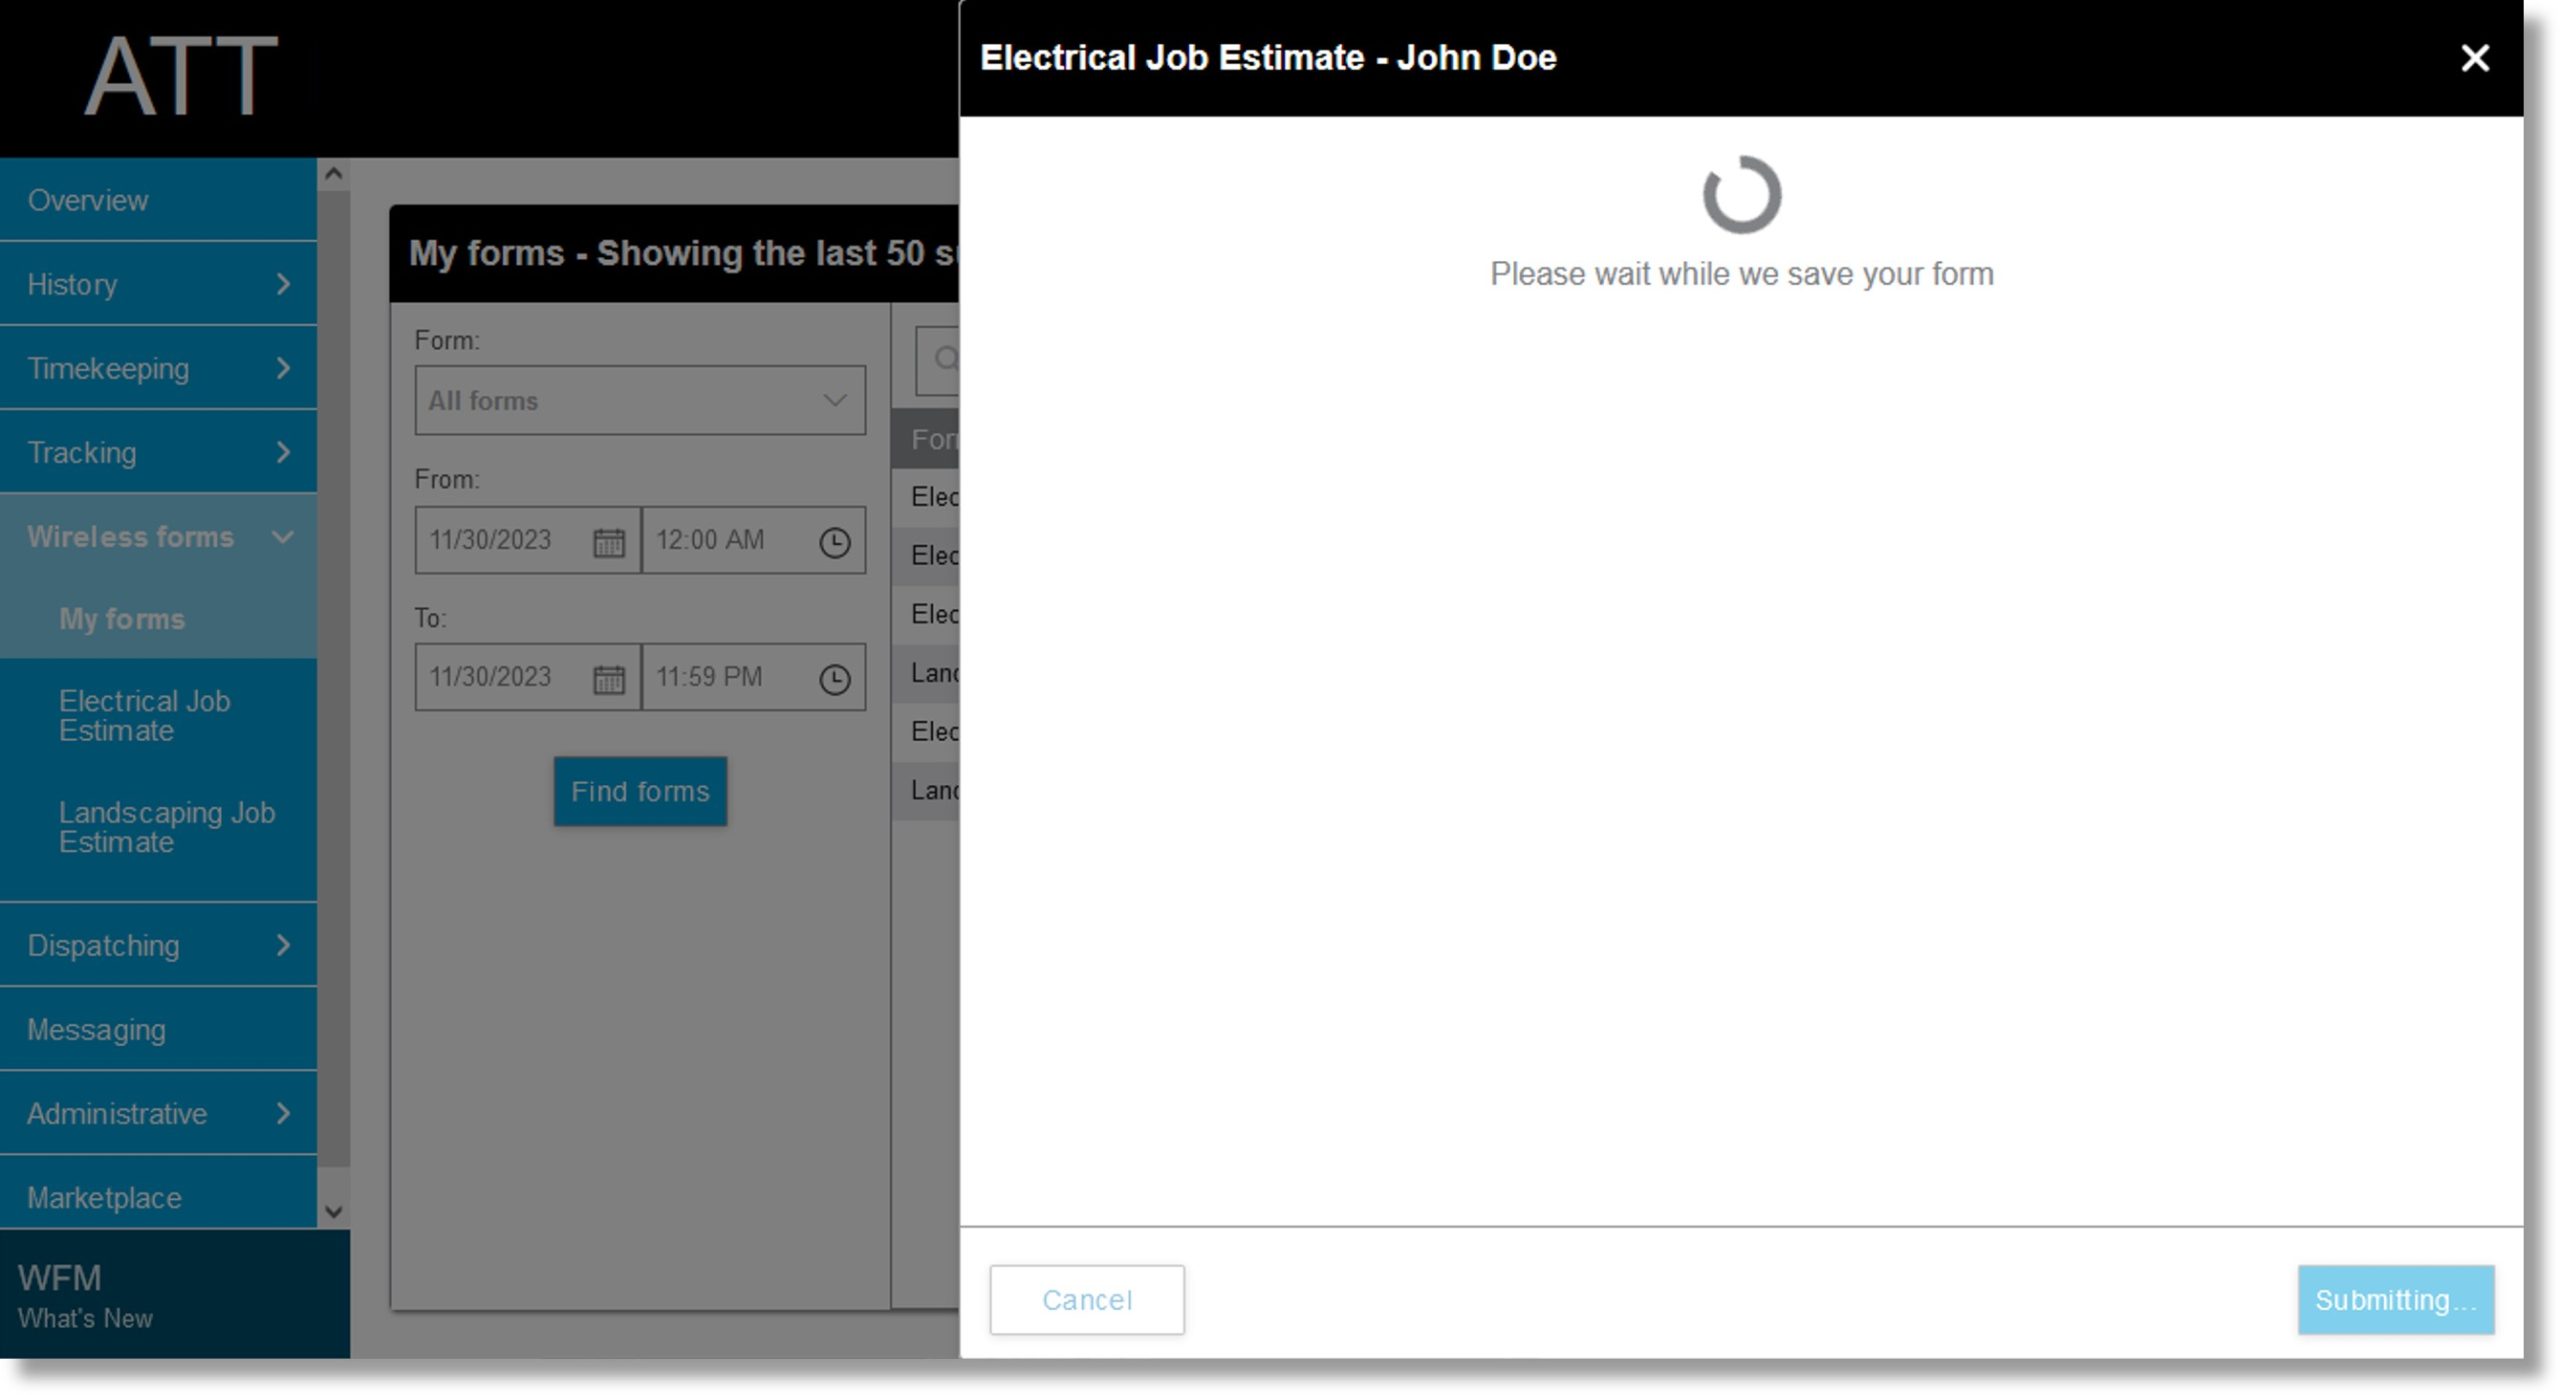
Click Submit.
-
The form saves.
-
The list of forms displays.