Configuring Call Queue Templates | AT&T Office@Hand #96700
After creating a call queue template, you can configure its settings to apply it to your existing call queue groups. Applying call queue templates to your call queue groups will allow quick configuration changes to how calls will be queued once a set condition has been met.
NOTE: If you check the box for Override call queue settings, the template’s settings will take precedence over the call queue extension’s settings.
Template information
- Go to the Admin Portal and sign in.
- Go to Users > Templates > Call Queue Settings.
- Select the template you created.
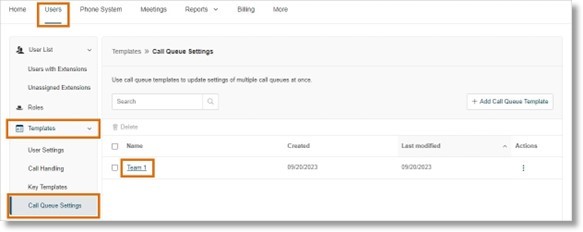
- Under Template Information, configure the following:
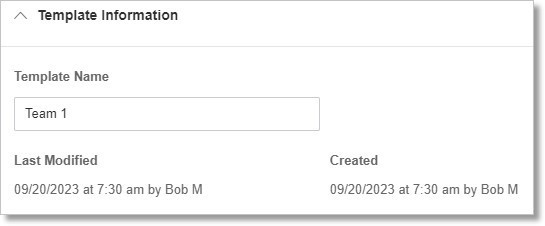
- Template Name: The name of the template.
- Click Save.
Call Queue Details
- Go to the Admin Portal and sign in.
- Go to Users > Templates > Call Queue Settings.
- Select the template you created.
- Under Call Queue Details, configure the following:
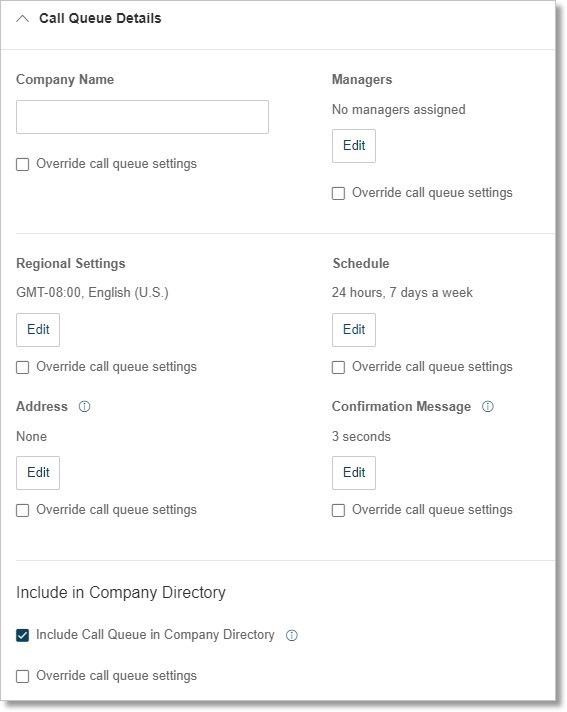
- Company Name: The name of your company.
- Managers: Click Edit to select a manager for the call queue template.
- If you check the box for Override call queue settings, choose to Add to existing managers or Replace managers of a call queue extension.
- Regional Settings: Click Edit to change the default time zone and language.
- Schedule: Click Edit to set the schedule.
- Address: Click Edit to change the default address.
- Service Level Settings: Click Edit to set the call queue’s service level and abandoned calls settings.
- Service Level Target: Set the percentage of calls that agents must answer within the service-level time threshold.
- Service Level Threshold: Set the period of time in seconds that is considered to be an acceptable service level. A call within this time period will be marked as “within service level”, while calls of longer duration will be considered as “outside of service level”.
- Include abandoned calls: Check the box to allow abandoned calls into the service level’s calculation. Abandoned calls are when callers hang up prior to being served by an agent.
- Abandoned calls threshold: Set the number of seconds you want to allow abandoned calls to be included in the calculation of Service Level. Zero value means that abandoned calls of any duration will be included in the calculation.
- Site: Click Edit to select a site.
- Confirmation Message: Click Edit to specify how long the confirmation message will appear after a successful operation is finished.
- Automatic Call Recording: Click Edit to enable or disable automatic call recording for inbound and outbound calls.
- Include in Company Directory: Check the box for Include Call Queue in Company Directory to show the call queue extension in your company directory.
- Click Save.
Greeting and hold music
- Go to the Admin Portal and sign in.
- Go to Users > Templates > Call Queue Settings.
- Select the template you created.
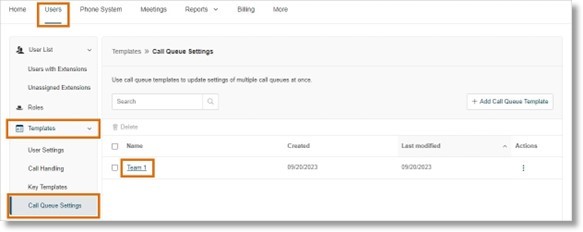
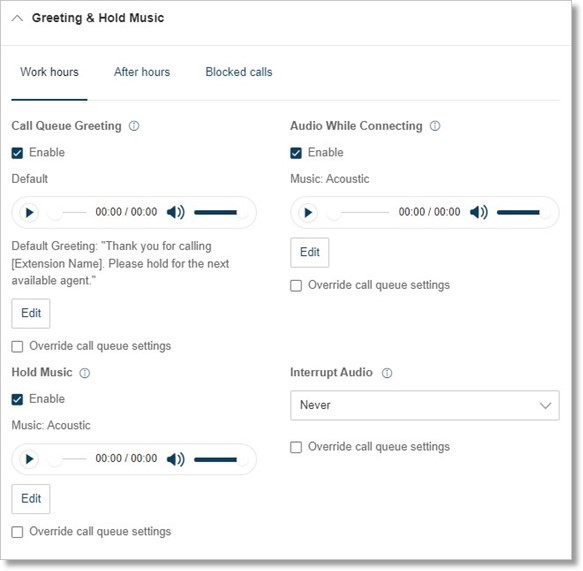
- Under Greeting & Hold Music, set your call queue’s greeting settings and hold music settings during your Work hours, After hours, and for Blocked calls.
- Click Save.
Call handling and members
- Go to the Admin Portal and sign in.
- Go to Users > Templates > Call Queue Settings.
- Select the template you created.
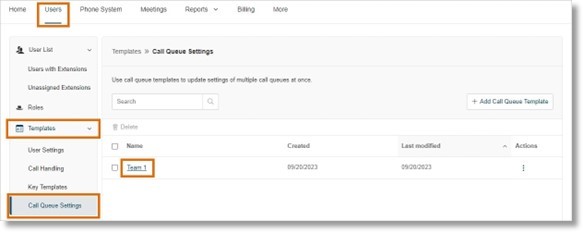
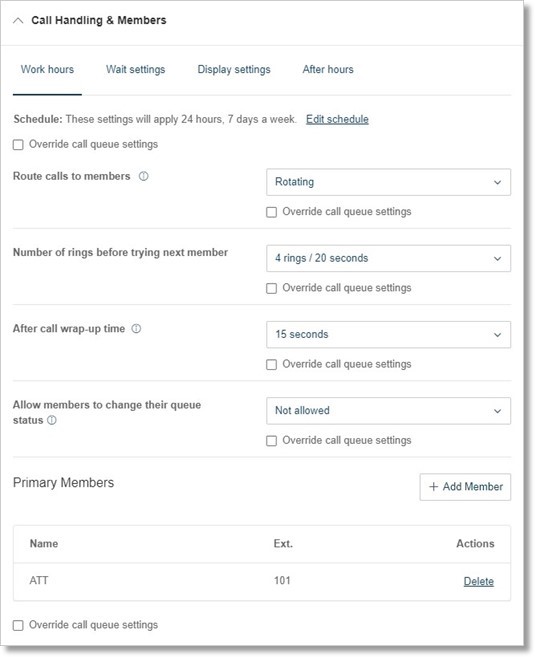
- Under Call Handling & Members, configure the following:
- Work hours: Set the call handling settings during business hours and add primary members to your call queue.
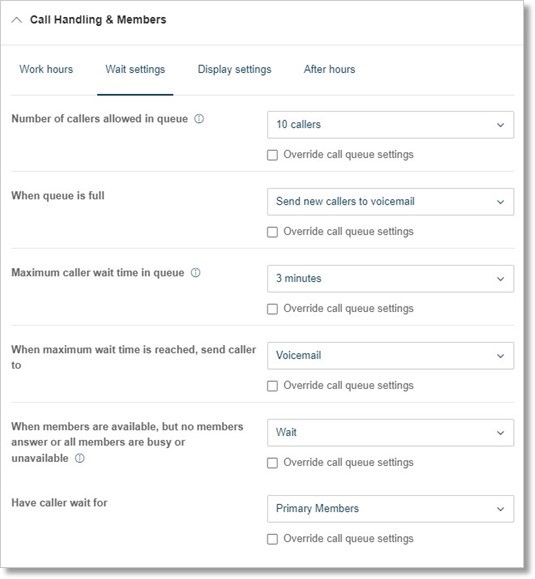
- Wait settings: Set the wait settings, maximum caller wait time, and overflow group settings for your call queue.
- Display settings: Set the display settings for your call queue.
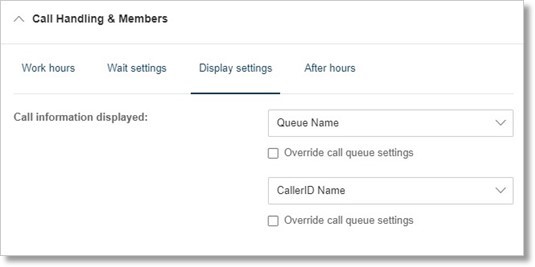
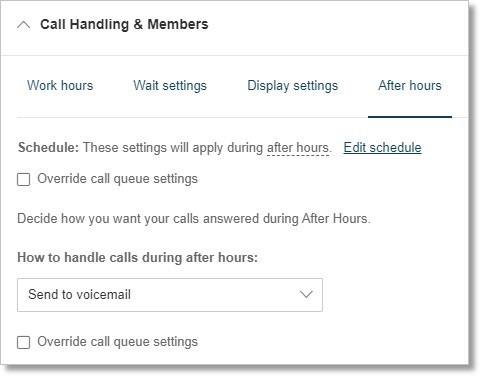
- After hours: Set the call handling settings after business hours.
- Click Save.
Pickup settings and members
- Go to the Admin Portal and sign in.
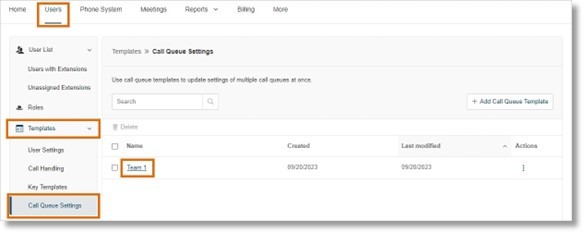
- Go to Users > Templates > Call Queue Settings.
- Select the template you created.
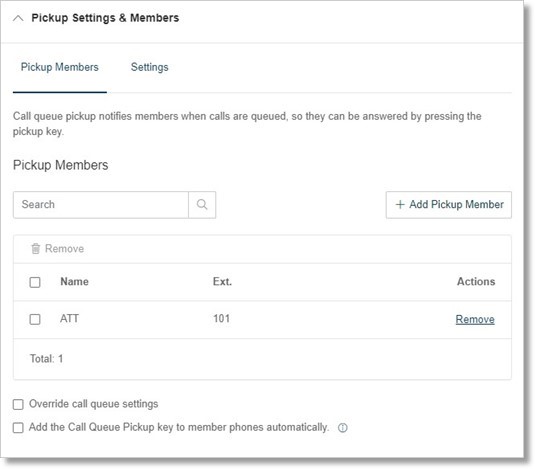
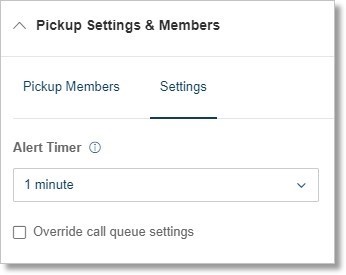
- Under Pickup Settings & Members, configure the following:
- Pickup members: Manage the pickup members for your call queue.
- Settings: Set the Alert Timer for when pickup members are notified when calls are queued.
- Click Save.
Voicemail and notifications
- Go to the Admin Portal and sign in.
- Go to Users > Templates > Call Queue Settings.
- Select the template you created.
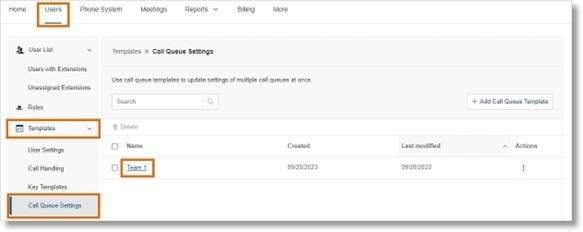
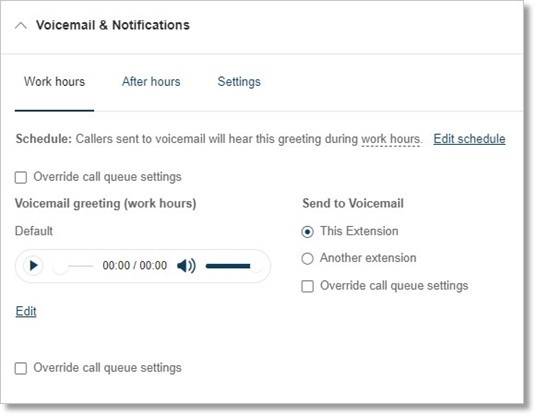
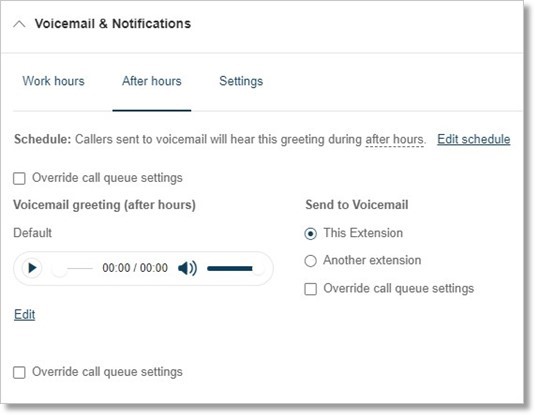
- Under Voicemail & Notifications, configure the following:
- Work hours: Set your voicemail greeting during business hours and choose which extension will receive the voicemail.
- After hours: Set your voicemail greeting after business hours and choose which extension will receive the voicemail.
- Settings: Edit your call queue’s notification settings, enable or disable voicemail to text, and add co-recipients for shared voicemail.
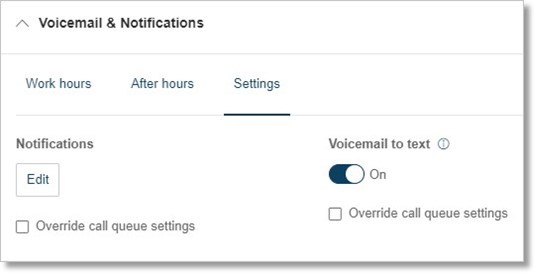
- Click Save.
Key Words: AT&T Office@Hand Online Account, Admin Portal, Call Queue, template information, call queue details, greeting and hold music, call handling and members, pickup settings and members, voicemail and notifications, 96700
Was this page helpful? Yes No


