TOP

AT&T Office@Hand

Learn how to use features from AT&T Office@Hand. Access our self-help options to set up and use this application to communicate with customers.

Back to Product Page
Use the dropdown to get support, or purchase this product

Related Content

No related content found

Changing the language in the AT&T Office@Hand Desktop and Admin Portal

Users can change the language settings to their preferred language. Once set, users can view the text in the AT&T Office@Hand Desktop and Admin Portal in their chosen language.
Supported languages
The AT&T Office@Hand apps for mobile, desktop, and web support the following languages:

  • Chinese (Simplified)
  • Chinese (Traditional—Hong Kong)
  • Chinese (Traditional—Taiwan)
  • Dutch
  • English (UK, US, and AU)
  • Finnish
  • French
  • French Canadian
  • German
  • Italian
  • Japanese
  • Korean
  • Portuguese
  • Portuguese (Brazilian)
  • Spanish
  • Spanish (Latin America)

Changing the language in the desktop app

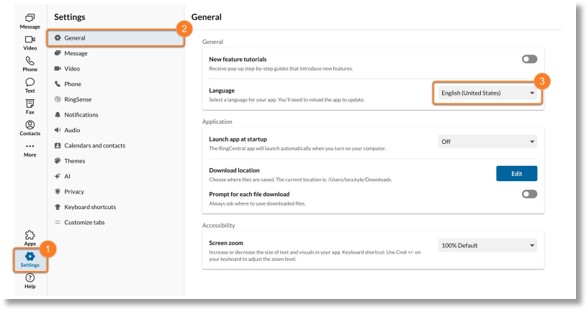
  1. In the navigation bar, click Settings.
  2. Click General.
  3. Click the dropdown next to Language, then select your preferred language.

    Image of steps 1 through 3.

  4. Click Reload in the popup box for the language change to take effect.
    Note: When you reload the app, anything currently running will be closed. Click Later if you want to reload the app at a different time.

To change the language in the mobile app (iOS and Android), use the settings within the device’s operating system.

Changing the language in the Admin Portal

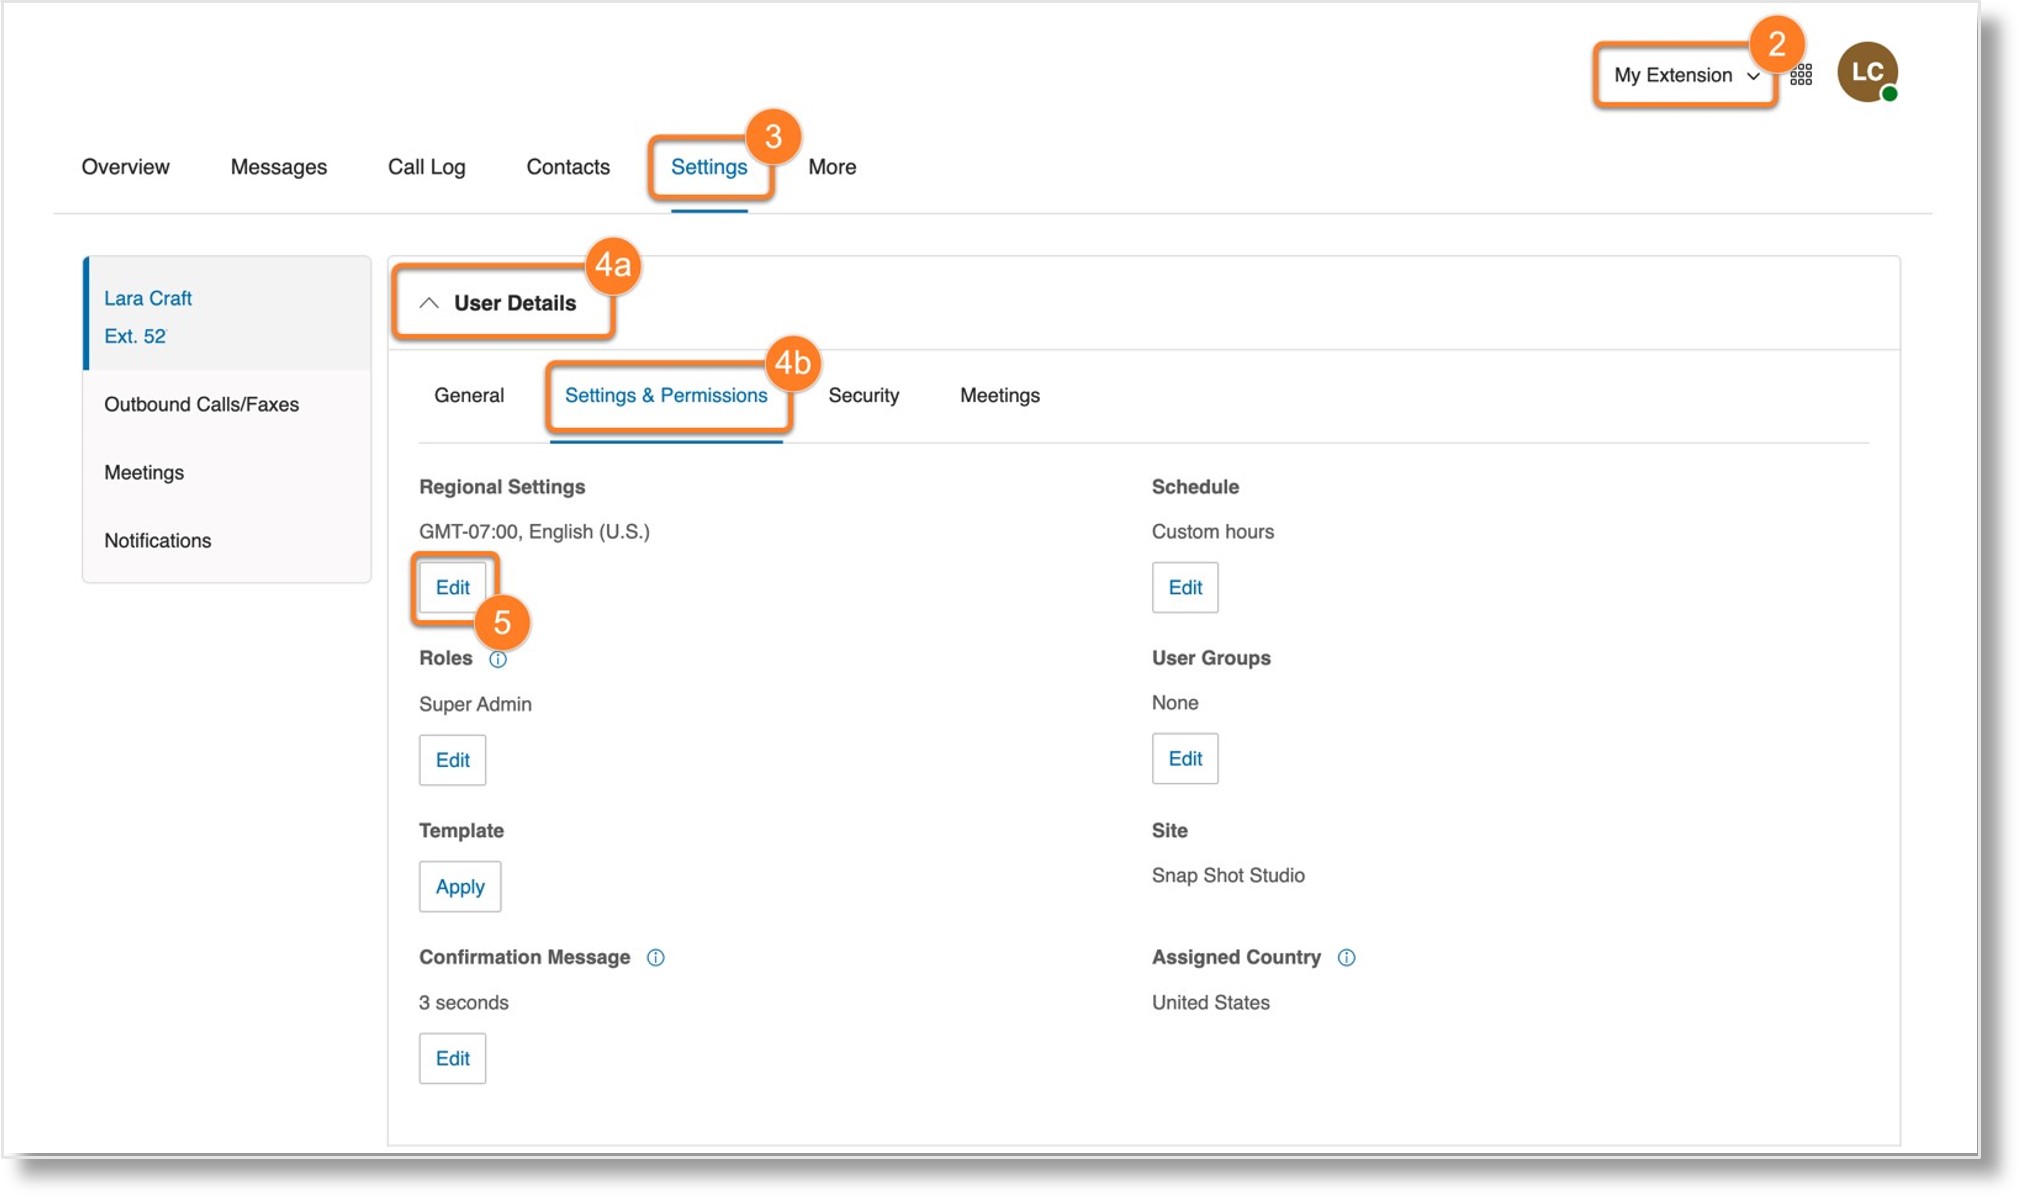
  1. Go to the Admin Portal and sign in.
  2. If you’re an admin, select My Extension from the dropdown at the top right.
  3. Click the Settings tab.
  4. Click the User Details dropdown (a), then select Settings & Permissions (b).
  5. Under Regional Settings, click Edit.

    Image of steps 1 through 5.

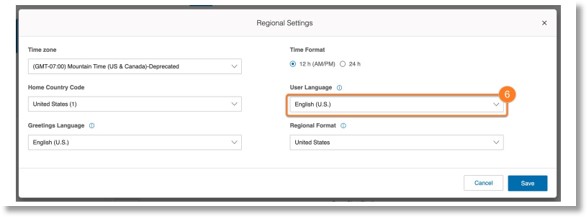
  6. Click the User Language dropdown, then select your preferred language. The Greetings Language and Regional Format selections will automatically change to the language you’ve chosen.
  7. Click Save.

    Image of step 6.