TOP

AT&T Enhanced Push-to-Talk

Use our self-help resources to learn how to place and receive calls, manage contacts and groups, send and receive alerts, and understand notifications.

See a list of compatible devices here.

Back to Product Page
Use the dropdown to get support, or purchase this product

Change the Location settings in AT&T Enhanced Push-to-Talk Web Dispatch

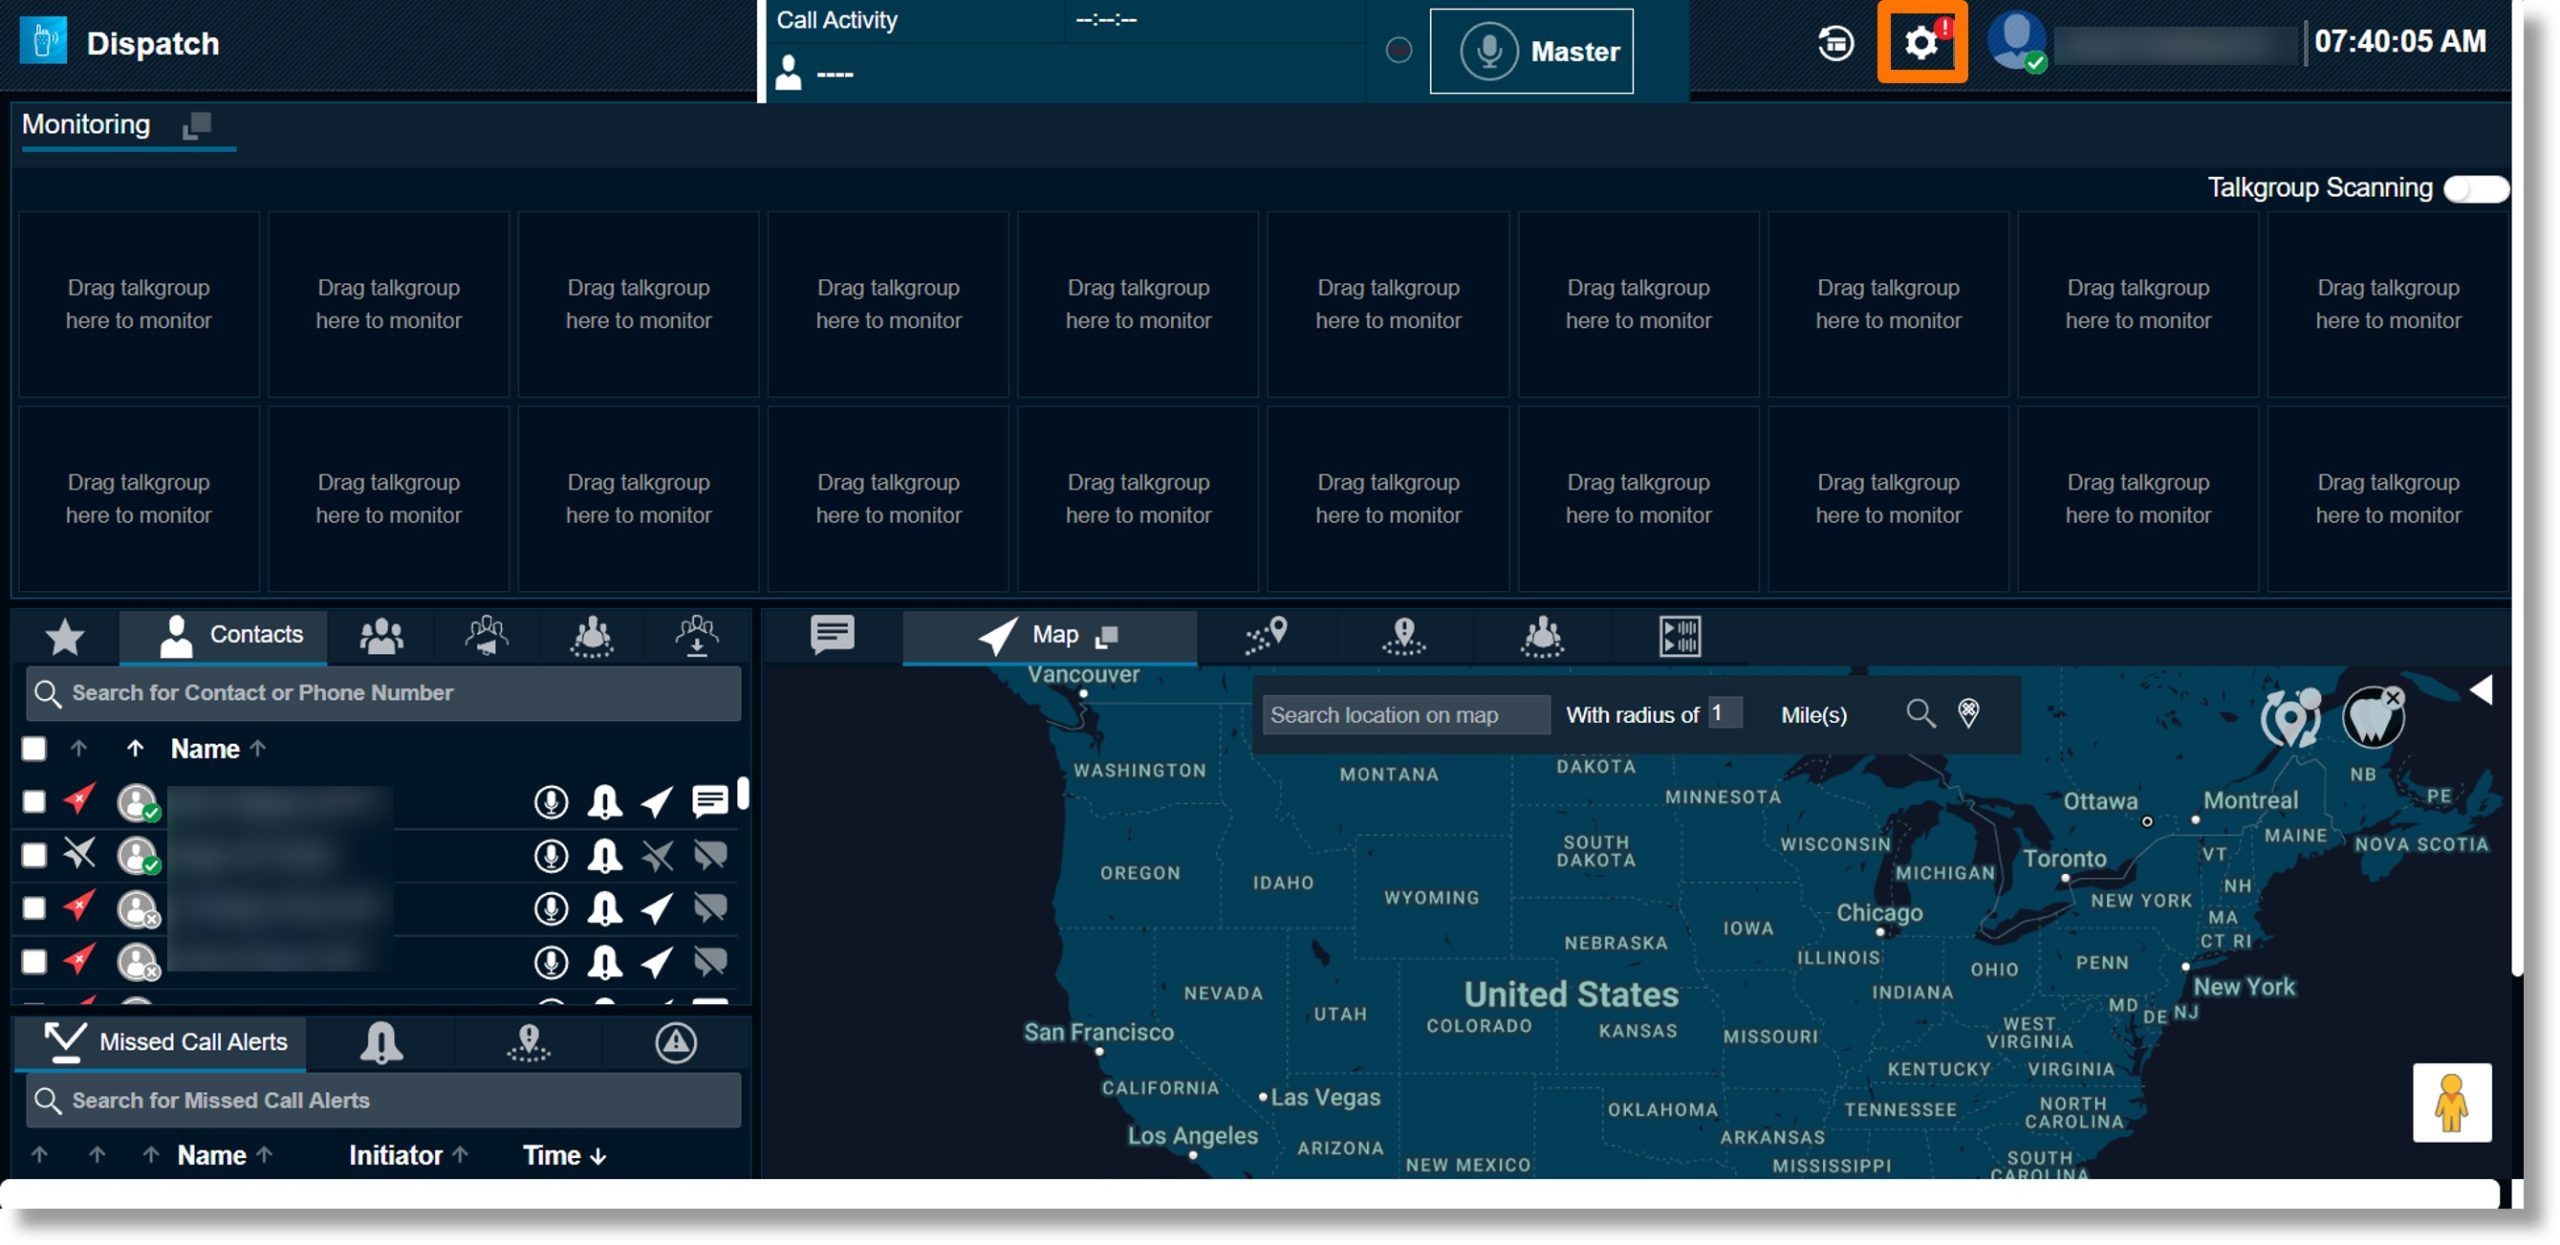
  1. Click on the gear icon Image of the gear icon. at the top right.

    Image of step 1.

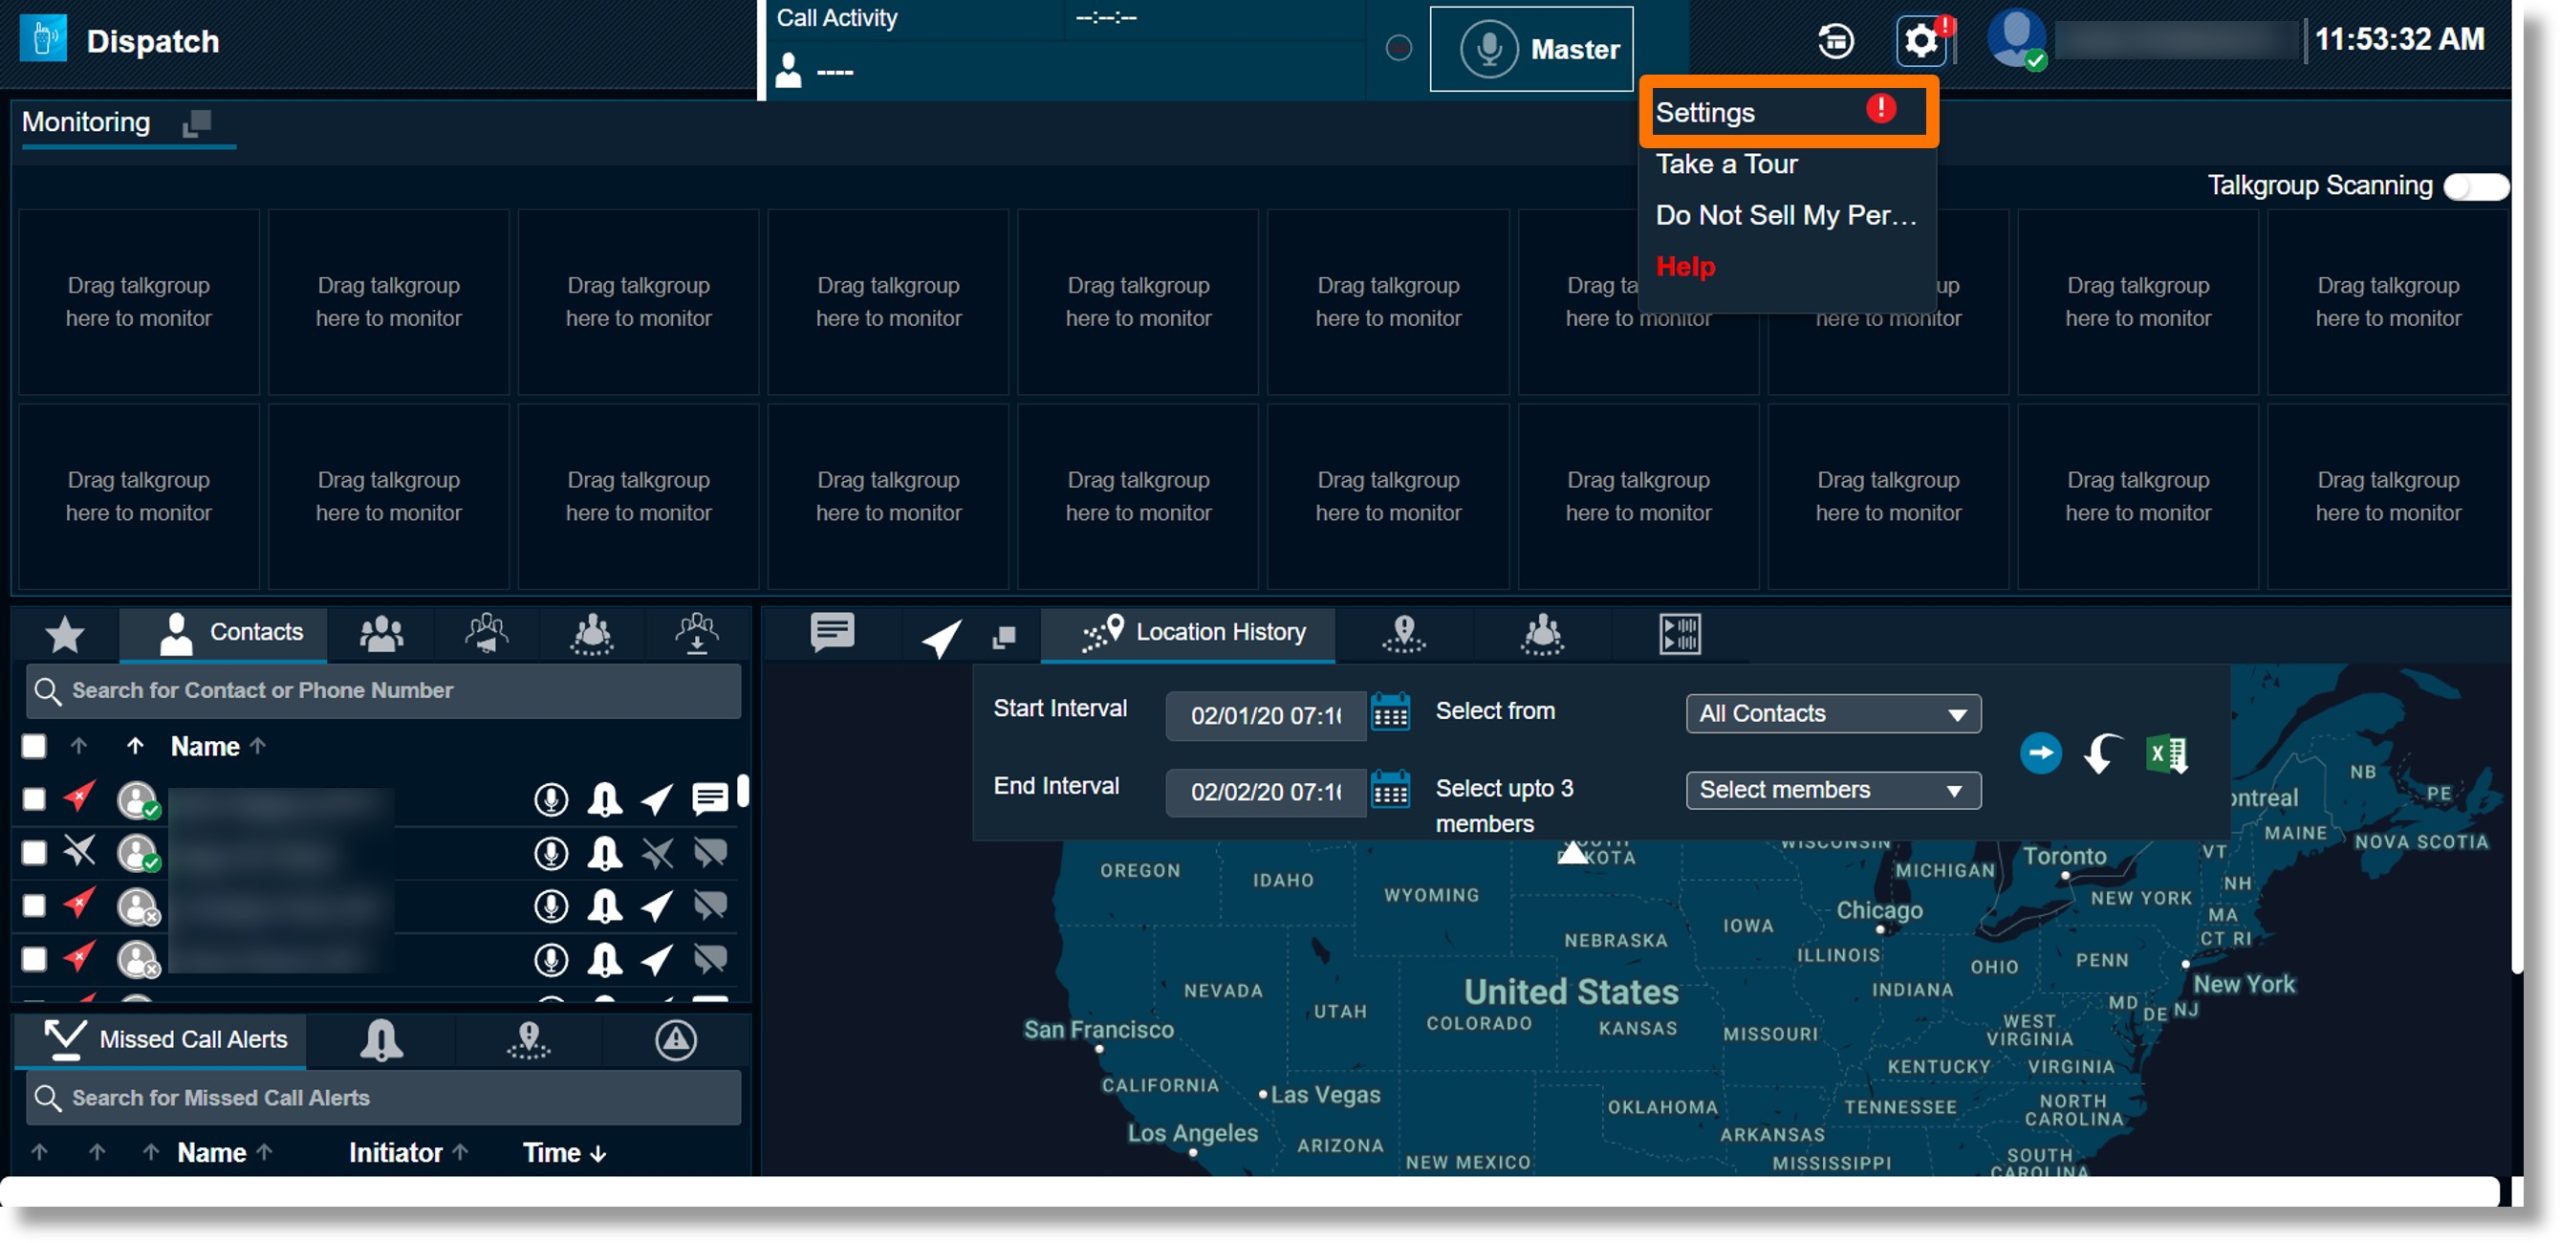
  2. Click on Settings in the menu.

    Image of step 2.

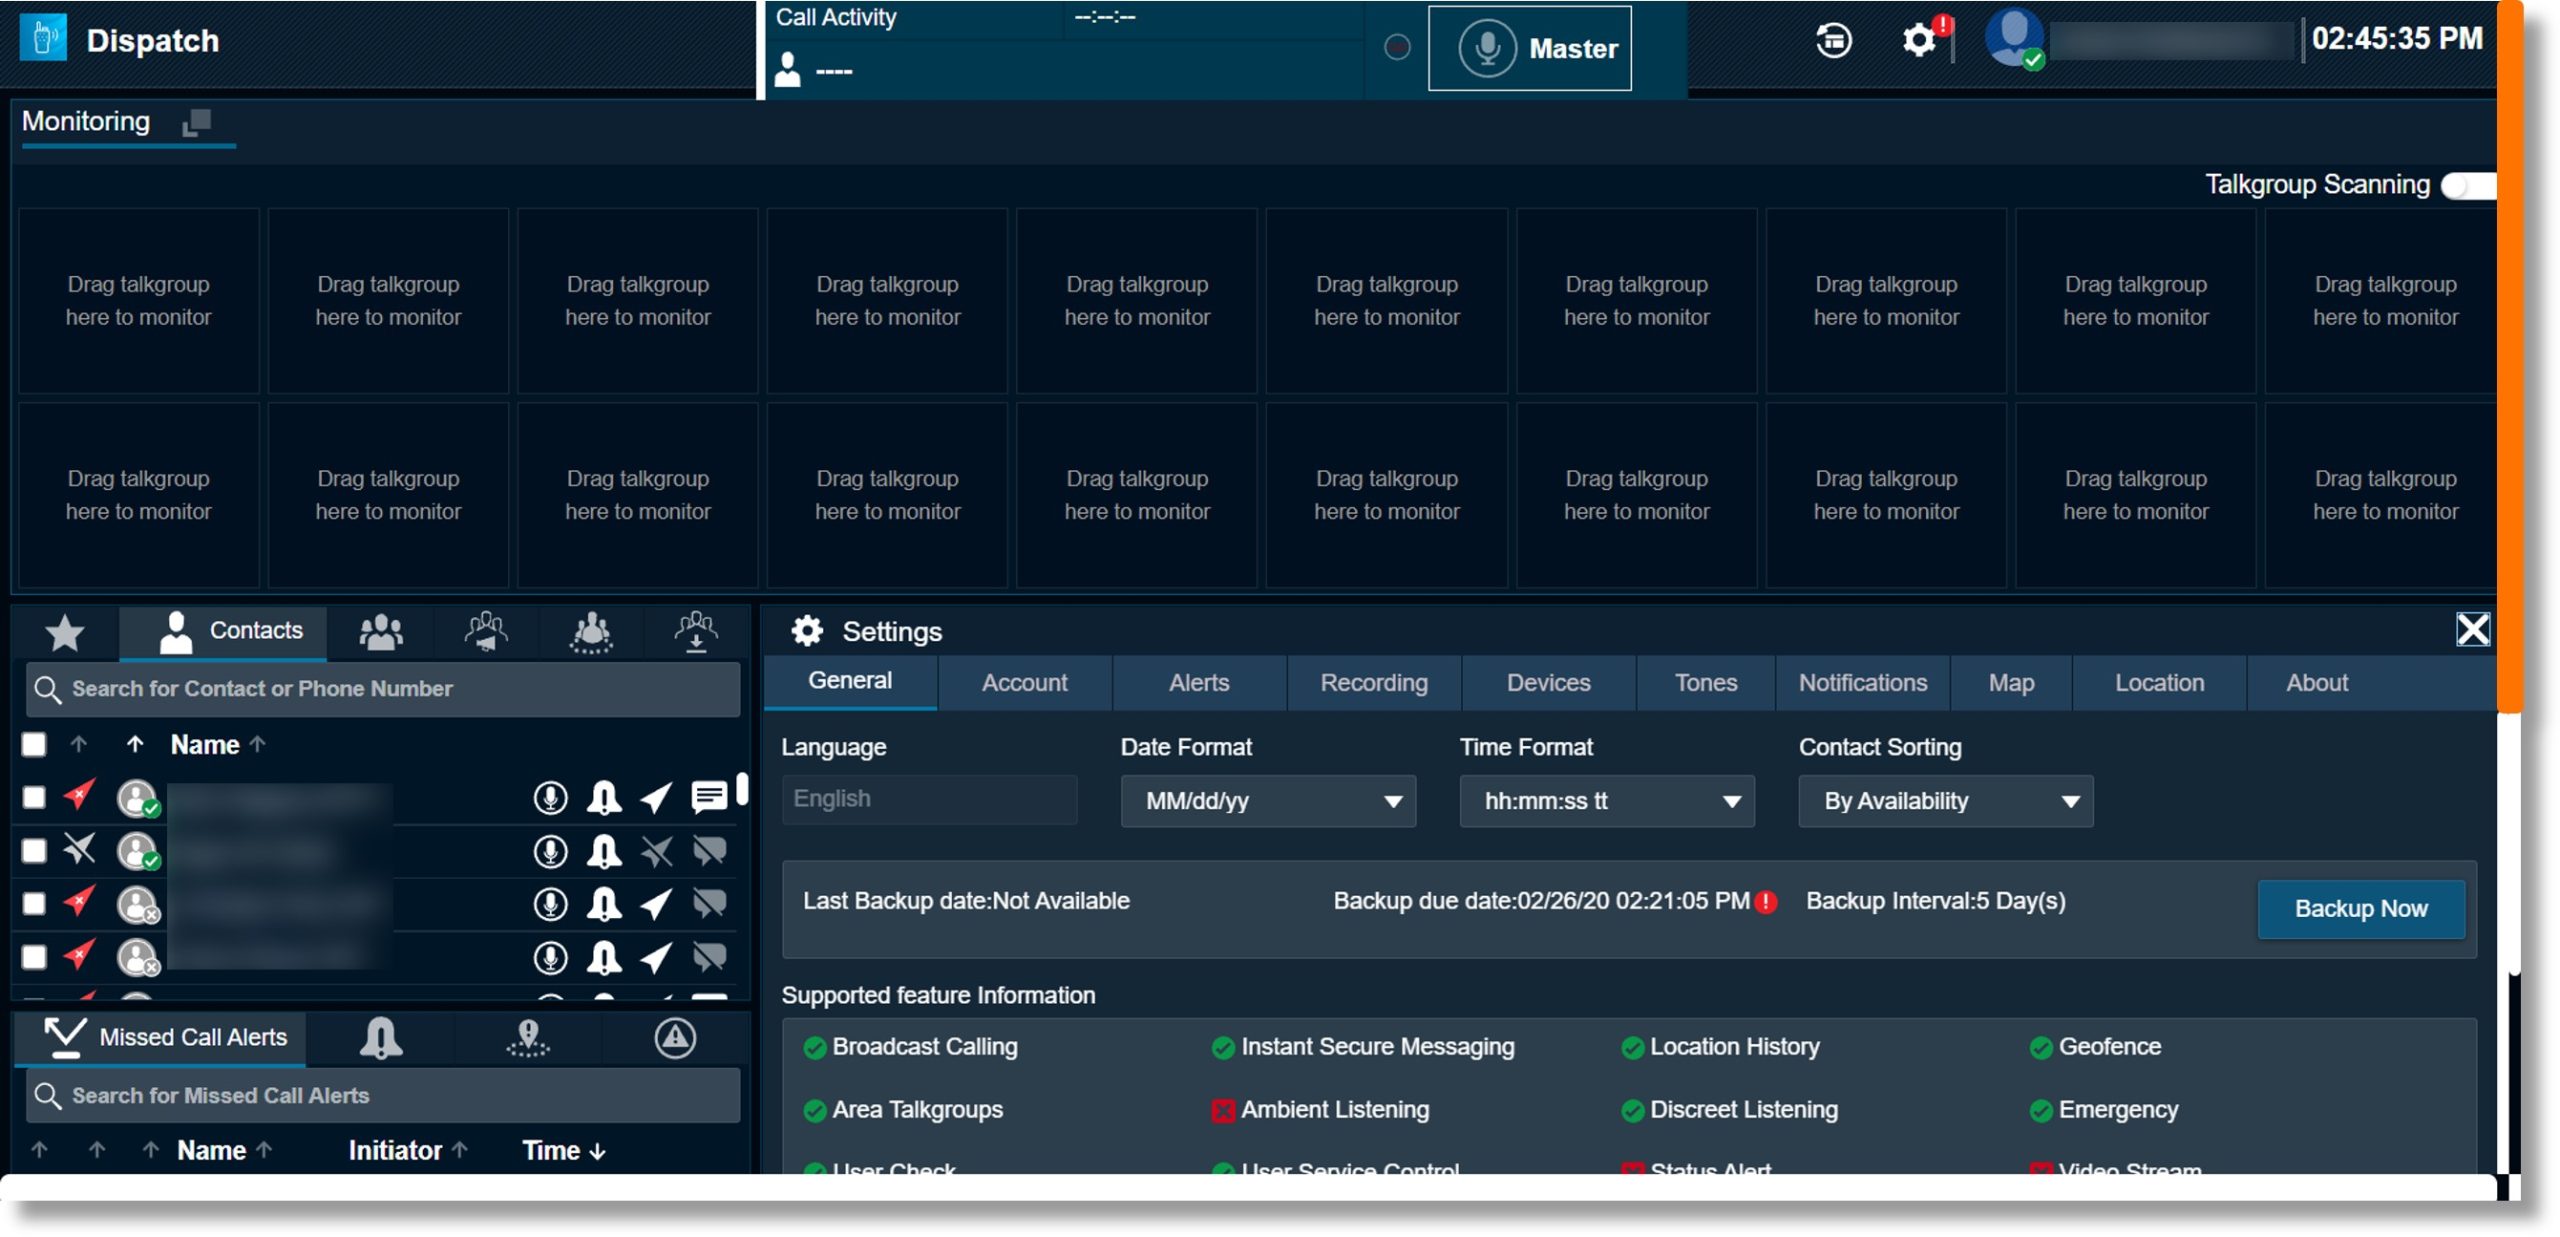
  3. Scroll down to the “Settings” section.

    Image of step 3.

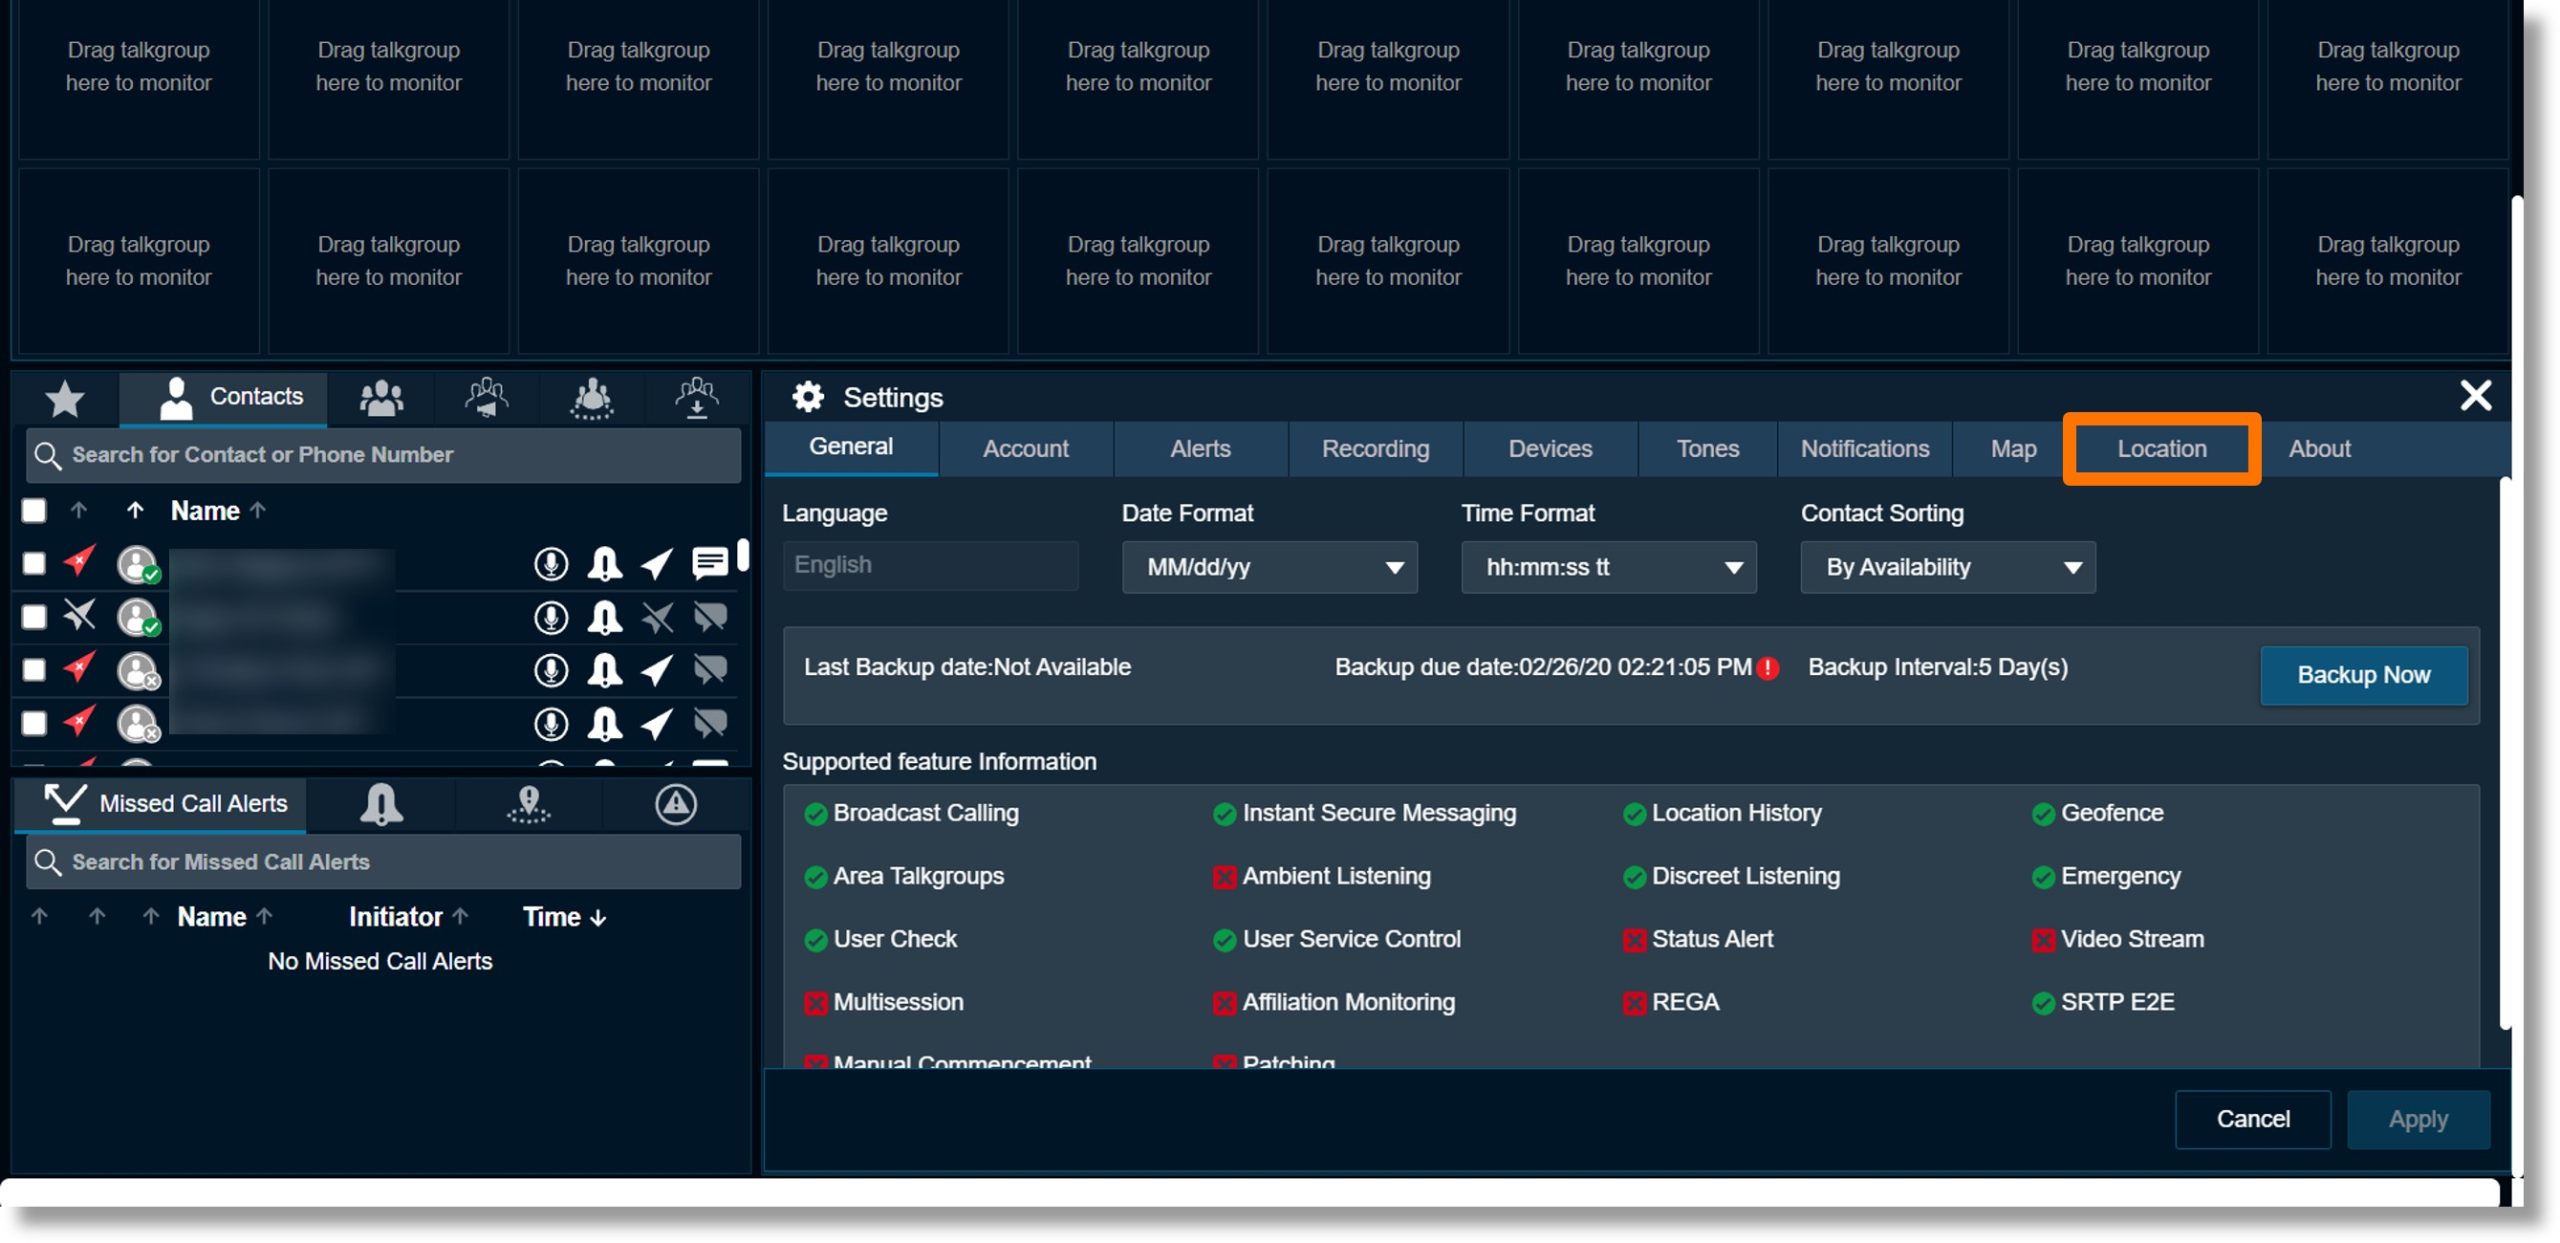
  4. Click on the Location tab.

    Image of step 4.

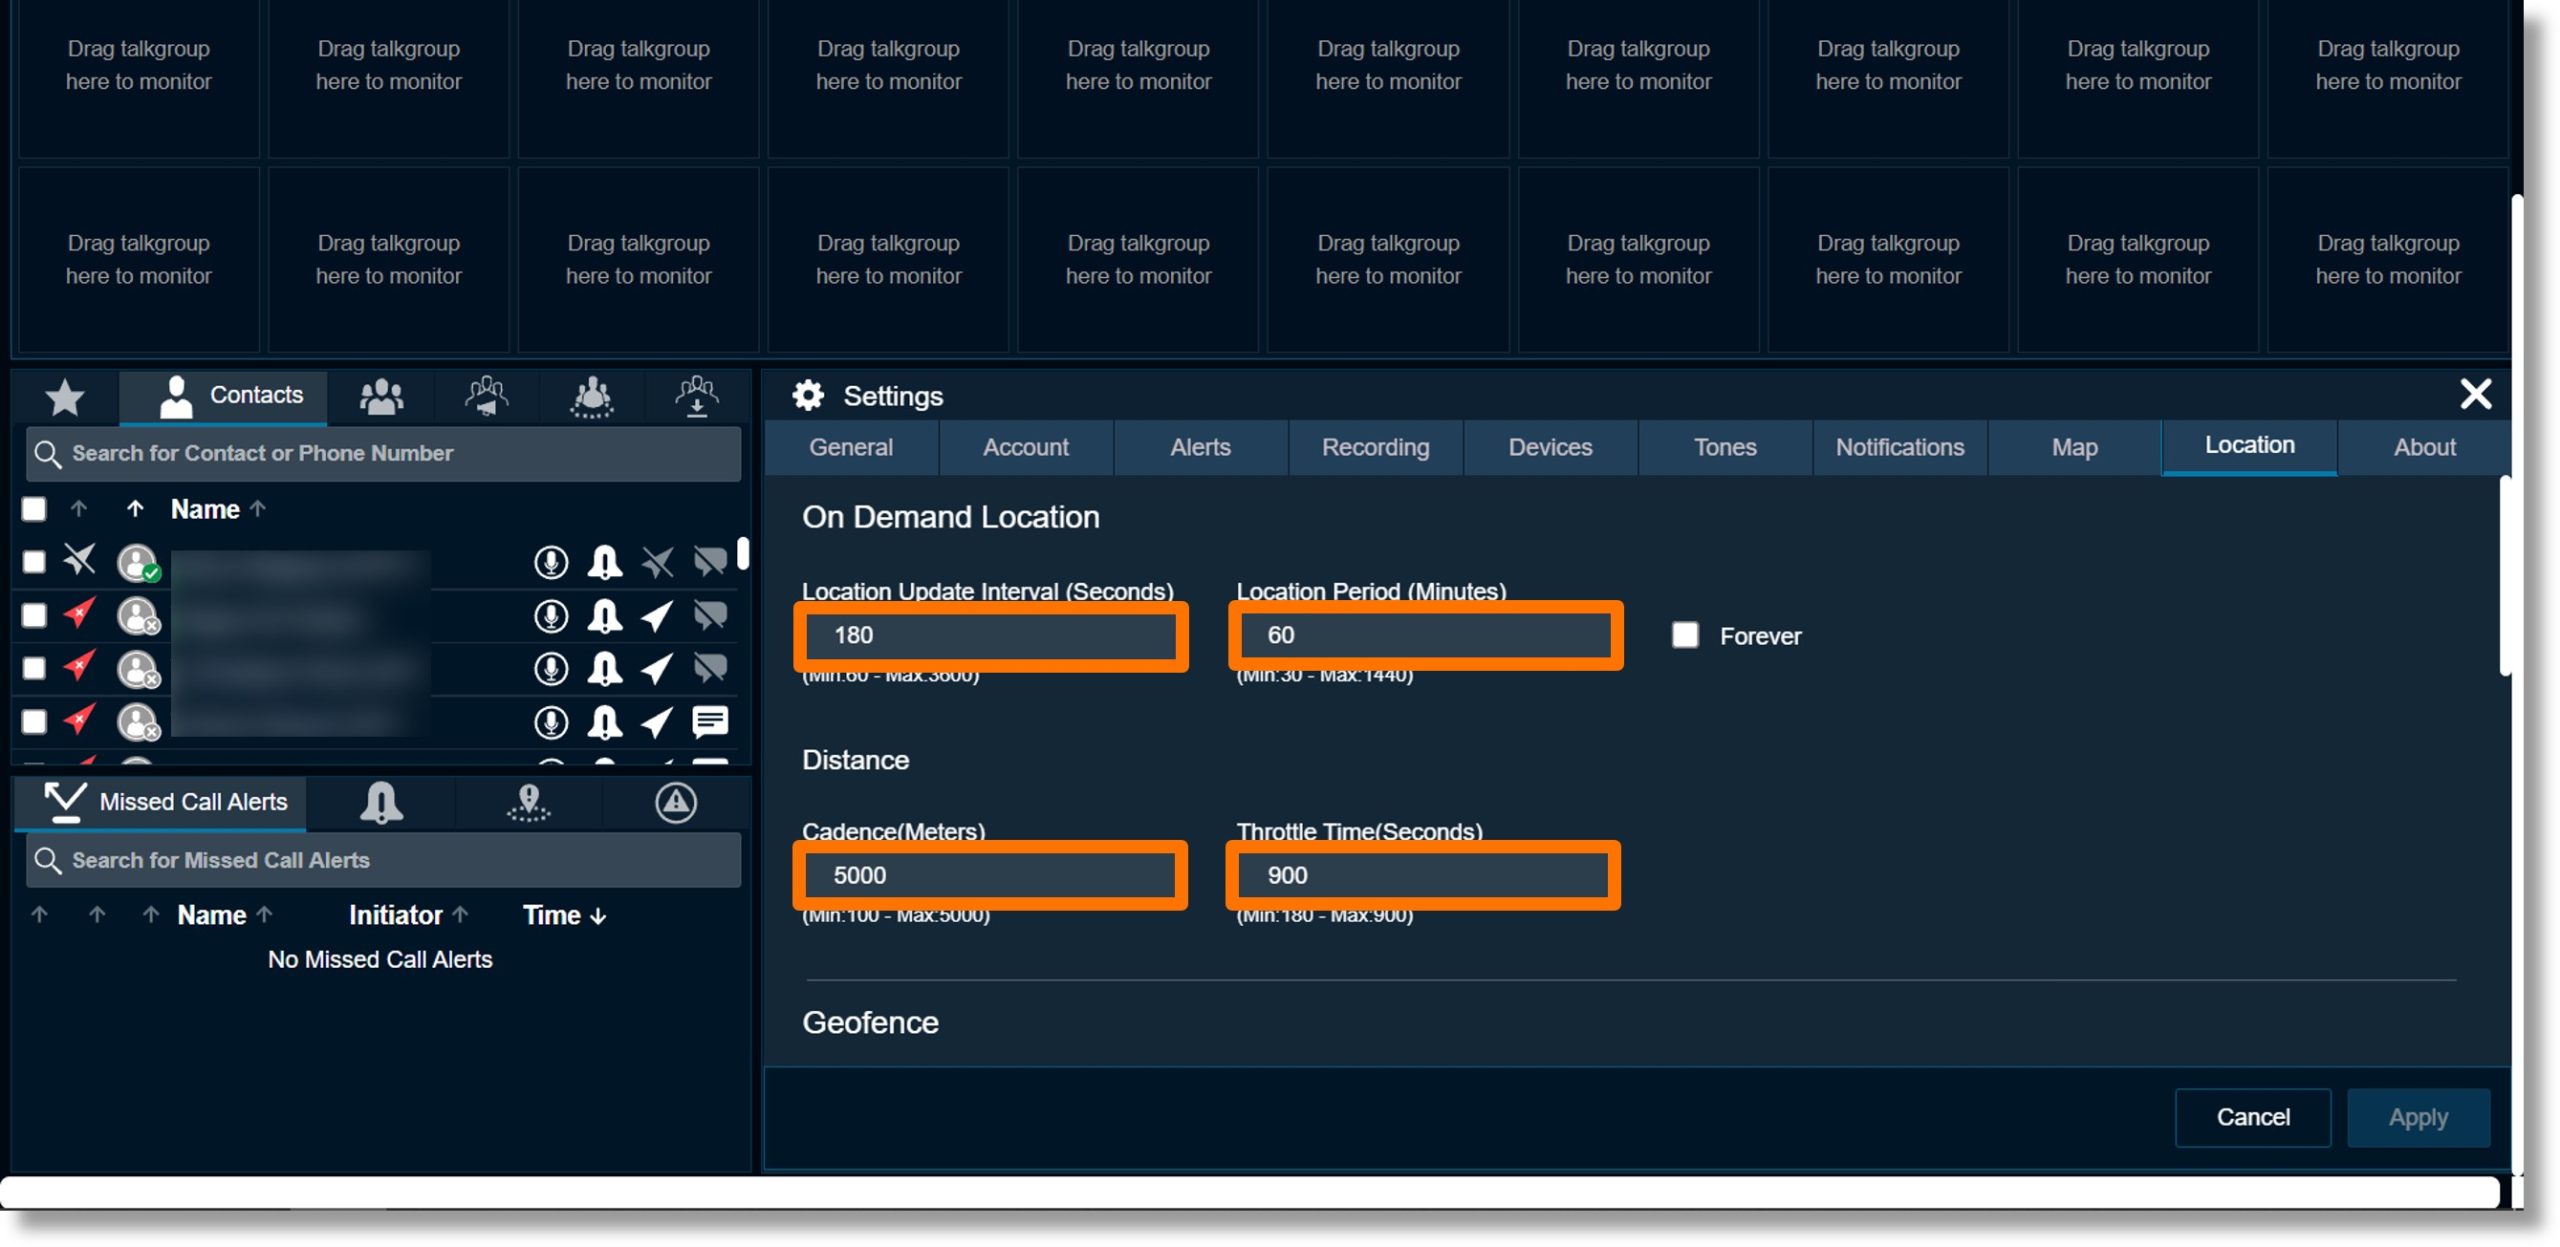
  5. Scroll to the “On Demand Location” section.
  6. The field under “Location Update Interval (Seconds)” shows how often the user’s GPS location is reported.
  7. The field under “Location Period (minutes)” shows the time the user’s GPS location is reported.
    Note: You can also click on the checkbox to the left of “Forever”.
  8. The field under “Cadence (Meters)” allows you to see how often the user’s location updates.
  9. The field under “Throttle time (Seconds)” allows you to adjust for users in transit, and reporting requests would drain the device’s battery.

    Image of steps 5 through 9.

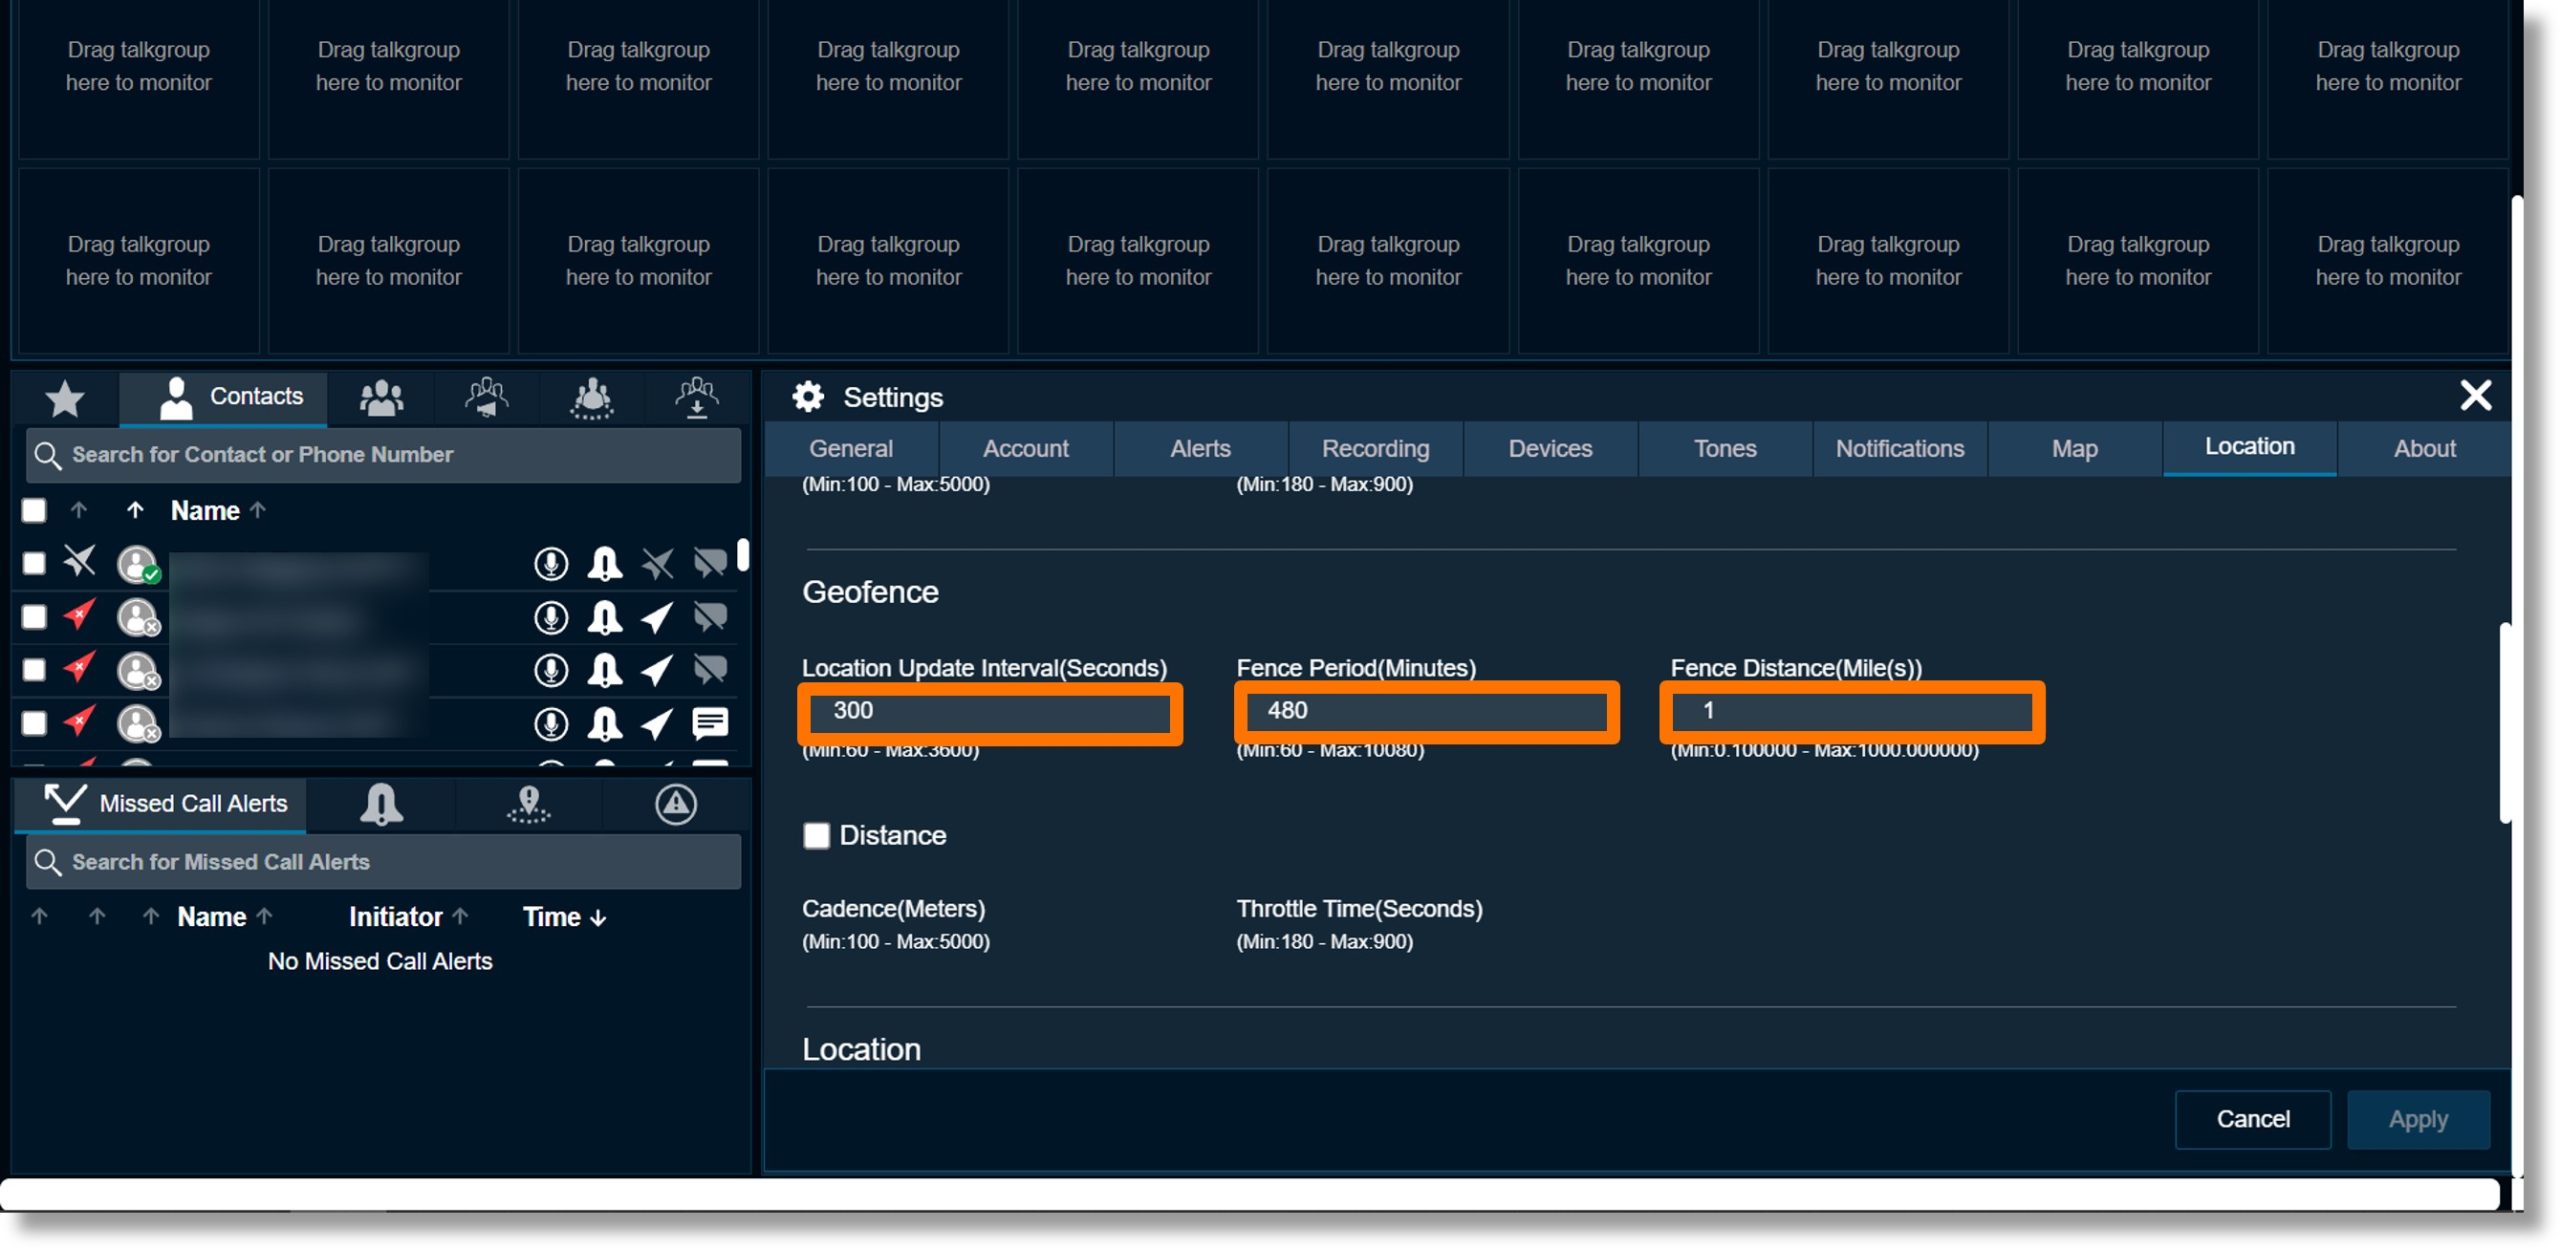
  10. Scroll to the “Geofence” section.
  11. The field under “Throttle time (Seconds)” allows you to adjust for users actively in transit, and reporting requests would drain the device’s battery.
  12. Click on the field to the right of “Fence Period (Minutes)” to set the desired timeframe for how long the user’s location should be reported while in a geofenced area.
  13. Click on the field to the right of “Fence Distance (Mile(s))” to set the desired default geofence distance.
  14. Click the check box to the left of “Distance” to manually enter the “Cadence” and “Throttle time” settings for a geofence.

    Image of steps 10 through 14.

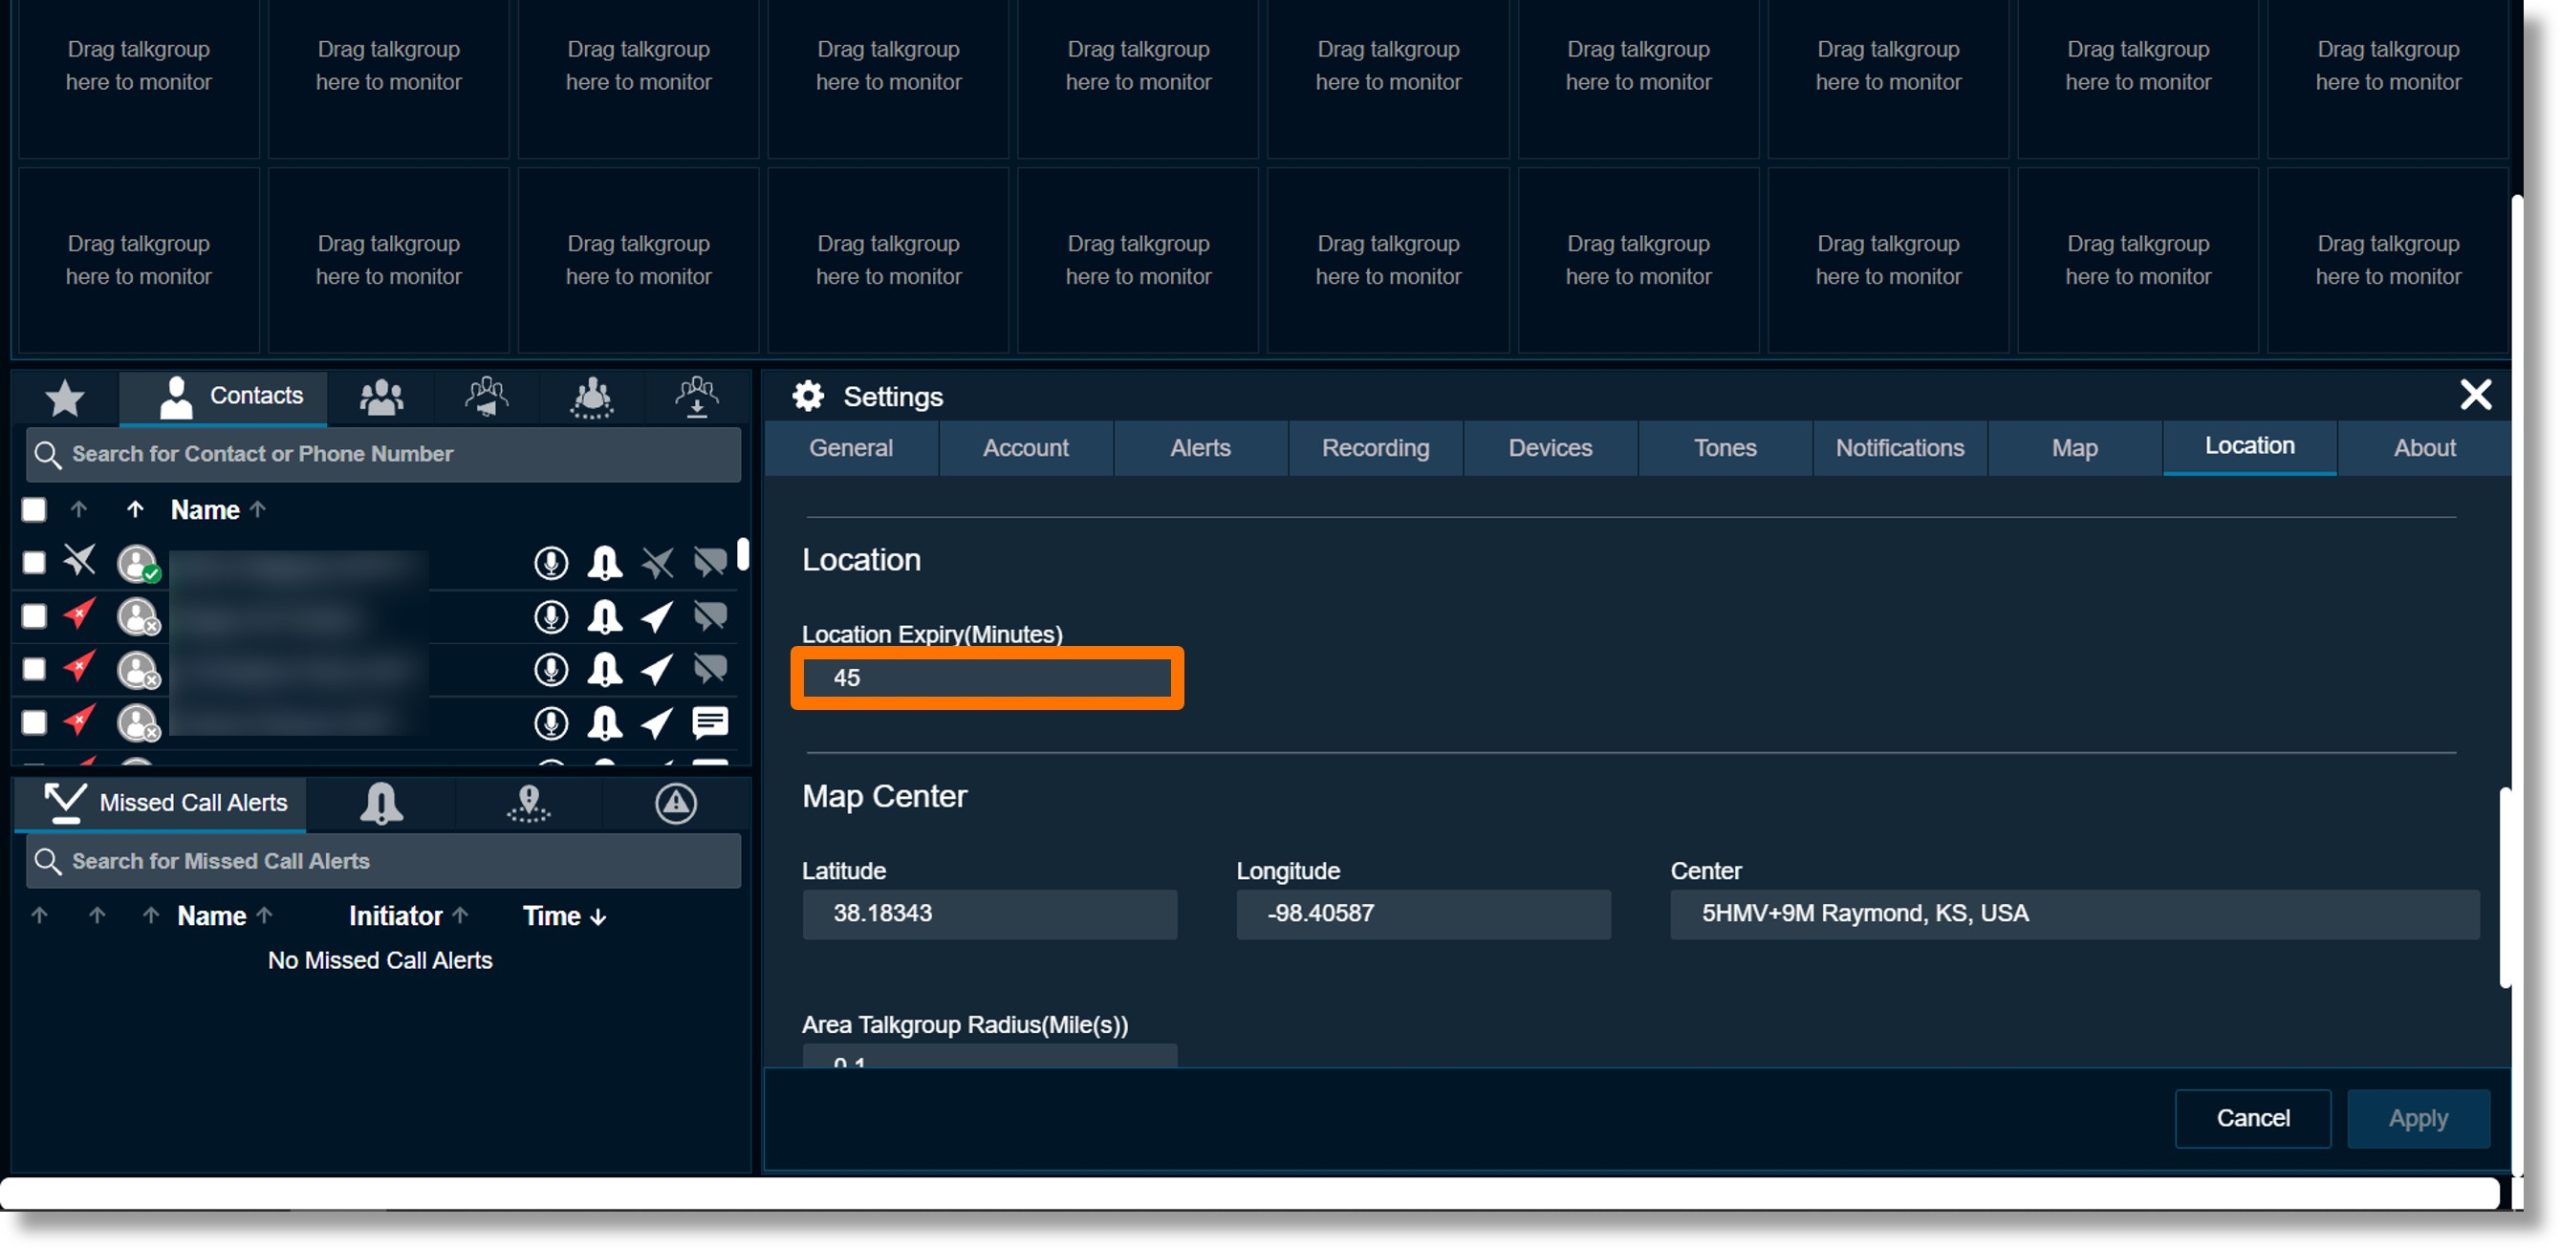
  15. Scroll to the “Location” section.
  16. Click on the field under “Location Expiry(Minutes)” to set how much time before a user’s location is set to “Expired”.

    Image of steps 15 and 16.

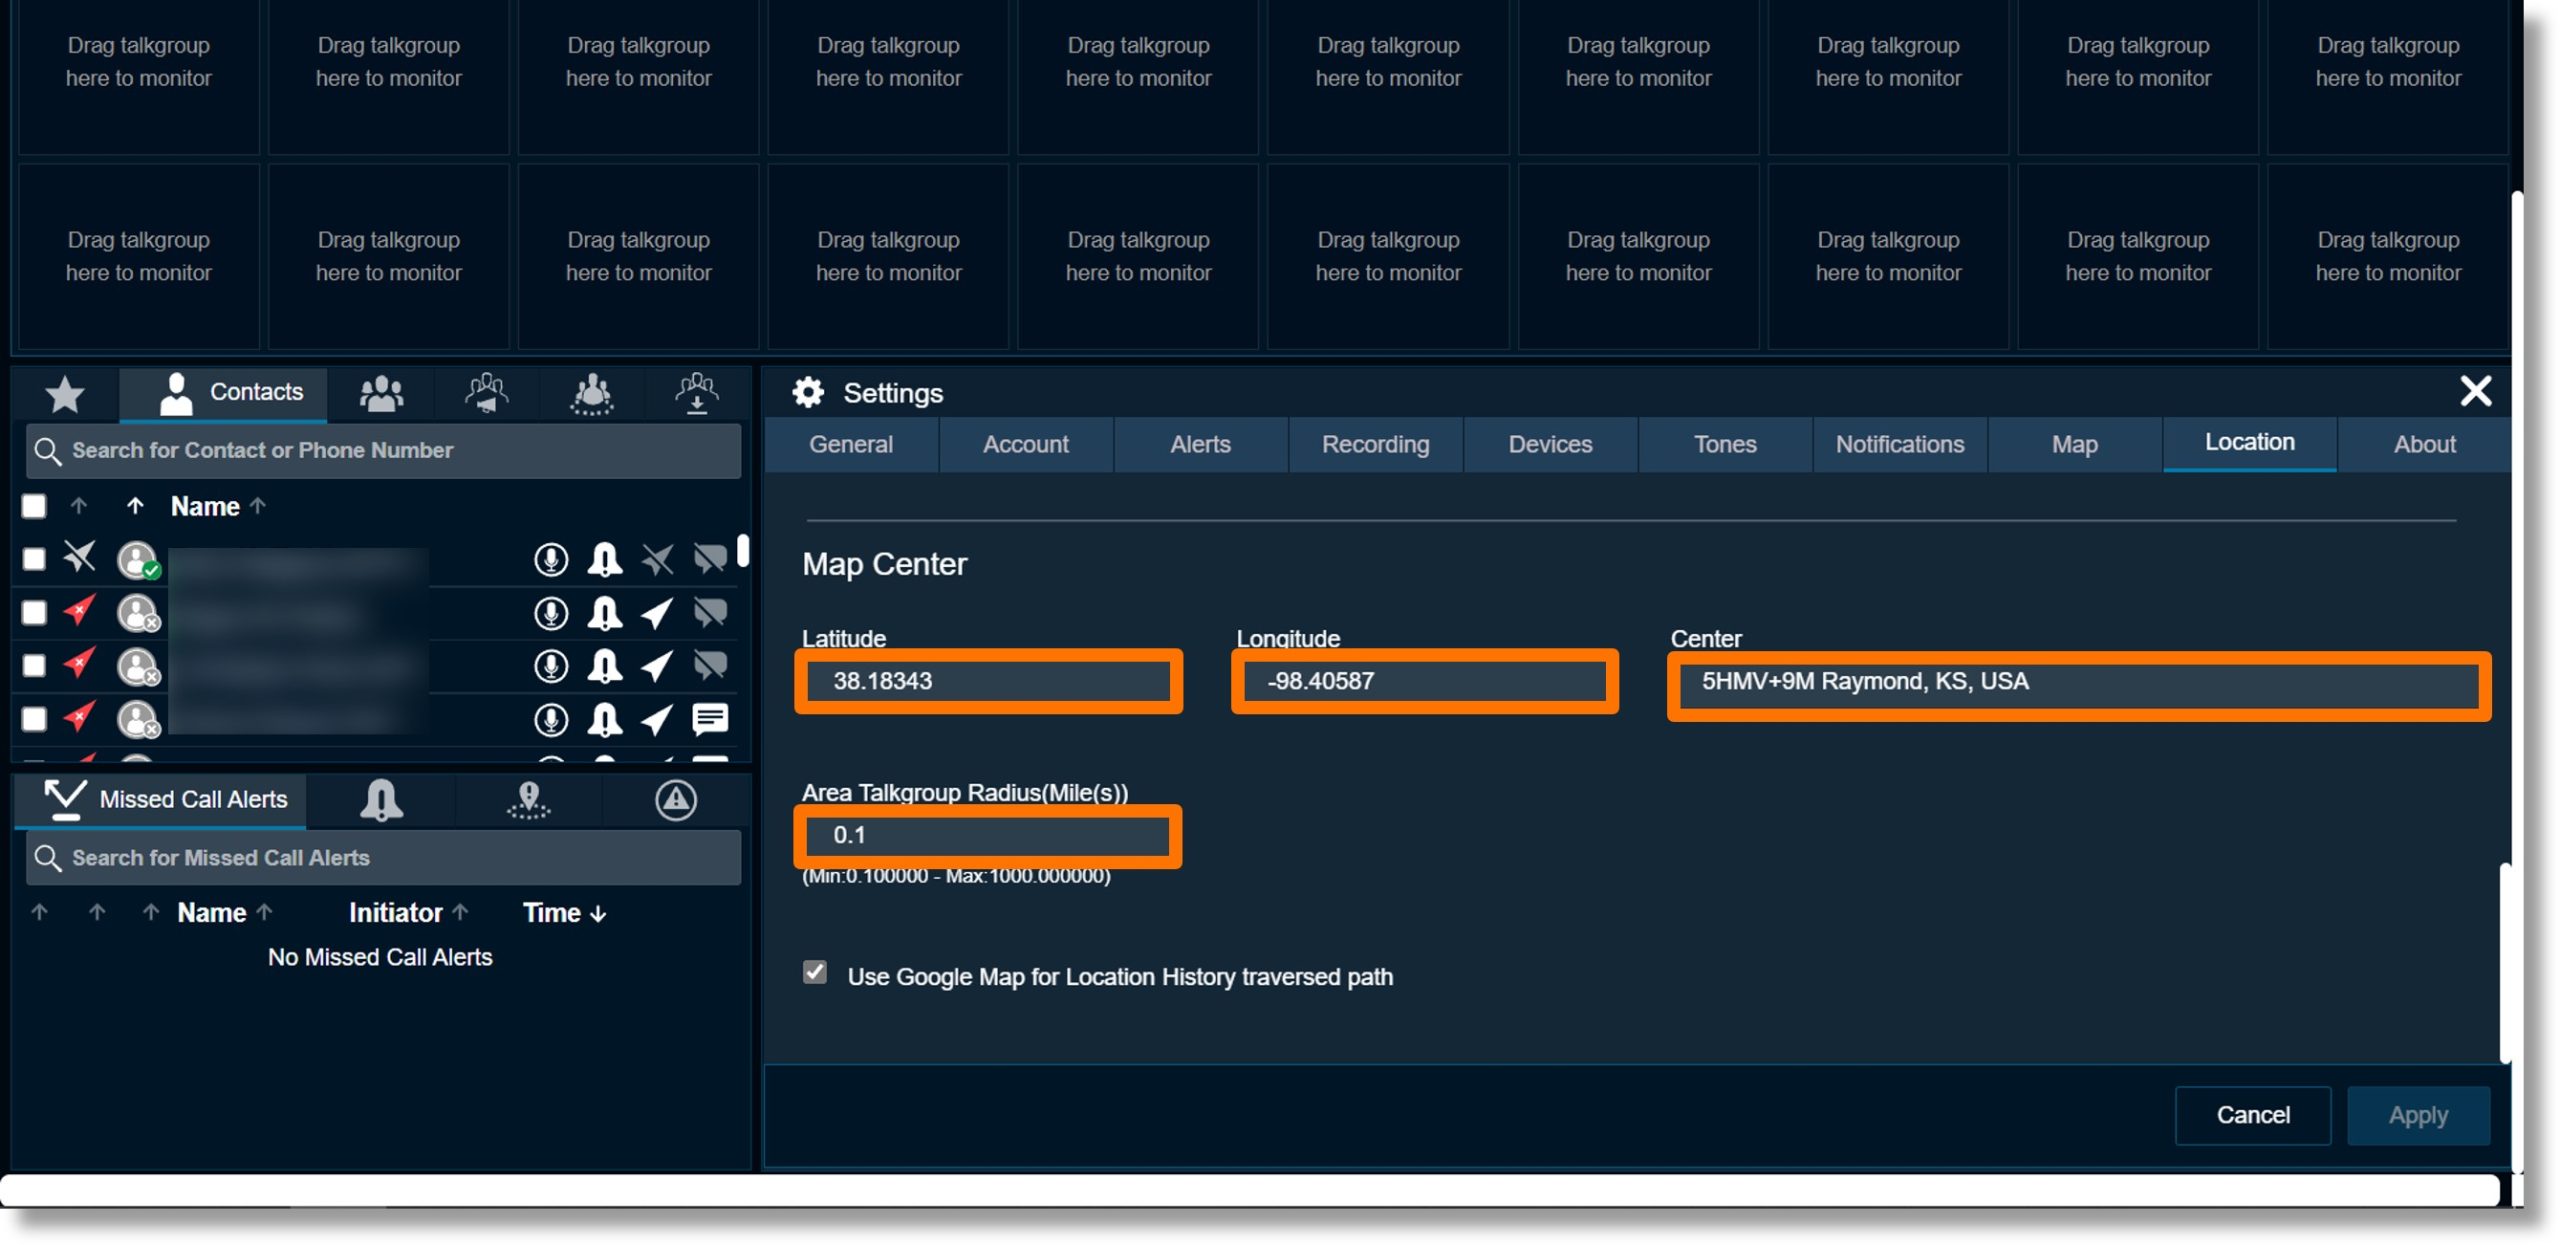
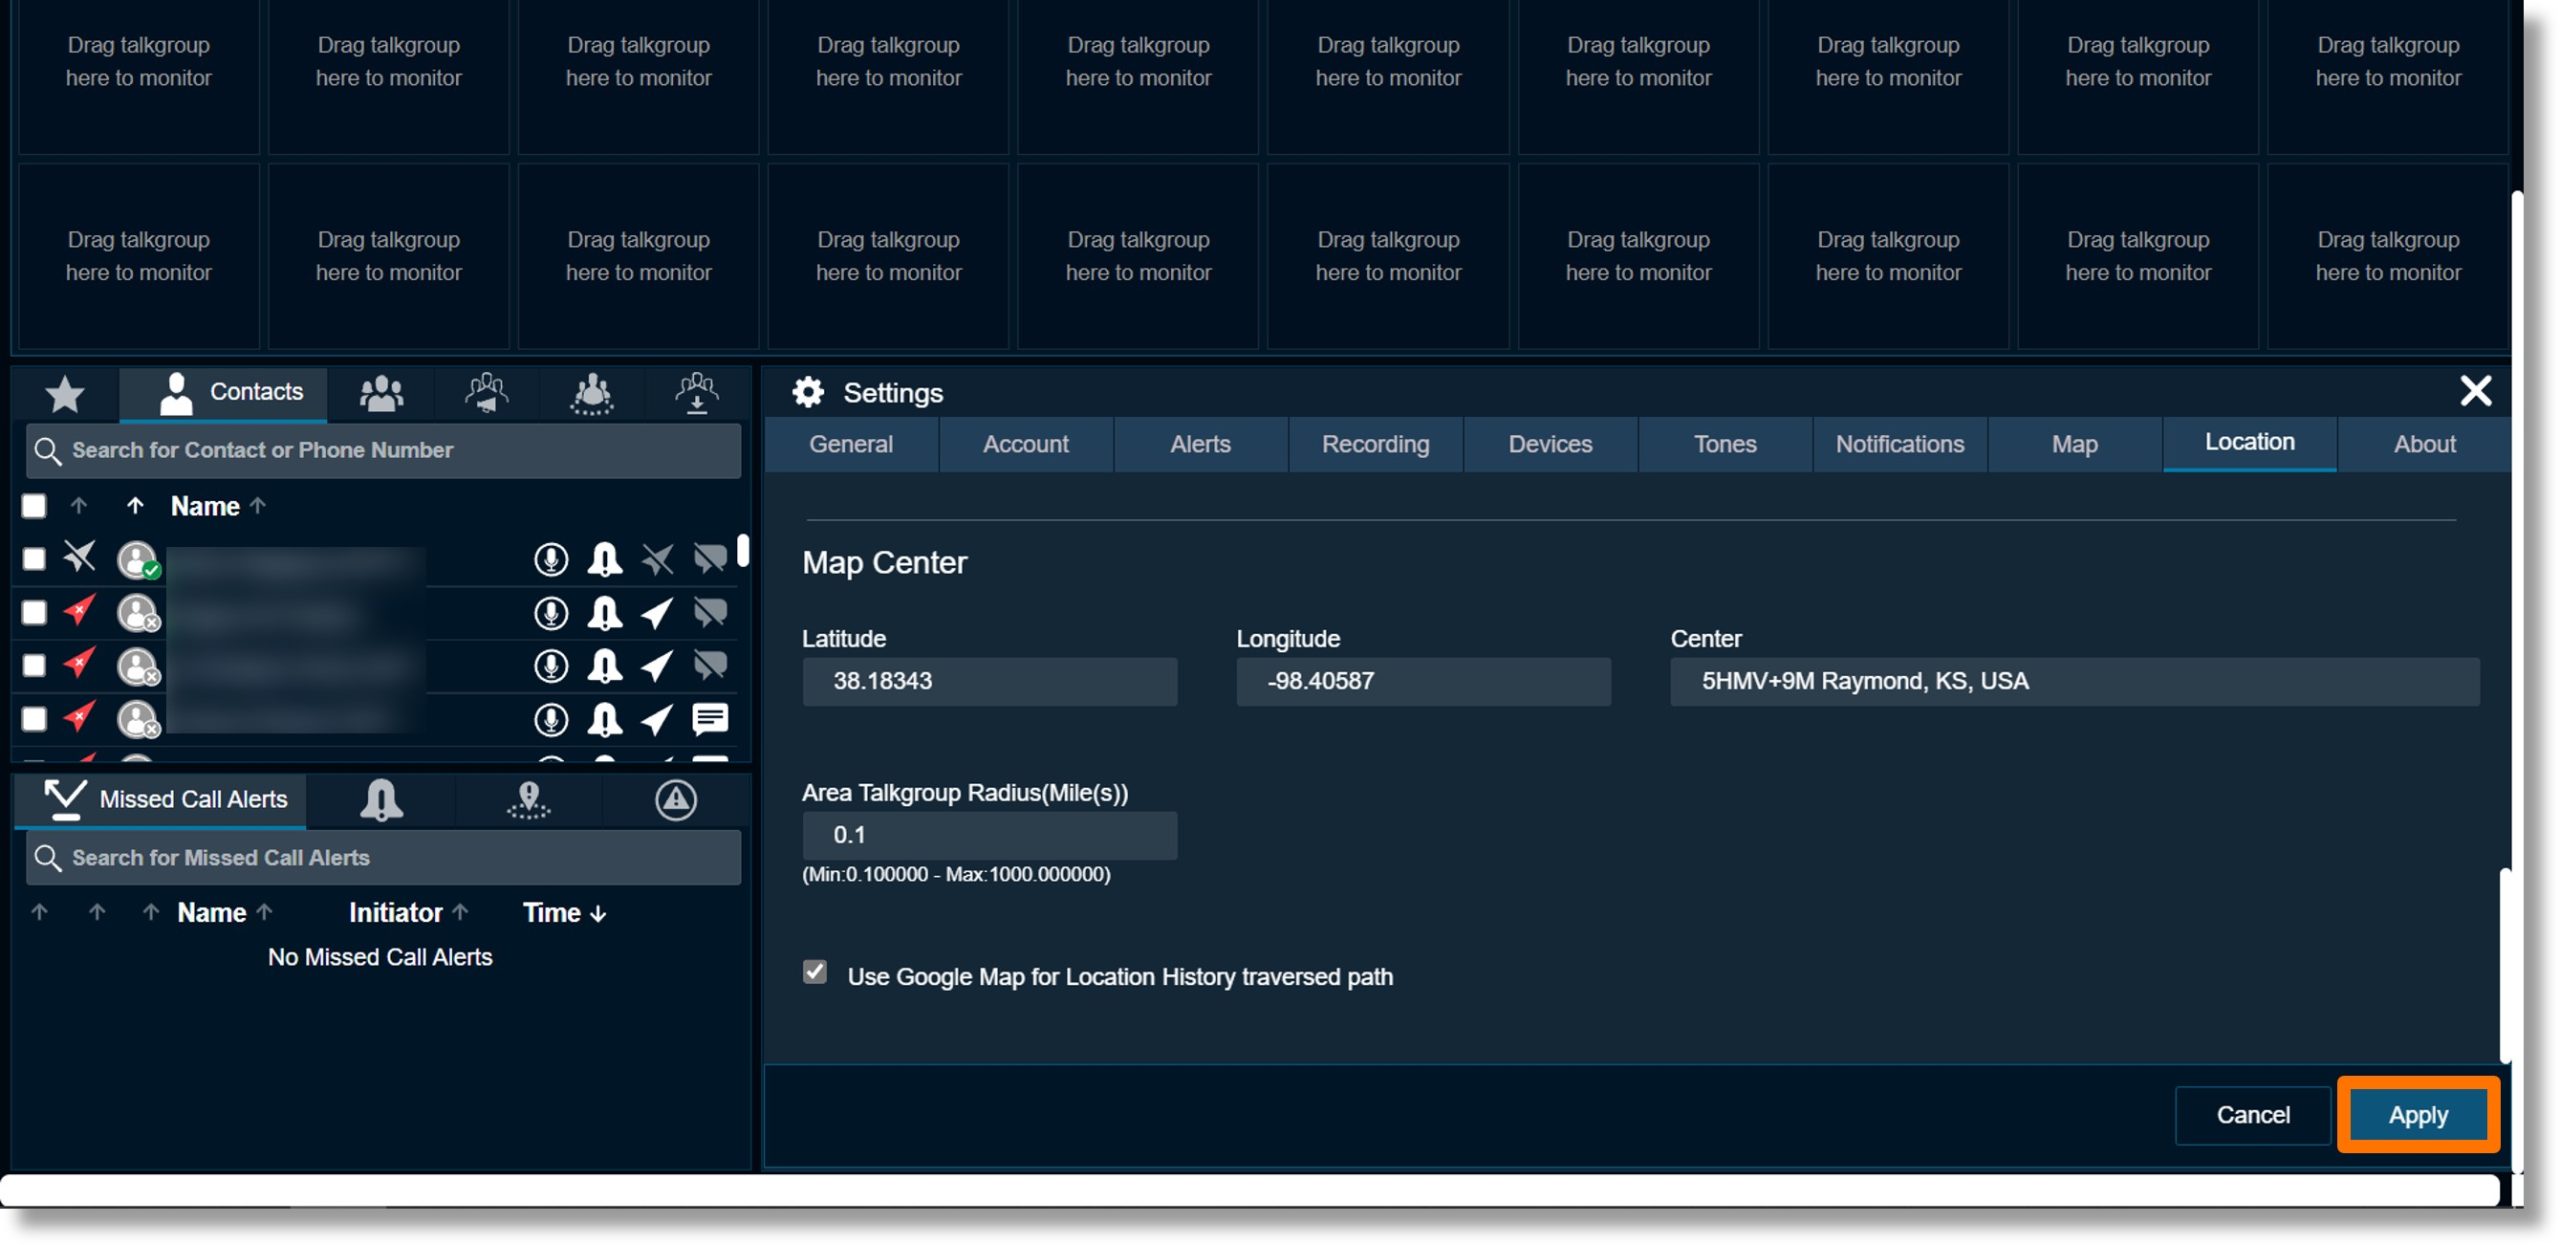
  17. Scroll to the “Map Center” section.
  18. The field to the right of “Center” displays the location configured as the default view for the map.
  19. The values under “Latitude”, “Longitude”, and “Center” automatically populate based on the map center location.
  20. Click on the field under “Area Talkgroup Radius (Mile(s))” to enter the desired default radius for area talkgroups.
  21. Click the checkbox to the left of “User Google Map for Location History traversed path” to show the user’s paths via Google maps.
    Note: If you disable this option, the user’s path is shown as a straight line from start to finish.

    Image of steps 17 through 21.

  22. Click on the Apply button to save the changes.

    Image of step 22.