AT&T Office@Hand for Learning Tools Interoperability (LTI) Configuration Setup
Step 1: Add or View a configuration
Navigate to the AT&T Office@Hand for LTI app gallery listing to sign in and begin your setup. Click on Add configuration to connect your Learning Management System (LMS) Tool with AT&T Office@Hand Video using a step-by-step wizard.
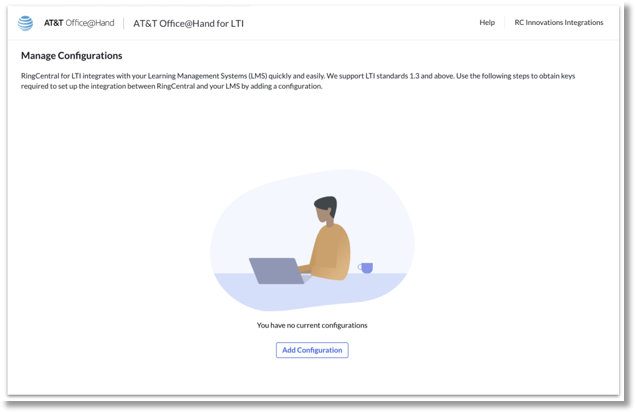
Figure 2.1
Click on View details to any previous configurations. Click on More menu to delete an existing configuration.
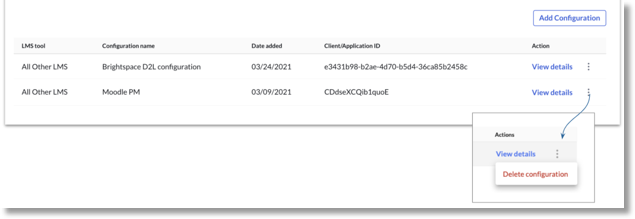
Figure 2.2
Step 2: Select the LMS tool
Select the Blackboard as the LMS tool to configure with AT&T Office@Hand. Click Next.
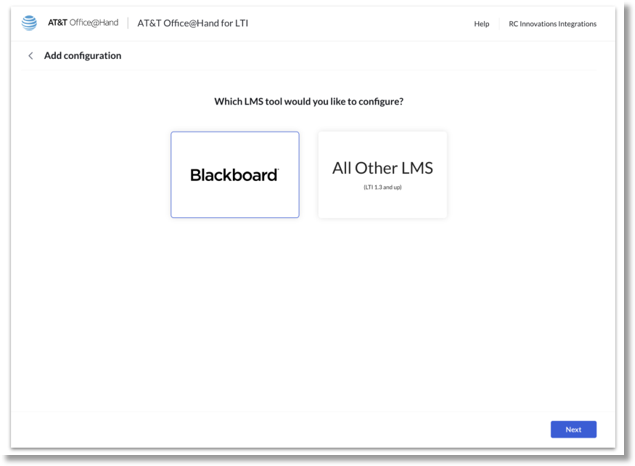
Figure 3
Step 3: Step-by-Step configuration wizard
Step 3.1: Enter a name and a brief description (optional) of the configuration.

Figure 4.1
Step 3.2: Client and Deployment ID
Step 3.2.1: Copy the Client ID displayed in Step 2 of the configuration wizard.
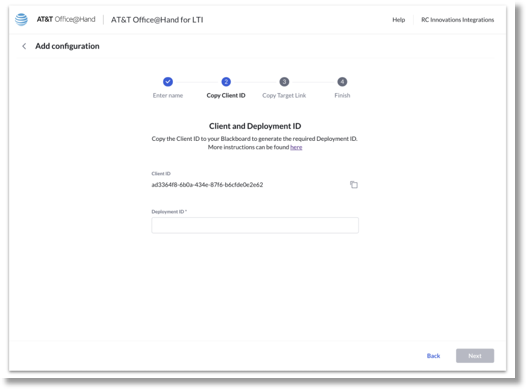
Figure 4.2
Step 3.2.2: Navigate back to the Blackboard account to the Administrator Panel. Click on System Admin tab and scroll down to click on LTI Tool Providers.
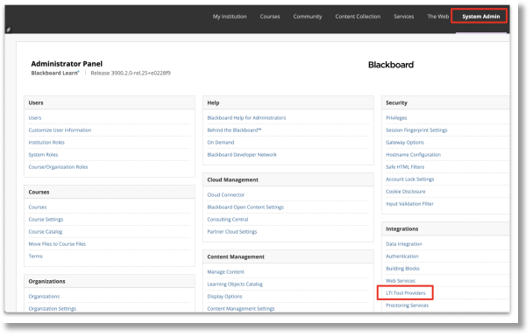
Figure 4.3
Step 3.2.3: Next, click on Register LTI 1.3 Tool. Paste the Client ID that was copied in the beginning of this step 3.2.1. Click Submit.
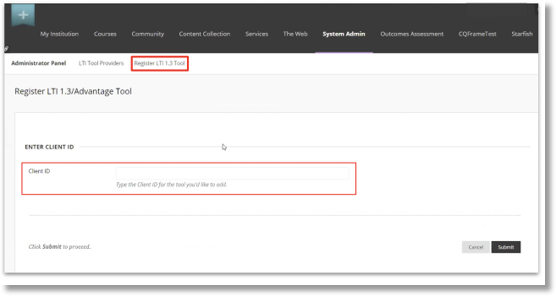
Figure 4.4
Step 3.2.4: Copy the Deployment ID displayed in the Tool Status page. Enter a name and description of the tool.
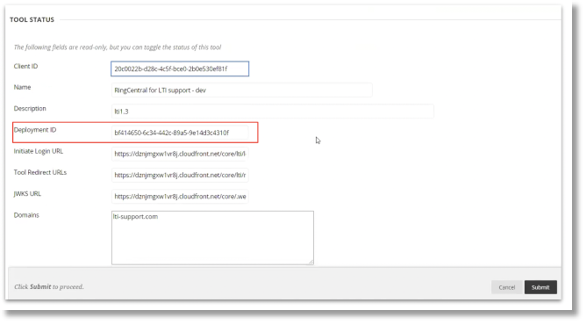
Figure 4.5
Step 3.2.5: Navigate back to AT&T Office@Hand for LTI webpage to paste the Deployment ID under Step 2 of the configuration wizard. Click Next.
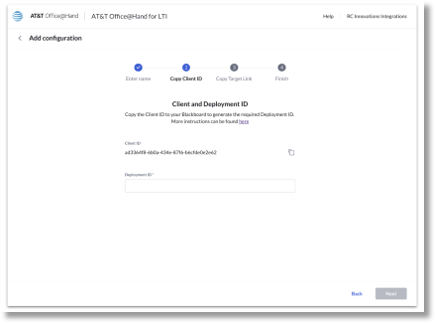
Figure 4.6
Step3.3: Copy Target Link URI.
Step 3.3.1: Copy the Target Link URI displayed in Step 3 of the configuration wizard (shown in Figure 3.7). This key is required while adding the AT&T Office@Hand tool to a course and managing its placement within the course.
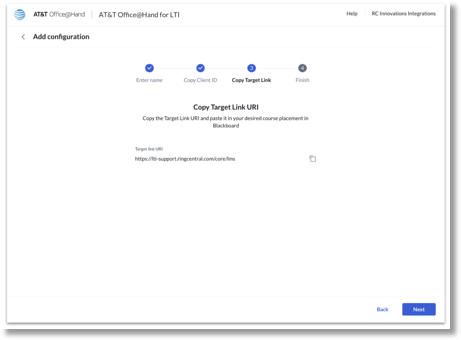
Figure 4.7
Step 3.3.2: Navigate to Blackboard interface to the list of LTI Tool Providers.
Search using the name of the tool (Ex: AT&T Office@Hand). Click on the downward arrow next to the name and click on Manage Placements. Next, click Create Placement.
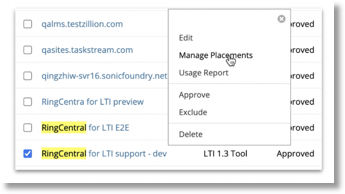
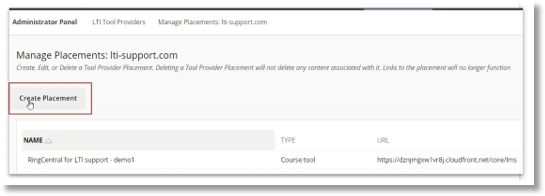
Figure 4.8
Step 3.3.3: Enter values for the required fields – Label, Handle, Availability and Type. Select Yes for Availability and select Course tool -> Allow student access to make the tool available to students for all their courses.
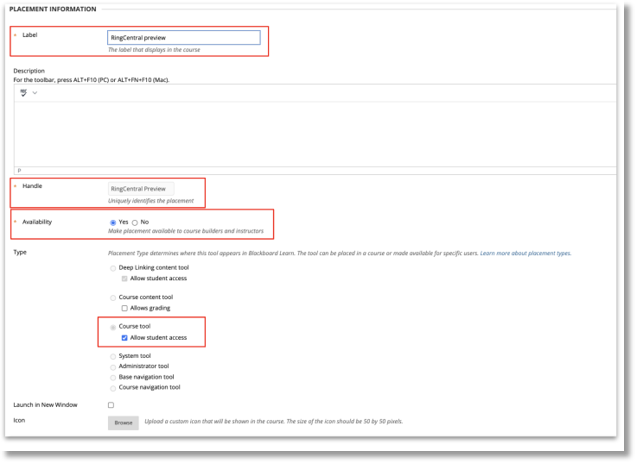
Figure 4.9
Step 3.3.4: Next, scroll down and paste the Target Link URI copied at the beginning of this step (Step 3.3). Click Submit.
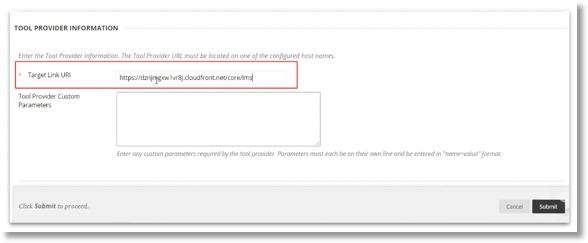
Figure 4.10
Step 3.4: Finish Configuration.
Navigate back to AT&T Office@Hand for LTI webpage and click Next to go to Step 4 of the configuration wizard. At this point, AT&T Office@Hand tool is successfully added to the courses where instructors can select from the Tools menu under each course in their Blackboard account.
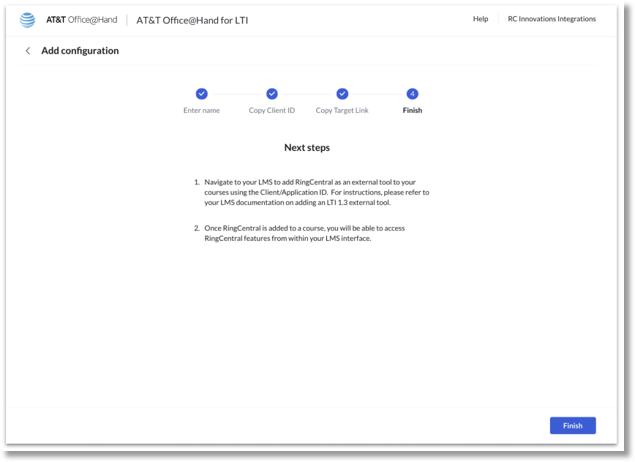
Figure 4.11
Accessing AT&T Office@Hand in Blackboard
Note: Available for both instructors and students
Step 1: Navigate to the courses tab in Blackboard
If not logged in at this step, enter the login in Blackboard as Administrator or Instructor account and click on Courses tab.
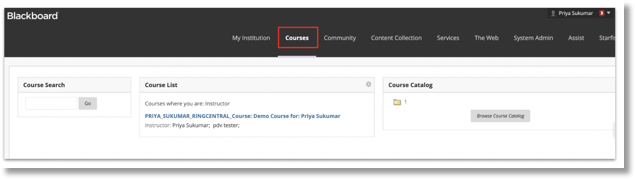
Figure 5
Step 2: Select the course to access AT&T Office@Hand tool
Select the course where you would like to use AT&T Office@Hand Video tool to schedule meetings. Next, click on Tools on the left side menu within the selected course.
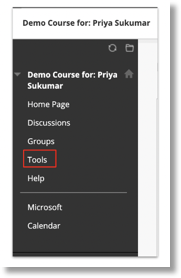
Figure 5.1
Step 3: Launch AT&T Office@Hand tool within Blackboard course
Scroll to find and click on the name of the AT&T Office@Hand tool you just configured. Once clicked on the tool name, the page loads to display the login screen for AT&T Office@Hand tool.
Click the Sign in button and enter your AT&T Office@Hand login credentials.
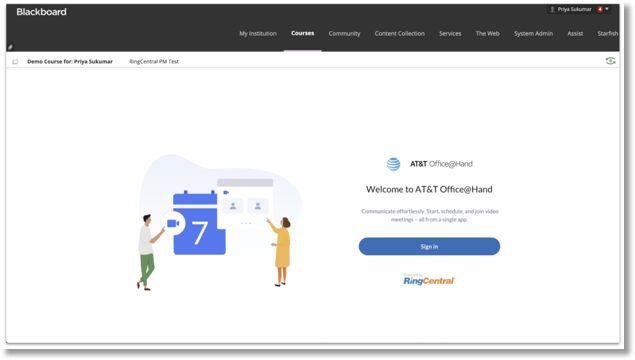
Figure 5.2
Was this page helpful? Yes No