Self-Provisioning – Yealink Phones | AT&T Office@Hand
Article #8682
This article demonstrates how Account Administrators can provision their Yealink W52P, Yealink W56P, Yealink W60P, Yealink T21P, Yealink T46S, Yealink T42S and Yealink T42S Phone on their AT&T Office@Hand Online account.
Self-Assisted Provisioning – Yealink Phones
| Yealink W52P |
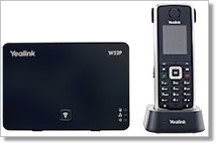 |
A Yealink W52P phone can be purchased from third-party vendors. You can set up a Yealink W52P via AT&T Office@Hand’s Self-Assisted Provisioning. Once provisioned, updates and new features will appear automatically.
To get started, follow the steps below.
|
| Yealink W56P |
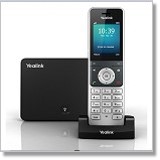 |
A Yealink W56P phone can be purchased from third-party vendors. You can set up a Yealink W56P via AT&T Office@Hand’s Self-Assisted Provisioning. Once provisioned, updates and new features will appear automatically.
To get started, follow the steps below.
|
| Yealink W60P |
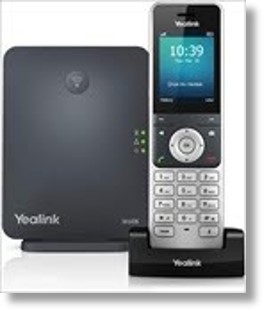 |
You can purchase a pre-configured, fully provisioned Yealink W60P from AT&T Office@Hand. When you get a pre-configured phone from AT&T Office@Hand, you just need to plug the phone in to a high-speed internet connection to get started. Since your system is in the cloud, updates and new features appear automatically.
To purchase a AT&T Office@Hand pre-configured device, go to Adding Desktop IP Phones to your account. If you purchased your device from a third-party vendor, follow the steps below.
|
Yealink T21P
|
| Yealink W52P |
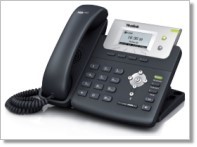 |
A Yealink T21P phone can be purchased from third-party vendors. You can set up a Yealink T21P phone via AT&T Office@Hand’s Self-Assisted Provisioning. Once provisioned, updates and new features will appear automatically.
To get started, follow the steps below.
|
| Yealink T46S |
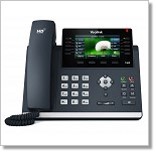 |
You can purchase a pre-configured, fully provisioned Yealink T46S from AT&T Office@Hand. When you get a pre-configured phone from AT&T Office@Hand, you just need to plug the phone in to a high speed internet connection to get started. Since your system is in the cloud, updates and new features appear automatically.
To purchase a AT&T Office@Hand pre-configured device, go to AT&T Office@Hand: Adding Desktop IP Phones to your account.
|
| Yealink T42S |
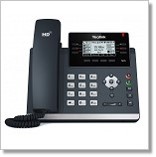 |
You can purchase a pre-configured, fully provisioned Yealink T42S from AT&T Office@Hand. When you get a pre-configured phone from AT&T Office@Hand, you just need to plug the phone in to a high speed internet connection to get started. Since your system is in the cloud, updates and new features appear automatically.
To purchase a Office@Hand pre-configured device, go to AT&T Office@Hand: Adding Desktop IP Phones to your account. If you purchased your device from a third-party vendor, follow the steps below.
|
| Yealink T48S |
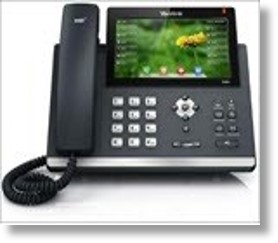 |
You can purchase a pre-configured, fully provisioned Yealink T48S from AT&T Office@Hand. When you get a pre-configured phone from AT&T Office@Hand, you just need to plug the phone in to a high-speed internet connection to get started. Since your system is in the cloud, updates and new features appear automatically.
To purchase a AT&T Office@Hand pre-configured device, go to Adding Desktop IP Phones to your account. If you purchased your device from a third-party vendor, follow the steps below.
|
Adding and provisioning your device from a third-party vendor
Step 1: Add a Phone Number / Digital Line for your Yealink T21P, Yealink W52P phone, Yealink W56P, Yealink T42S, or Yealink T46S
Step 2: Provision your Yealink T21P, Yealink W52P Phone, Yealink W56P, Yealink T42S, or Yealink T46S
Add a Phone Number / Digital Line for your Yealink T21P, Yealink W52P phone, Yealink W56P, Yealink T42S, or Yealink T46S
- Log in to your AT&T Office@Hand account as an Administrator.
- Under Admin Portal, click Users > User list.
- Under Users with Extensions, click the name of the user you wish to modify.
- Go to Phones & Numbers, and then select Phones. Click Add Phone.
- Select Other Phones, then click on Existing Phone. You will see a pop-up with a note: Select this option if you have your own unlocked SIP compatible device you’d like to use. Click Add to Cart.
- Specify the number of Phone Number/Digital Line under QTD, and then click Next.
- Select the Emergency Address that will be assigned to the phone.
• If you have set an Emergency Address for a device before, you can select it from the drop-down menu.
• If the Emergency Address for this device you are adding is different from a previously set Emergency Address, click New.
When you select New, the page will redirect to a window where you can Add new Emergency Address.
Fill out the Emergency Calling Address form. Make sure you read the terms and conditions, then click the checkbox to Accept the Terms, and then click I Accept.
Note: Use the address where your desk phone is located. DO NOT include special characters in the Customer Name field.
IMPORTANT: This is the address that will be used in the event of an emergency call (911 in the United States and Canada, and such other Emergency Call Services as applicable in other countries) from this Office@Hand Desk phone. Be sure to update this address anytime you change the location where you use this AT&T Office@Hand Desk phone.
- Select the device where the Emergency Address will be applied, and then click on Assign to Selected.
- Click Next.
Provision your Yealnk T21P, Yealink W52P Phone, Yealink W56P, Yealink T42S, or Yealink T46S
IMPORTANT: If you purchased your device from a different provider, make sure that the phone is unlocked before you proceed.
- On the Admin Portal page, select Phone System, and then click Phones & Devices.
- Under User Phones, click the number that you wish to assign to your Yealink phone. You must select a number that is not yet tied with any device. If the number is not yet assigned to a device, you will see Setup & Provision when you point your cursor over it.
- Select Yealink IP Phones, and then click Select to choose the model number of the Yealink phone that you will provision.
Click on the links below to proceed.
Yealink T21P, T42S, or T46S
Yealink W52P or W56P Cordless Phone
Yealink T21P, T42S, or T46S
If you selected Yealink T21P, T42S, or T46S, you will see the instructions on how to reset the existing configuration on your phone.
You’ll need to reset the existing configuration via the Web interface:
- Press the OK button on the Phone GUI, or press the [Menu] > [Status] in order to obtain the IP address of the desktop phone.
- Enter this IP address into the address bar of your web browser and press the Enter key. Login to the web interface of the desktop
phone.
- Click on the “Settings” tab and then click on the “Upgrade” menu option.
- Locate the “Reset to Factory” item and click the “Reset Now” or “Reset to Factory” button.
Or you can reset the existing configuration via the Phone GUI:
- Long press OK button for 5 seconds.
- Type in the administrator password.
- Press the “Yes” to trigger the factory reset.
Note: The web interface of the desktop phone will prompt you for login credentials – these are the administrator credentials to your phone and you must know it to continue. By default it is admin/admin. If you do not know your login/password you may need to contact the vendor of the phone.
After resetting the phone, enter the phone’s MAC Address, and then click Next.
Note: A Media Access Control (MAC) Address is a code that uniquely identifies a hardware device in a network. It is usually found at the back of the phone or through the phone status menu. It should have 12 characters and should consist of the numbers 0-9 and letters a-f. You can also obtain the MAC Address through the display of any handset paired to the base station being provisioned. On the handset press [OK] > Status > System status. Scroll down if necessary to locate the MAC setting.
Click here to proceed to the next step
Yealink W52P or W56P Cordless Phone
If you selected Yealink W52P Cordless Phone, you will see the instructions on how to reset the existing configuration on your phone.
You’ll need to reset the existing configuration:
1. On any handset paired to your cordless phone base station press [OK] > Status > System status in order to obtain the IP address of the cordless phone base station.
2. Enter this IP address into the a ddress bar of your web browser and press the Enter key. Login to the web interface of the cordless phone.
3. Click on the “Phone” tab and then click on the “Upgrade” menu option.
4. Locate the “Reset to Factory” item and click the “Reset Now” button.
Note: The web interface of the cordless phone will prompt you for login credentials – these are the administrator credentials to your phone and you must know it to continue. By default it is admin/admin. If you do not know your login/password you may need to contact the vendor of the phone.
AT&T Office@Hand only supports the following versions of this cordless phone.
Base Station:
Hardware version: 25.1.0.0.0.0.0 or higher
Software version: 25.80.25.1 or higher
IMPORTANT: For the Yealink W52P Cordless Phone, you need to manually update the software/firmware version of the base station from 25.50.0.20 to version 25.80.25.1.
Handsets:
| Yealink W52P |
| Hardware version |
26.0.0.7 or higher |
| Software version |
26.50.0.20 or higher |
| Yealink W56P |
| Hardware version |
61.0.0.1 or higher |
| Software version |
61.80.0.10 or higher |
Please refer to the manufacturer’s documentation for instructions on how to identify the versions numbers
If your cordless phone handsets or base do not meet this requirement you may not be able to provision or use the devices.
Please note that only 4 paired handsets per base station are supported. Pairing a 5th handset may result in some users not being able to make phone calls.
After resetting the phone, enter the phone’s MAC Address, and then click Next.
Note: A Media Access Control (MAC) Address is a code that uniquely identifies a hardware device in a network. It is usually found at the back of the phone or through the Phone status menu. It should have 12 characters and should consist of the numbers 0-9 and letters a-f. You can also obtain the MAC Address through the display of any handset paired to the base station being provisioned. On the handset press [OK] > Status > System status. Scroll down if necessary to locate the MAC setting.
4. Follow the additional instructions for provisioning your device.
- Access Web Interface
Next you’ll need to point your desktop phone to AT&T Office@Hand for configuration information. Login via web interface of the desktop phone. You will be prompted for a login/password credentials – this are the administrator credentials to your phone and you must know it to continue. By default these are admin/admin. If you do not know your login/password you may need to contact the vendor of the phone.
- Configure Provisioning Server
In the desktop phone web interface , click the “Setting” tab, and then select “Auto Provision” menu option. Locate “Provisioning server” field and enter the provisioning link:
| Yealink T21P |
https://yp.ringcentral.biz/provisioning/yealink/T21P |
| Yealink W52P |
https://yp.ringcentral.biz/provisioning/yealink/W52P |
| Yealink W56P |
https://yp.ringcentral.biz/provisioning/yealink/W56P |
| Yealink T42S |
https://yp.ringcentral.biz/provisioning/yealink/T42S |
| Yealink T46S |
https://yp.ringcentral.biz/provisioning/yealink/T46S |
- Save and Apply Config
Ensure that the ‘User Name’ and ‘Password’ fields are blank. Now click [Confirm] to save the configuration. Click [Autoprovision Now] to get your AT&T Office@Hand settings provisioned to your phone. The phone will reboot.
5. Your phone should reboot and provision itself. Click Done when finished.
You will be redirected to the phone’s details afterward. The status of the phone should show online once it is successfully provisioned to your account.
You can also configure the following settings before clicking rgb(0, 102, 204).
• Name: Give your phone a name to help you identify this device when configuring your Call Handling settings.
• Data Usage: To improve the quality of your calls, you can set how much network bandwidth to use for calls:
– High Bandwidth gives you better sound quality but calls can become choppy when it’s not available.
– Low Bandwidth gives you lower sound quality but ensures no interruptions during your conversation.
• HD Voice: You can click the box to enable HD Voice on this device if possible.
Keywords: yealink, yealink t21, yealink t-21, t21, t-21, yealink provisioning, 8682
Was this page helpful? Yes No


