TOP

AT&T Workforce Manager

AT&T Workforce Manager strengthens communications between dispatchers and mobile workers, improves control over field operations, and delivers services faster and more efficiently. Make near real-time decisions about your mobile operations so you can save time and increase productivity.

Back to Product Page
Use the dropdown to get support, or purchase this product

Add a user to AT&T Workforce Manager

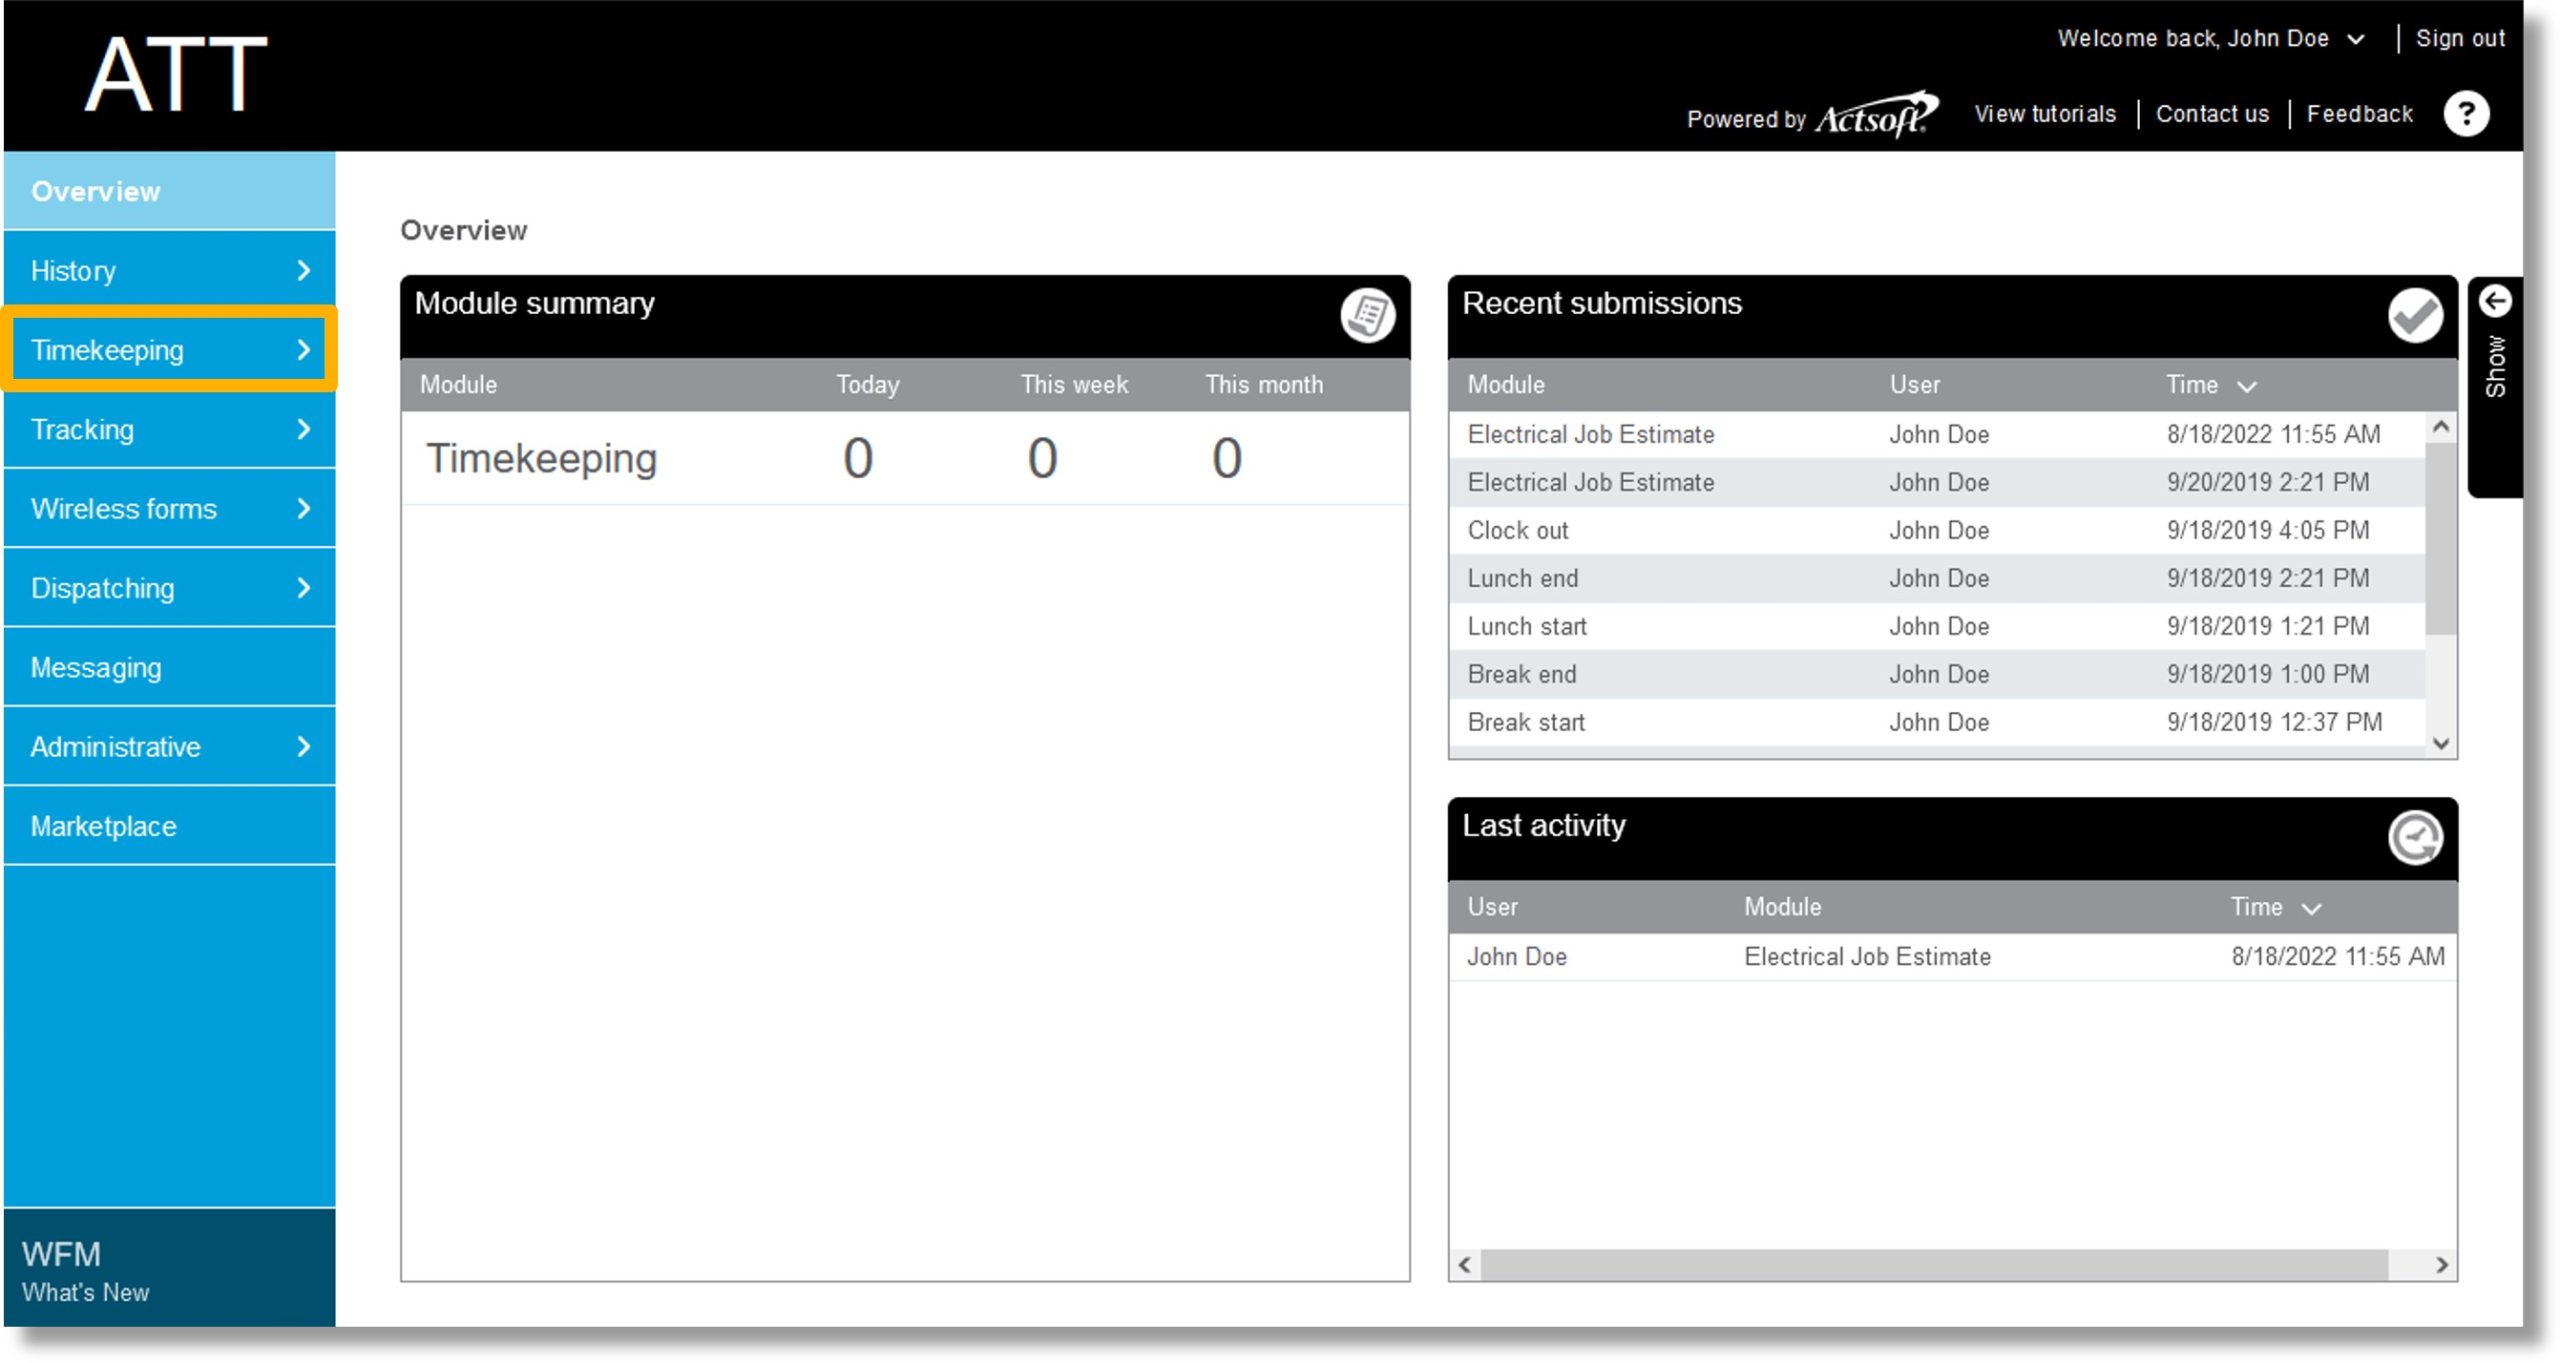
  1. Click on Administrative in the menu on the left.

    Image of step 1.

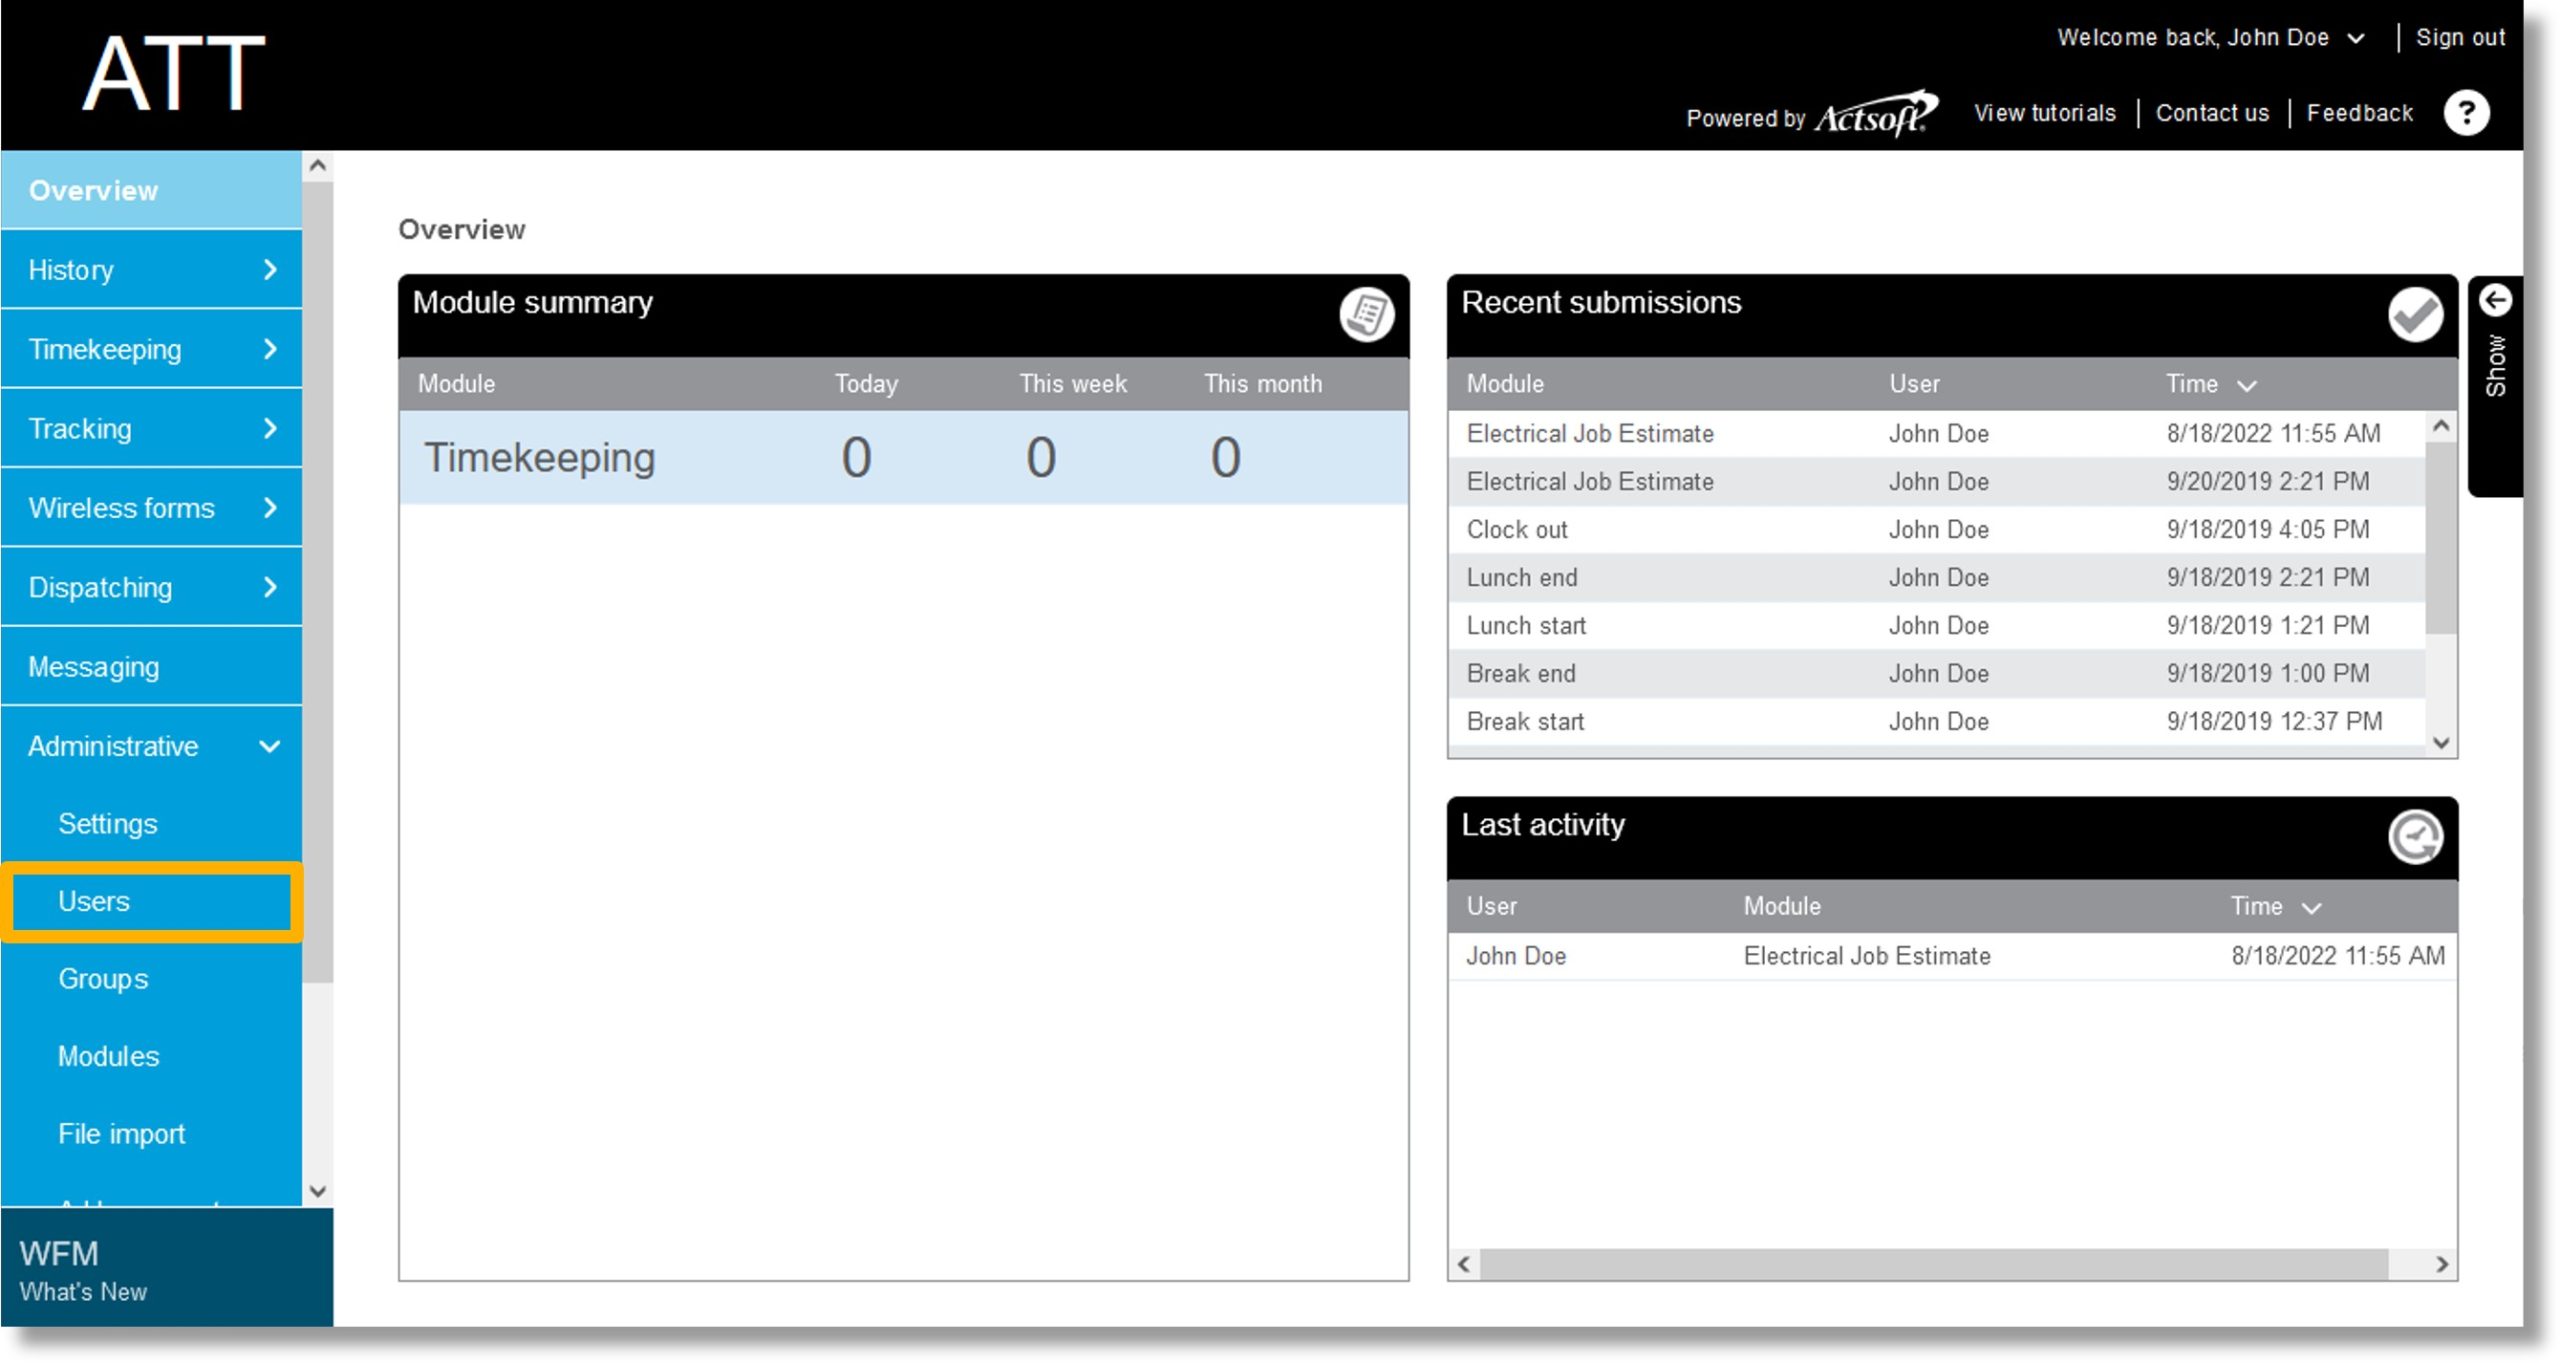
  2. Click Users.

    Image of step 2.

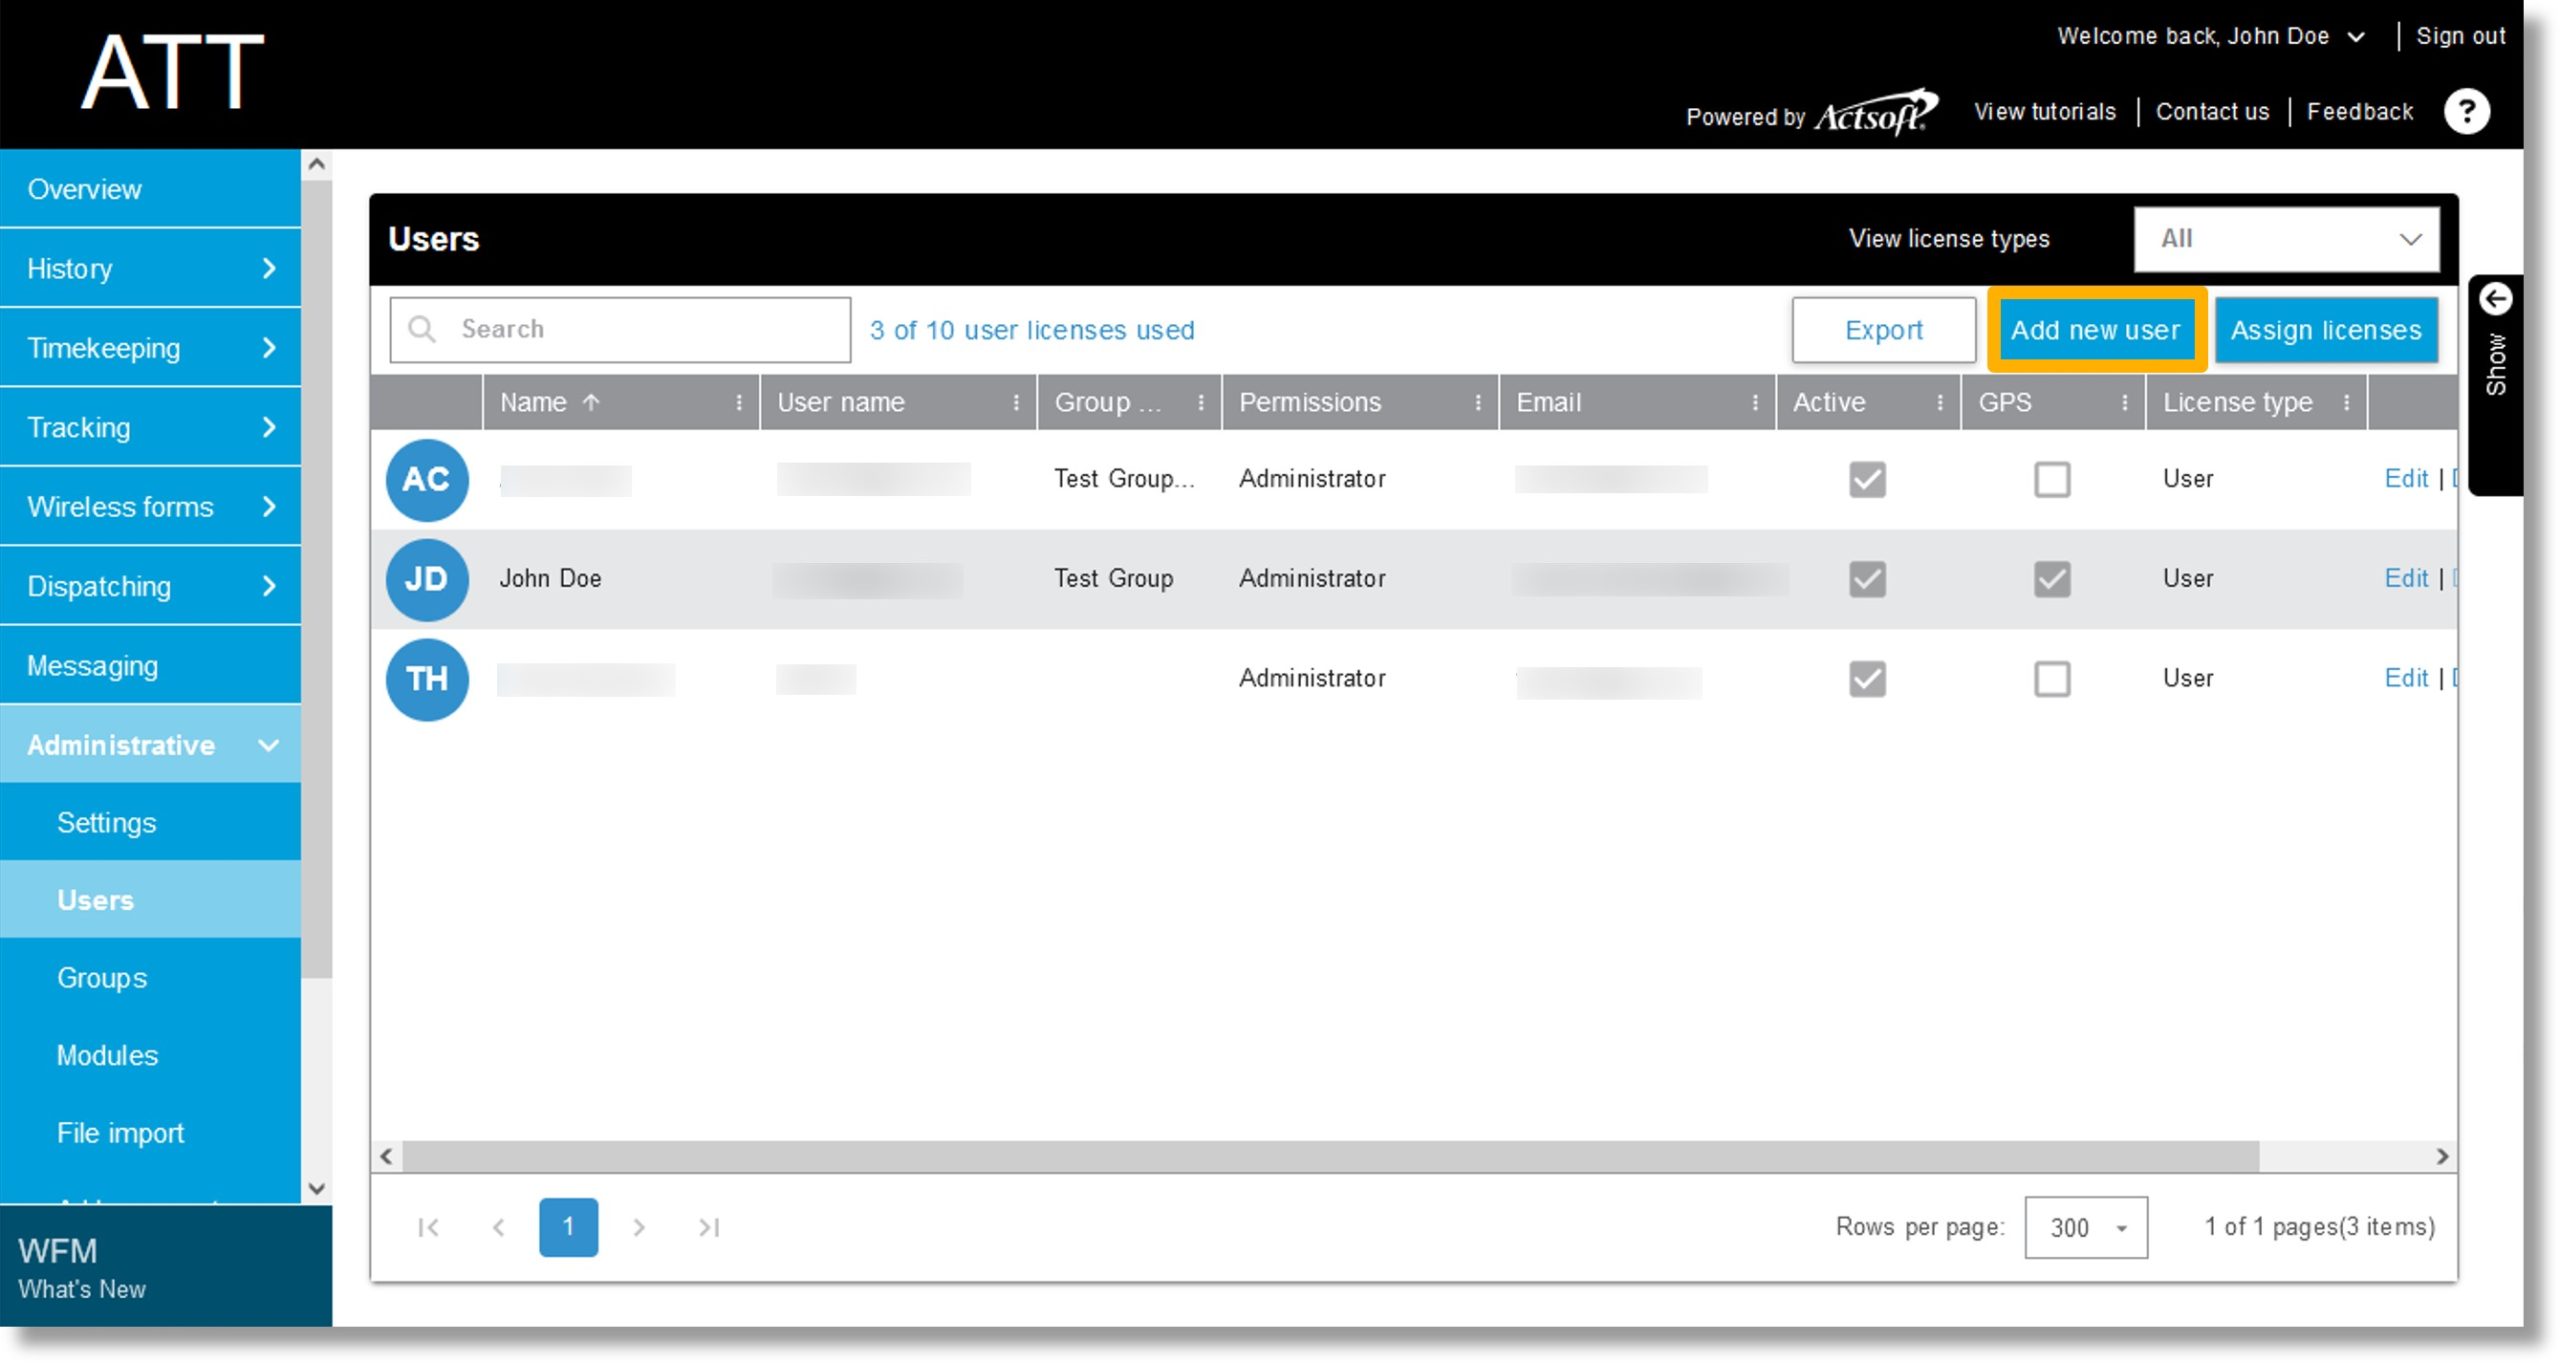
  3. The list of configured users displays.

  4. Click Add new user.

    Image of steps 3 and 4.

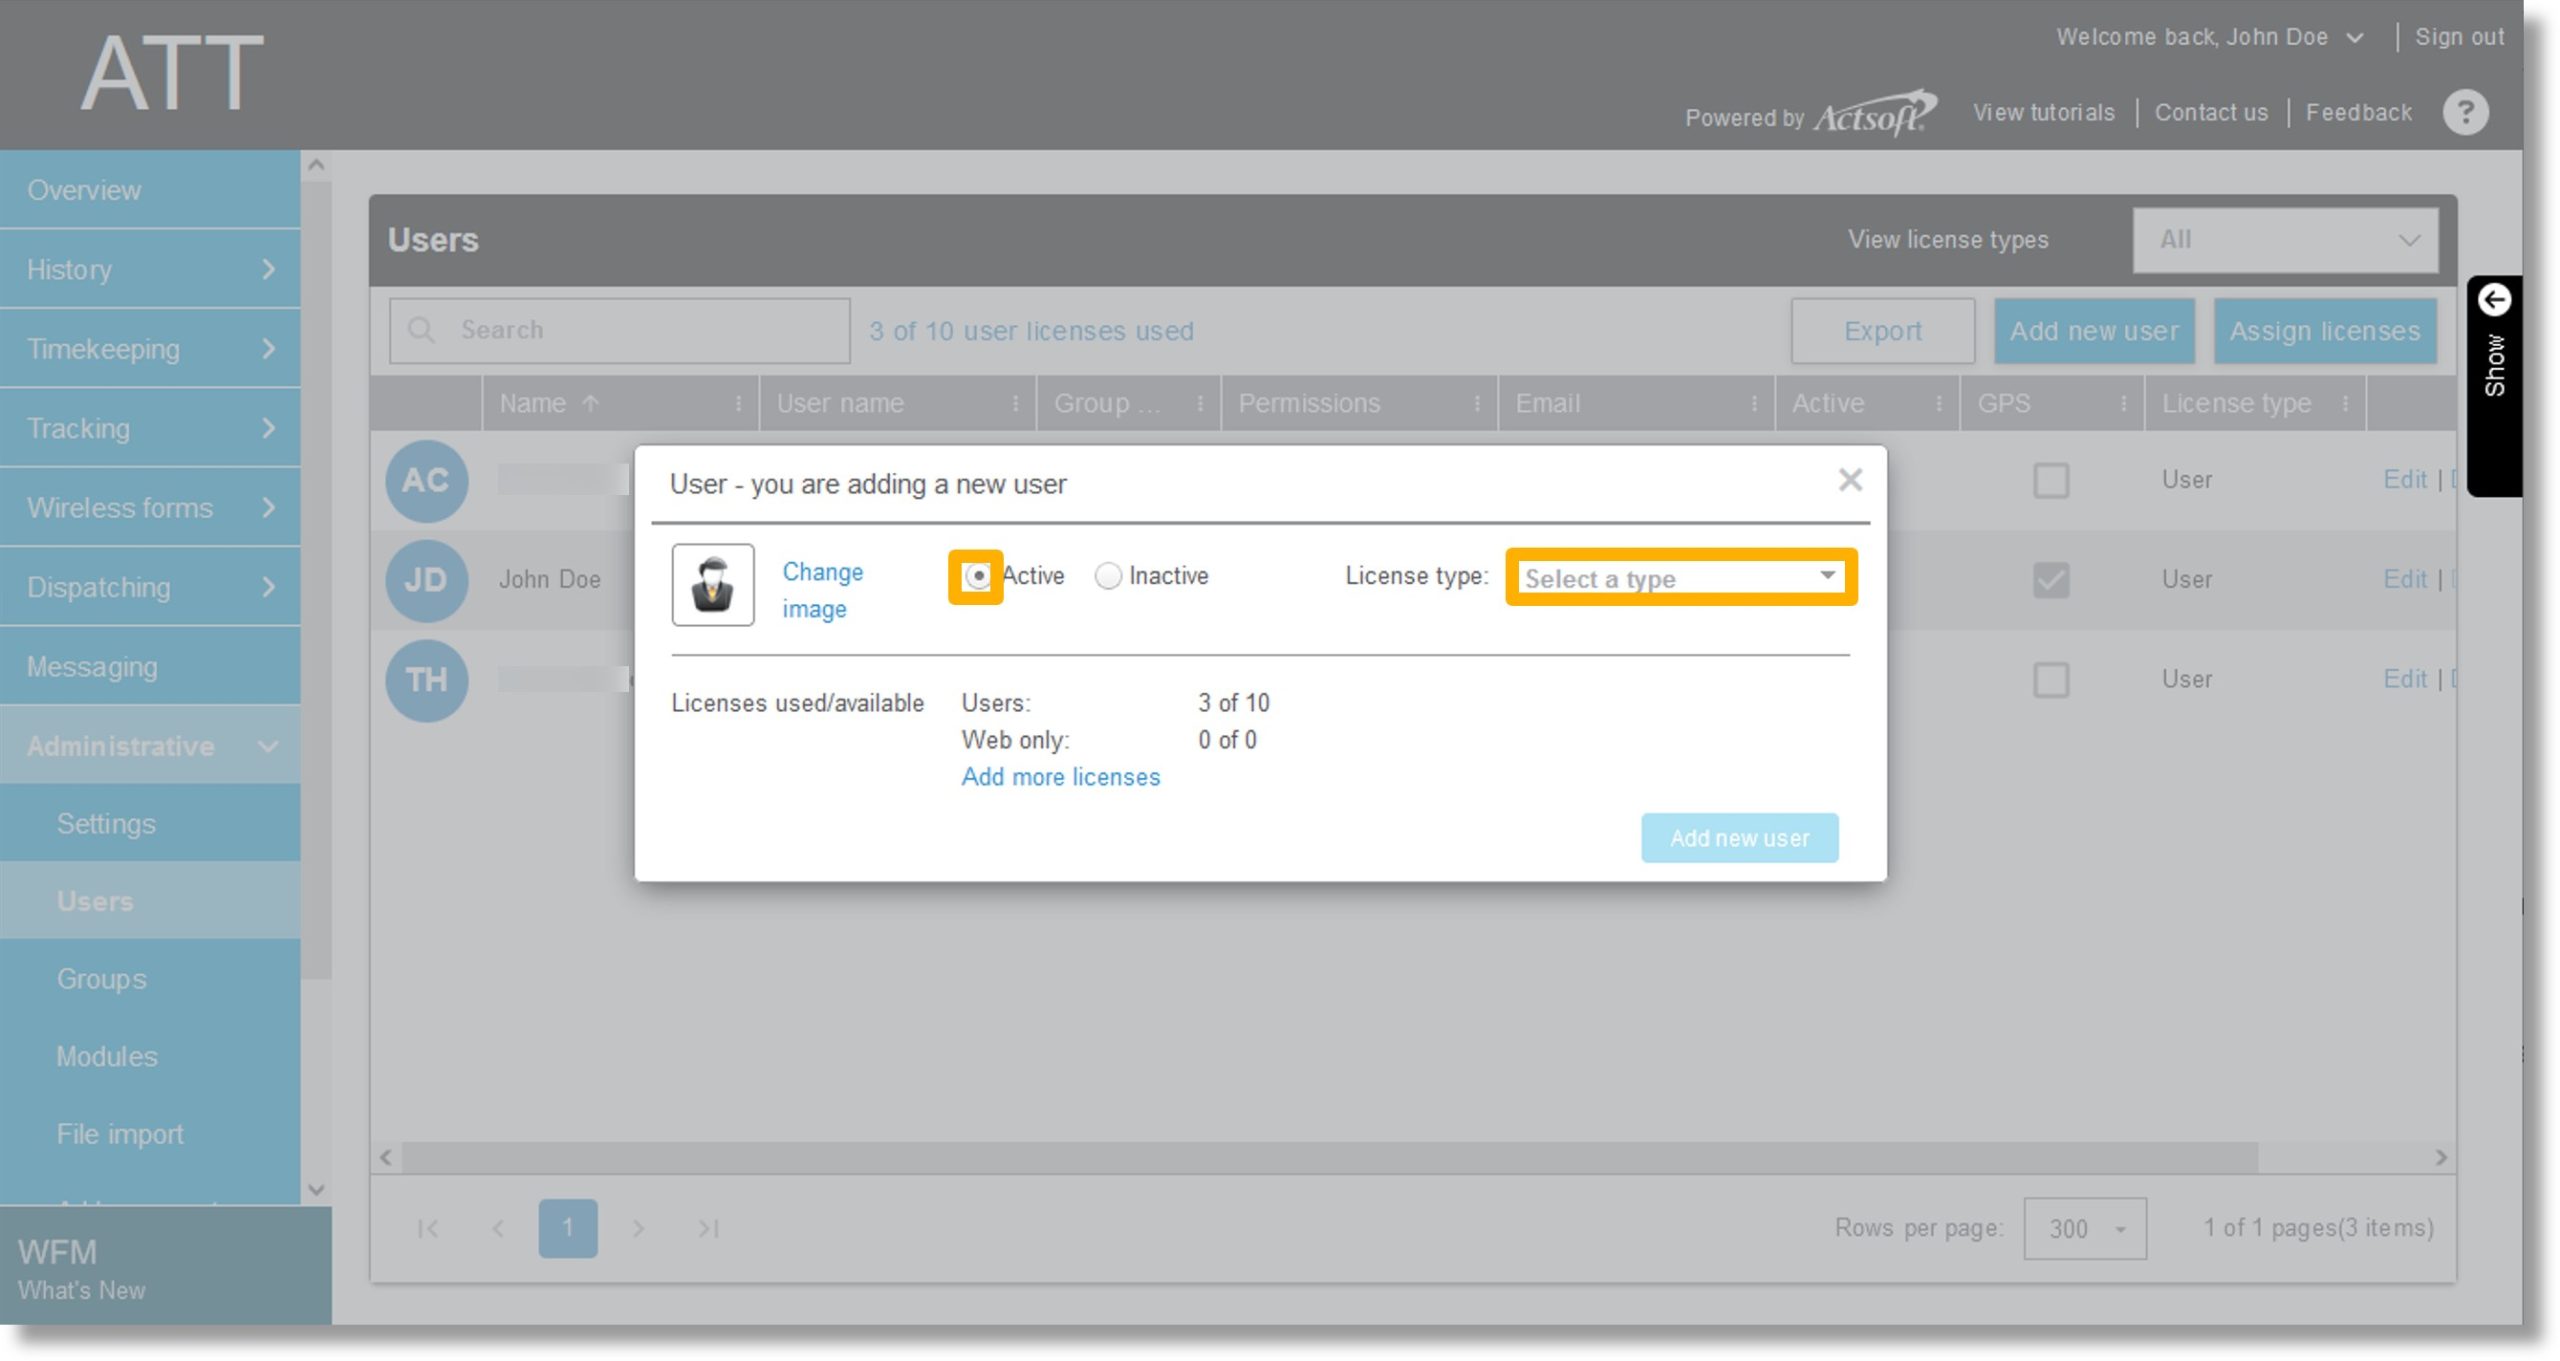
  5. Click the radio button to the left of Active to enable the user.
    Note: If you have an image of your user and would like to add it, click on Change Image, and navigate to and select the image.

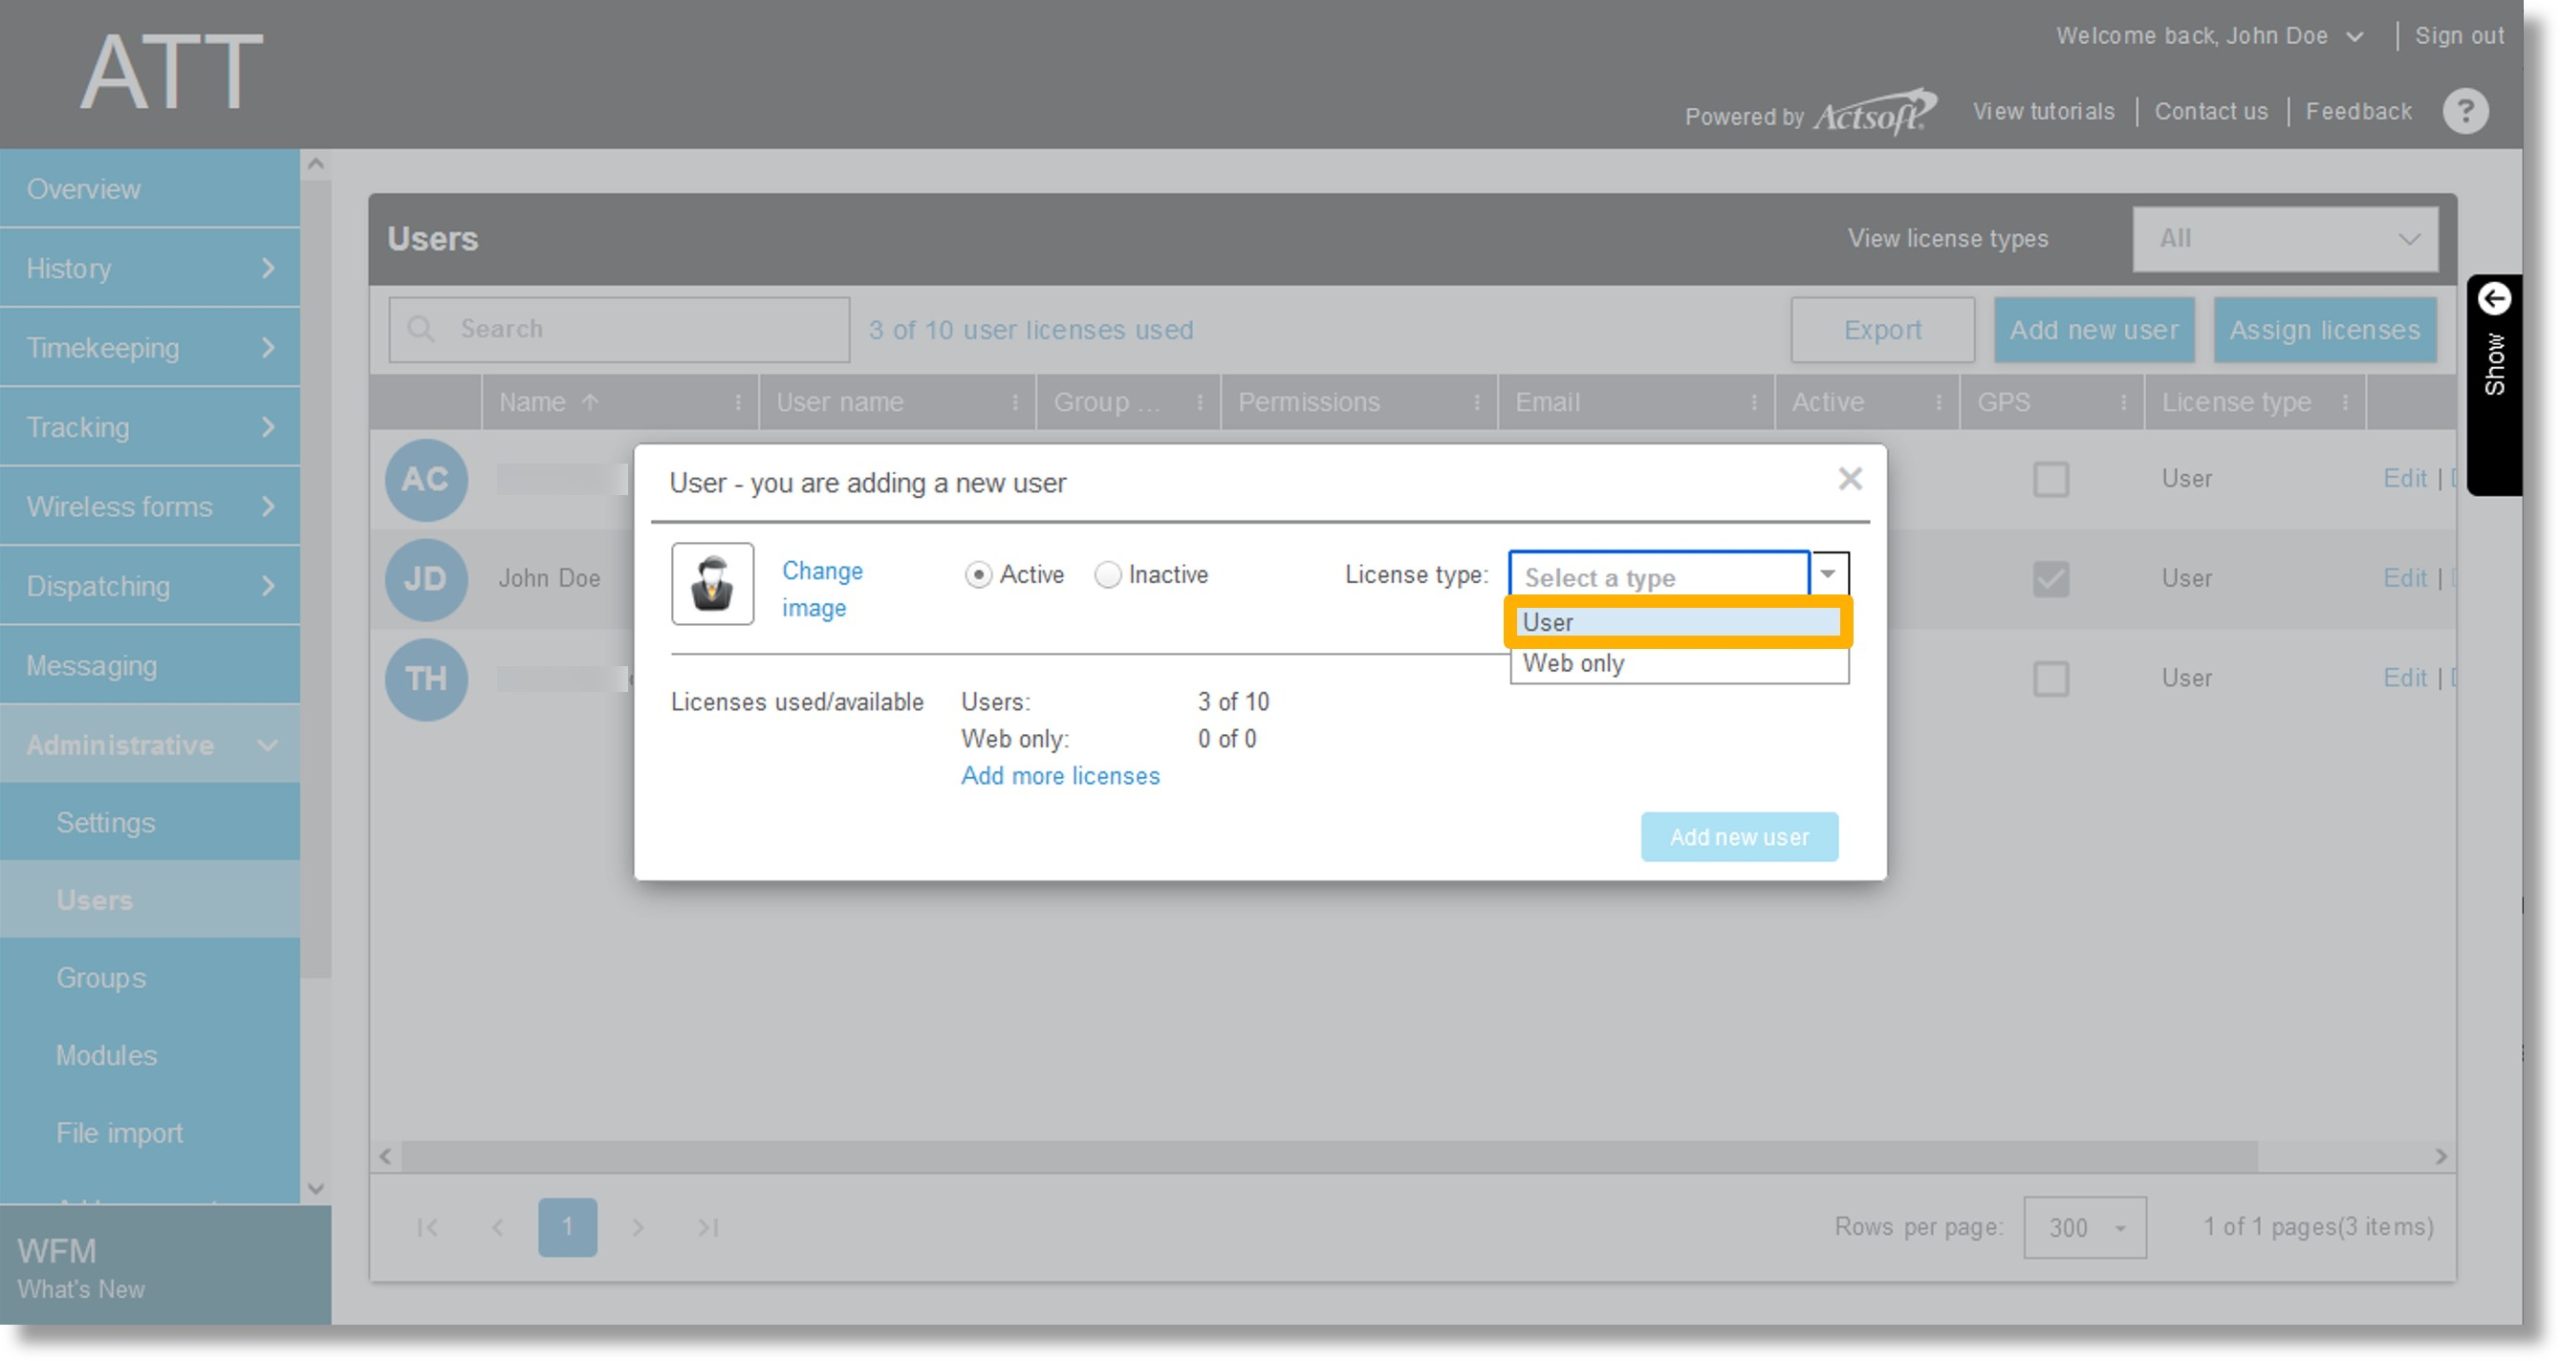
  6. Click the dropdown to the right of License type.

    Image of steps 5 and 6.

  7. Click on the desired license type.

    Image of step 7.

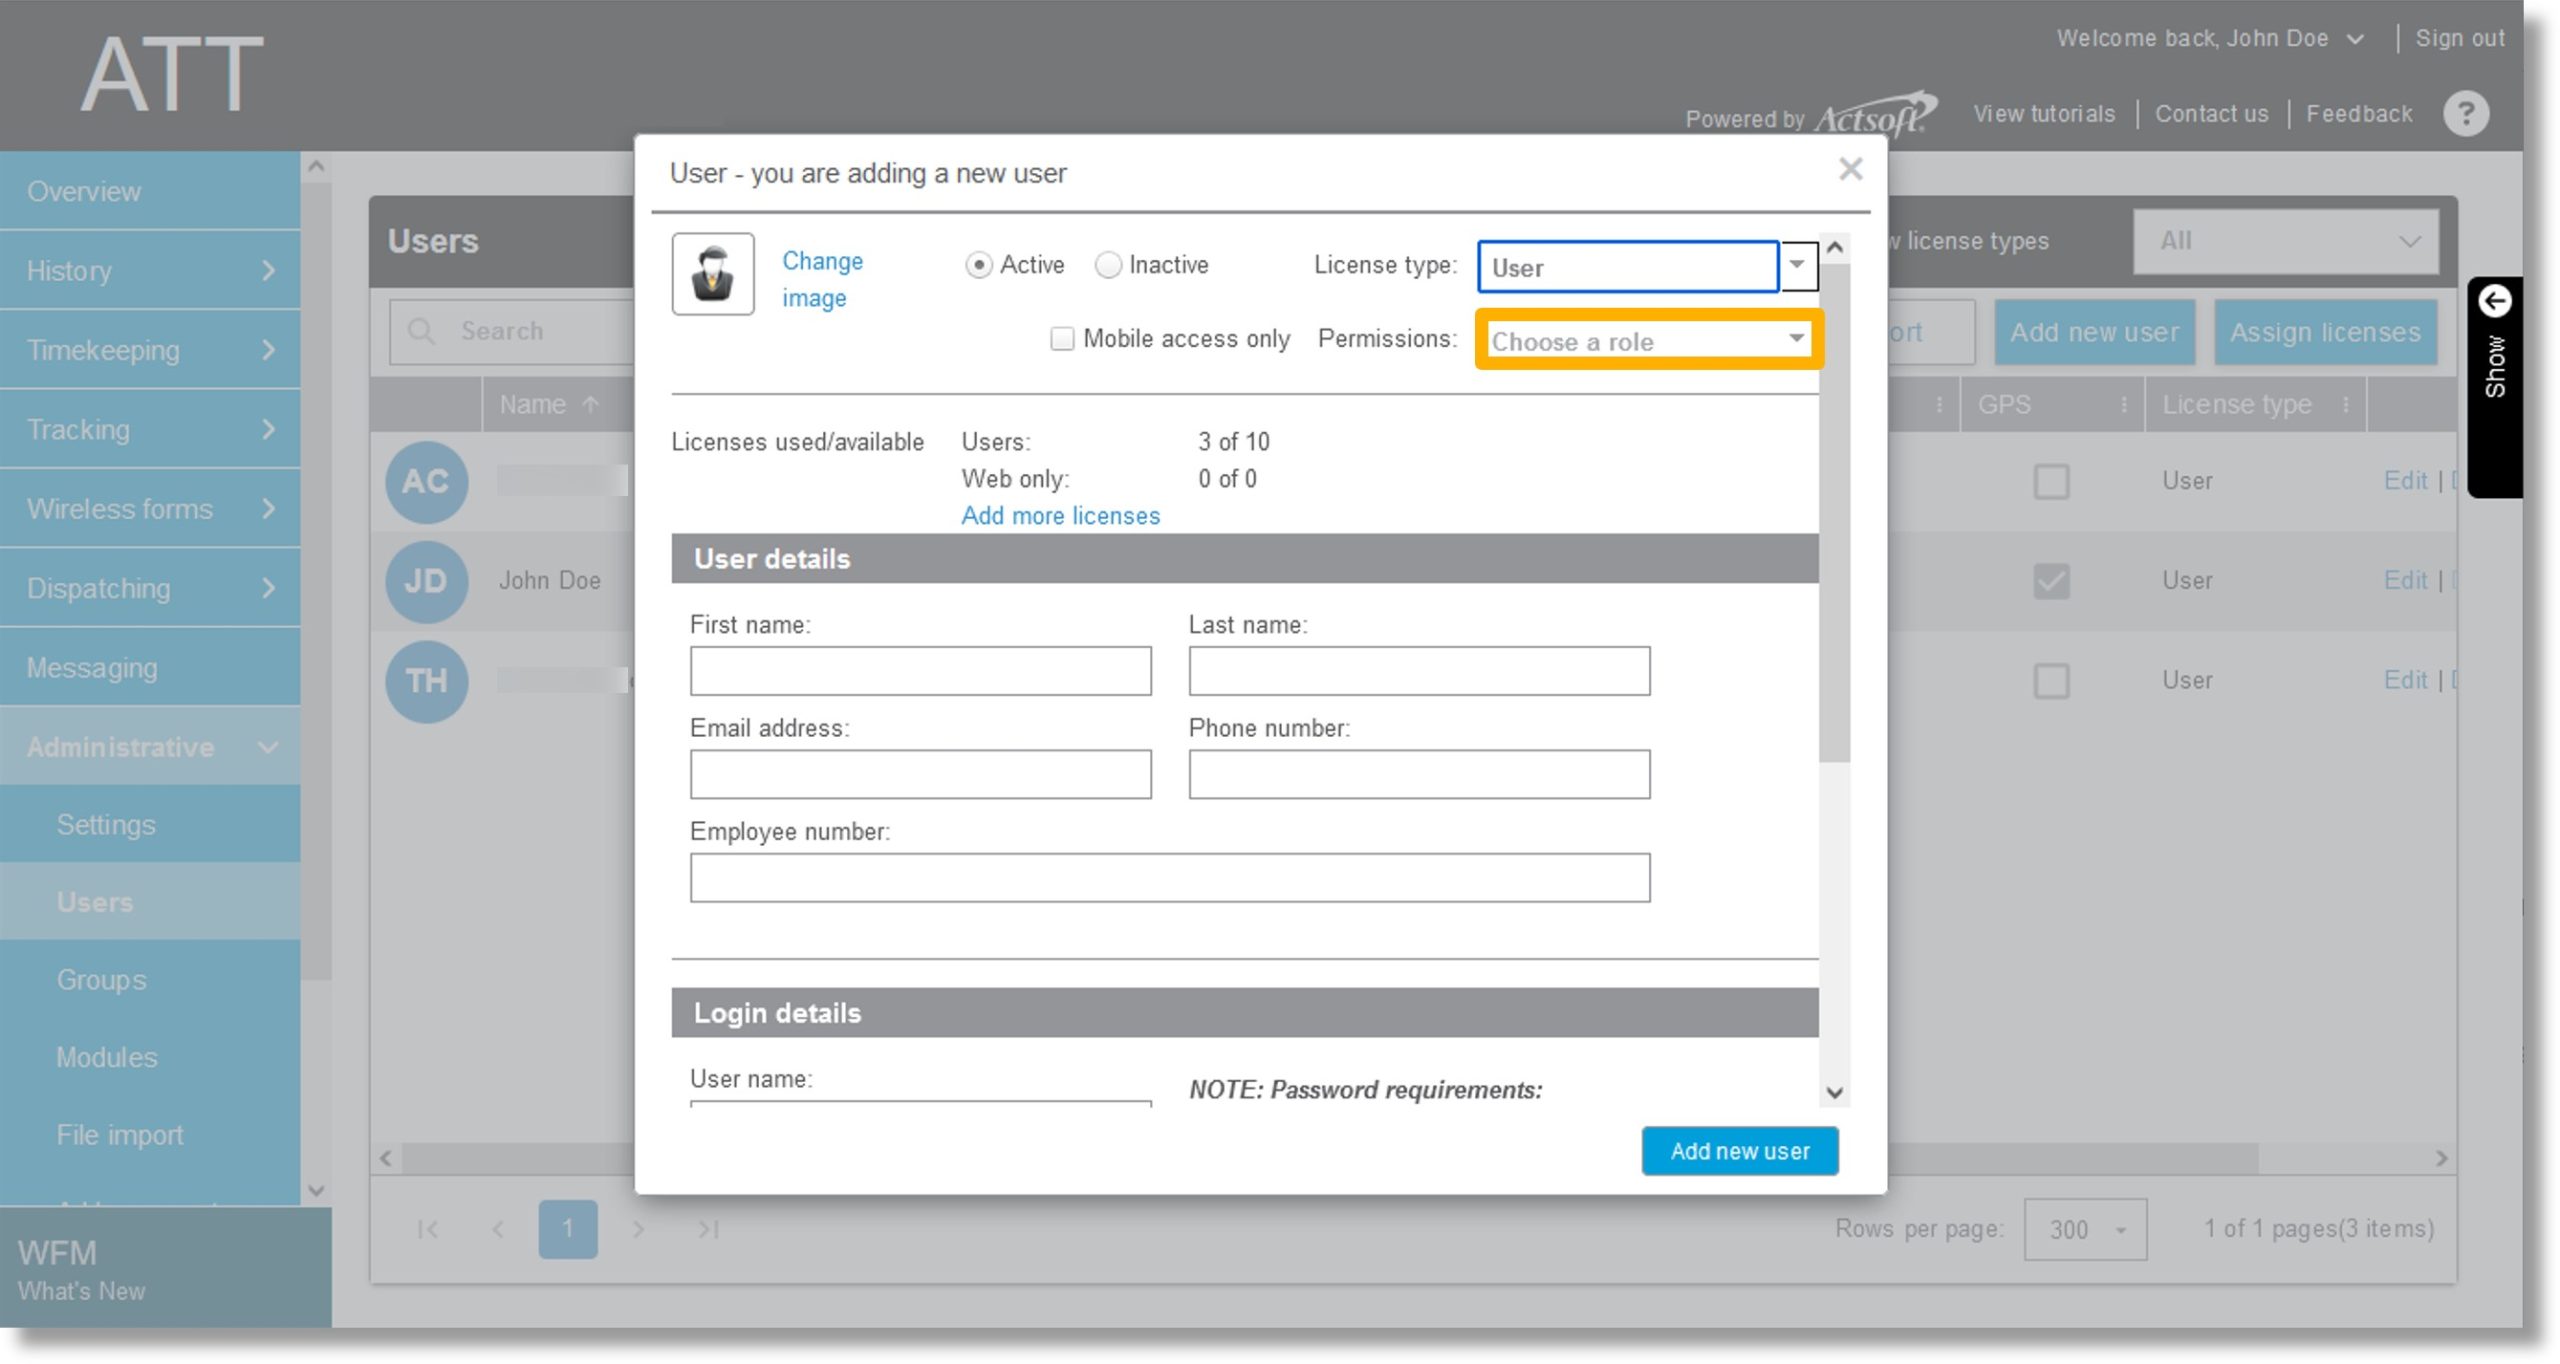
  8. Click on the dropdown to the right of Permissions.

    Image of step 8.

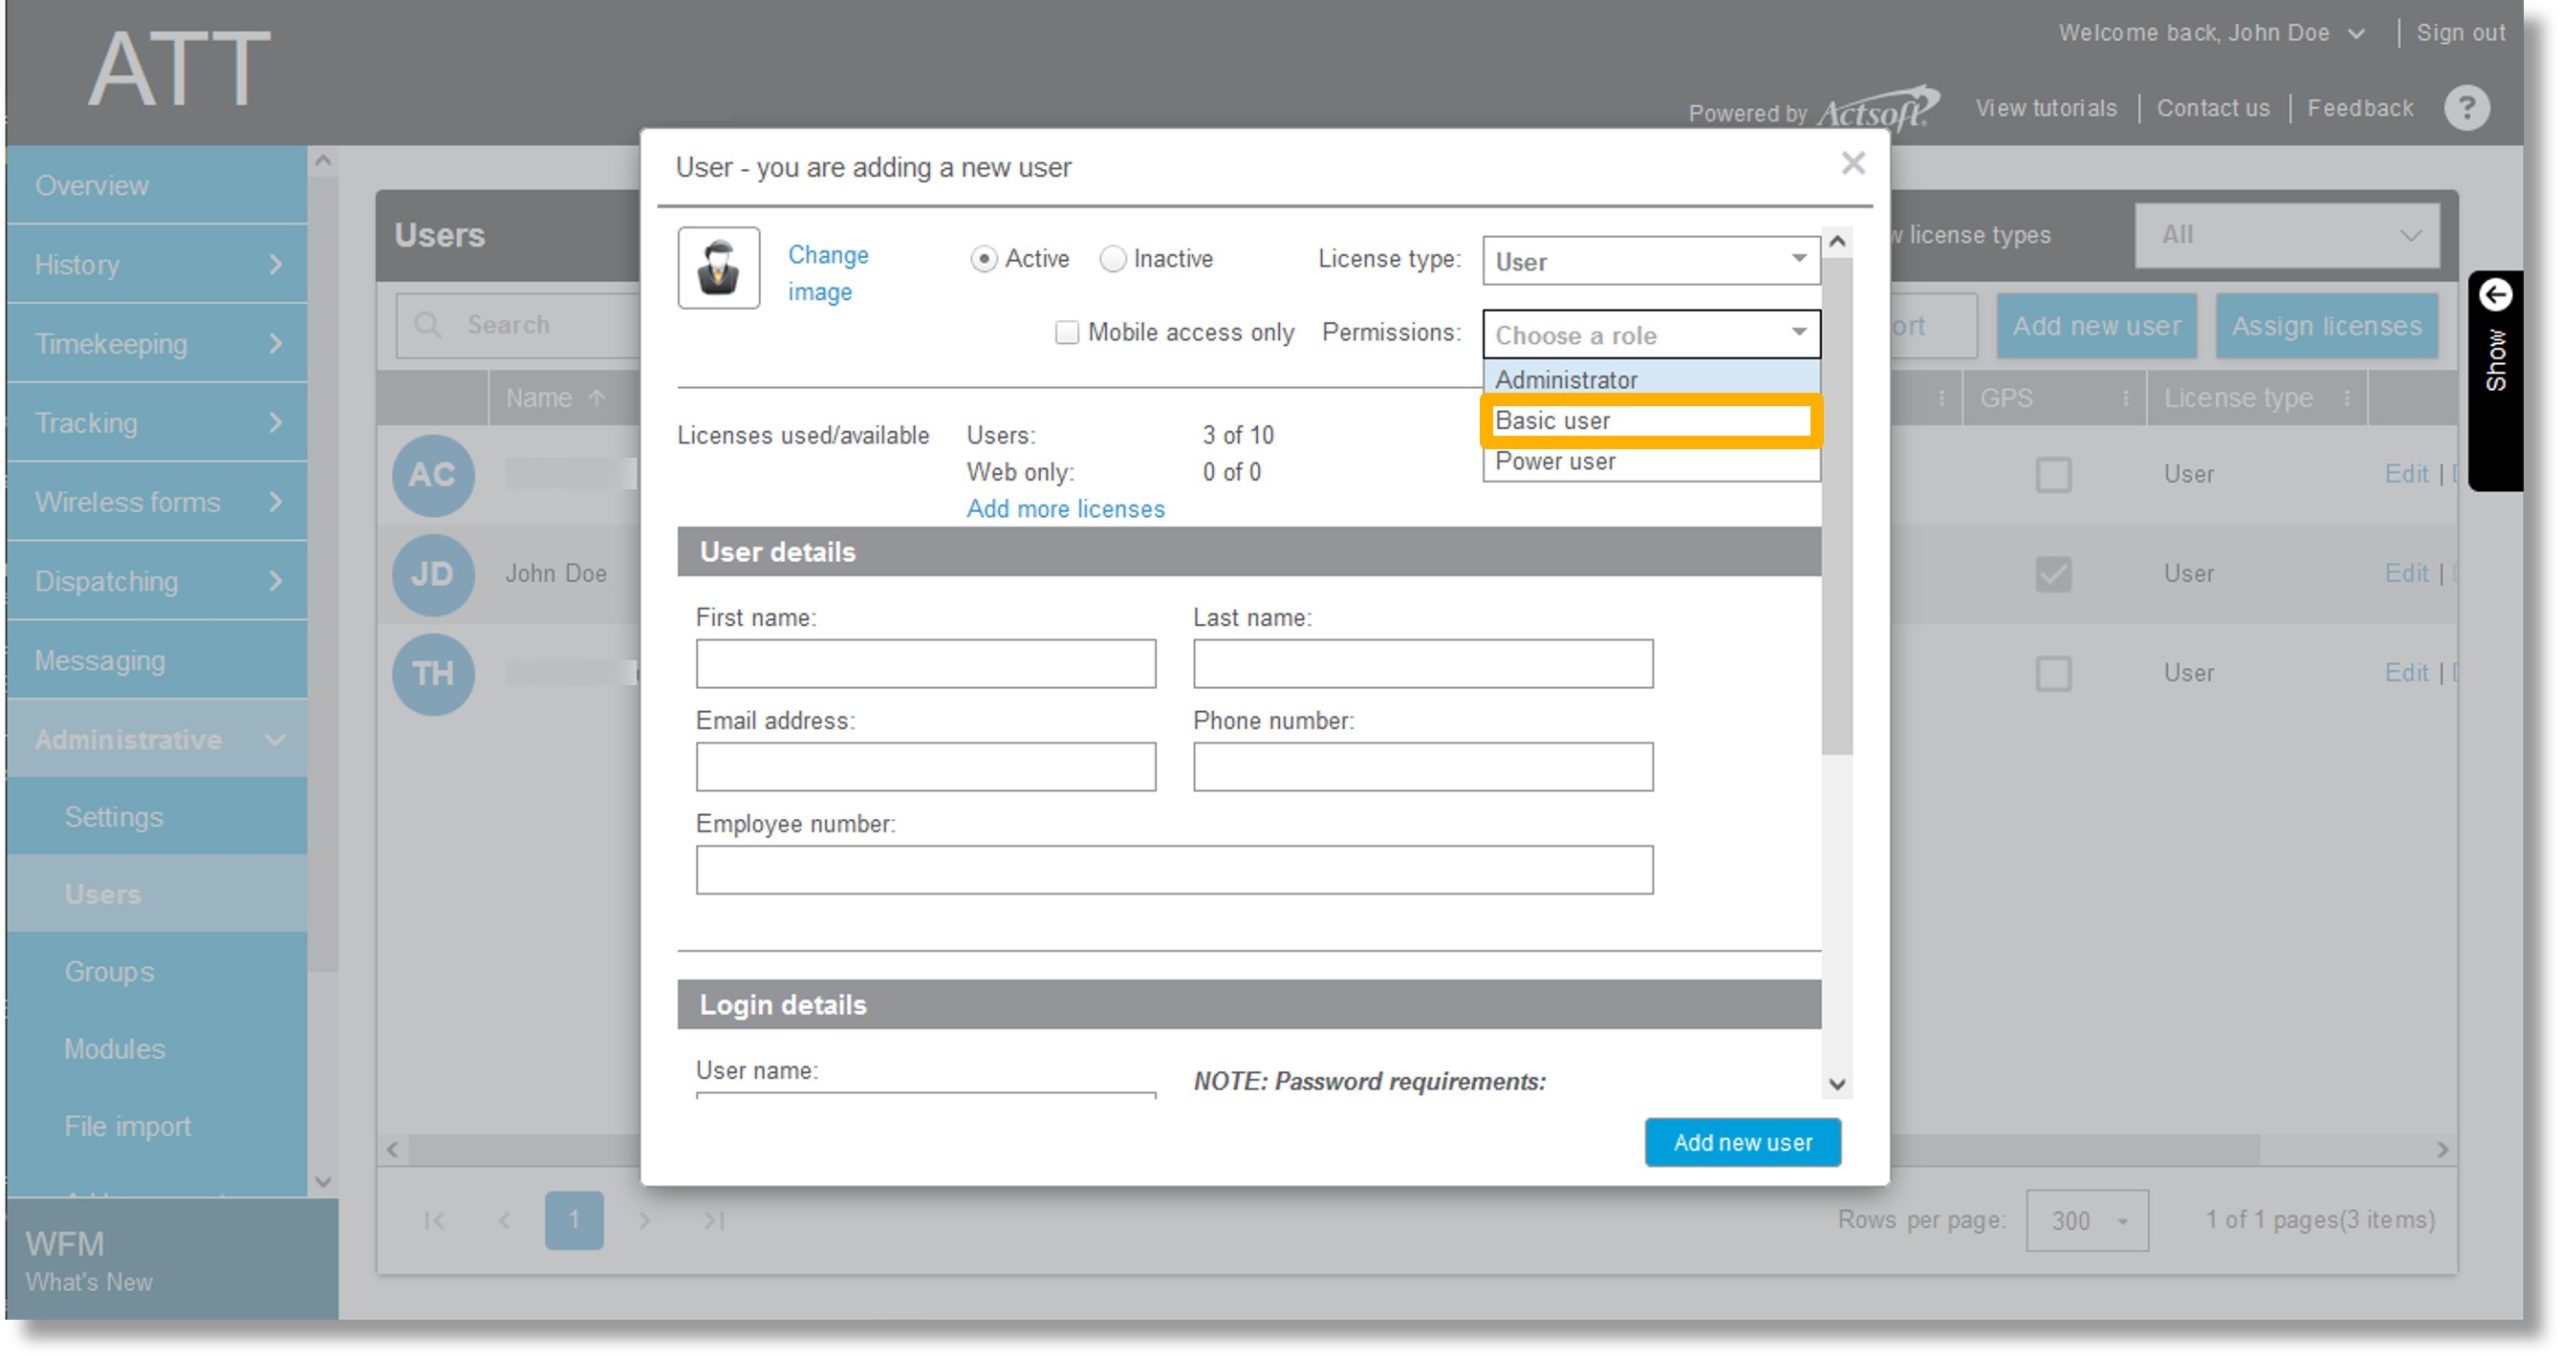
  9. Click on the desired permission level.

    Image of step 9.

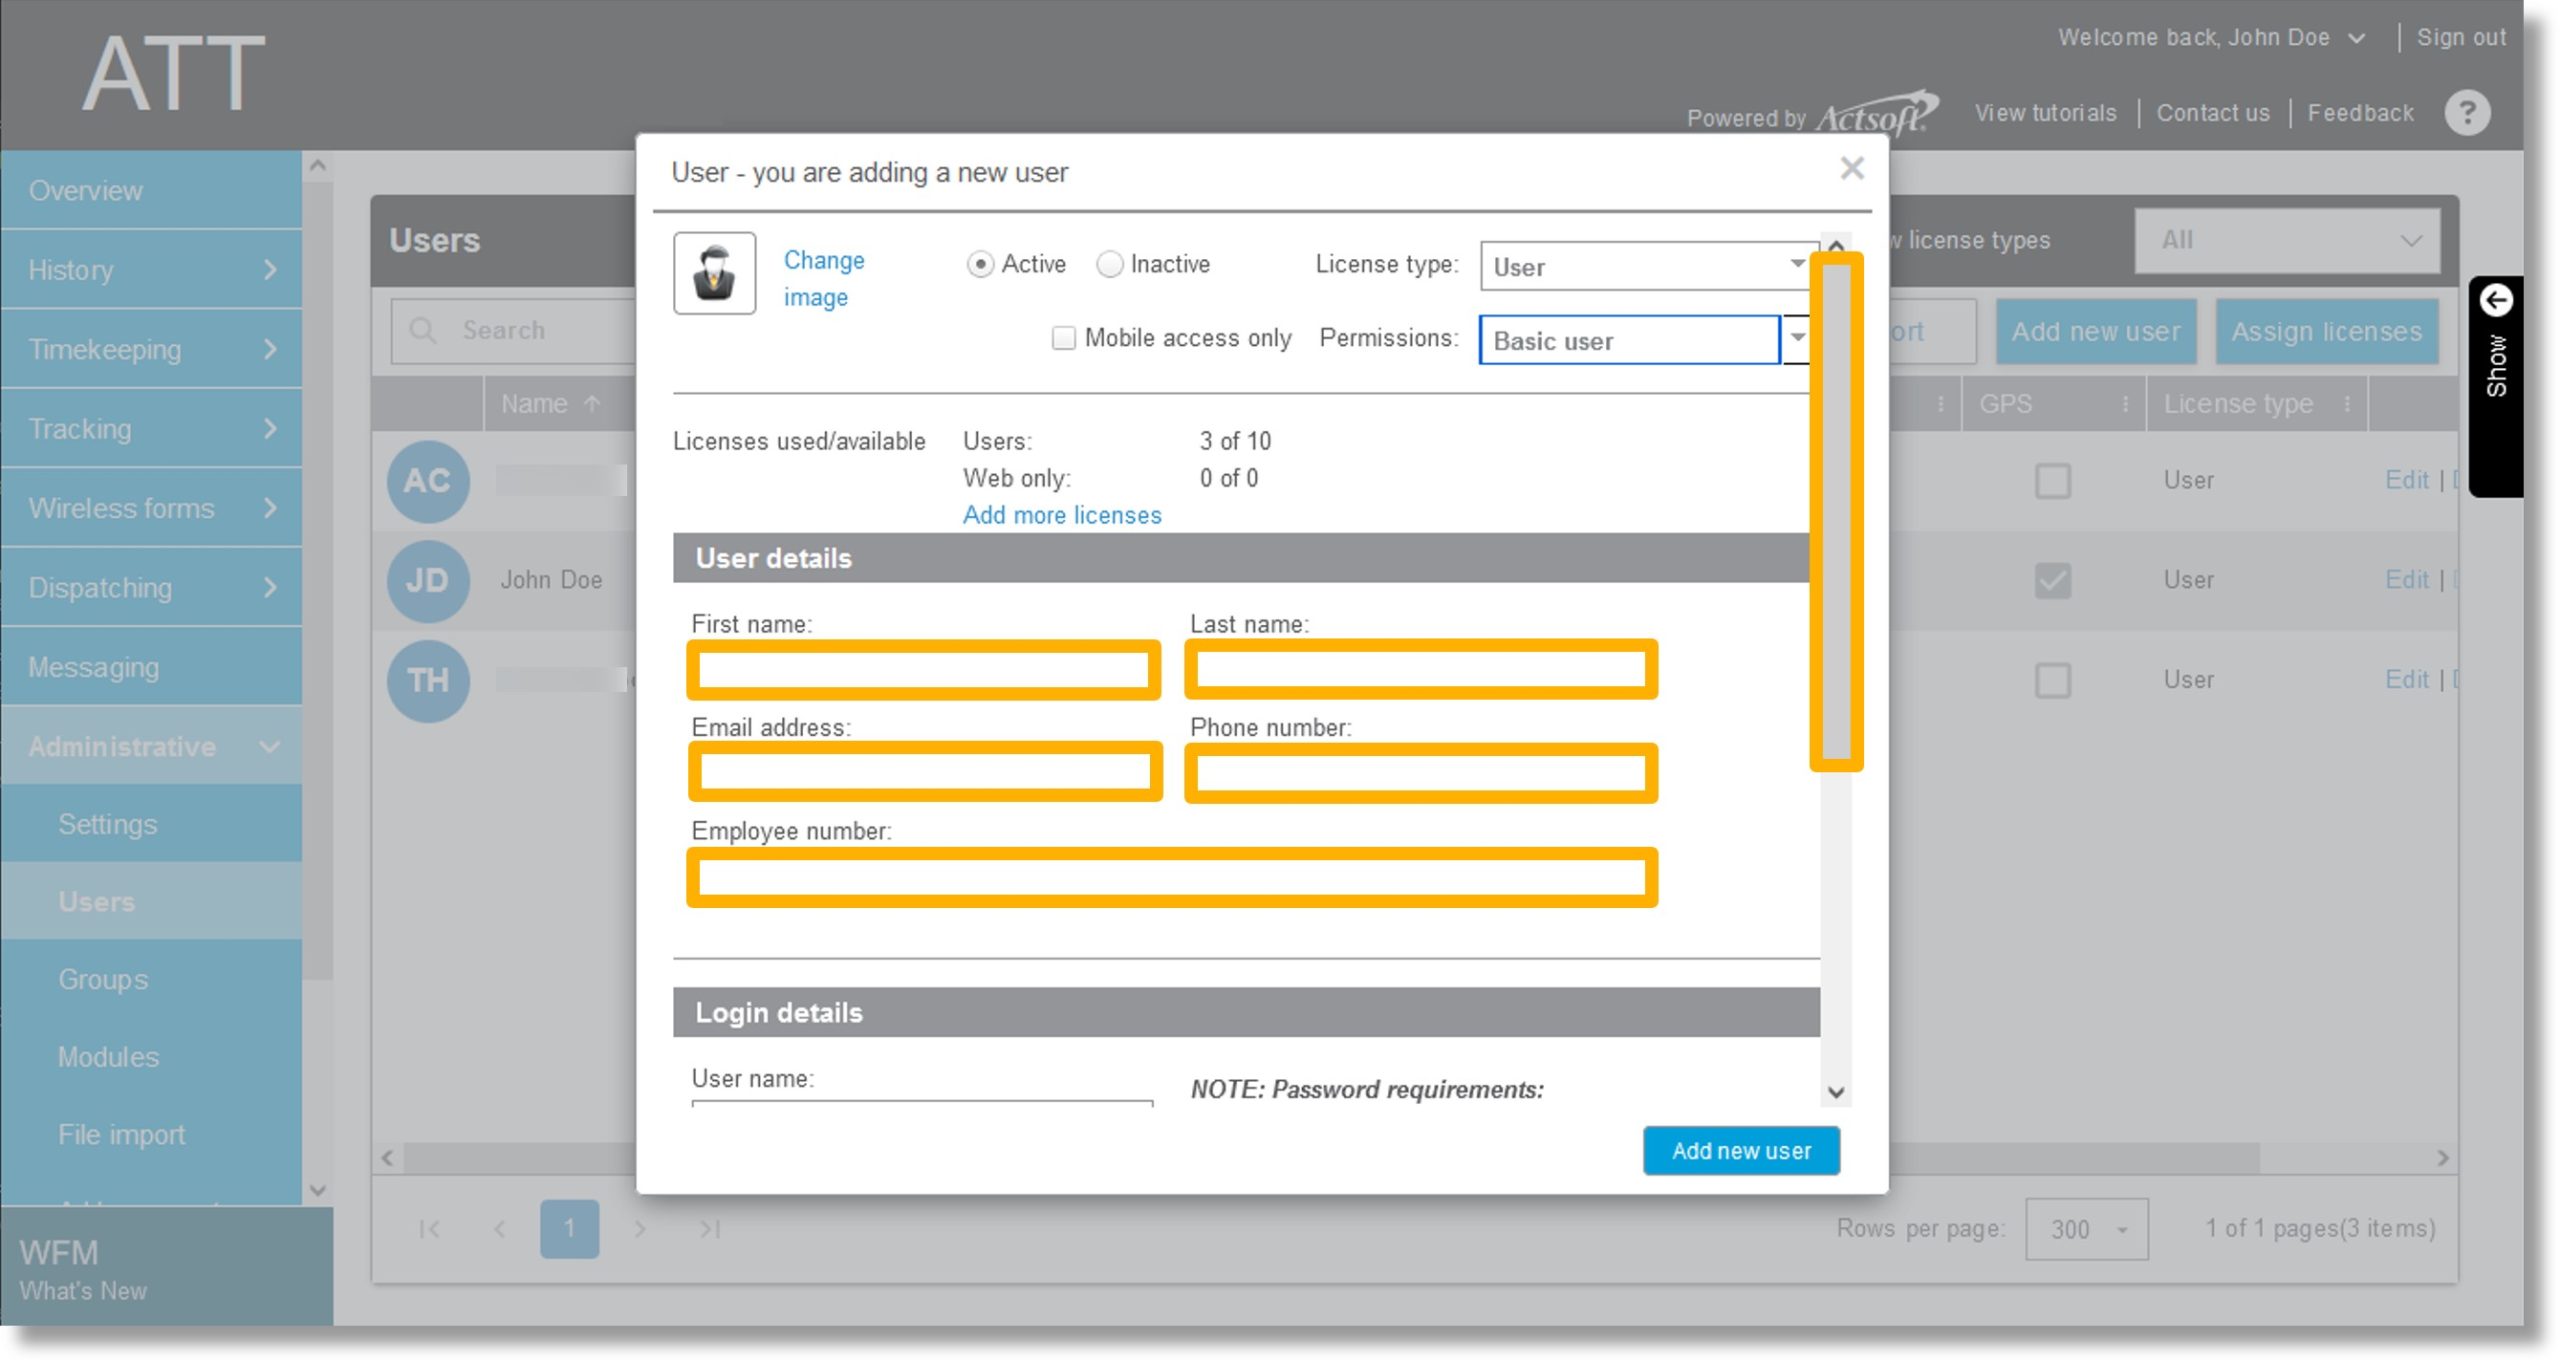
  10. Click in the field under First name and enter the user’s first name.

  11. Click in the field under Last name and enter the user’s last name.

  12. Click in the field under Email address and enter the user’s email address.

  13. Click in the field under Phone number and enter the user’s phone number.

  14. Click in the field under Employee number and enter the user’s employee number.

  15. Scroll down.

    Image of steps 10 through 15.

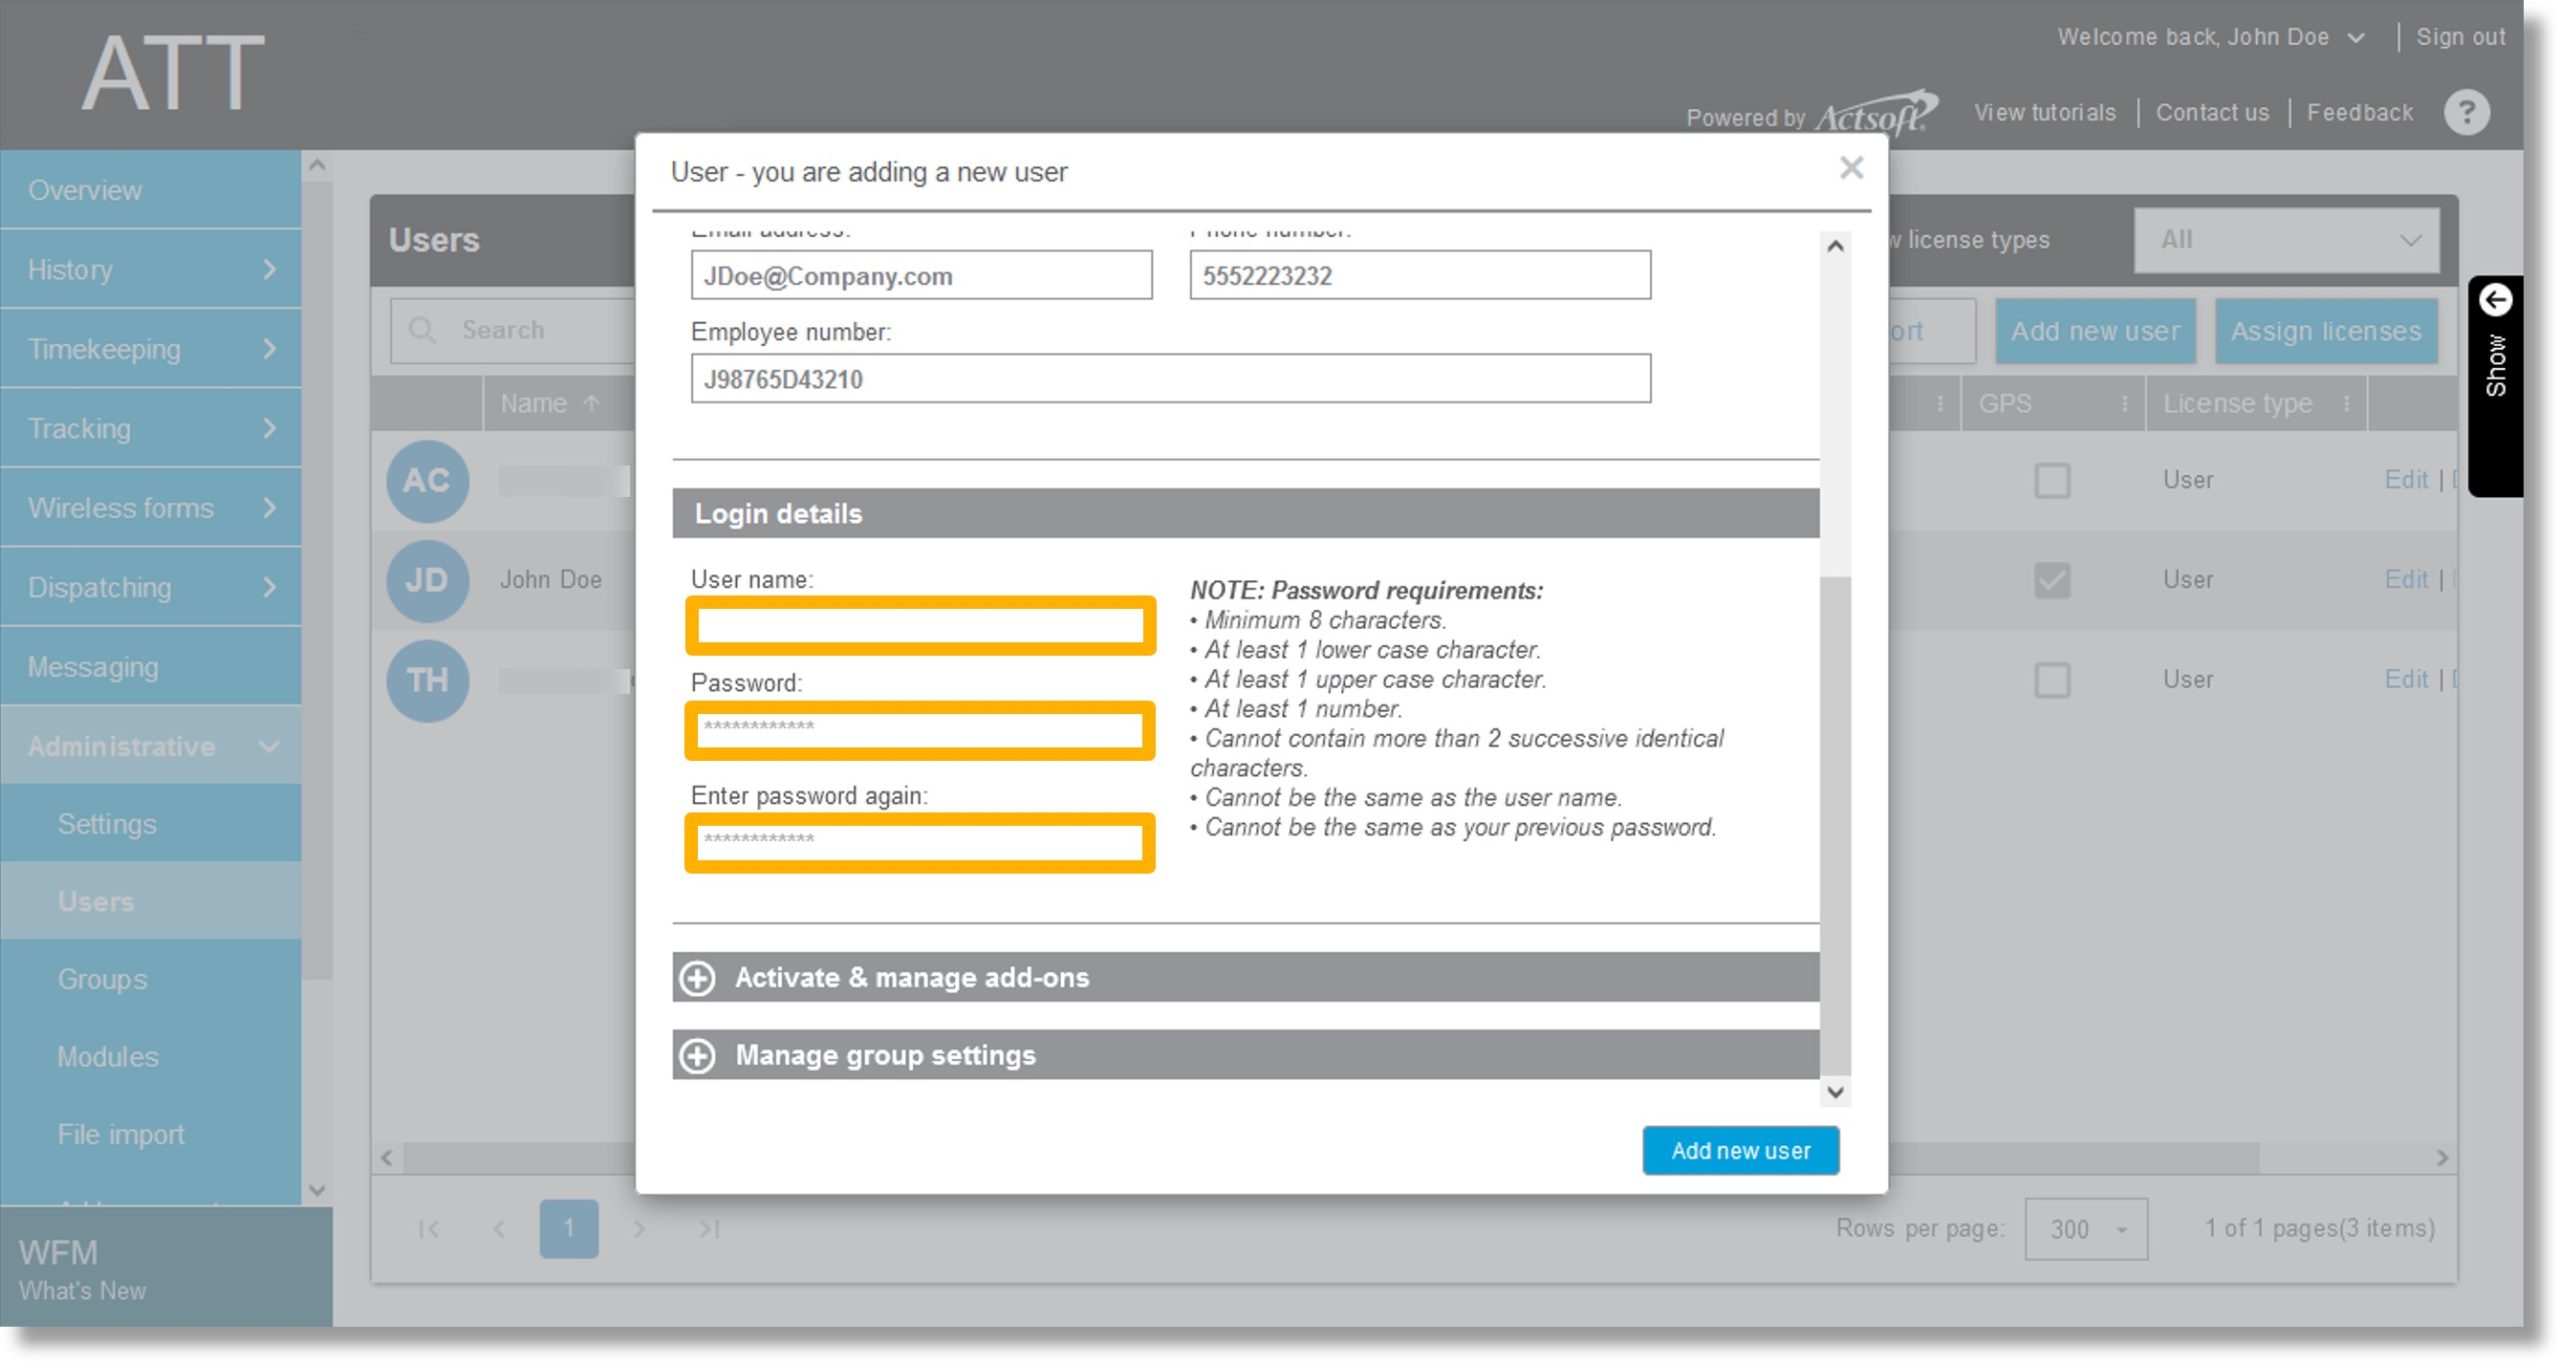
  16. Click in the field under User name and enter the desired username.

  17. Click in the field under Password and enter a password.

  18. Click in the field under Enter password again and confirm the password.
    Note: You can click on the plus symbol to the left of Activate & manage add-ons to assign an add-in for the user or Manage group settings to assign the user to a group.

    Image of steps 16 through 18.

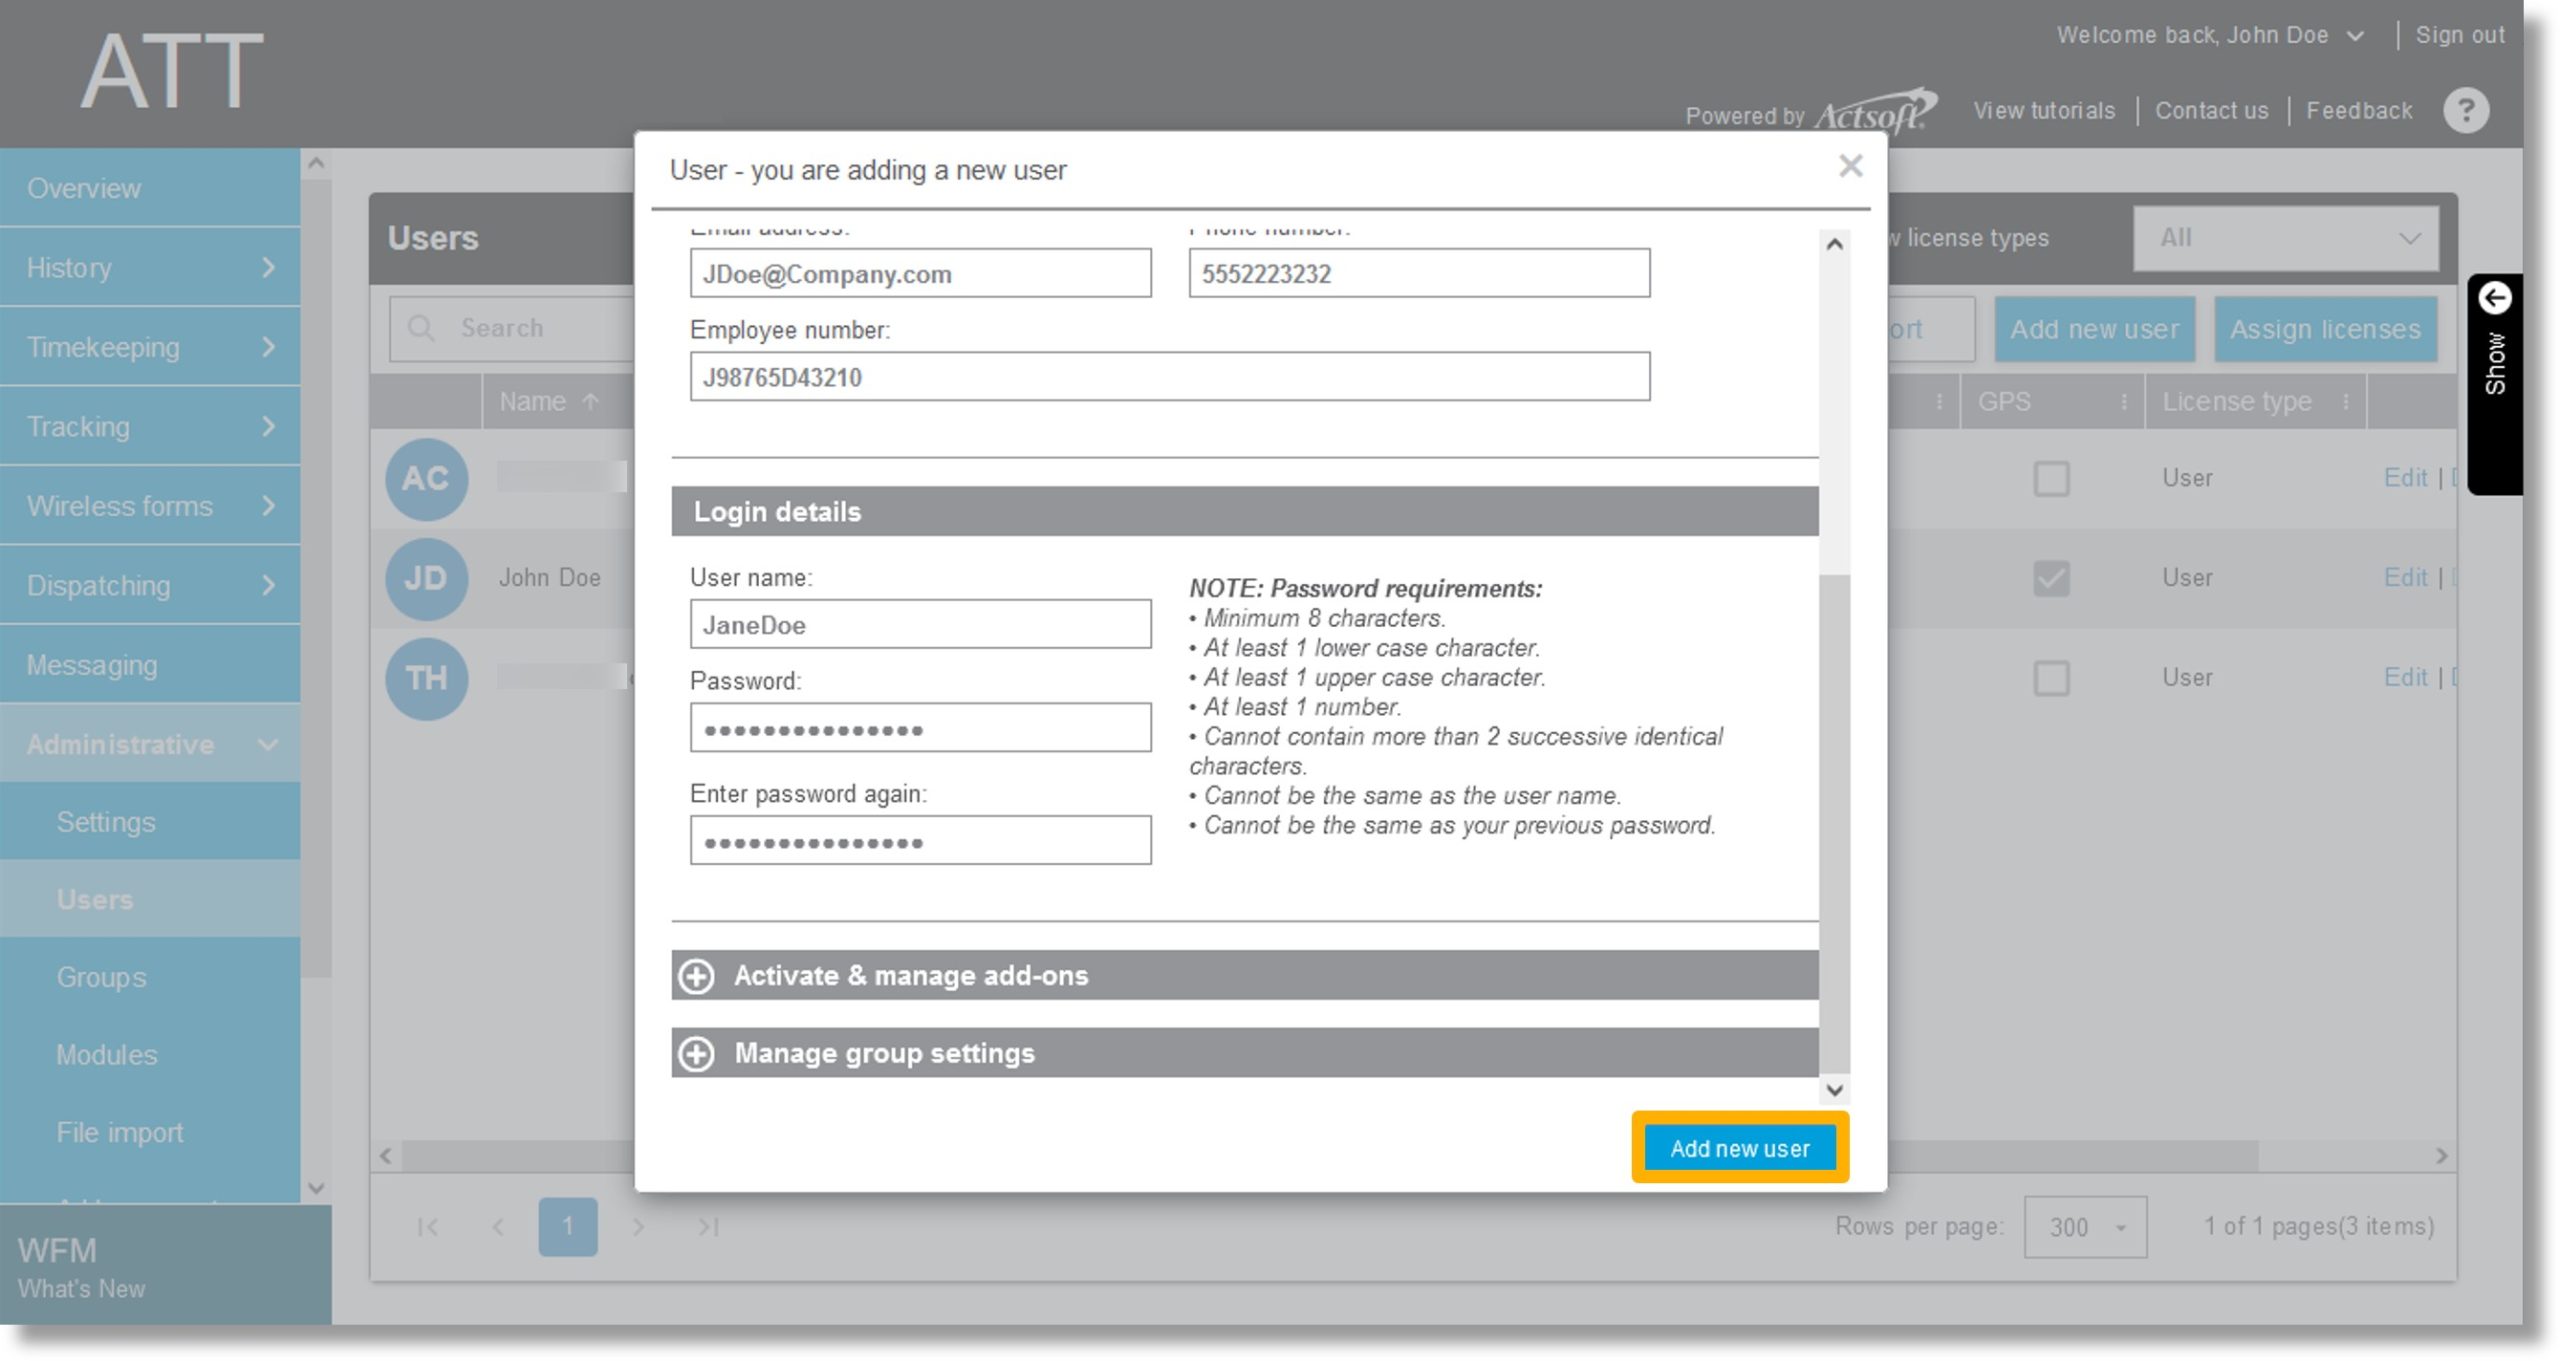
  19. Click Add new user.

    Image of step 19.