Add a user to your Box from AT&T account via the admin console
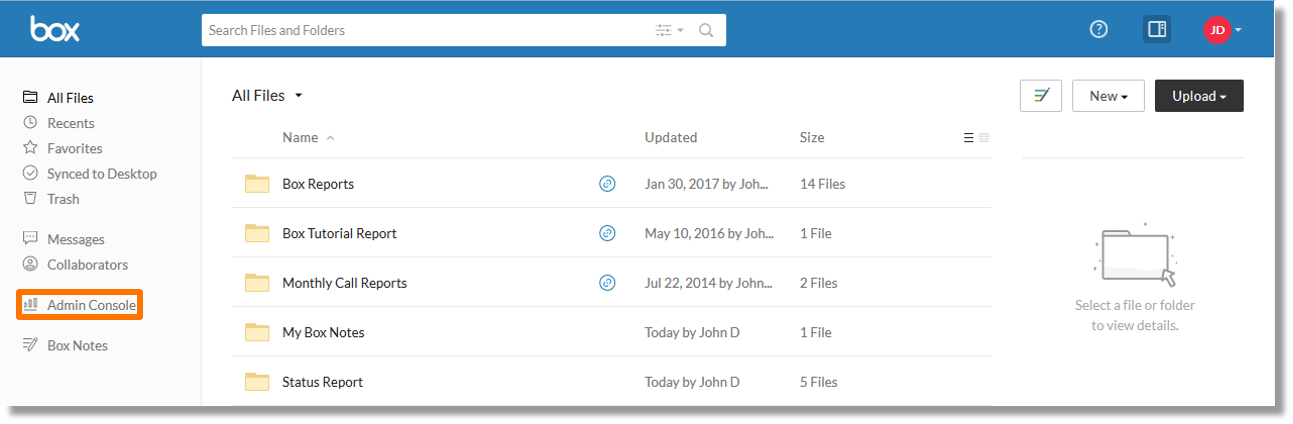
1. From the home screen, click the Admin Console link in the column on the left side of the page.
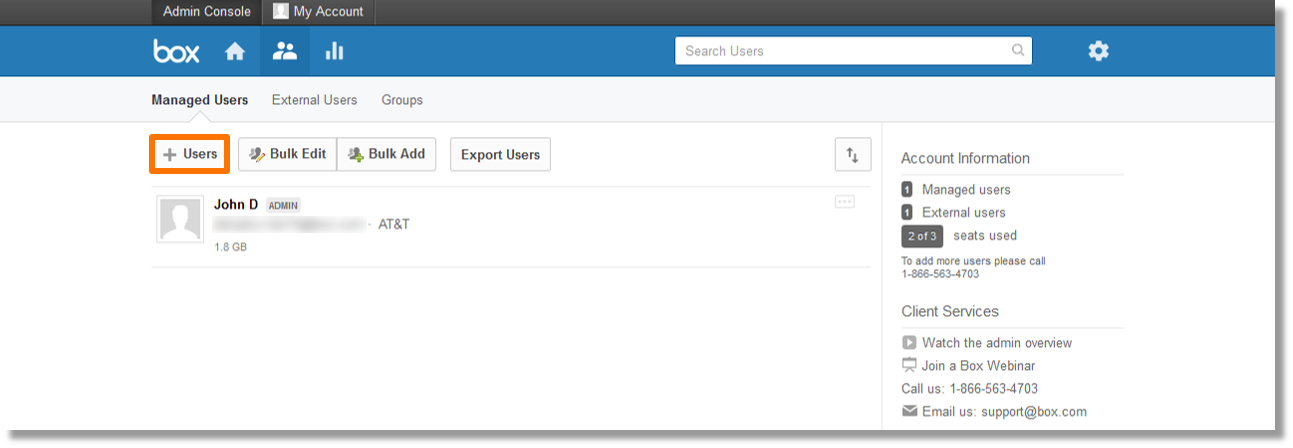
2. Click the Users and Groups icon  at the top of the page.
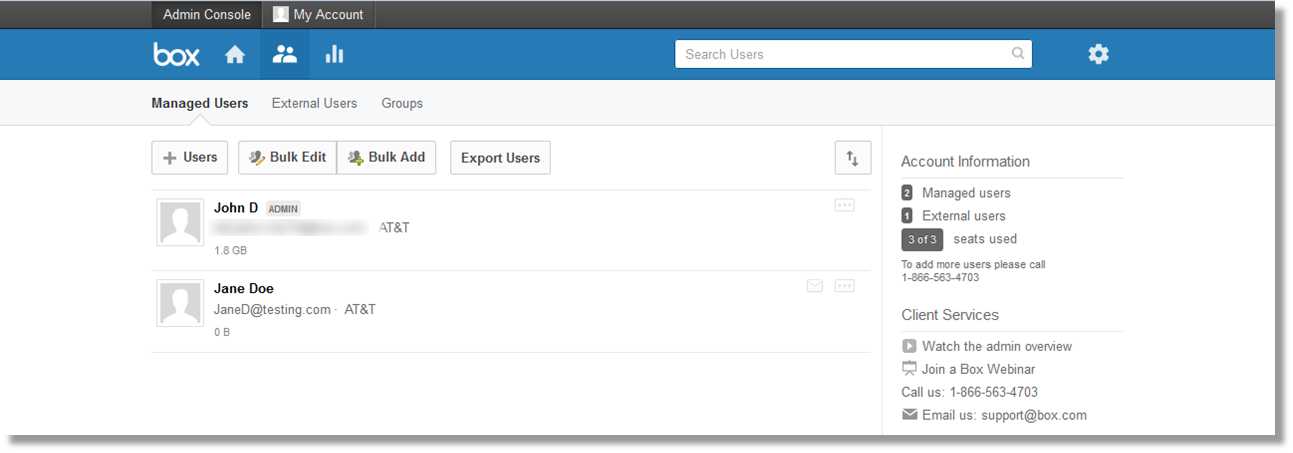
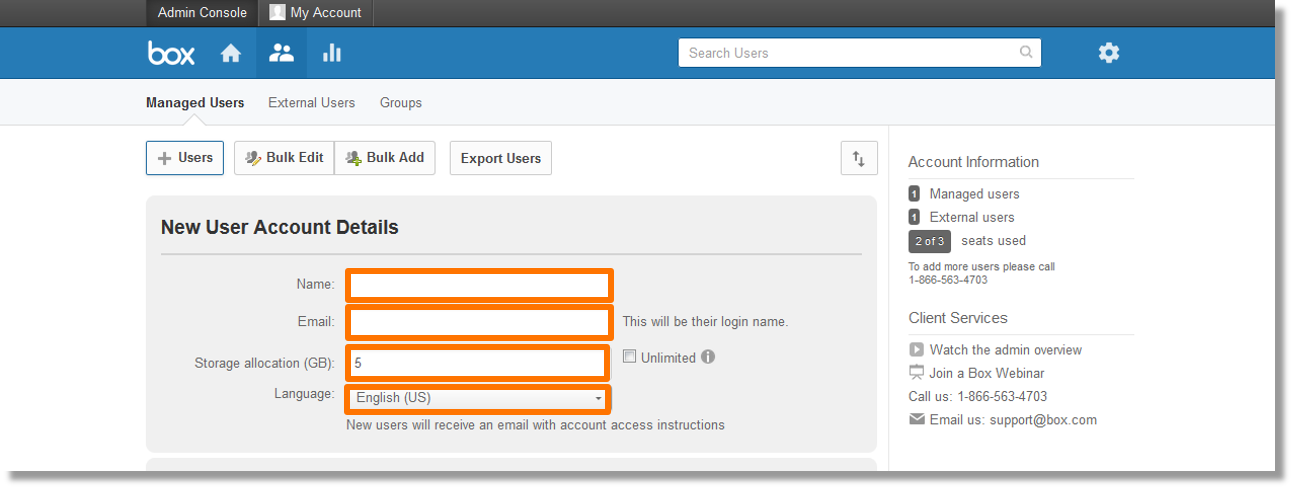
3. Click the + Users button below “Managed Users”.
4. Click in the field to the right of “Name:”, and enter the user’s first and last name.
5. Click in the field to the right of “Email:”, and enter the user’s email.
6. Click in the field to the right of “Storage allocation (GB):”, and enter the amount of data storage allocated for this user.
Note: To allocate unlimited storage for a user, click the checkbox to the right of the storage allocation textbox.
7. To the right of “Language:”, click the drop-down and select the desired language.
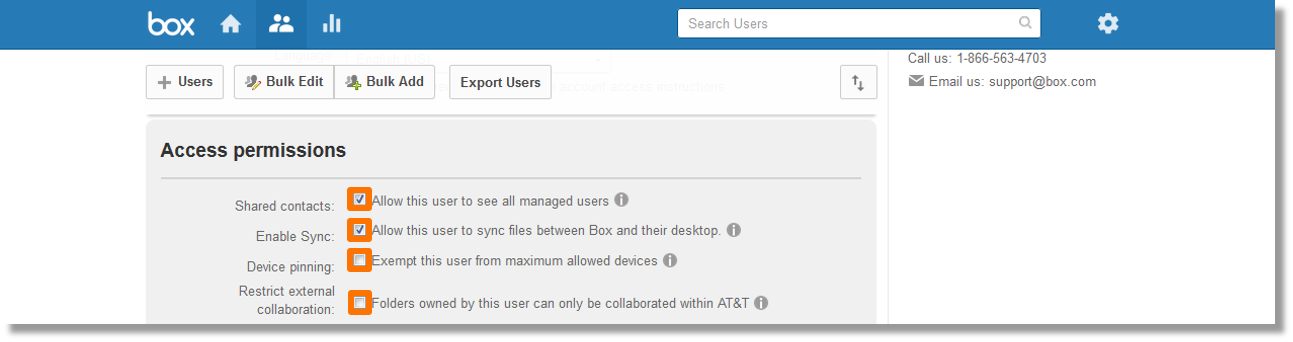
8. Scroll down and select the desired options under “Access permissions”:
· Click the checkbox to the right of “Shared contacts:” to allow this user to see all managed users.
· Click the checkbox to the right of “Enable Sync:” to allow this user to sync files between Box and their desktop.
· Click the checkbox to the right of “Device Pinning:” to exempt the user from the maximum allowed devices rules.
· Click the checkbox to the right of “Restrict external collaborators:” to restrict external collaborators.
9. Scroll down to the “Select groups this user is in:” section, and click the hyperlink below “Access Level”.
10. Select the appropriate access.

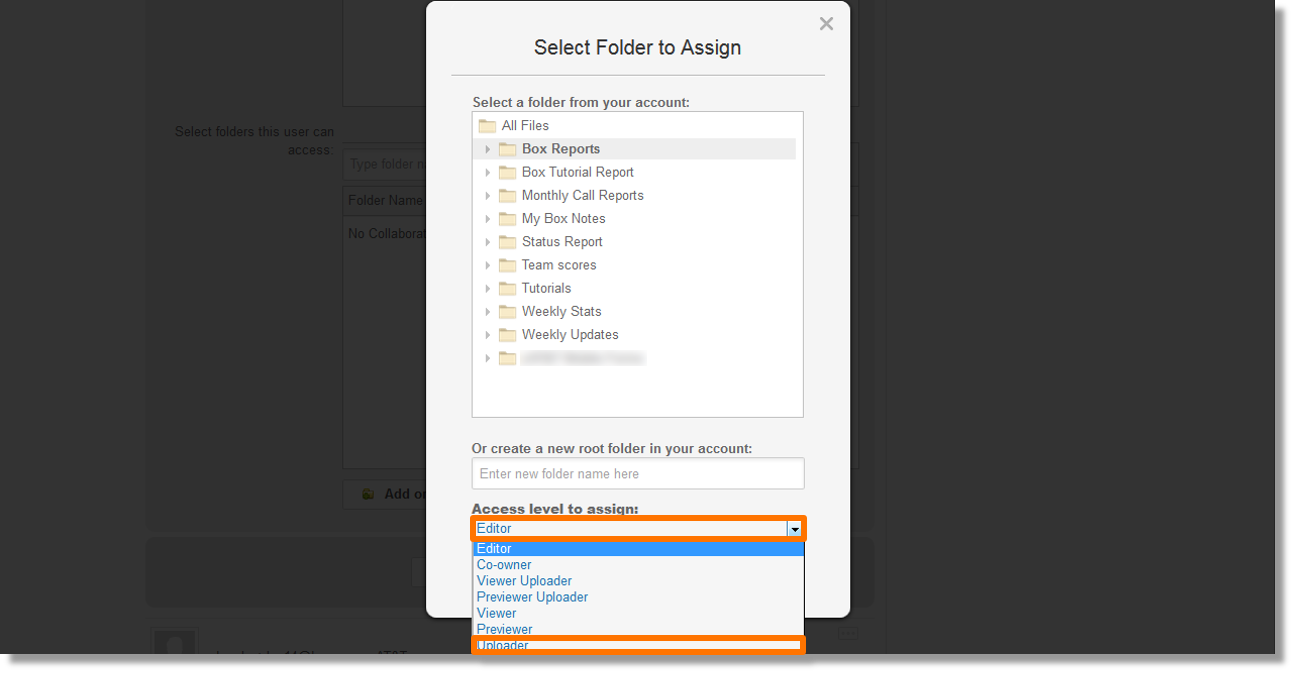
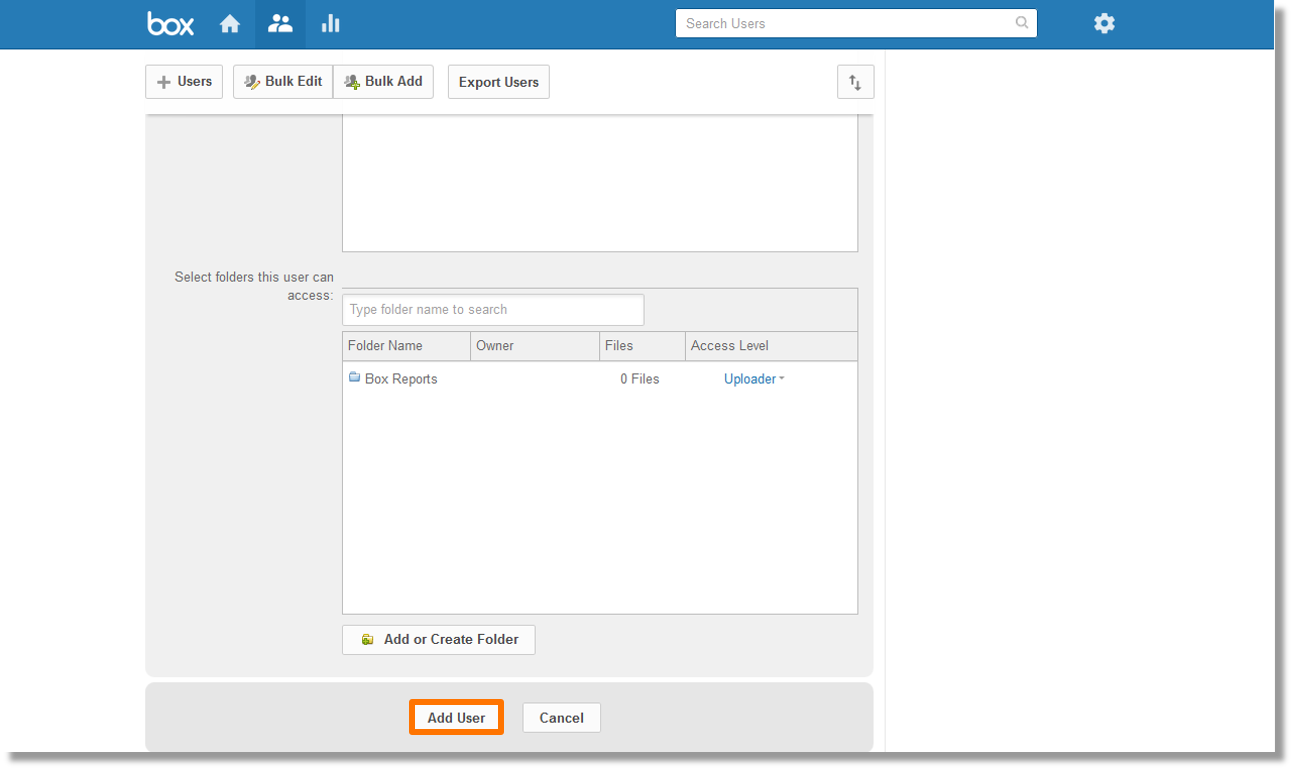
11. Scroll down to “Select folders this user can access:”, and click the Select Folders from your account URL or the Add or Create Folder button.
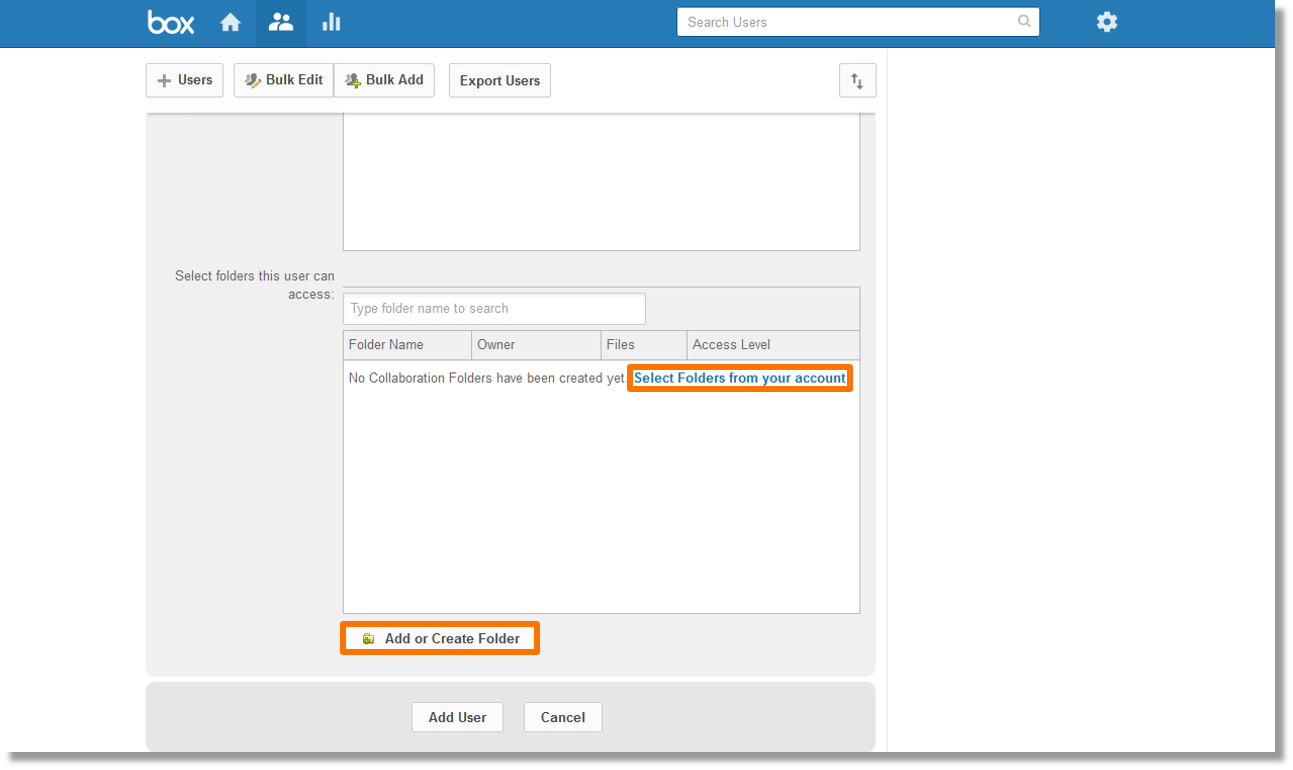
12. Click to select the desired folder(s).
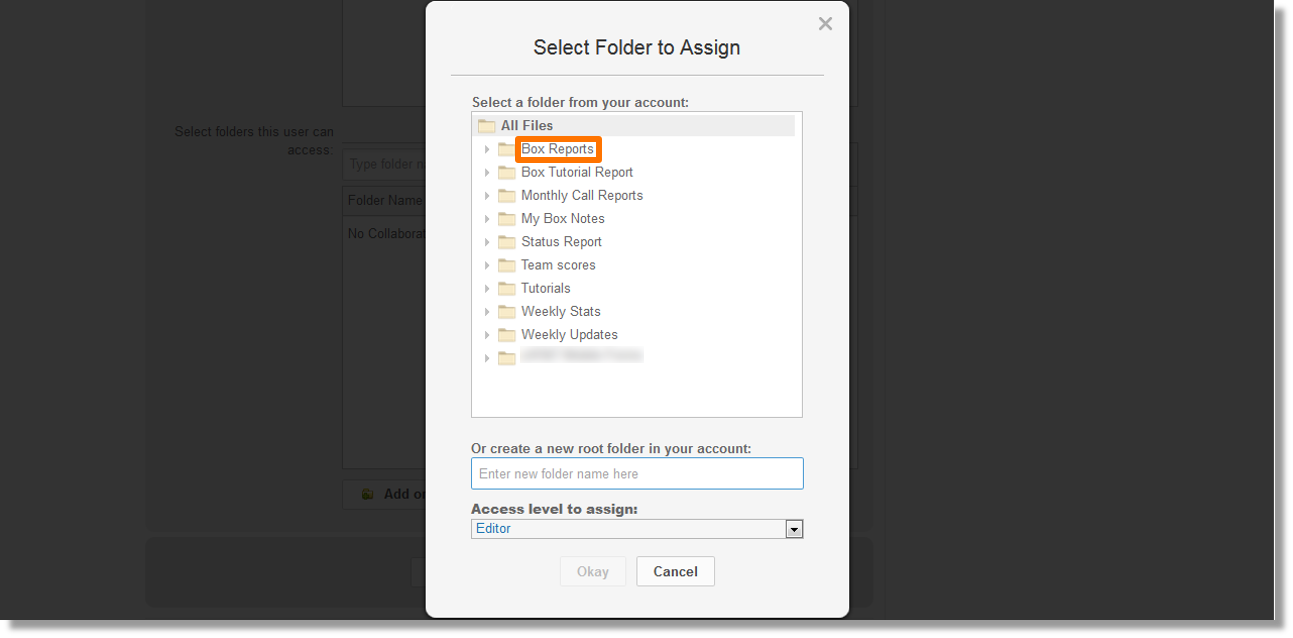
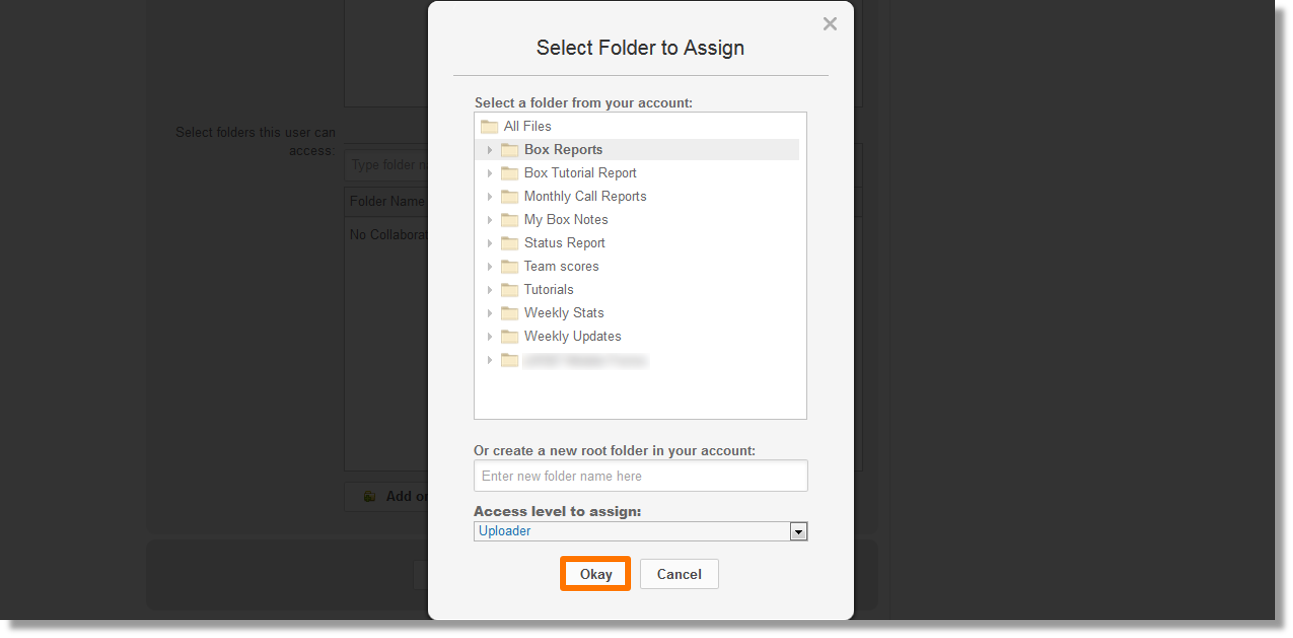
13. Click on the field or drop-down arrow under “Access Level to assign:”, and select the desired access level.
14. Click on the Okay button.
15. Click the Add User button.
16. The new user displays.