Manual Provisioning – Polycom IP Phone | AT&T Office@Hand
Article #5706
This article describes the steps to manually provision your third party Polycom IP Phone.
Manual Provisioning – Polycom IP Phone – AT&T Office@Hand
Please check Office@Hand: Desktop and Conference IP phones to know if your device can be set up with Assisted Provisioning. If the model of your Polycom phone is not on the list, then you may provision it manually.
Before you proceed with the Manual Provisioning, make sure to do the following:
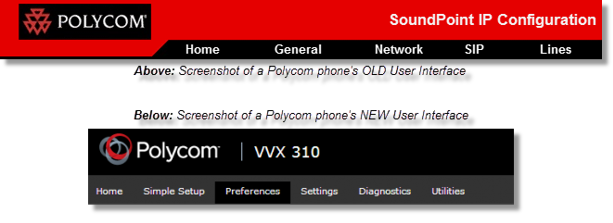
Your Polycom phone may have the old or new interface. Older Polycom phone models have the old user interface with a red header. New Polycom phone models have a black header. Click on the link below to proceed.
Manual provisioning for a Polycom device with the OLD interface
Manual provisioning for a Polycom device with the NEW interface
Manual provisioning for a Polycom device with the OLD interface
- Launch a web browser and enter the IP address of your phone in the address Bar.
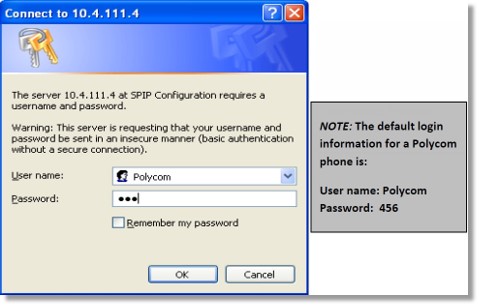
- Log in to the phone’s web user interface.
User Name: Polycom
Password: 456 or blank
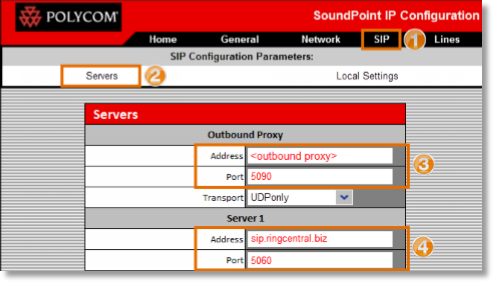
- Click on the SIP tab, and then go to Servers. Using the SIP Information, fill out the required fields.
Outbound Proxy
Address: enter the Outbound Proxy from the SIP Information. Current options are:
sip10.ringcentral.biz = SJC Data Center
sip20.ringcentral.biz = IAD Data Center
Port: 5090
Transport: UDP only
Server 1
Address: enter the SIP Domain from the SIP Information
Port: You can enter a port number between 5060 and 5090
Transport: UDP only
- Scroll down, and then click Submit.
Note: Your phone will restart after you slick Submit. After restart, log in to the phone’s User interface again. The phone’s IP address might change after restart.
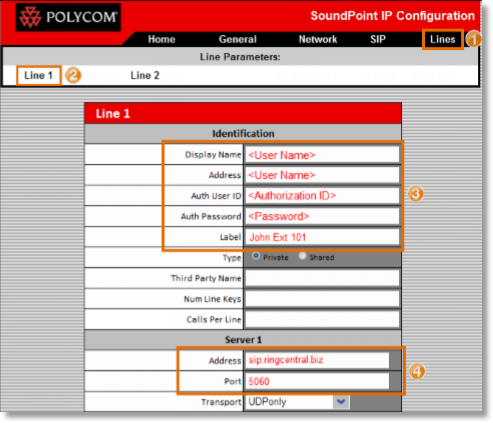
- Click the Lines tab, and then go to Line 1. Using the SIP Information, fill out the required fields.
Identification
Display Name: enter the User Name from the SIP Information
Address: enter the User Name from the SIP Information
Auth User ID: enter the Authorization ID from the SIP Information
Auth Password: enter the Password from the SIP Information
Label: The Label will appear on the phone’s screen
Server 1
Address: enter the SIP Domain from the SIP Information
Port: You can enter a port number between 5060 and 5090
Transport: UDP only
- Scroll down and look for Message Center. Under Message Center, enter the Subscriber and Callback Contact information.
Subscriber: enter the User Name from the SIP Information
Callback Mode: Registration
Callback Contact: *86
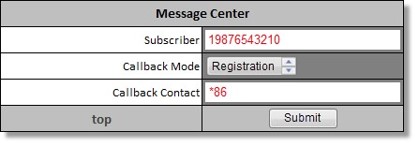
- Click Submit.
Note: Your phone will restart after you click Submit. Your device will restart several times and should have a dial tone when online. If you have further inquiries regarding setup or configuration, visit our Customer Support Center.
IMPORTANT: DO NOT unplug your phone while provisioning as it may corrupt the phone’s firmware.
Manual provisioning for a Polycom device with the NEW interface
- Launch a web browser and enter the IP address of your phone in the address bar.
- Log in as Admin to the phone’s web user interface.
User Name: Polycom
Password: 456 or blank

- Click on Simple Setup. Using the SIP Information, fill out the required fields.
SIP Server
Address: enter the SIP Domain from the SIP Information
Port: You can enter a port number between 5060 and 5090
SIP Outbound Proxy
Address: enter the Outbound Proxy from the SIP Information
Port: 5090
SIP Line Identification
Display Name: enter the User Name from the SIP Information
Address: enter the User Name from the SIP Information
Authentication User ID: enter the Authorization ID from the SIP Information
Authentication Password: enter the Password from the SIP Information
Label: The Label will appear on the phone’s screen
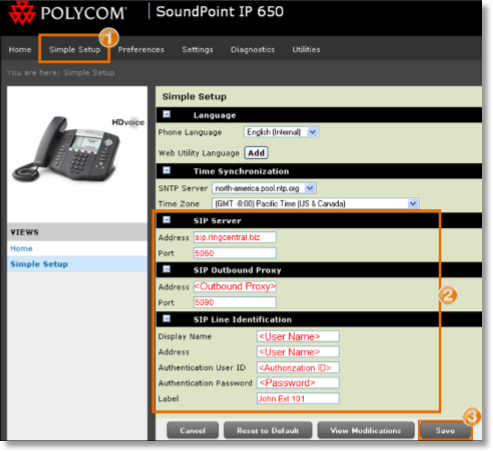
- Click Save.
Note: Your phone will restart after you click Save. Your device will restart several times and should have a dial tone when online. If you have further inquiries regarding setup or configuration, visit our Customer Support Center.
IMPORTANT: DO NOT unplug your phone while provisioning as it may corrupt the phone’s firmware.
Keywords: Instructions, Manual, Provisioning, Unsupported, Devices, Polycom, IP Phone
Was this page helpful? Yes No