Manage Call Settings in AT&T Collaborate Enhanced Mobile
You can manage AT&T Collaborate™ calling features that affect how incoming calls are treated. From the Manage Forwarding and Ringing page, you can view and manage these calling features:
- Anonymous Call Rejection
- Do Not Disturb
- Selective Call Acceptance
- Selective Call Rejection
- Call Forwarding Always
- Call Forwarding Busy
- Call Forwarding No Answer
- Call Forwarding Not Reachable
- Call Forwarding Selective
- Locate Me – Simultaneous Ring
- Locate Me – Sequential Ring
- Virtual Office
- Voicemail
Note: Only features assigned to you by your administrator appear.
Advanced ringing settings provide greater flexibility for ways that callers can reach you. You should be aware of all of your forwarding settings and interactions between the settings. It’s a good idea to turn on the fewest settings needed to achieve the result you want. For example, don’t turn on Virtual Office, Locate Me ─ Simultaneous Ring, and Locate Me ─ Sequential Ring at the same time.
If you’re using the Collaborate mobile app’s callback method, you must set up your wireless phone number as a Virtual Office location.
The Manage Forwarding and Ringing page has 3 sections:
- Forwarding Preconditions
- Basic Forwarding Settings (for basic call forwarding features)
- Advanced Ringing Settings (for advanced call forwarding features)
Forwarding Preconditions
Forwarding preconditions are applied first, before basic and advanced forwarding conditions. Preconditions override basic and advanced conditions.
Note: If your administrator turned on Location Night Forwarding for you, it will override your personal settings during the times when Location Night Forwarding applies.
Here are some examples of how you might use forwarding preconditions:
- When you can’t accept calls for a few hours, turn on the Do Not Disturb call forwarding precondition. The system temporarily ignores your other forwarding settings and all calls go to voicemail or receive a busy signal.
- When you don’t want to accept calls from callers who hide their caller ID, turn on the Anonymous Call Rejection precondition. Calls without caller ID are automatically rejected. Rejected callers receive a message that states that you’re not accepting calls from unidentified callers.
- When you want to screen calls based on particular phone numbers or times of day, set Selective Call Acceptance and Selective Call Rejection criteria as preconditions. You can define selective criteria rules that evaluate an incoming call to determine whether to pass the call on to your basic or advanced call forwarding settings.
Manage call rejection feature settings
Call rejection features are listed under Forwarding Preconditions. These features are processed first. If you set a feature or criteria that rejects a call, that feature overrides your forwarding settings.
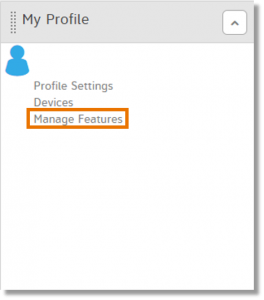
- On the Collaborate homepage, in the My Profile widget, click Manage Features. The Manage My Features page appears.
- Next to Selective Call Acceptance, Selective Call Rejection, or Anonymous Call Rejection, click Manage. The Manage Forwarding and Ringing Settings page appears.

- To turn on call rejection, under Anonymous Call Rejection, slide the switch to the right (on), and then click Save Changes.
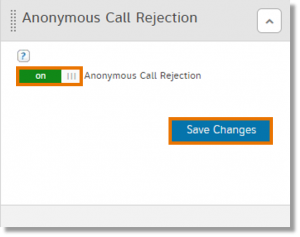
Collaborate will then reject calls that are marked Private. Calls with unavailable or other caller ID values will still be accepted. Rejected callers receive a message that states that you’re not accepting calls from unidentified callers.
- Under Selective Call Acceptance or Selective Call Rejection, click Add New Criteria.
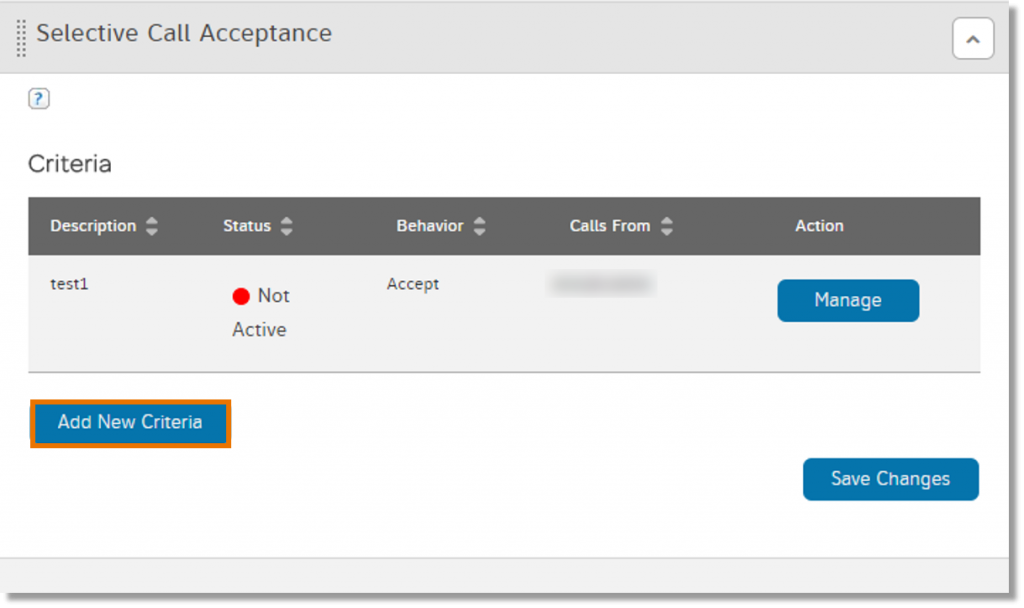
- For each setting, you can specify whether calls that meet the criteria will be rejected or accepted. An accepted call will be processed further for call forwarding or will ring your phone if you have no call forwarding set. A warning message appears telling you to save your changes before you go to other pages.
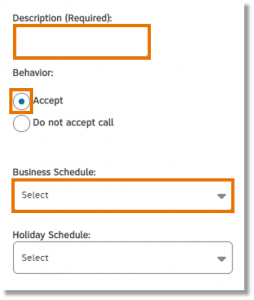
- Click Proceed. The Selective Call Rejection – Add Criteria or Selective Call Acceptance – Add Criteria page appears.
- Enter a description, select an action, and then select schedules (Business and Holiday).
- Select call forwarding preferences, enter up to 12 phone numbers, click Add, and then click Back.
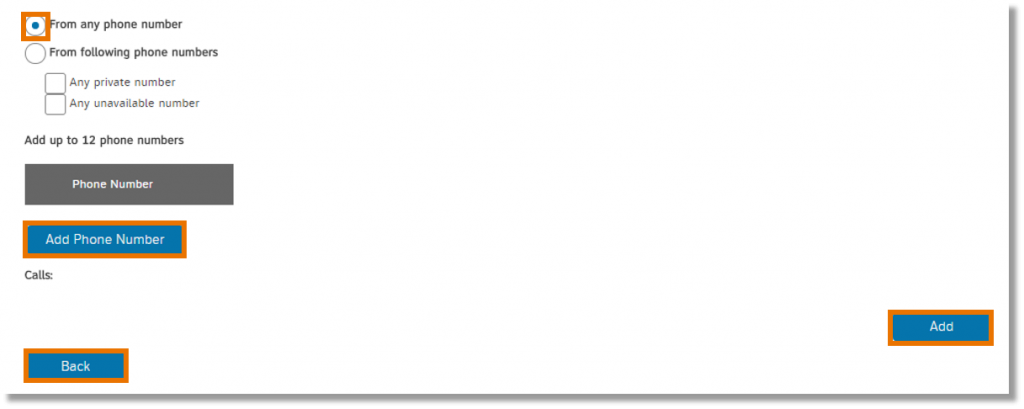
- Under Selective Call Acceptance or Selective Call Rejection, click Save Changes.

Manage Do Not Disturb
When you don’t want to be bothered, use the Do Not Disturb feature to send your calls directly to your “when I’m busy” treatment (usually voicemail) without your phone ringing. To make sure you know when a call is sent to voicemail, use Ring Reminder, which plays a short burst of rings on your primary phone to let you know when calls are sent to voicemail.
- On the Collaborate homepage, in the My Profile widget, click Manage Features. The Manage My Features page appears.
- Next to Do Not Disturb, click Manage. The Do Not Disturb Settings page appears.

- To turn on Do Not Disturb, slide the switch to the right (on). To turn Do Not Disturb off, slide the switch to the left (off).
- To turn on Ring Reminder, slide the switch to the right (on). To turn Do Not Disturb off, slide the switch to the left (off).
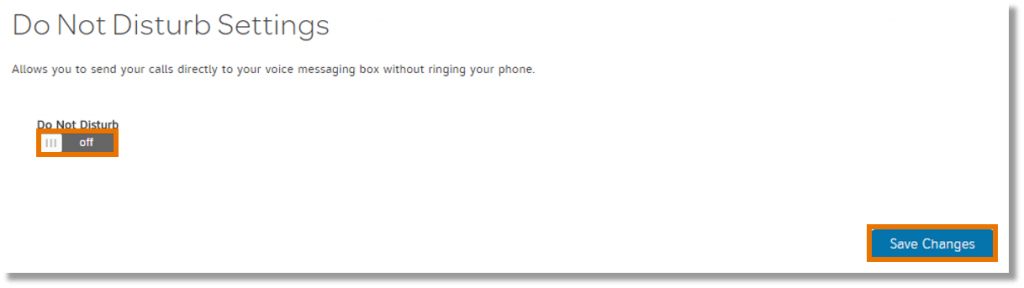
- Click Save Changes.
Top
Basic Call Forwarding Features
Basic call forwarding features include:
- Call Forwarding Always
- Call Forwarding Busy
- Call Forwarding No Answer
- Call forwarding Not Reachable
- Voicemail Management (when to forward calls to voicemail).
Call Forwarding Always, Call Forwarding Busy, or Call Forwarding No Answer override your voicemail management settings and calls aren’t sent to voicemail.
Call Forwarding Not Reachable is used to forward incoming calls to different phone numbers when your device can’t be reached, such as during a power outage. This setting is often used for disaster recovery, when a full site power outage or network interruption occurs.
Manage basic call forwarding settings
- On the AT&T Collaborate homepage, in the My Profile widget, click Manage Features. The Manage My Features page appears.
- Next to Call Forwarding, click Manage.

The Manage Forwarding and Ringing Settings page appears.
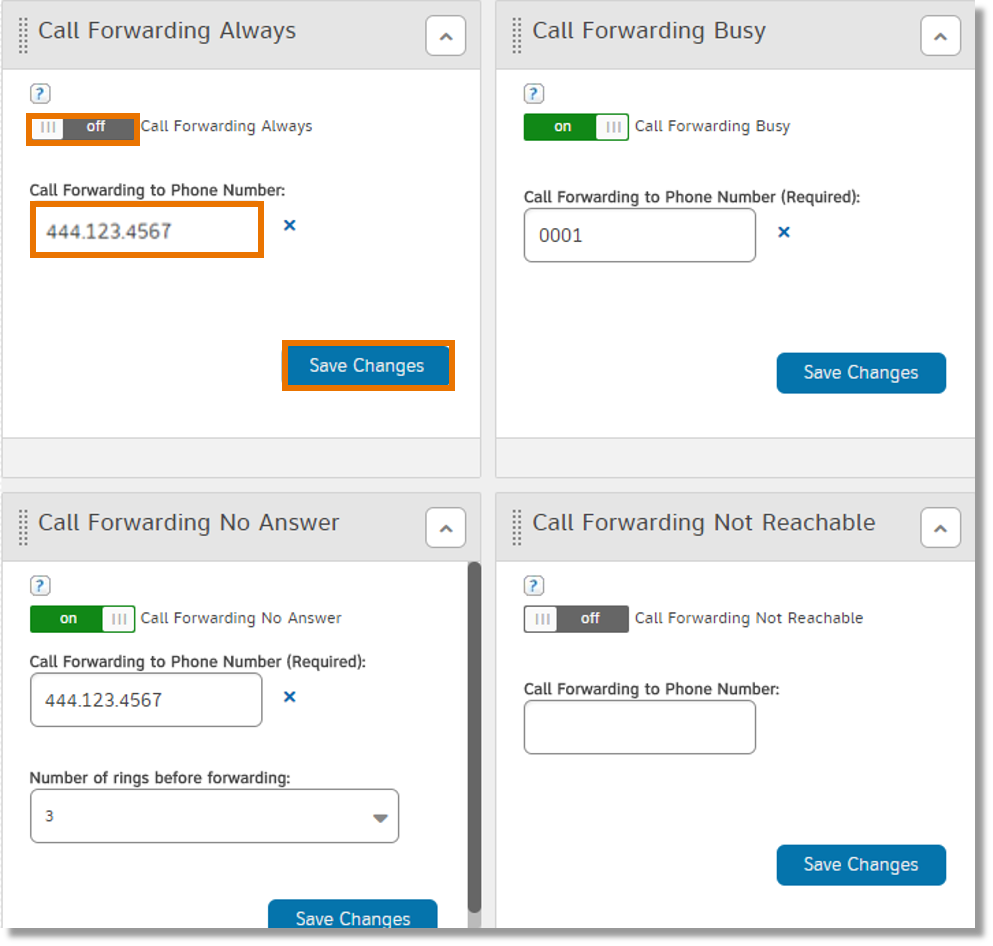
- For each call forwarding feature:
– To turn the feature on, slide the switch to the right (on).
– Enter a forwarding phone number.
– Select the number of times the phone should ring before forwarding a call (between 0 and 10 times) (if applicable).
– Click Save Changes.
Add Virtual Office phones
- On the Collaborate homepage, in the My Profile widget, click Manage Features. The Manage My Features page appears.
- Next to Virtual Office, click Manage. The Manage Forwarding and Ringing Settings page appears.

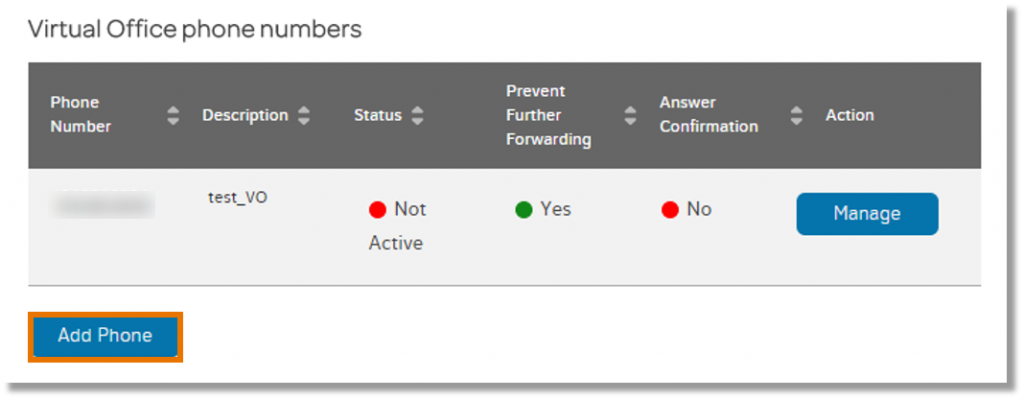
- Under Virtual Office, click Add Phone. A warning message appears telling you to save your changes before you go to other pages.
- Click Proceed. The Virtual Office Phone Number page appears.
- Enter a phone number and description.
- To turn different settings for this phone number on or off, slide the switch to the right (on) or left (off), and then click Add.
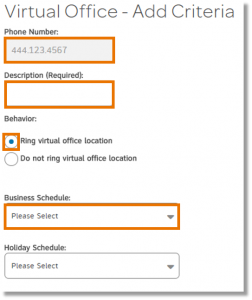
- In the Criteria section, click Add New Criteria. The Virtual Office – Add Criteria page appears.
- Enter a description, select an action, and then select schedules (Business and Holiday).
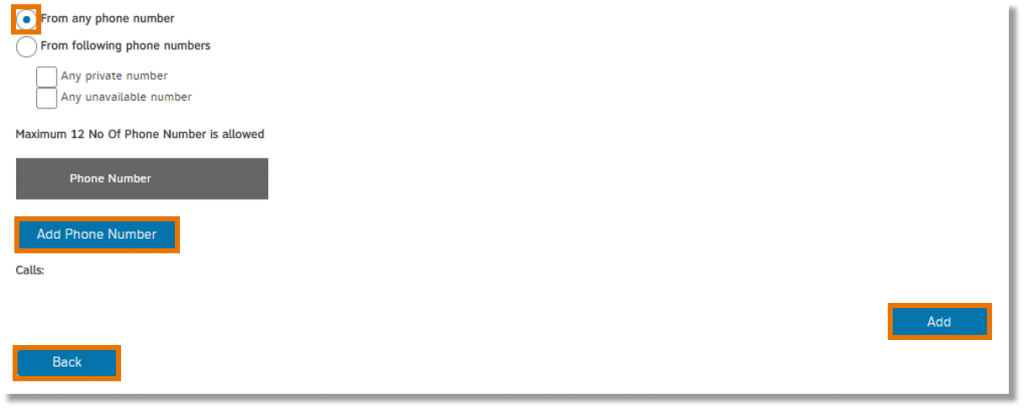
- Select call forwarding preferences, enter up to 12 phone numbers, click Add, and then click Back. You return to the Virtual Office Phone Number page.
- Click Save.

Manage Virtual Office phones
Use Virtual Office to link phone numbers such as your home phone number to your AT&T Collaborate account. Virtual Office phones will ring when your mobile phone rings. Virtual Office phones also ring when you make click-to-dial calls (if you select that option).
- On the Collaborate homepage, in the My Profile widget, click Manage Features. The Manage My Features page appears.
- Next to Virtual Office, click Manage. The Manage Forwarding and Ringing Settings page appears.
- If you want calls to ring your active Virtual Office locations when you use click-to-dial, under Virtual Office, check the Alert all locations for Click-to-Dial calls box, and then click Save Changes.
- In the Virtual Office Phones table, click Manage next to the phone you want to manage. A warning message appears telling you to save your changes before you go to other pages.
- Click Proceed. The Virtual Office Phone Number page appears.
– To delete the phone number, click Delete Phone Number.

– To turn different settings for this phone number on or off, slide the switch to on or off.
– To add settings for this phone number, click Add New Criteria. The Virtual Office – Add Criteria page appears.
- Enter a description, select an action, and then select schedules (Business and Holiday).
- Select call forwarding preferences, enter up to 12 phone numbers, and then click Add.
- To return to the Virtual Office Phone Number page, click Back.
- Click Save.
Top
Advanced Call Forwarding Features
You can manage the following features in the Advanced Ringing Settings section of the Manage Forwarding and Ringing Settings page:
- Call Forwarding Selective
- Locate Me – Simultaneous Ring
- Locate Me – Sequential Ring
These features give you additional flexibility in how to manage incoming calls.
Manage advanced call forwarding settings
- On the Collaborate homepage, in the My Profile widget, click Manage Features. The Manage My Features page appears.
- Next to Call Forwarding Selective, Locate Me – Simultaneous or Locate Me – Sequential, click Manage. The Manage Forwarding and Ringing Settings page appears.
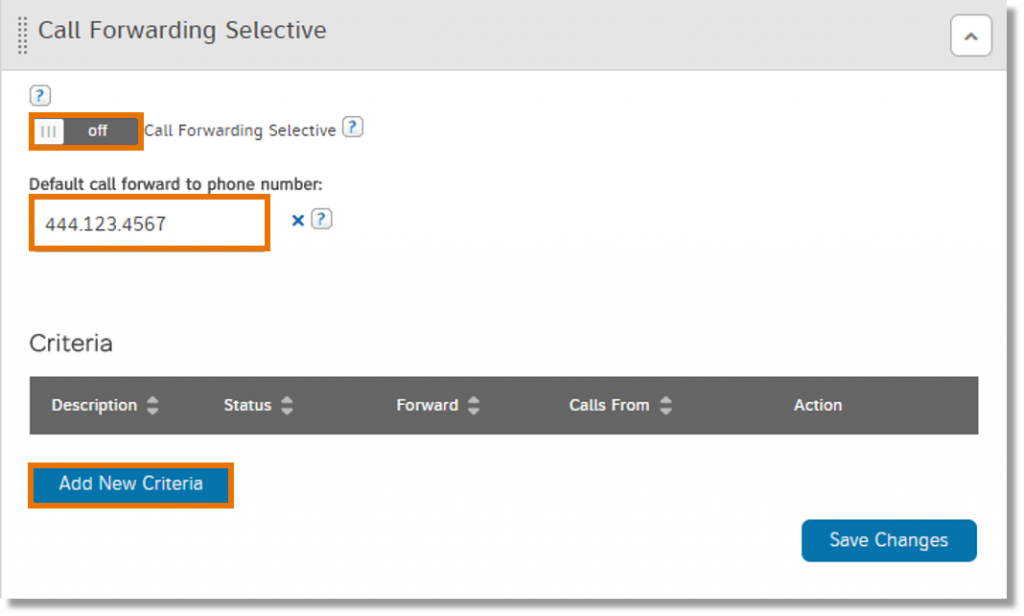
- Under Call Forwarding Selective:
– Enter a default forwarding phone number. When you add selective criteria, you can decide whether calls with the same criteria are forwarded to this default number or to a different number.
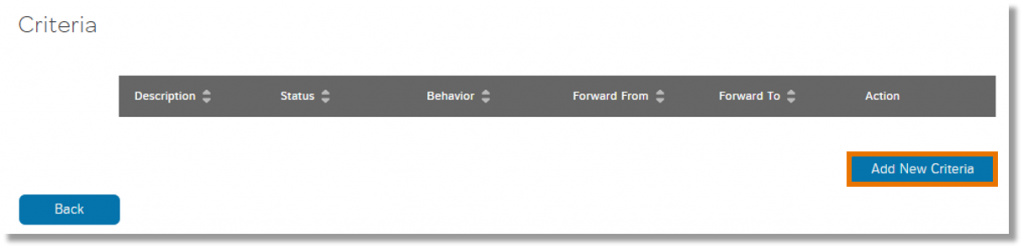
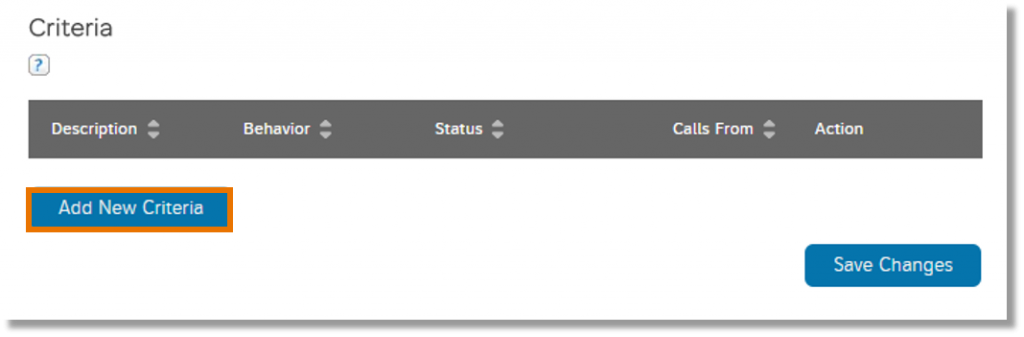
– To add more settings, click Add New Criteria.
A warning message appears telling you to save your changes before you go to other pages.
– Click Proceed. The Call Forwarding Selective – Add Criteria page appears.
– Enter a description, select an action, and then select schedules (Business and Holiday).
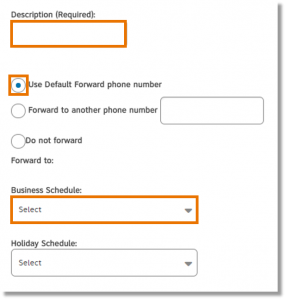
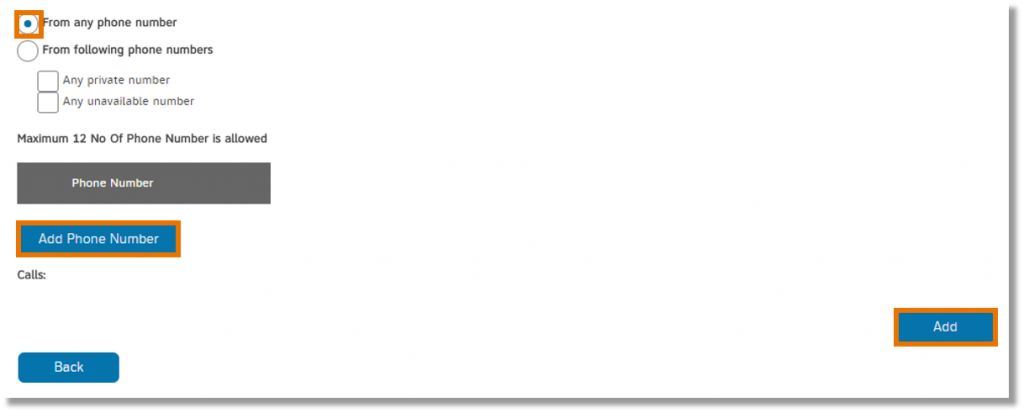
– Select call forwarding preferences, enter up to 12 phone numbers, click Add, and then click Back.

– In the Call Forwarding Selective tile, slide the switch to the right (on), and then click Save Changes.
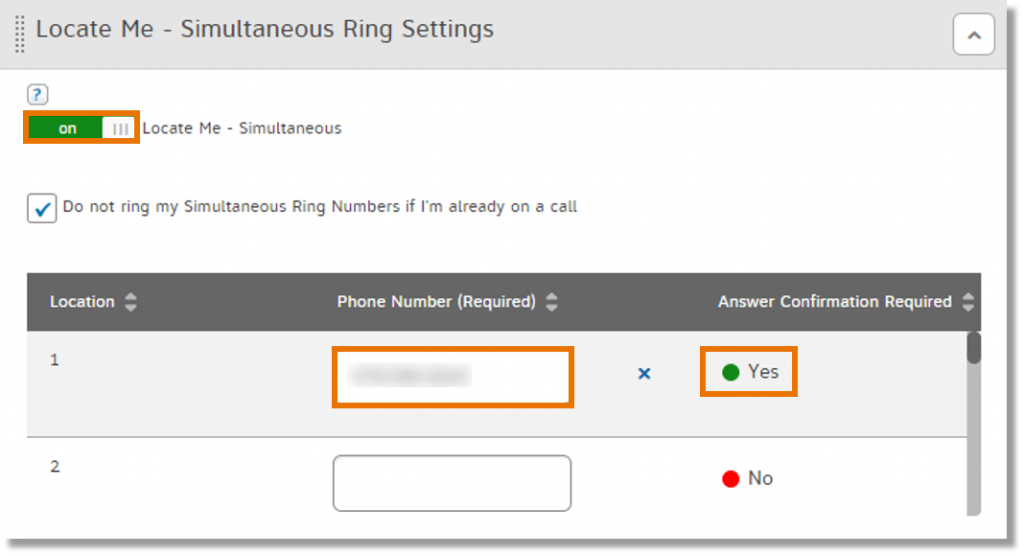
- Under Locate Me – Simultaneous Ring Settings:
– Slide the switch to the right (on).
– If you don’t want other numbers to ring when you’re on a call, check the Do not ring my Simultaneous Ring Numbers if I’m already on a call box.
– Enter up to 10 additional phone numbers that you want to ring when a call comes in to your primary number.
– To turn on answer confirmation, for each phone number click No. Yes appears and the button changes from red to green.
– To add more settings, click Add New Criteria.
A warning message appears telling you to save your changes before you go to other pages.
– Click Proceed. The Simultaneous Ring – Add Criteria page appears.
– Enter a description, select an action, and then select schedules (Business and Holiday).

– Select call forwarding preferences, enter up to 12 phone numbers, click Add, and then click Back.
– Click Save Changes.
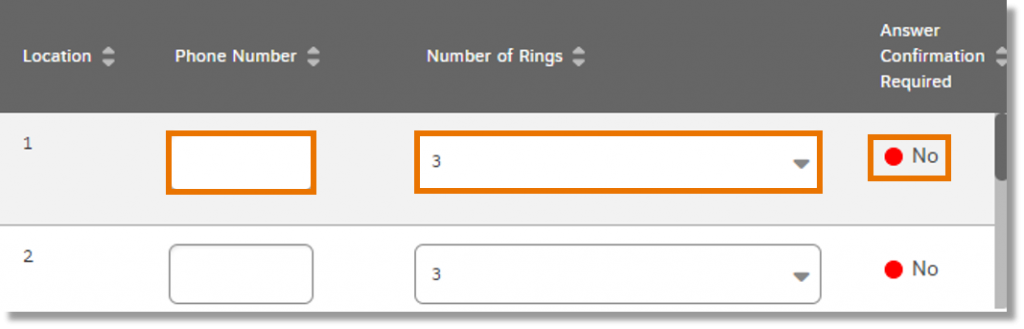
- Under Locate Me – Sequential Ring Settings:
– Check the boxes for the settings you want.
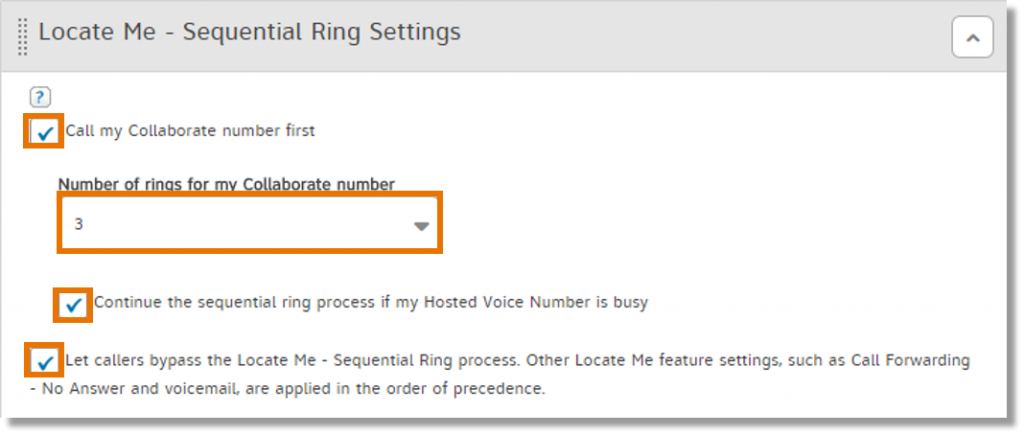
– Select the number of rings for your AT&T Collaborate phone number.
– To turn on answer confirmation for each phone number, click No. Yes appears and the button changes from red to green.
– To add more settings, click Add New Criteria.
– When you receive a warning message, click Proceed. The Simultaneous Ring – Add Criteria page appears.
– Enter a description, select an action, and then select schedules (Business and Holiday).
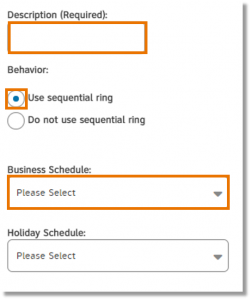
– Select call forwarding preferences, enter up to 12 phone numbers, click Add, and then click Back.
– Click Save Changes.
Manage voicemail forwarding
Call forwarding settings override voicemail forwarding settings. To make sure your voicemail forwarding settings apply, turn off these features:
- Call Forwarding Always
- Call Forwarding Busy
- Call Forwarding No Answer
- On the Collaborate homepage, in the My Profile widget, click Manage Features. The Manage My Features page appears.
- Next to Voicemail, click Manage. The Manage Forwarding and Ringing Settings page appears.

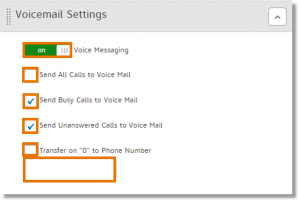
- To turn the feature on or off, under Voicemail Settings slide the switch to the right (on) or to the left (off).
- Decide what calls you want to send to voicemail. Check one or more of these boxes:
– Send All Calls to Voice Mail
– Send Busy Calls to Voice Mail
– Send Unanswered Calls to Voice Mail
- To transfer callers to a specific phone number when they press 0, check the Transfer on “0” to Phone Number box, and then enter a phone number in the blank field.
- To get an email notification of new messages, check the box next to Notify me by email of the new message at this email address and enter an email address.
- To get the voice message sent to you, check the box next to Email a copy of the message (WAV file) to and enter n email address.
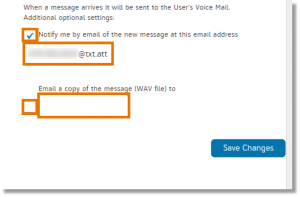
- Click Save Changes.
Top