Call Queue – Edit Messages and Notification Settings | AT&T Office@Hand
Article #2610
This article provides information on how to edit a Call Queue group’s Messages and Notification settings. Administrators can customize a Call Queue group’s Voicemail Greetings and configure its Notification settings. The steps below are applicable for your Call Queue’s Business Hours. It can also be applied to your Call Queue’s After Hours, provided that your Call Queue’s Call Handling set is to Send callers to call queue voicemail.
Call Queue – Edit Messages and Notification Settings
- Log in to your Office@Hand account as an Administrator.
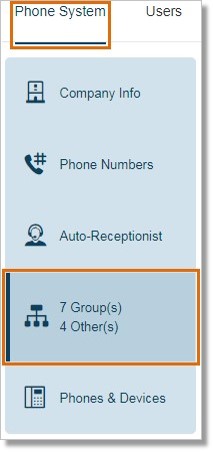
- Go to Phone System > Groups.
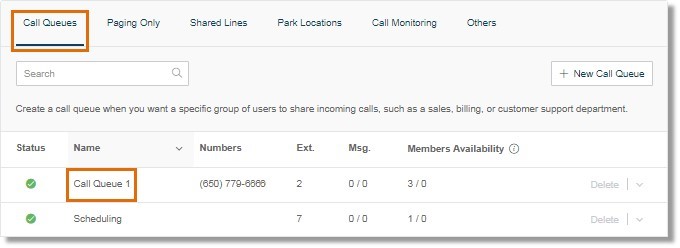
- On the Call Queues tab, select the Call Queue that you want to modify.
- Click Messages & Notifications. Then select if you want to modify Call Queue Hours or After Hours.
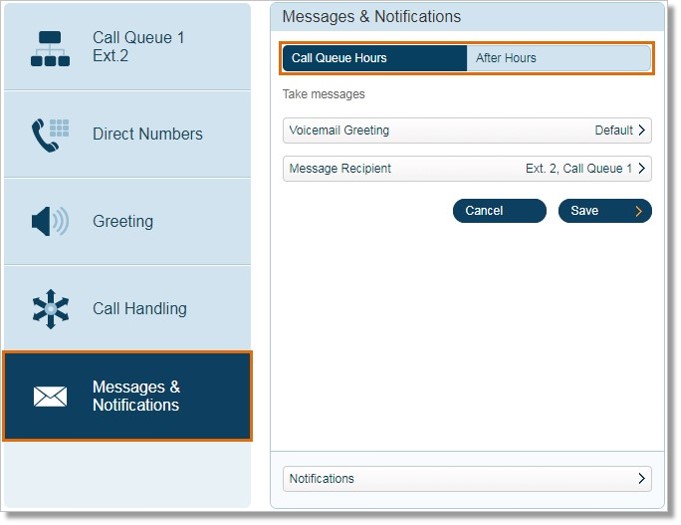
- Click the links below to configure the settings that you wish to modify:
a. Voicemail Greeting
b. Message Recipient
c. Notifications
d. Advanced Notifications
Voicemail Greeting
A pop-up will appear displaying the current Voicemail Greeting. Choose your preferred type of greeting:
Default
- Select Default.
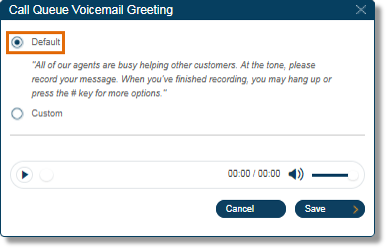
- Click Save.
Custom
- Click Custom. Select how you would like to set your custom recording.
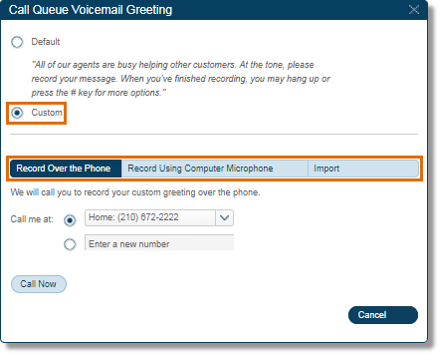
Record Over the Phone
- Select Record Over the Phone, and then enter the number where Office@Hand can call you to record your custom greeting. Click Call Now when you are ready to record. Click Save.
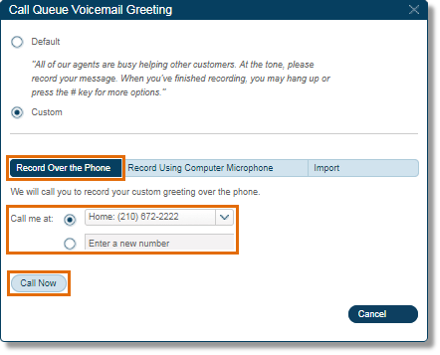
Note: Additional instructions will be given over the phone.
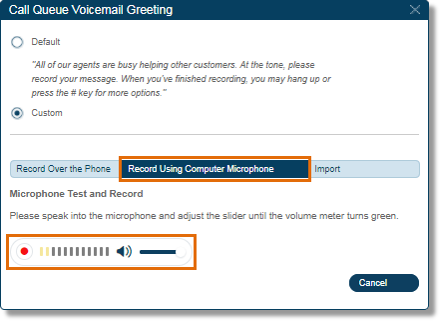
Record Using Computer Microphone
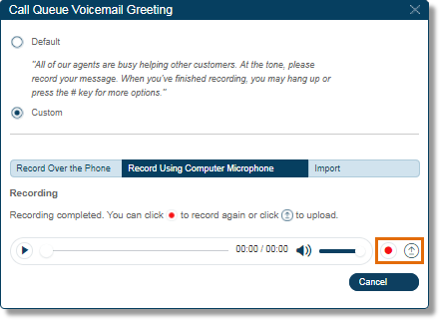
Select Record Using Computer Microphone, and then click Record to begin recording your custom greeting using your computer’s microphone.
Stop the recording and listen to the playback. Click the Record button to start a new recording or click the Upload button to save your current recording.
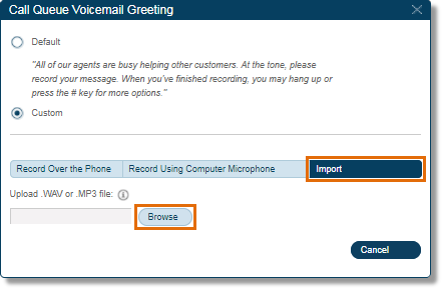
Import
Import lets you upload an audio file stored on your computer. It is recommended to use .wav audio file formats, otherwise it will not work correctly. Recommended audio file formats are:
- CCITT u-Law (G711a), 8kHz, 8 bit, mono
- PCM, 8kHz, 16 bit, mono
- Select Import, and then click Browse.
- Browse to the location of the file that you wish to upload, and then select the file.
- Click Attach.
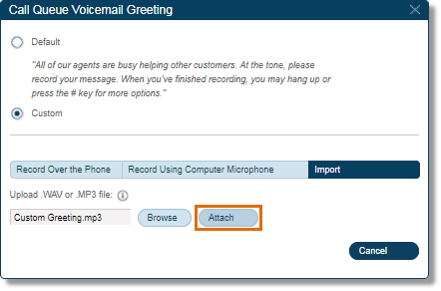
- Click Save.
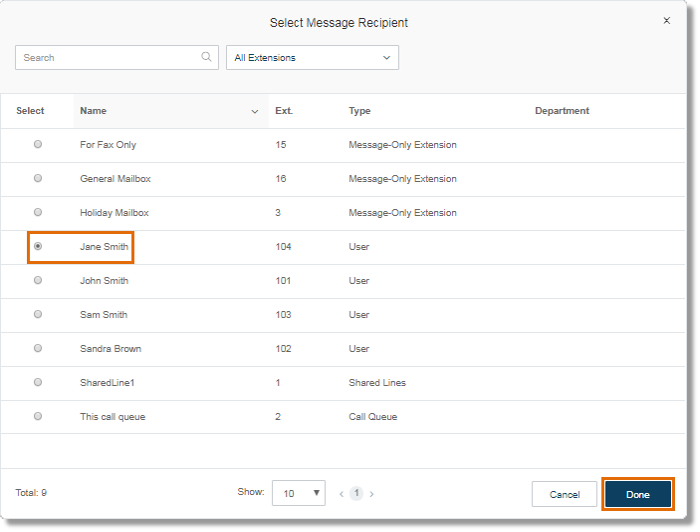
Message Recipient
- Click Message Recipient.
- Choose the extension where you want to save the messages. Click Done.
Notifications
As an Administrator, you can set up notifications to be sent to your phone or email when a voicemail, fax, or text message is sent to your extensions.
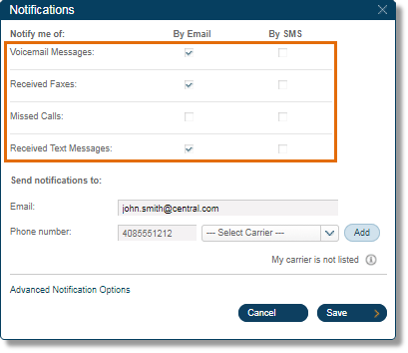
- On the Messages & Notifications tab, click Notifications.
- You can select how you want to be notified, Notify By Email or Notify By SMS, by checking the box next to the following:
- Voicemail Messages
- Received Faxes
- Missed Calls
- Received Text Messages
Notify By Email
Enter the Email Address where you want the email notifications to be sent. You can enter multiple email addresses to receive the email notification by separating each using a comma. Click Save when finished.

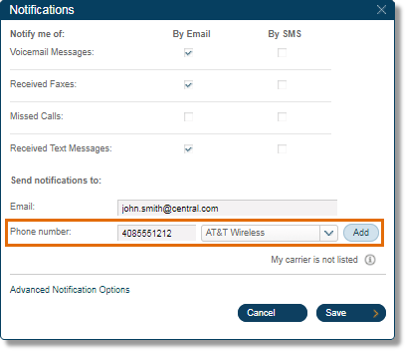
Notify By SMS
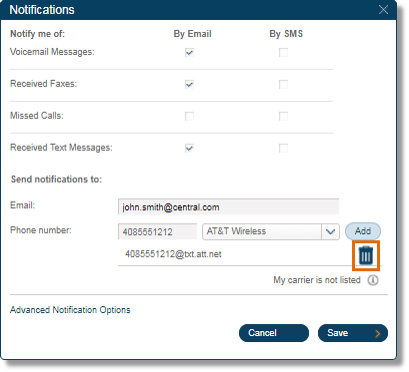
Enter the Phone Number where you want to receive the Text notification, and then choose the phone number’s carrier from the drop-down list. Click Add. Once the phone number is added, click Save. If your carrier is not listed, you can contact your carrier to find out the email address by which you can receive text messages and enter it into the Phone Number field. For example yournumber@yourcarrier.com.
Note: To remove the number, click the Litter Bin.
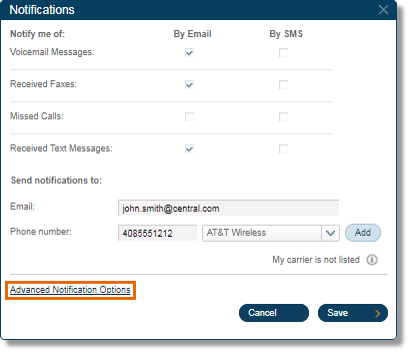
Note: For more notification options, go to Advanced Notification Options.
Advanced Notifications
- Under Messages & Notifications, click Notifications.
- Click Advanced Notification Options.
- Under the Advanced Notification Options, you can find additional options:
- Include attachment with email
When this option is checked, you can have a copy of your Voicemail (.mp3 file) and Fax Message (.pdf file) sent to your email
- Mark messages as read once emailed
When this option is checked, your Voice and Fax messages will be marked as read on your Office@Hand online account, mobile app, and desktop app, when we send you the email notification.
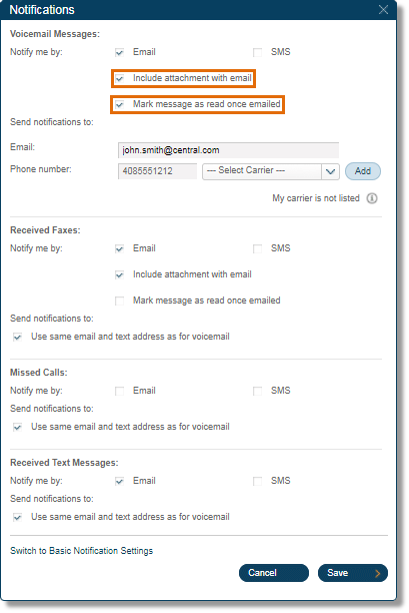
- If you want the notifications to be sent to the same email and mobile address set on your Voicemail Notifications, check the box next to Use same email and text address as for voicemail.
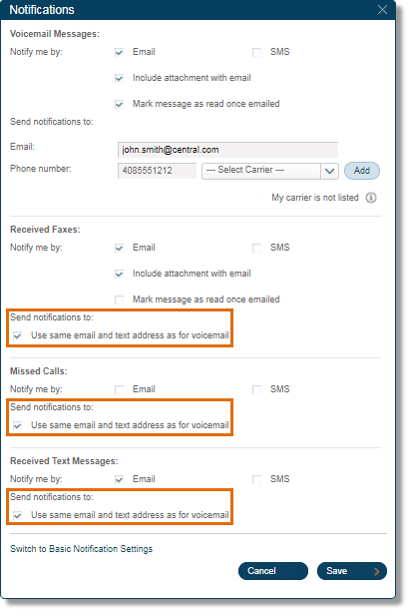
If you want to send your Fax Notifications to a different email address for example, uncheck Use same email and text address as for voicemail, and then enter the Email Address or Mobile Number and carrier, where you want to receive the notifications.

- Click Save.
See Also:
Office@Hand: Groups Overview
Keywords: extensions, business hours, messages, notifications, settings
Was this page helpful? Yes No