TOP

AT&T Fleet Management for Enterprise/Government

AT&T Fleet Management for Enterprise (AFMFE) delivers real results with GPS tracking information to enable fleets to be more efficient, profitable and customer focused. Vehicle tracking, optional vehicle engine and performance data, and extensive reporting assist in optimizing business operations.

Back to Product Page
Use the dropdown to get support, or purchase this product

User Interface Settings

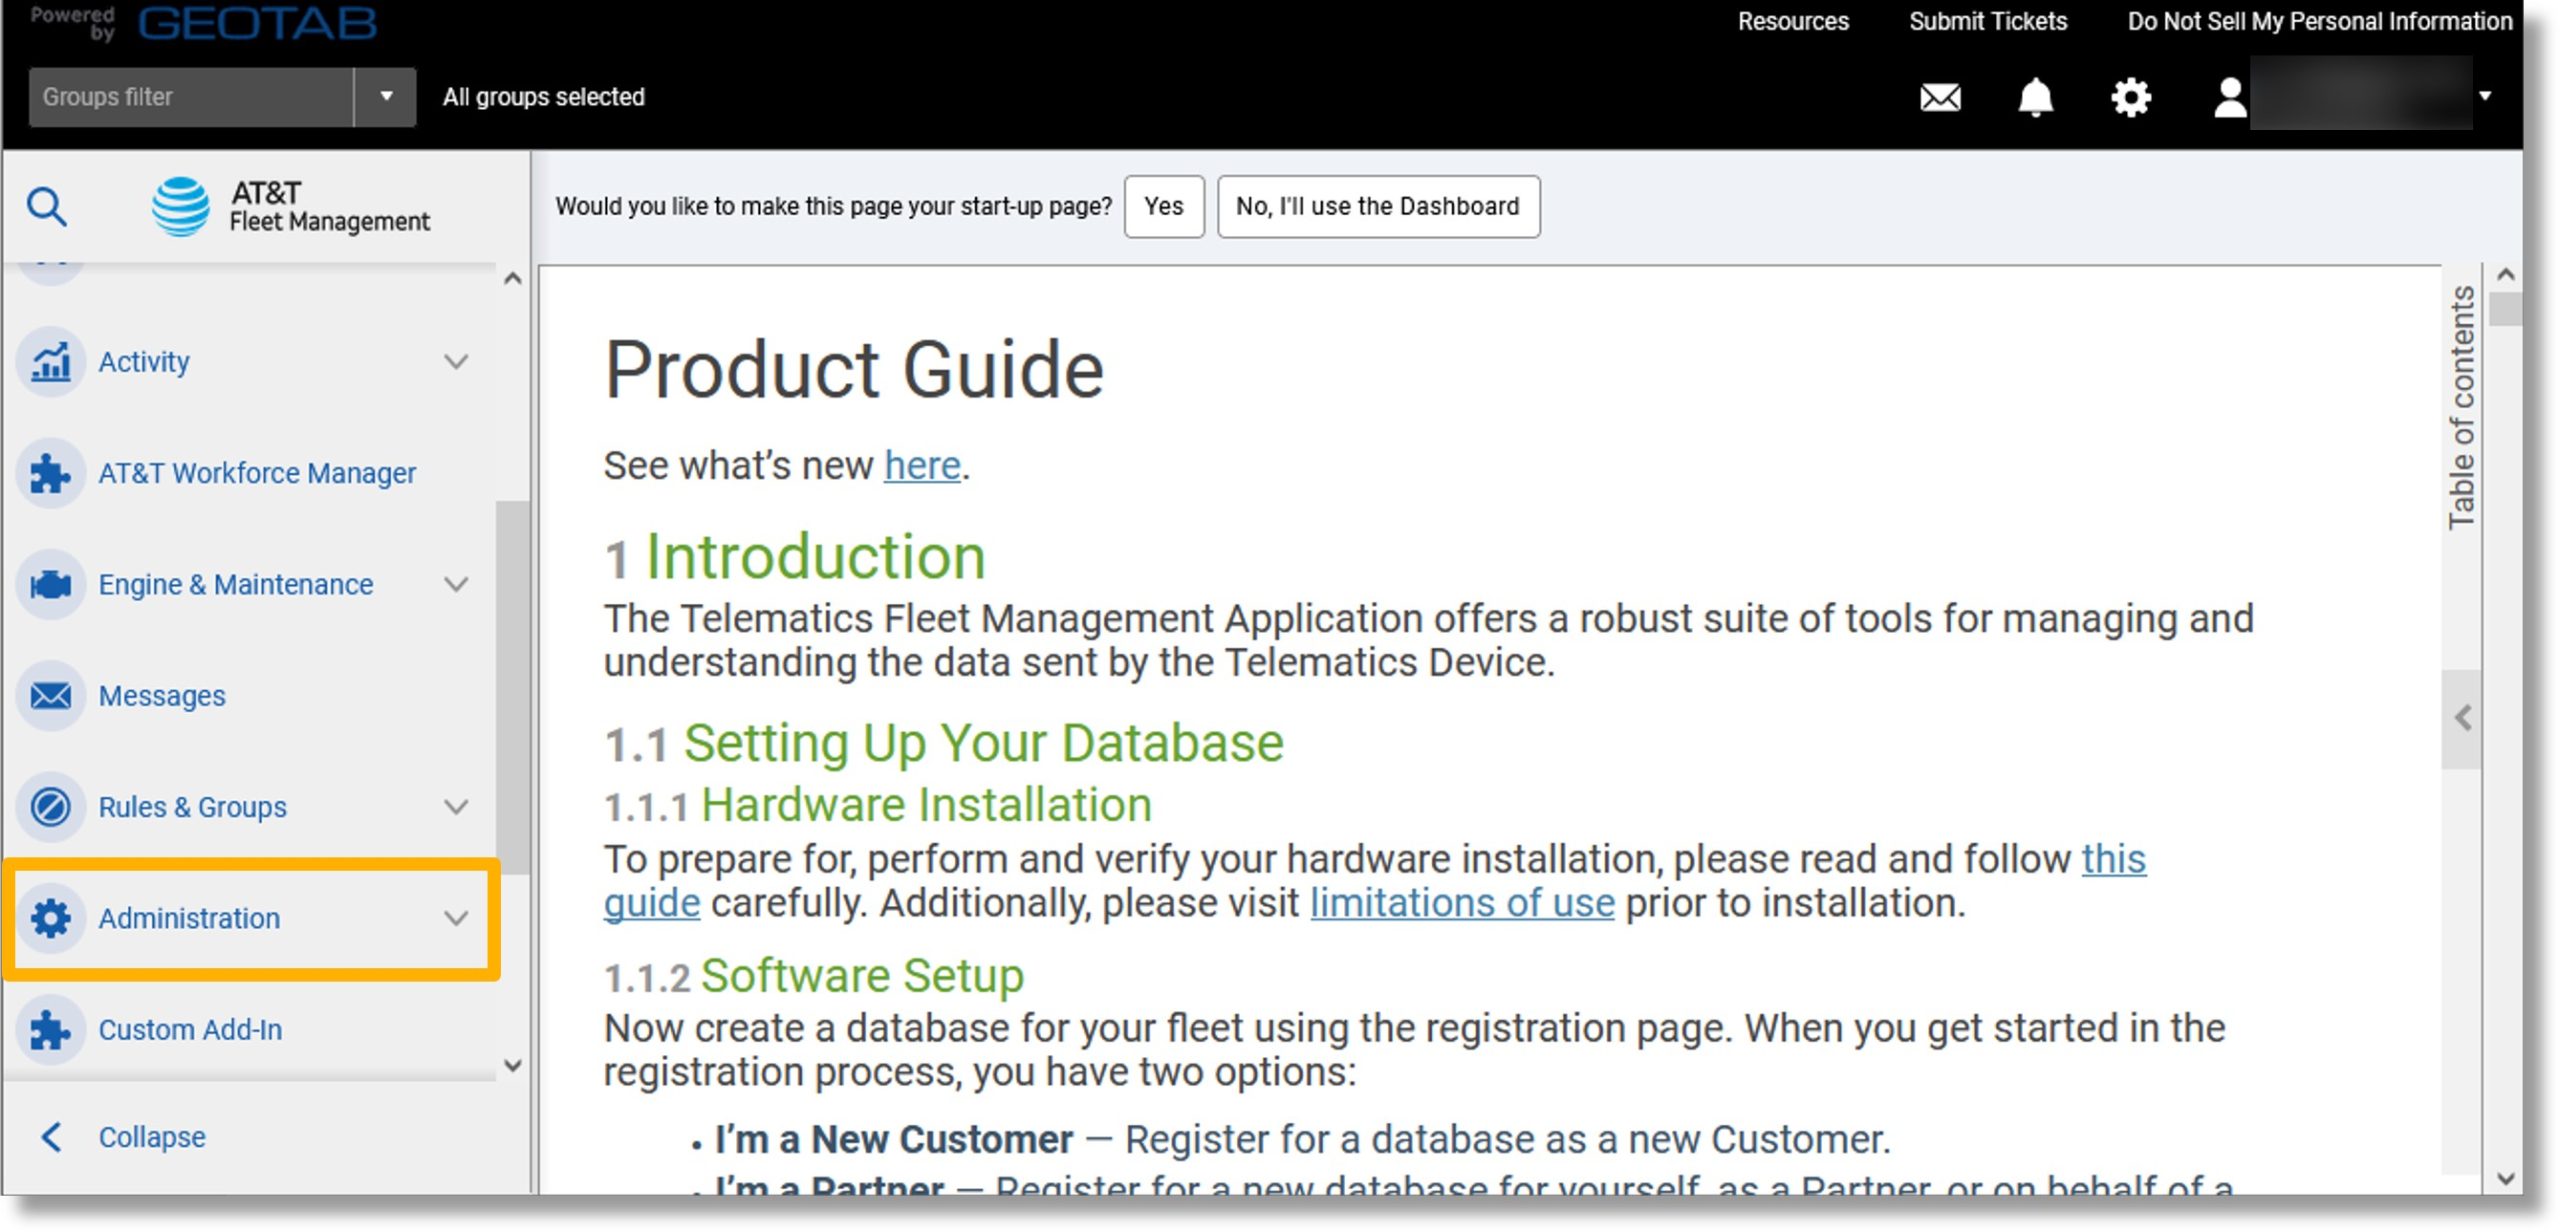
  1. Scroll down to Administration in the column on the left.

    Image of step 1.

  2. Click on Administration.

    Image of step 2.

  3. Scroll down to Users.

    Image of step 3.

  4. Click on Users.

    Image of step 4.

  5. Click on the desired user’s name.

    Image of step 5.

  6. Click on the UI Settings tab.

    Image of step 6.

  7. Click on the drop down to the right of “Profile”.

    Image of step 7.

  8. Scroll to and click on the desired profile.

    Image of step 8.

  9. Click on the desired distance measurement to the right of “Distance measurement system:”.
  10. Click on the desired fuel measurement to the right of “Fuel economy measurement:”.
  11. Click on the desired electric energy measurement to the right of “Electric energy economy measurement:”.
    Note: The measurement type selected for fuel economy should match the electric energy economy.
  12. Scroll down.

    Image of steps 9 through 12.

  13. Click on the drop down to the right of “Currency displayed as”.

    Image of step 13.

  14. Scroll to and click on the desired currency.

    Image of step 14.

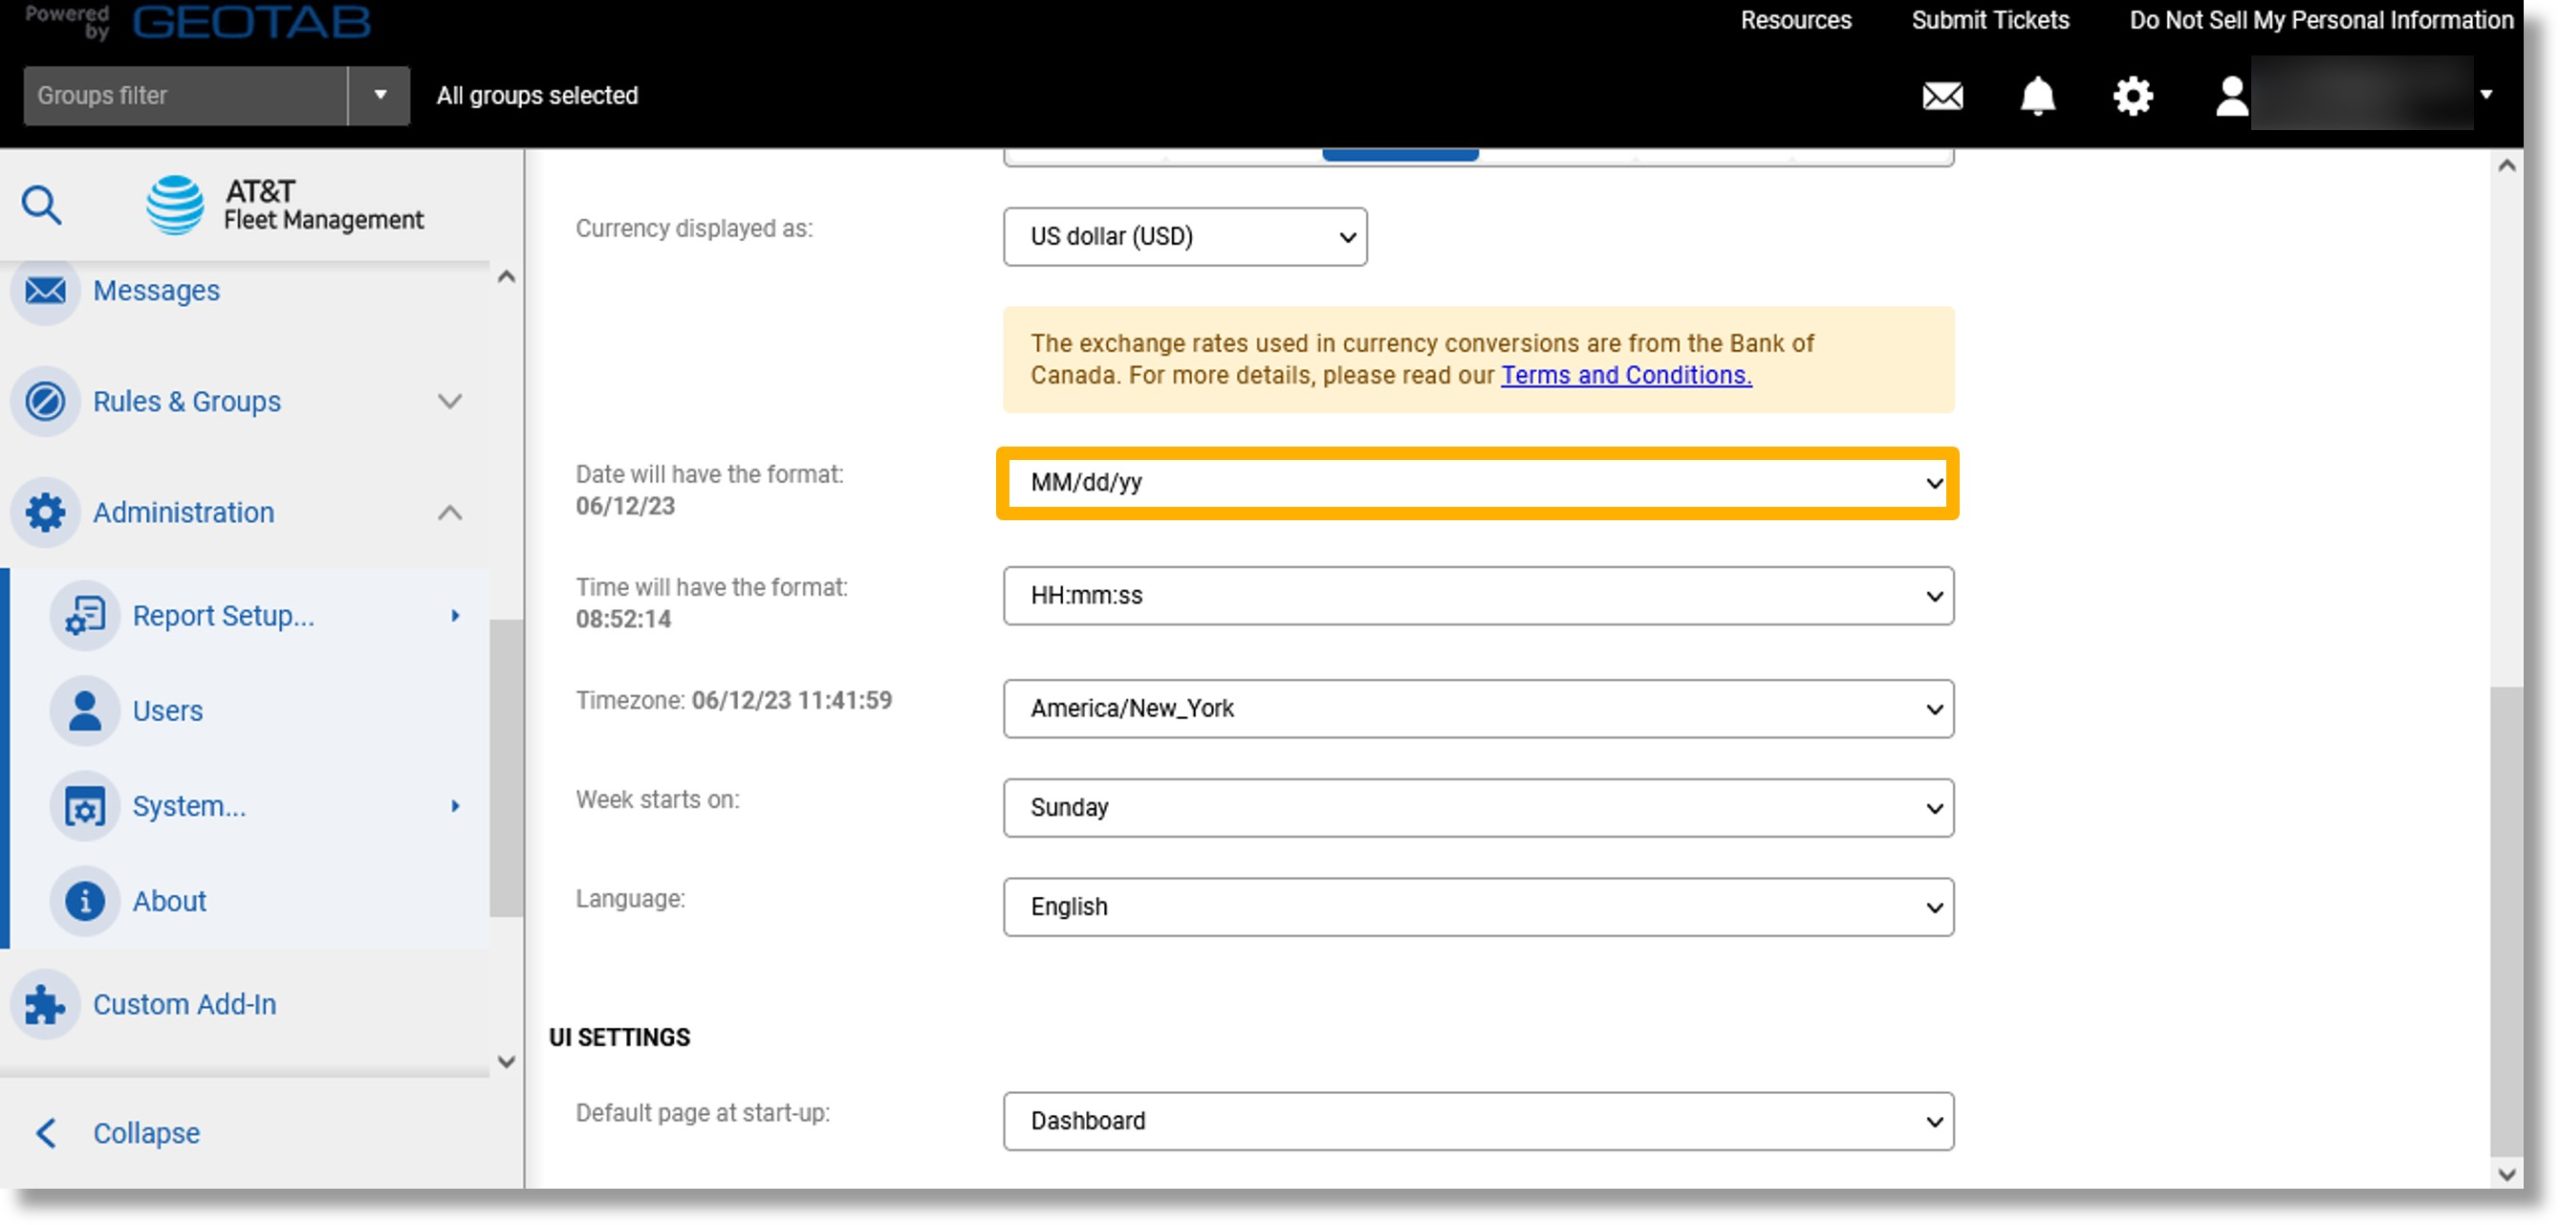
  15. Click on the drop down to the right of “Date will have the format:”.

    Image of step 15.

  16. Scroll to and click on the desired date format.

    Image of step 16.

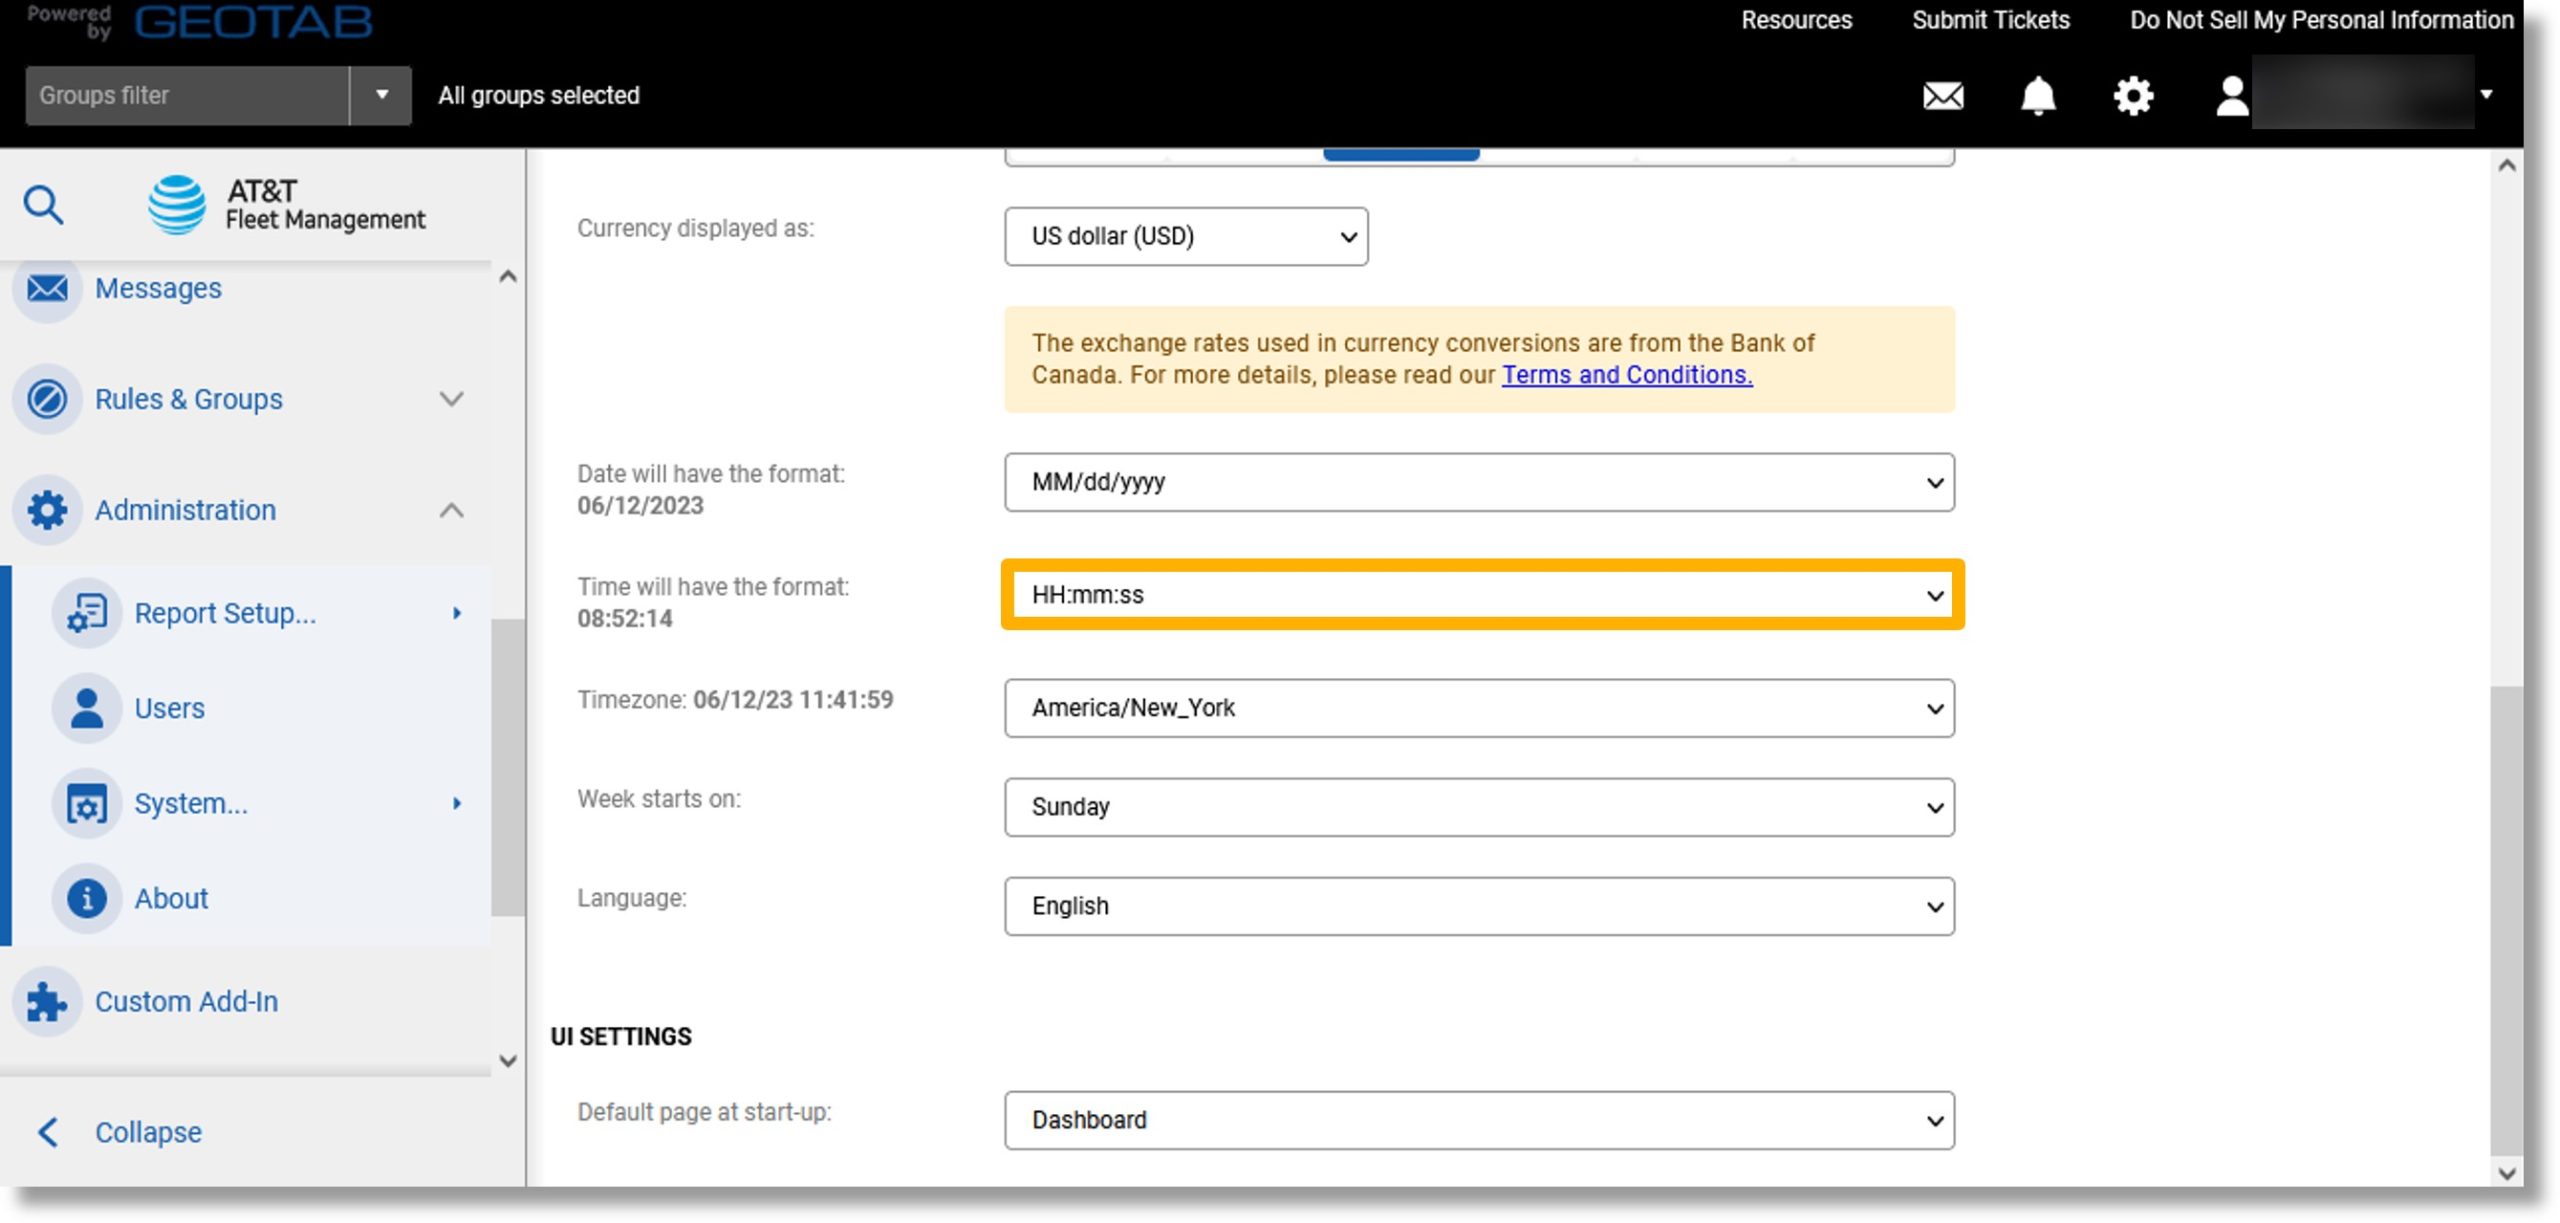
  17. Click on the drop down to the right of “Time will have the format:”.

    Image of step 17.

  18. Scroll to and select how you would like the time to be displayed.

    Image of step 18.

  19. Click the drop down to the right of “Time Zone:”.

    Image of step 19.

  20. Scroll to and click on the desired time zone.

    Image of step 20.

  21. Click on the drop down to the right of “Week Starts on”.

    Image of step 21.

  22. Scroll to and click on the desired day of the week.

    Image of step 22.

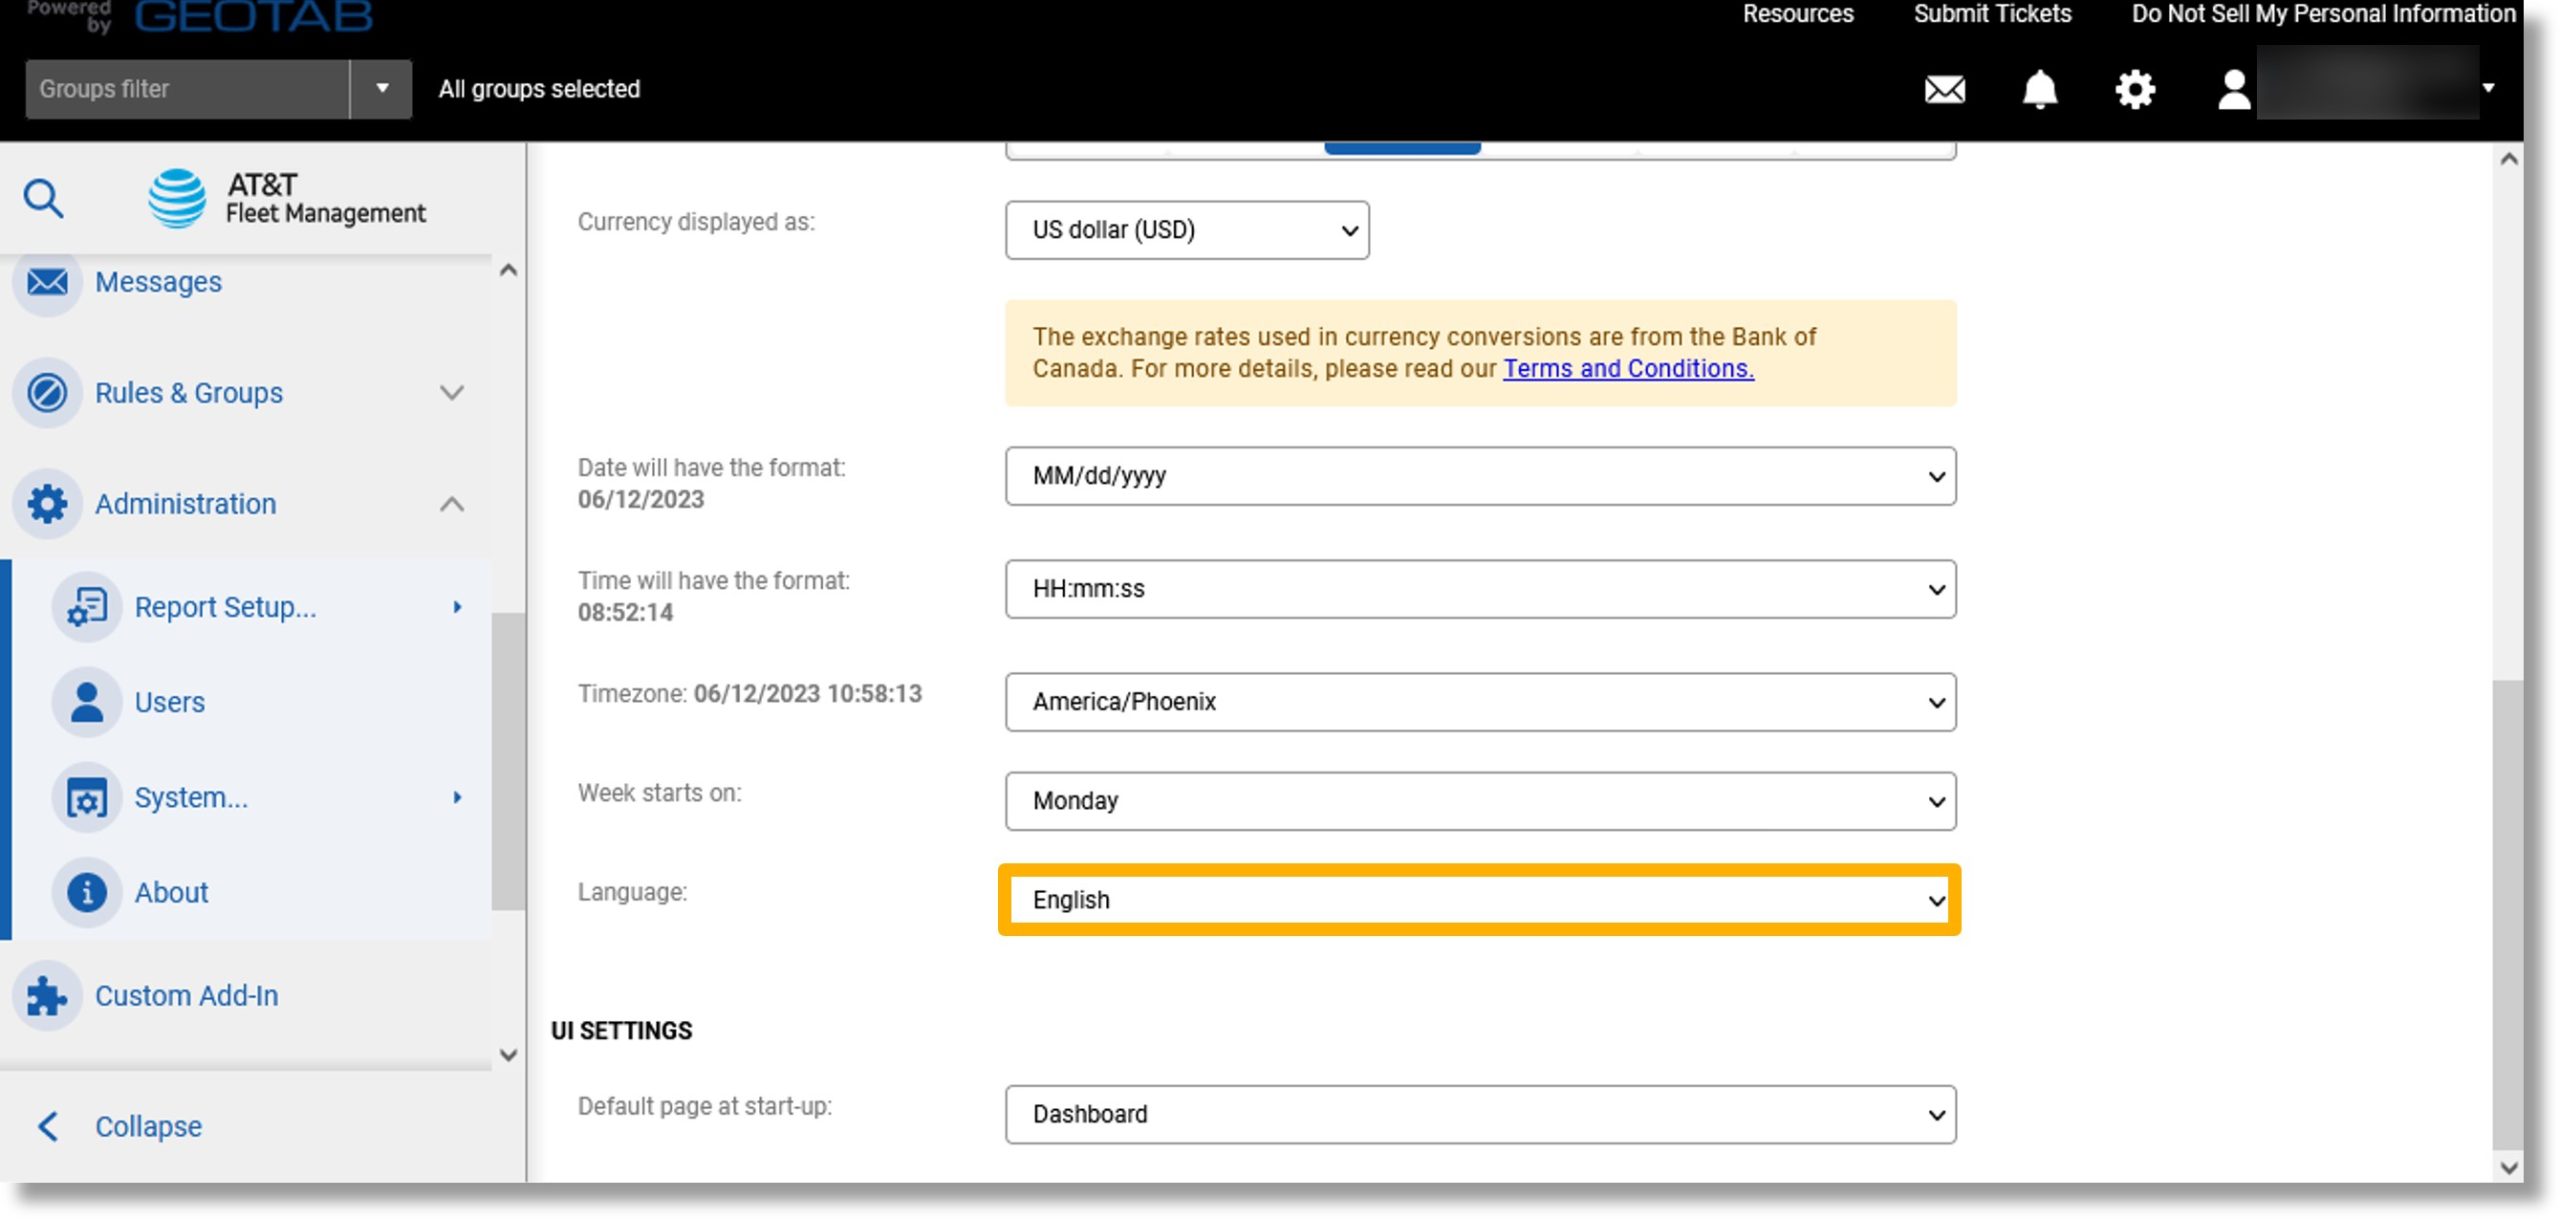
  23. Click on the drop down to the right of “Language:”.

    Image of step 23.

  24. Select your desired language.

    Image of step 24.

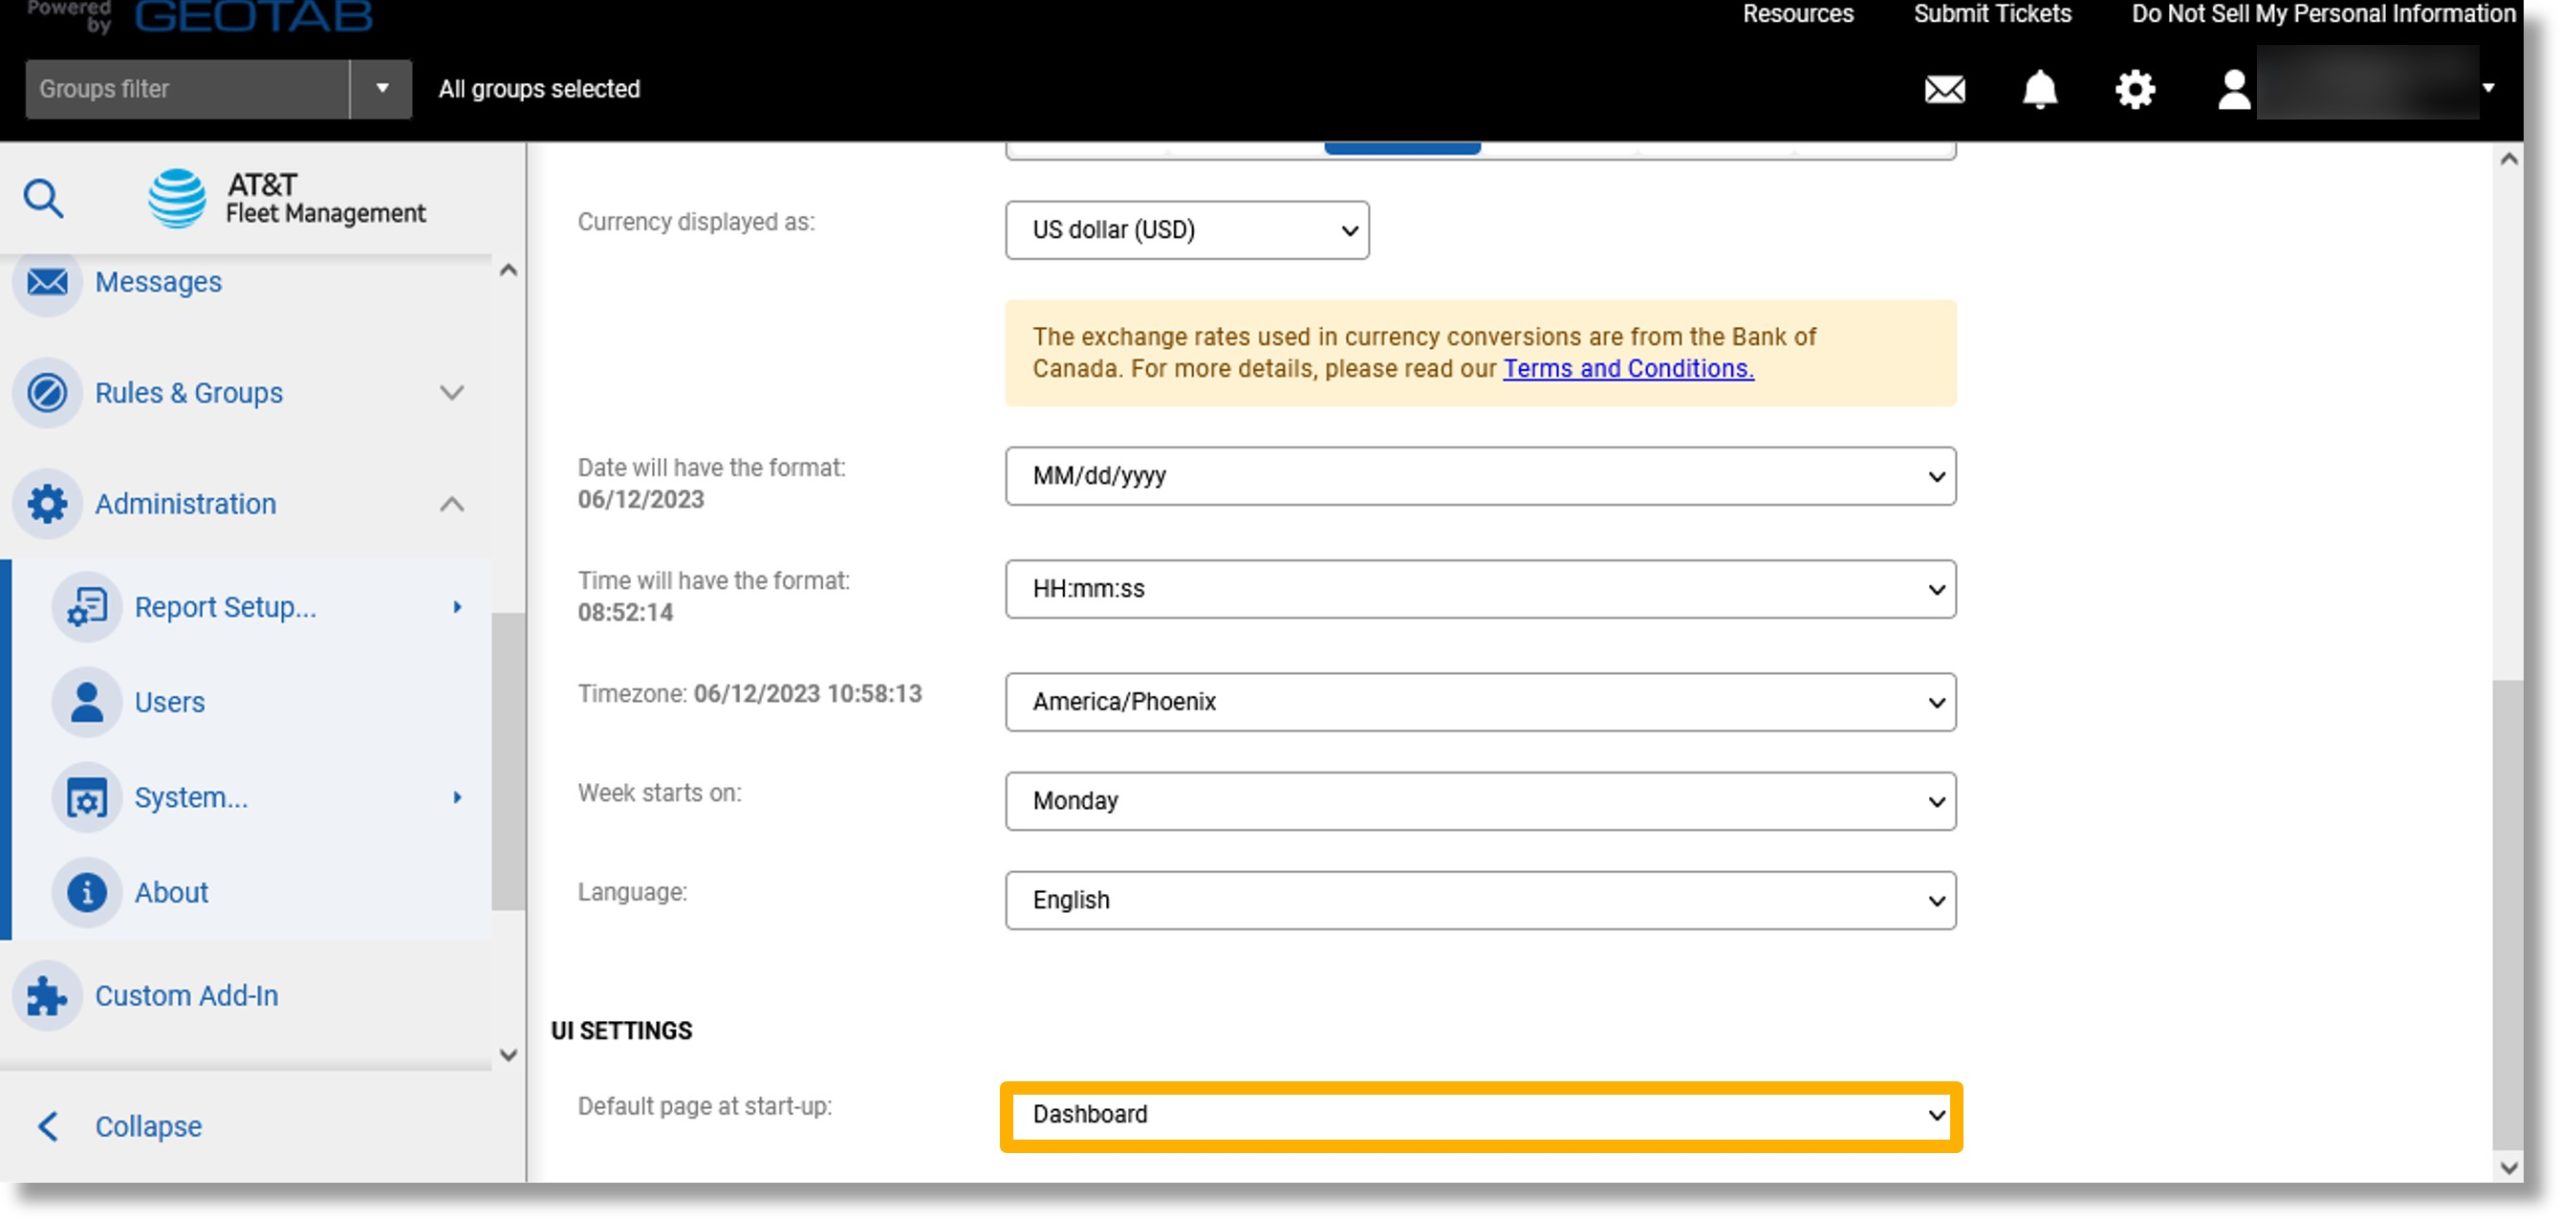
  25. Click on the drop down to the right of “Default page at start-up:”.

    Image of step 25.

  26. Scroll to and select the page that displays when users log in.

    Image of step 26.

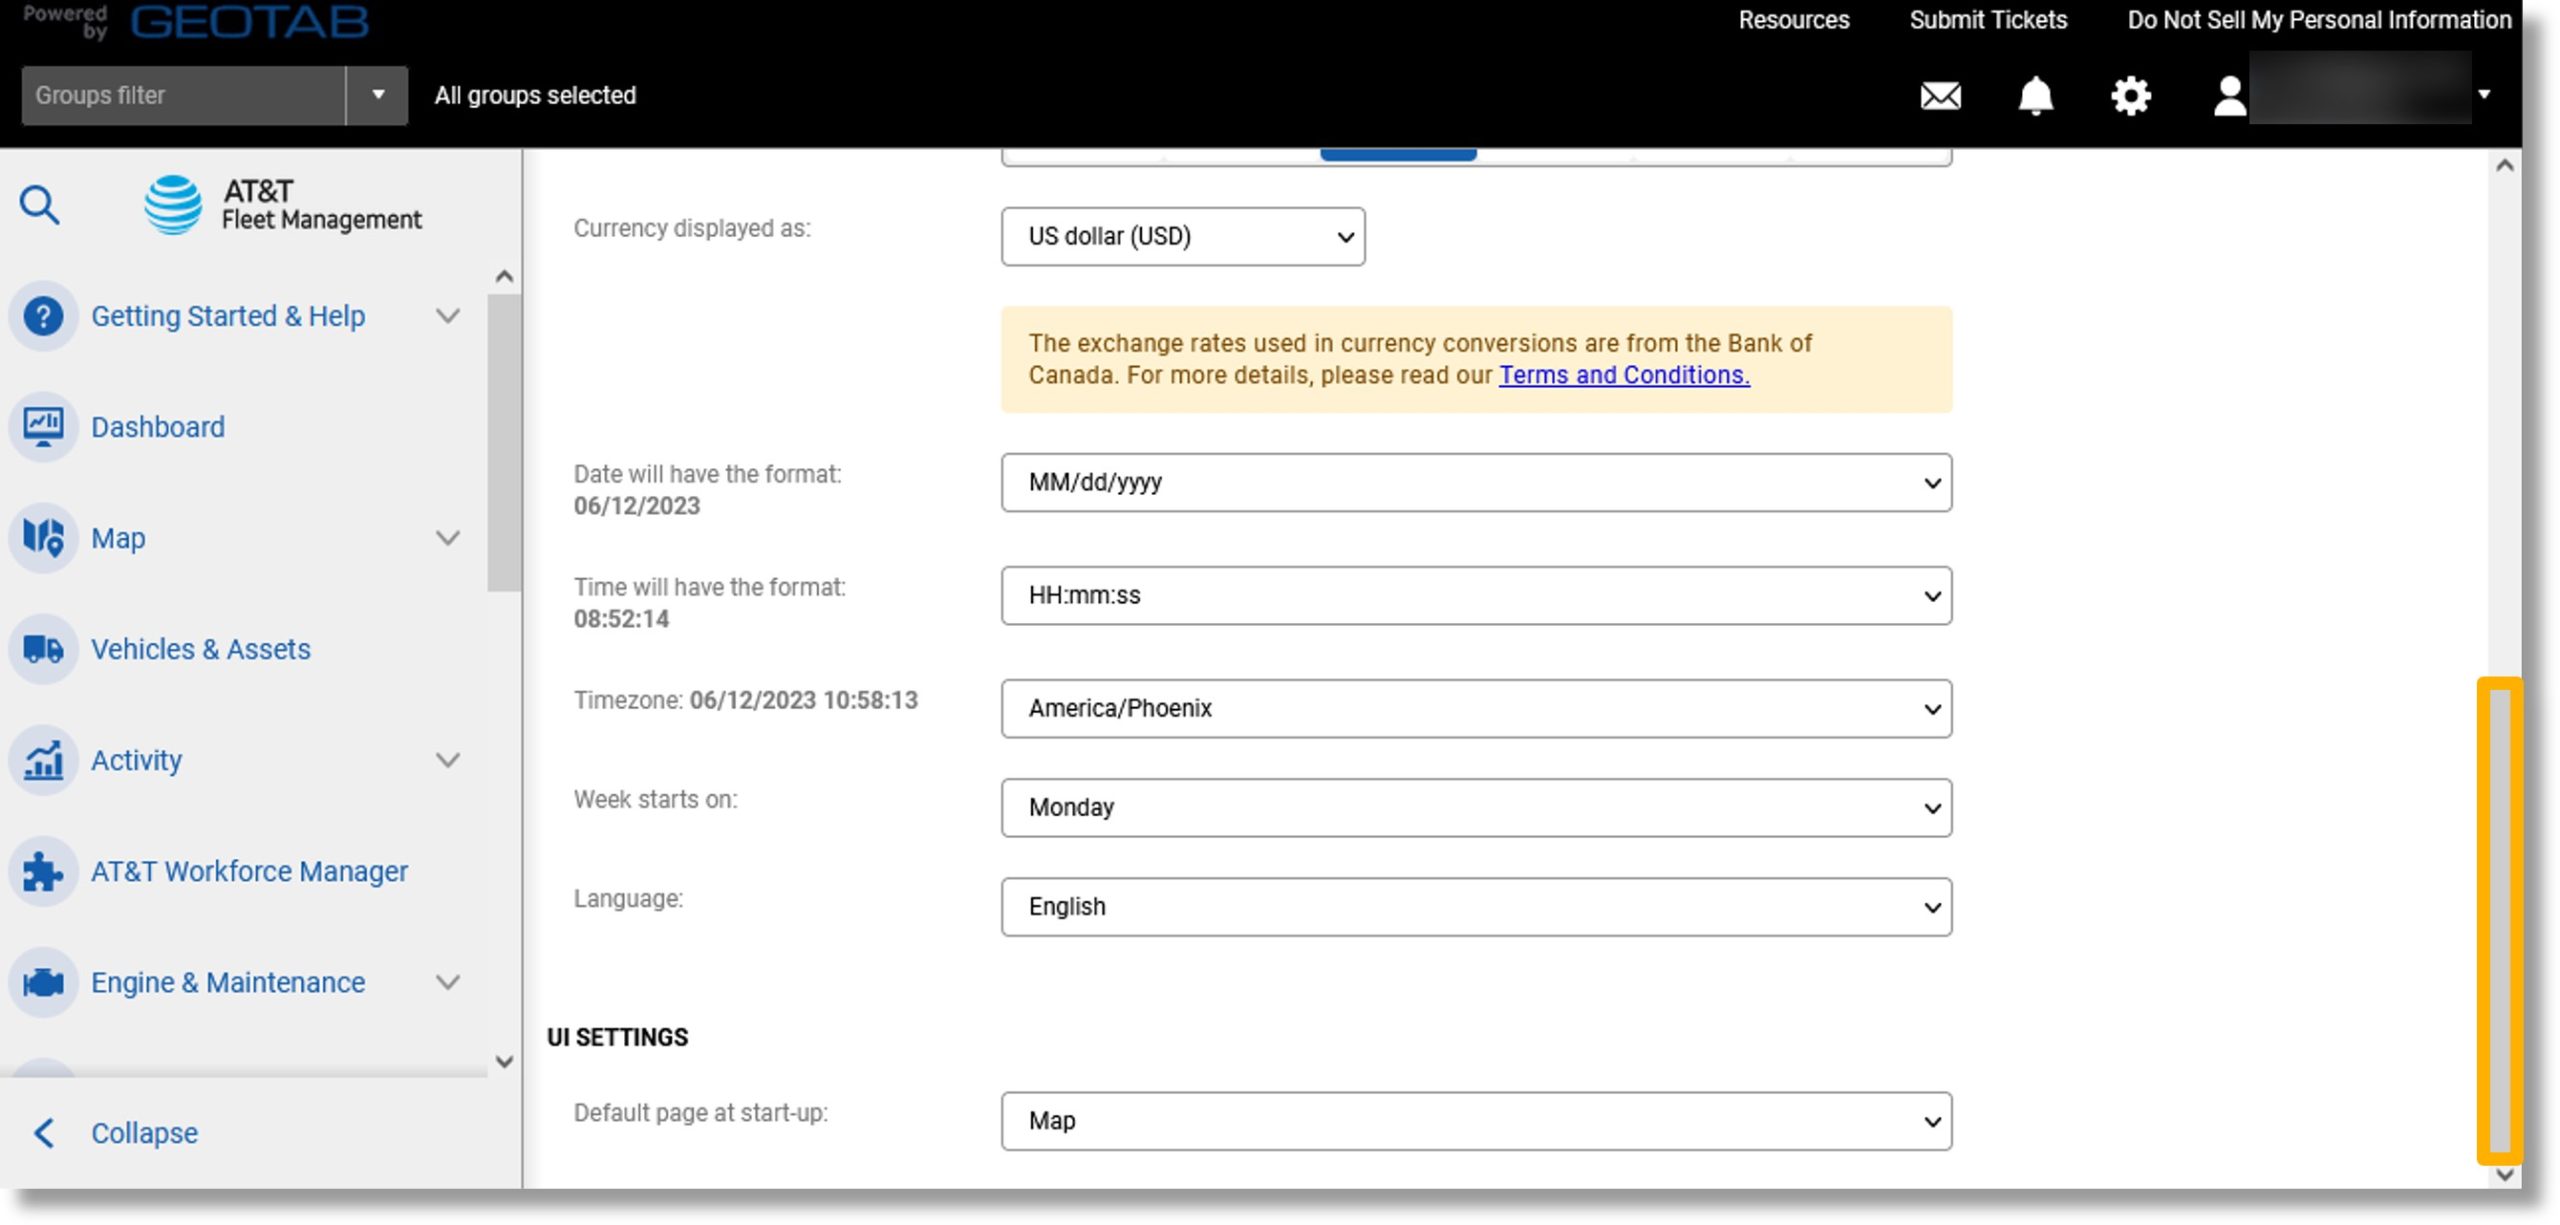
  27. Scroll to the top of the page.

    Image of step 27.

  28. Click the Save button.

    Image of step 28.