Call Queue – Add and Remove Members in an Existing Call Queue group | AT&T Office@Hand
Article #10878
This article provides information on how to add members to an existing call queue group. Groups allow you to manage incoming calls so that they are catered by a designated group of employees with similar activities. Call Queues are different from extensions. Call queues increase the efficiency of your company by directing the calls to the right employees.
- Log in to your AT&T Office@Hand account as an Administrator.
Note: You can also log in as the Call Queue Manager.
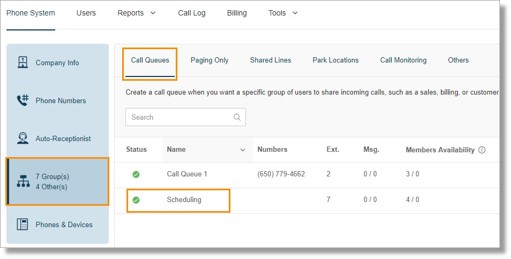
- Go to Phone System > Groups > Call Queues, select the Call Queue that you want to set up.
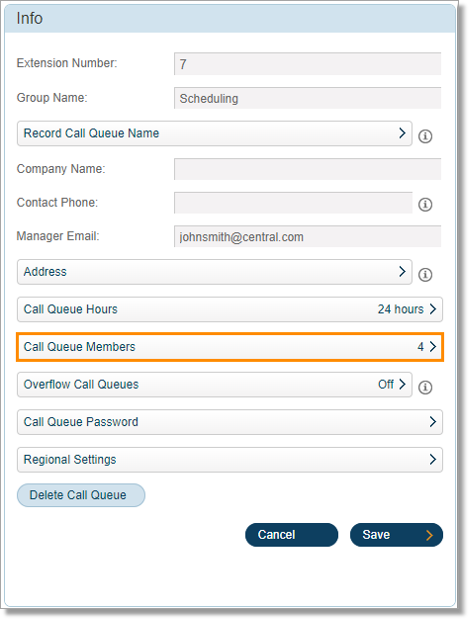
- Click Call Queue Members.
- Select the Users that you wish to add to the Call Queue group’s member list. Click the checkbox for the members you want to add.
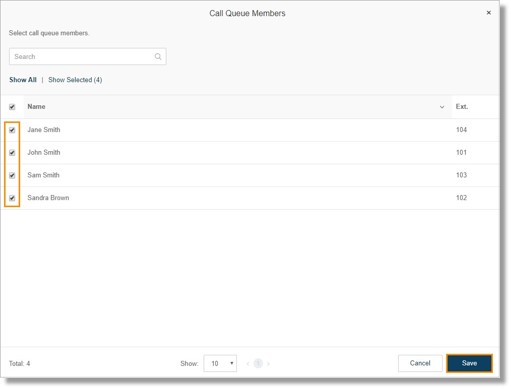
To increase the limit of the number of agents that can be added to the call queue group, please Contact AT&T Office@Hand Support.
Note: Limit increase will only work if there are no agents or members in queue with more than 2 enabled phones in their extension’s Call Handling and Forwarding rule. Members with more than 2 enabled phones in their extension’s call handling and forwarding rules can’t be added to a call queue group with more than 10 members.
- Click Save. The page will return to the Call Queue group’s info section.
Note: You can use an existing Call Queue to handle calls when there’s an increase in your Call Queue’s call volume by using the Overflow Call Queue feature. For more information, go to Call Queue – Overflow Call Queues Overview | AT&T Office@Hands.
This article provides information on how to remove members from a call queue group. Groups allow you to manage incoming calls so that they are catered by a designated group of employees with similar activities.Call Queues are different from extensions. Call queues increase the efficiency of your company by directing the calls to the right employees.
- Log in to your AT&T Office@Hand account as an Administrator.
Note: You can also log in as the Call Queue Manager.
- Go to Phone System > Groups > Call Queues, select the Call Queue that you want to set up.
- Click Call Queue Members.
- Select the Users that you wish to remove from the Call Queue group’s member list. Uncheck the checkbox for the members you want to remove and then click Save.
The page will return to the Call Queue group’s info section.
See Also:
Call Queue – Set Up Call Queue Group | AT&T Office@Hand
Call Queue – Edit Call Queue group’s Information | AT&T Office @Hand
Call Queue – Overflow Call Queues Overview | AT&T Office@Hand
Key Words: call queue, group, add, member, add call queue group member, 10878, 10882, remove, remove member
Was this page helpful? Yes No